Table of Contents
Advertisement
Quick Links
Advertisement
Table of Contents

Related Manuals for Easyrig vario 5


Summary of Contents for Easyrig vario 5
- Page 1 User Manual Setup and Adjustment...
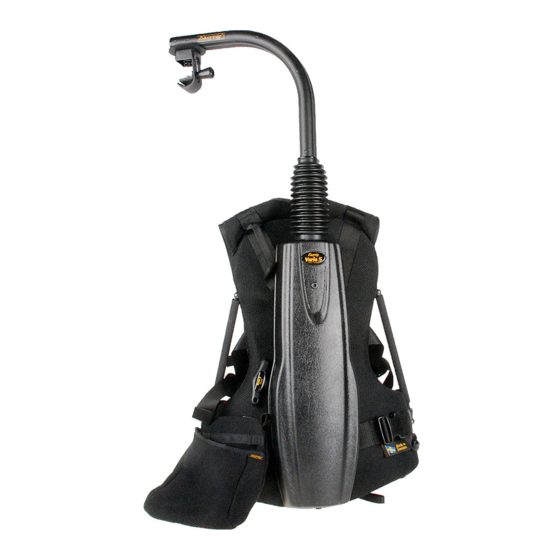
- Page 2 Weight complete with Gimble vest adjustable arm +130 ....5,5 kg (12 Ibs) Height (mounted) ..............97–114 cm (38–45 in) Height (folded) ................... 60 cm (24 in) Suspension line (fully stretched) ............90 cm (35 in) Load range ................. 5-17 kg (11-38 Ibs) Designed and made in Sweden - www.easyrig.com...
- Page 3 The Easyrig vario 5 is ergonomically designed and field tested to achieve maximum results. To get the most out of your Easyrig vario 5, please read this user manual carefully. Thank you for your investment in the Easyrig vario 5.
- Page 4 Using the Easyrig Vario 5 It´s easy to get into the Easyrig vario 5 vest, just as with a backpack. Your Easyrig vario 5 is loaded with adjustments for your customized comfort. When the vest is adjusted properly you should feel the weight of the camera primarily on your hips.
- Page 5 • If the tension is incorrect to support your camera weight, continue to step 4a. • If the tension is correct to support your camera weight, continue to step 6. Fig. 4 Locate the adjustment Allen-key 6mm tool behind the Easyrig vario 5 cover and pull it out.
- Page 6 Check again to make sure your camera is supported properly. Repeat step 4b if necessary. Fig. 6 Put on your Easyrig vario 5 vest. Adjust the waist belt snugly to ensure the weight sits firmly on your hips. Then set the other vest...
- Page 7 Fig. 10 Adjust the height of the support arm by removing the Easyrig vario 5 cover located on the back of your Easyrig vario 5. Locate the two cover screws and unscrew them with the 6mm Allen-key to remove the cover.
- Page 8 20 mm tube inside the support arm at it´s base under the bellows. Fig. 13 The Easyrig vario 5 support arm is now in the correct position. Fig. 14 By twisting the side support arm you can shorten or lenghten them to adjustthe amount of weight on your hips.
- Page 9 Attach the safety line between your vest and your camera. Fasten one end to the loop on the left shoulder pad of the Easyrig vario 5 vest and the other through your camera handle. Your Easyrig vario 5 is now ready to be used.
-
Page 10: Safety Precautions
Easyrig vario 5! If the waist buckle is released while the camera is attached, the weight of the camera will pull the top of the Easyrig vario 5 down, and could cause you to lose control of the camera. - Page 11 This will prevent the suspension line from wearing. • If your Easyrig vario 5 will be inactive for more than a couple of months, make sure to store it standing up. This will keep the shock absorber gasket from drying out.
- Page 12 Easyrig vario 5 Warranty Information Card Registration of your newly bought Easyrig can also be done on our website www.easyrig.com. [please fill in and mail within 30 days of purchase] Name ......................Title ........
Need help?
Do you have a question about the vario 5 and is the answer not in the manual?
Questions and answers