Brother P-Touch 9600 User Manual
Laser printer
Hide thumbs
Also See for P-Touch 9600:
- User manual (159 pages) ,
- Advanced functons (53 pages) ,
- User manual (1 page)

Related Manuals for Brother P-Touch 9600


Summary of Contents for Brother P-Touch 9600
- Page 1 9600/3600 9600/3600 9600/3600 User's Guide User's Guide User's Guide User's Guide User's Guide • Read this User’s Guide before you start using your P-touch. • Keep this User’s Guide in a handy place for future reference.
- Page 2 European Community. The Declaration of Conformity (DoC) can be downloaded from our website. Visit http://solutions.brother.com -> choose region (eg. Europe) -> choose country -> choose your model -> choose "Manuals"-> choose Declaration of Conformity (*Select Language when required).
-
Page 3: Quick Reference
QUICK REFERENCE Entering text Adding a space Space bar Entering/Exiting Insert mode Adding an uppercase h or t + desired character letter Adding a series of c → Type character uppercase letters (enter- ing Caps mode) Adding a lowercase let- h or t + desired character ter in Caps mode a →... - Page 4 Setting up the Euro con- Rotate r to select CONVERSION SETUP, then press r (OR just press version function d + h) → Rotate r (OR m or g) to select currency → Press r (OR n) → Type in exchange rate → Press r (OR n) → Rotate r (OR m or g) to select separator →...
- Page 5 Changing the character Select GLOBAL FORMAT, BLOCK FORMAT or LINE FORMAT, then size press r (OR just press d + 1, 2 or 3) → Rotate r, then press r (OR j or k) to select SIZE → Rotate r (OR m or g) to select setting →...
- Page 6 Changing the block Select GLOBAL FORMAT or BLOCK FORMAT, then press r (OR just length press d + 1 or 2) → Rotate r, then press r (OR j or k) to select B. LENGTH → Rotate r (OR m or g) to select setting → Press r (OR n) Printing in reverse (mir- Rotate r to select MIRROR, then press r (OR just press d + p) →...
- Page 7 Changing how the Rotate r to select AUTO CUT, then press r (OR just press d + f) labels are cut → Rotate r (OR m or g) to select setting → Press r (OR n) Printing using the cur- rent print options Feeding and cutting 24 mm of tape...
-
Page 9: Table Of Contents
CONTENTS Chapter 1 Before You Start ............1 GENERAL DESCRIPTION .............2 Top view ......................2 Bottom view ......................3 LCD display ......................3 Keyboard ......................4 Carrying case ...................... 5 Chapter 2 Getting Started ............7 PRECAUTIONS ................8 Connecting the AC adapter ................9 Turning on/off the P-touch .................. - Page 10 Chapter 4 Machine Adjustments ........... 51 Machine adjustments ..................52 ERROR MESSAGE LIST .............. 55 TROUBLESHOOTING ............... 60 MACHINE SPECIFICATIONS ............. 64 Appendix .............. 65 Symbols ......................66 Special barcode characters ................69 Fonts ........................69 Sizes and widths ....................70 Type styles ......................72 Framing and shading patterns ................74 Pre-set templates ....................75 Template text styles ...................78 INDEX ..................
-
Page 11: Before You Start
Ch.1 Before You Start Chapter efore tart... -
Page 12: General Description
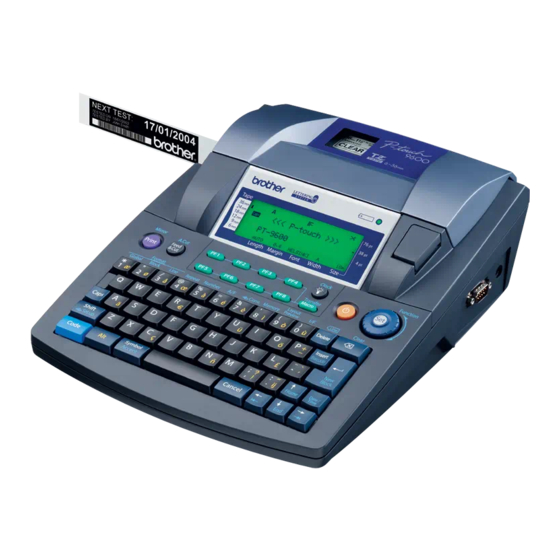
Ch. 1 Before You Start GENERAL DESCRIPTION Top view P-touch 9600: Tape compartment cover Recharging indicator LCD display Cover release button AC adapter connector RS-232C port USB port Navigation dial Keyboard P-touch 3600: Tape compartment cover LCD display Cover release button... -
Page 13: Bottom View
Ch.1 Before You Start Bottom view Battery compartment cover (PT-9600 only) Handle Tape exit slot LCD display 1 2 3 4 5 6 7 8 9 A B C D E F K Q Q Q Q Q Q Q Q Q Q Q Q Q <<<P-touch>>>... -
Page 14: Keyboard
Ch. 1 Before You Start Keyboard P-touch 9600: P-touch 3600: 1 Power key ➩ p. 9 6 Arrow keys ➩ p. 14 2 Screen backlight key (PT-9600 only) 7 Return key ➩ p. 15 ➩ Refer to the Advanced Functions booklet. -
Page 15: Carrying Case
Ch.1 Before You Start Carrying case The carrying case, which is included with the PT-9600 and available as an option for the PT-3600, is useful for storing and transporting the P-touch and its accessories. The cover attached inside the case at the right helps protect your tape cassettes from dust. - Page 16 Ch. 1 Before You Start...
-
Page 17: Getting Started
Ch. 2 Chapter etting tarted... -
Page 18: Precautions
Ch. 2 Getting Started PRECAUTIONS ● Use Brother TZe tapes with this machine. ● Do not pull on the tape being fed from the P-touch, otherwise the tape cassette may be dam- aged. ● Avoid using the machine in extremely dusty places. Keep it out of both direct sunlight and rain. -
Page 19: Connecting The Ac Adapter
NOTE ☞ Only use the AC adapter designed exclusively for this machine. P-touch 9600: ☞ If you do not intend to use this machine for an extended period of time, disconnect the AC adapter. Turning on/off the P-touch ●... -
Page 20: Connecting The P-Touch To A Computer
Mac OS, and print labels created using the P-touch Editor software. P-touch 9600: NOTE Do not connect the P-touch to the computer before installing the P-touch Editor software, otherwise it may not be installed correctly. -
Page 21: Installing The Software & Printer Driver
Ch. 2 Getting Started Installing the Software & After the P-touch is connected to a computer using a USB cable, the P-touch enters Interface Printer Driver mode when data is sent to it from the computer. ● ● ● ● ●... - Page 22 Ch. 2 Getting Started...
-
Page 23: Functions
Ch. 3 Chapter unctions... -
Page 24: Performing Basic Operations
Ch. 3 Functions Performing basic operations k (right arrow key) ● ● ● ● ● ● ● ● ● ● ● ● ● ● ● ● ● ● ● ● ● ● To move the cursor one character to the The following keys are necessary for using the right: many functions. - Page 25 Ch. 3 Functions g (down arrow key) Return key (n) The return key can be used to select an item To move the cursor down to the following line: from a list, (for example, when adding a symbol or accented character to the text) or to apply a ●...
-
Page 26: Entering Text
Ch. 3 Functions Entering text ● ● ● ● ● ● ● ● ● ● ● ● ● ● ● ● ● ● ● ● ● ● NOTE If the P-touch is in Caps mode, holding down h Typing in the text for your labels is almost the or t while pressing a letter key will enter a lower- same as typing on a typewriter or a computer. - Page 27 Ch. 3 Functions Alt mode (a) Maximum number of Accented characters or special punctuation Tape width lines that can be printed marks on the right-hand side of the keys can be 6 mm added to the text using the Alt mode. Enter or 9 mm exit Alt mode by pressing a.
- Page 28 Ch. 3 Functions Symbol key (s) Accent function (d + s) In addition to the letters, symbols and numerals The Accent function can be used to add on the key tops, there are over 440 additional accented characters to your text. Many of these symbols and pictures available with the Symbol characters can also be found on the keys and function.
-
Page 29: Composite Character Keys
Ch. 3 Functions To type in a composite character: 1 To type in a diacritical mark written in col- K Q Q Q Q Q 1 2 3 4 5 6 7 8 9 B C D E F our on the key, press a once. The Alt Q Q Q Q Q Q Q Q Q Q Q Q... - Page 30 Ch. 3 Functions To change the barcode parameter settings: Parameter Settings 3 Press m. UNDER# ON, OFF (numbers printed below barcode) 1 2 3 4 5 6 7 8 9 A B C D E F K Q Q Q Q Q Q Q Q Q Q Q Q Q 01/04...
- Page 31 Ch. 3 Functions NOTE 1 2 3 4 5 6 7 8 9 A B C D E F K Q Q Q Q Q To quit the Barcode function without adding a Q Q Q Q Q Q Q Q Q Q Q Q barcode, press e at any time (OR hold Q Q Q Q...
- Page 32 Ch. 3 Functions 6 Rotate r (OR press m or g) until the set- 4 Press r (OR n). The value is converted ting for the desired separator is displayed. and values in both currencies are added to the text at the cursor’s current position. NOTE The following separator settings are available: NOTE...
-
Page 33: Editing Text
Ch. 3 Functions Editing text To delete a sequence of characters: ● ● ● ● ● ● ● ● ● ● ● ● ● ● ● ● ● ● ● ● ● ● 1 Press j, k, m or g to position the cur- sor below the character that you wish to Backspace key (b) delete. -
Page 34: Formatting
Ch. 3 Functions Formatting 2 Since is already beside TEXT&FORMAT, press n. All of the text is erased and all of ● ● ● ● ● ● ● ● ● ● ● ● ● ● ● ● ● ● ● ●... - Page 35 Ch. 3 Functions NOTE NOTE To return to the text without changing the format- To return to the text without changing the format- ting, press e (OR hold down d and press ting, press e (OR hold down d and press Line format functions Block format functions (d + 3)
- Page 36 Ch. 3 Functions Font function (FONT) 3 Rotate r (OR press m or g) until the desired setting is displayed. With the Font function, you can change the font of the text to one of the many that are available. For samples of the available Font settings, refer to NOTE page 69.
- Page 37 Ch. 3 Functions 3 Rotate r (OR press m or g) until the desired setting is displayed. NOTE ☞ NOTE Since the text sizes that can be printed depends on the width of the tape, the following table ☞ If “*****” appears as a setting, the Size function shows the maximum text size that can be used has already been applied to either a line in the with each tape width.
- Page 38 Ch. 3 Functions Style1 function (STYLE1) NOTE With the Style1 function, 5 other text styles are This step may be skipped if settings for several for- available, allowing you to create more personal- mat functions are being applied at the same time. ised labels.
- Page 39 Ch. 3 Functions The VERTICAL style setting, which rotates each ° character 90 counterclockwise and prints the NOTE text vertically along the length of the label, is ☞ If “*****” appears as a setting, the Style1 func- different from the Text rotation function tion has already been applied to either a line in °...
- Page 40 Ch. 3 Functions 4 Press r (OR press n) to apply the setting. NOTE K Q Q Q Q Q 1 2 3 4 5 6 7 8 9 B C D E F If r is used to select the settings, only one function Q Q Q Q Q Q Q Q 06/13...
- Page 41 Ch. 3 Functions 4 Press r (OR press n) to apply the setting. NOTE K Q Q Q Q Q 3 4 5 6 7 8 9 B C D E F Q Q Q Q If r is used to select the settings, only one function Q Q Q Q <<<...
- Page 42 Ch. 3 Functions To change the setting for the Text align- 4 Press r (OR press n) to apply the setting. ment function: NOTE If r is used to select the settings, only one function 1 Select GLOBAL FORMAT, BLOCK FORMAT or LINE FORMAT (OR hold down d and can be set at a time.
-
Page 43: Tape Margin Function
Ch. 3 Functions Tape margin function NOTE (T. MARGIN) This step may be skipped if settings for several for- The Tape margin function allows you to adjust mat functions are being applied at the same time. the size of the margins on the left and right sides 2 Rotate r until ROTATE is displayed, and of your text. - Page 44 Ch. 3 Functions NOTE NOTE ☞ This step may be skipped if settings for several Glo- To return the function to its default setting (0.4 bal Format functions are being applied at the same cm), press the space bar. time. ☞...
- Page 45 Ch. 3 Functions Block margin function 4 Press r (OR press n) to apply the setting. (B. MARGIN) NOTE The width of the margins between text blocks If r is used to select the settings, only one function can be set between 0.0 cm and 30.0 cm. The left and right margins for each text block will can be set at a time.
-
Page 46: Mirror Printing Function
Ch. 3 Functions NOTE K Q Q Q Q Q ☞ 1 2 3 4 5 6 7 8 9 B C D To return the function to its default setting Q Q Q Q Q Q Q Q <<< P-touch >>> Q Q Q Q (AUTO), press the space bar. - Page 47 Ch. 3 Functions 2 Hold down d and press S. The many templates available allow you to cre- ate labels and stamps for a variety of needs— from addressing envelopes to identifying floppy 1 2 3 4 5 6 7 8 9 A B C D E F K Q Q Q Q Q Q Q Q Q disks or audio and video cassettes.
- Page 48 Ch. 3 Functions B C D E F K Q Q Q Q Q 1 2 3 4 5 6 7 8 9 A B C D E F K Q Q Q Q Q 4 5 6 7 8 9 Q Q Q Q Q Q Q Q Q Q Q Q...
- Page 49 Ch. 3 Functions 0 Press r (OR press n) to print the label. The message “COPIES 1/ 1” appears in the NOTE display while the label is being printed. The ☞ The template that was last used appears first. MENU screen appears in the display again. Selecting this template displays the text that was entered in it at that time.
-
Page 50: Printing
Ch. 3 Functions Printing However, if an Auto cut setting using chain print- ing is selected, the last label in the previous ses- ● ● ● ● ● ● ● ● ● ● ● ● ● ● ● ● ● ●... -
Page 51: Repeat Printing Function
Ch. 3 Functions NOTE ☞ After printing with settings 5, 6, 7 or 8, press f 1 2 3 4 5 6 7 8 9 A B C D E F K Q Q Q Q Q Q Q Q Q to feed the tape, then cut it. - Page 52 Ch. 3 Functions NOTE NOTE ☞ ☞ To select the default setting (1), press the space Only one numbering field can be selected from bar. any text. ☞ ☞ To change the setting in steps of 5, hold down If you include a non-alphanumeric character either m or g, and then release the key when such as a symbol in the numbering field, only the desired setting is displayed.
-
Page 53: Storing And Recalling Files
Ch. 3 Functions Storing and recalling files ● ● ● ● ● ● ● ● ● ● ● ● ● ● ● ● ● ● ● ● ● ● K Q Q Q Q Q 1 2 3 4 5 6 7 8 9 B C D E F Q Q Q Q Q Q Q Q... - Page 54 Ch. 3 Functions Storing text and Auto format templates 4 Rotate r (OR press m or g) until the file number where you wish to store the text is displayed. To save a text file: NOTE 1 Rotate r until MEMORY is displayed, and File numbers that are not flashing already contain a then press r (OR hold down d and text file.
- Page 55 Ch. 3 Functions Recalling text and Auto format tem- plates NOTE ☞ To see other parts of the selected text file, press j or k. To recall a file that has been saved: ☞ Auto format template files of the same tape 1 Rotate r until MEMORY is displayed, and width are displayed grouped together.
- Page 56 Ch. 3 Functions For an Auto format template file: 6 Repeat steps 4 and 5 until appears to the right of all files to be deleted. Files marked with will be deleted. 1 2 3 4 5 6 7 8 9 A B C D E F K Q Q Q Q Q Q Q Q Q Q Q Q Q CLEAR...
- Page 57 Ch. 3 Functions NOTE 1 2 3 4 5 6 7 8 9 A B C D E F K Q Q Q Q Q ☞ Q Q Q Q If multiple files are to be printed, follow steps Q Q Q Q 04/04 CLEAR Q Q Q Q...
- Page 58 Ch. 3 Functions 5 Rotate r (OR press m or g) until the file To change the style of the stored Auto for- number containing the text that you wish to mat template: print is displayed. The file name is shown 0 Rotate r (OR press m or g) until beside the file number, and the text stored moves beside CHANGE STYLE.
- Page 59 Ch. 3 Functions F Rotate r (OR press m or g) until the file number containing the text that you wish to print is displayed. The file name is shown beside the file number, and the text stored under the selected file number is shown in the bottom line.
- Page 60 Ch. 3 Functions...
-
Page 61: Machine Adjustments
Ch. 4 Chapter Machine Adjustments... -
Page 62: Machine Adjustments
Ch. 4 Machine Adjustments Machine adjustments To change the TAPE LENGTH ADJUST setting: ● ● ● ● ● ● ● ● ● ● ● ● ● ● ● ● ● ● ● ● ● ● When printing a label with a specified length Setup functions (d + A) (Tape length function), the length of the printed label may be slightly different. - Page 63 Ch. 4 Machine Adjustments To change the HEAD ADJUSTMENT setting: This function allows you to shift the printing up NOTE or down within the tape. If the tape is still not cut correctly even after this set- ting has been continuously adjusted, the cutter may NOTE be dull.
- Page 64 Ch. 4 Machine Adjustments To change the USB ID SELECTION setting: This function allows you to specify a unique identification number for each P-touch con- nected to a computer in order to print through the USB connection. Normally, for easy setup of multiple P-touch machines connected to a com- puter, all PT-9600/3600s will be set to 000000001, indicating that the data will be...
-
Page 65: Error Message List
ERROR MESSAGE LIST ERROR MESSAGE LIST ERROR MESSAGE CAUSE SOLUTION 4 DIGITS MINIMUM! ● This message appears if less ● Enter a minimum of four than the minimum four digits digits before pressing n. are entered as the barcode data. 16 LINE LIMIT! ●... - Page 66 ERROR MESSAGE LIST ERROR MESSAGE CAUSE SOLUTION CUTTER ERROR! ● This message appears if the cut- ● Turn off the P-touch, and ter did not operate correctly. then turn the P-touch on again. ● If the problem cannot be corrected, contact your service representative.
- Page 67 ERROR MESSAGE LIST ERROR MESSAGE CAUSE SOLUTION LENGTH LIMIT! ● This message appears if you try ● Delete some of the text. to print or use the Layout pre- view function when the length of the text is greater than the 1 m limit.
- Page 68 ERROR MESSAGE LIST ERROR MESSAGE CAUSE SOLUTION SET 9mm! ● This message appears if a 9- ● Install a 9-mm-wide tape mm-wide tape cassette is not cassette. installed when printing an Auto format template created for 9- mm-wide tape. SET 12mm! ●...
- Page 69 ERROR MESSAGE LIST ERROR MESSAGE CAUSE SOLUTION TEXT TOO HIGH! ● This message appears if the size ● Reduce the size of the of the text is larger than the characters, install a tape width of the installed tape. with a greater width or select the AUTO text size ●...
-
Page 70: Troubleshooting
TROUBLESHOOTING TROUBLESHOOTING Problem Solution (1) The display stays blank after you have ● Check that the AC adapter is connected. turned on the machine, or abnormal char- ● Check that the rechargeable Ni-MH bat- acters are displayed. tery is properly charged. (PT-9600 only) ●... - Page 71 TROUBLESHOOTING Problem Solution (5) The machine has “locked up” (i.e., noth- ● Reset the machine by: ing happens when a key is pressed). - (PT-3600) unplugging the AC adaptor, and leaving it unplugged for about one minute, then and plugging it in again - (PT-9600 only) pressing the reset button in the battery compartment at the bottom of the machine...
- Page 72 TROUBLESHOOTING Problem Solution (7) A blank horizontal line appears through 1 Turn off the machine, and then disconnect the text in the printed label. the AC adapter and (for the PT-9600 only) remove the rechargeable battery. 2 Open the tape compartment cover, then remove the tape cassette if one is installed.
- Page 73 TROUBLESHOOTING Problem Solution (8) The tape is not ejected correctly after ● Turn off the machine, open the tape com- being automatically cut. partment cover, and remove the tape cas- sette if one is installed. ● Using a cotton swab, clean off the metal piece in the exit slot to the left of cutter.
-
Page 74: Machine Specifications
MACHINE SPECIFICATIONS MACHINE SPECIFICATIONS HARDWARE Power supply: AC adapter AD9100ES (PT-9600 only: Rechargeable Ni-MH battery) Input device: Keyboard (PT-9600: 69 keys; PT-3600: 59 keys) 24 × 119 dots LCD: + Caps, Alt and other indicators (with screen backlight—PT-9600 only) Print tape: 6 widths available: 6 mm 9 mm... -
Page 75: Appendix
ppendix... -
Page 76: Symbols
Appendix Symbols ➩ p. 18 The following symbols are available. Symbols Category PUNCTUATION ® © ™ • × ÷ ± § ¶ ¿ ¡ (A01-A18) & BRACKET « » < > (B01-B08) ARROW → ← ↑ ↓ (C01-C14) UNIT ° ¥... - Page 77 Appendix Symbols Category PROHIBITION (I01-I29) WARNING (J01-J42) MANDATORY (K01-K19) FIRE (L01-L08) TRANSPORT (M01-M13) EMERGENCY (N01-N06) INFORMATION (O01-O43)
- Page 78 Appendix Symbols Category OTHER SIGNS (P01-P12) VIDEO (Q01-Q09) OFFICE (R01-R44) GENERAL (S01-S27) GARDENING (T01-T14) VEHICLES (U01-U13) OCCASIONS (V01-V18) ☞ The use of the CE mark is strictly governed by one or more European Council directives. Ensure that any labels you produce which use this mark conform with the relevant directives.
-
Page 79: Special Barcode Characters
Appendix Special barcode characters ➩ p. 19 The following special characters can only be added to barcodes created using types CODE39 or CODABAR. Value Character The following special characters can only be added to barcodes created using types EAN128 and CODE128. -
Page 80: Sizes And Widths
Appendix Sizes and widths ➩ pp. 26 & 27 Samples of some available text sizes and widths are shown below. Width WIDE NORMAL NARROW NARROWEST Size 76 points 72 points 64 points 56 points 48 points 40 points 36 points 32 points 28 points 24 points... - Page 81 Appendix Width WIDE NORMAL NARROW NARROWEST Size 7 points 6 points 5 points 4 points ☞ If the 4 point or 5 point text size setting is selected, the text will be printed with the BRUSSELS font setting, regardless of the font setting that is selected. ☞...
-
Page 82: Type Styles
Appendix Type styles ➩ pp. 28 & 29 Style1 setting NORMAL BOLD OUTLINE SOLID SHADOW INVERT Style2 setting NORMAL NORMAL NORMAL NORMAL NORMAL NORMAL Helsinki Brussels San Diego Florida Brunei Bold Angeles Bermuda Script Istanbul Letter Gothic Style1 setting NORMAL BOLD OUTLINE SOLID... - Page 83 Appendix Style1 setting NORMAL BOLD OUTLINE SOLID SHADOW INVERT Style2 setting ITALIC ITALIC ITALIC ITALIC ITALIC ITALIC Bermuda Script Istanbul Letter Gothic ☞ The VERTICAL style setting can be combined with all Style1 text styles (NORMAL, BOLD, OUTLINE, SOLID, SHADOW and INVERT). ☞...
-
Page 84: Framing And Shading Patterns
Appendix Framing and shading patterns ➩ p. 30 The following frame and shading patterns are available. Set- Set- Set- ting Sample ting Sample ting Sample... -
Page 85: Pre-Set Templates
Appendix Pre-set templates ➩ p. 37 Samples of the available templates are shown below. Template Tape Label Sample name width length ADDRESS-1 24 mm 80 mm ADDRESS-2 24 mm 78 mm ADDRESS-3 24 mm 104 mm ADDRESS-4 36 mm 86 mm ASSET 24 mm 84 mm... - Page 86 Appendix Template Tape Label Sample name width length PRICE-1 24 mm 57 mm PRICE-2 24 mm 110 mm SIGN 36 mm 114 mm FLOPPY-1 24 mm 70 mm FLOPPY-2 24 mm 70 mm FLOPPY-3 36 mm 70 mm VCR VHS-1 18 mm 140 mm VCR VHS-2...
- Page 87 Appendix Template Tape Label Sample name width length AUDIO-1 9 mm 89 mm AUDIO-2 9 mm 89 mm AUDIO-3 9 mm 89 mm SLIDE 12 mm 42 mm FILE-1 36 mm 200 mm FILE-2 24 mm 190 mm STAMP L STAMP NORMAL-L 115 mm (24mm)
-
Page 88: Template Text Styles
Appendix Template text styles ➩ p. 37 Samples of the available template text styles are shown below. CHAR. style Sample Font Style ORIGINAL Template default ITALIC Template default ITALIC DYNAMIC ISTANBUL SOLID ARTISTIC FLORIDA OUTLINE FORMAL BRUSSELS ITALIC ELEGANT NORMAL NATURAL SAN DIEGO NORMAL... -
Page 89: Index
INDEX Line format 25 Margins 33 AC adapter 9 Text alignment 32 AC adapter connector 2 Text in template 39 Accent function 18 Text rotation 32 Accented characters 18, 19 Character size 26 Adapter 9 Character styles 28, 29 Aligning text 31 CHECK DIGIT parameter 20 Alt indicator 17 Cleaning... - Page 90 Stamp 37 Format templates 37 Style 2 29 Formatting Style1 29 Entire text 24 Tape length 34 Text 24 Tape margin 34 Text automatically 37 Text alignment 32 Text blocks 25 Text rotation 33 Frame function 30 Width 28 Framing 30 Delete key 23 Function dial 15 Deleting...
- Page 91 Memory functions 43 Mirror printing function 36 Incremental printing 42 Modes Indicators Alt 17 Alt 17 Caps 16 Auto cut 40 Insert 16 Caps 16 Multiple copies 41 Font 26 Frame 30 Ins 16 Navigation dial 2 Line effects 30 New Block function 17 Size 26 New line 17...
- Page 92 Right alignment 31 Roller cleaning 62 UNDER# parameter 20 Rotating text 32 Underlining 30 RS-232C port (PT-9600) 2 Uppercase letters 16 USB port 10 Saving text file 44 Selecting function or setting 15 Vertical text style 29 Set key 15 Shift key 16 Signs 18, 66 Size function 26...
- Page 93 Printed in China LAD116001...
Need help?
Do you have a question about the P-Touch 9600 and is the answer not in the manual?
Questions and answers