Advertisement
Quick Links
Table Of Contents:
Wire Harness Quick View
Installation Of The Major Components
Door Lock / Unlock Harness
Tachometer Programming Information
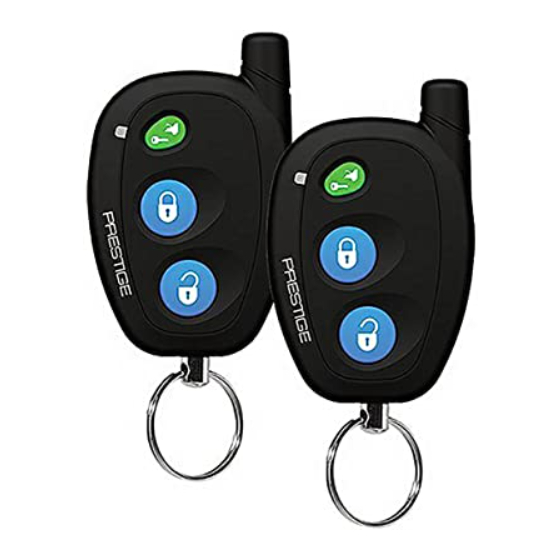
Transmitter Programming Information
Feature Bank 2 Program Information
Feature Bank 3 Program Information
Data Bus Port Information
Circuit Wiring Diagram
FCC NOTICE
This device complies with part 15 of the FCC rules. Operation of this device is subject to the following
conditions:
(1) This device may not cause harmful interference, and
(2) This device must accept any interference received, including interference that may cause undesired
operation.
Caution: Changes or modifications not expressly approved by the party responsible for compliance voids
the users authority to operate this device.
PATENTED: www.voxxintl.com/company/patents
Model APS622E
Installation Manual
Page 1
Page 2
Page 3
Page 4
Page 5
Page 6 & 7
Page 7 - 9
Page 9
Page 9 & 12
Page 10
Page 10 & 11
Page 12 & 13
Page 14
Page 14
Page 14
Page 16
128-9351
1 of 16
Advertisement

Related Manuals for Prestige APS622E

Summary of Contents for Prestige APS622E
-
Page 1: Table Of Contents
Model APS622E Installation Manual Table Of Contents: Before You Begin Page 2 Wire Harness Quick View Page 3 Installation Of The Major Components Page 4 6 Pin Power Harness Page 5 Door Lock / Unlock Harness Page 6 & 7... -
Page 2: Before You Begin
Before You Begin PROFESSIONAL INSTALLATION IS STRONGLY RECOMMENDED Roll down window to avoid locking the keys in the vehicle during installation. Avoid mounting components or routing wires near hot surfaces or near moving parts like the steering wheel as it may prevent proper operation of the vehicle. -
Page 3: Pin Power Harness
6 Pin Power Harness: 1124317 1 Blue Ignition 1 (+) 2 Red/White Battery 1 - 12V (+) 3 Green Ignition 2 (+) 4 Purple Accessory (+) 5 Red Battery 2 - 12V (+) 6 Yellow Starter Output 12 Pin Input/Output Harness: 1124321 1 Green/Orange Tachometer Input... - Page 4 This Remote Start System is designed to be used with Automatic Transmission- Fuel Injection Vehicles Only! INSTALLATION OF THE MAJOR COMPONENTS: CONTROL MODULE: (P/N 1365445) Select a mounting location inside the passenger compartment (up behind the dashboard). The mounting location selected must be within 24” of the ignition switch wiring harness to allow connection of the 6 pin main wiring harness.
- Page 5 WIRING THE 6 PIN MAIN POWER HARNESS Connector (P/N 1124317) BLUE Wire: Ignition 1 Output Connect this wire to the ignition 1 wire from the ignition switch. This wire will show +12 volts when the ignition key is turned to the “ON” or “RUN” and the “START” or CRANK” positions, and will have 0 volts when the key is turned to the “OFF”...
- Page 6 the units door unlock/lock circuits. Plug the 2 pin connector of the rated 250mA output of door unlock harness into the mating connector shell of the control module. Determine the door lock and unlock circuit of the vehicle you are working on and wire according to the diagrams shown.
- Page 7 Wiring The 12 Pin Input / Output Harness, Connector (P/N 1124321 The auxiliary 12 pin connector provides low current outputs to control various functions in the vehicle during different stages of the Remote Start unit’s operation. Understand- ing these outputs and the time in which they occur will allow you to determine if they are needed for the particular vehicle you are working on as well as how to use them.
- Page 8 7) Green w/ Yellow trace Wire: Diesel Wait To Start Input The Green/Yellow wire, when connected to the wire that get + 12 volts during the glow plug preheat stage will delay the starter output until this wire drops the 12 volts. In other words, in a Diesel vehicle with glow plug preheat circuit, when the ignition is turned on, the vehicle will not crank until the glow plugs are hot enough to fire the atomized fuel oil when injected into the cylinder.
- Page 9 12 Black/White Wire: (-) Horn Output The black w/ white trace wire is provided to beep the vehicle’s horn. This is a transistor- ized low current output, and should only be connected to the low current ground output from the vehicle’s horn switch. If the vehicle uses a + 12 VDC horn switch, then connect the black w/ white trace wire to terminal 86 of a 30Amp automotive relay, and connect relay terminal 85 to a fused + 12 VDC battery source.
- Page 10 To learn tach: 1. Turn the ignition key to the On position. 2. Press and release the valet/program push button switch 3 times. 3. Immediately turn the ignition key Off. 4. Press and hold the valet/program push button switch, then start the vehicle using the key.
- Page 11 Page 11 128-9351 11 of 16...
- Page 12 PROGRAMMING BANK 3 (REMOTE START ): You can enter Bank 3 from Bank 2 by turning the ignition key off then on after you've made the changes you wanted in Bank 2, (Siren two Long Chirp). You can also go right to bank 3 by: 1) Turn the ignition key to the On position.
- Page 13 Page 13 128-9351 13 of 16...
-
Page 14: Diagnostics
Diagnostics: Enter Bank 3 and turn on selectable feature # 9 as described in the feature selection and setting section. Exit the feature selection mode then press and hold the pushbutton valet/program switch and then turn the ignition switch to the on position. NOTE: Diagnostic mode is a temporary mode. - Page 15 NOTES Page 15 128-9351 15 of 16...
- Page 16 2 Red/White (+ 12VDC Relays Ign 1 & Ign 2) 3 Green (Ign 2) 4 Purple (Accessory) 5 Red (+ 12VDC Relays ACC & Start) 6 Yellow (Starter) APS622E (-) Unlock Output 500mA Green (-) Lock Output White (Parking Light Relay Output)
Need help?
Do you have a question about the APS622E and is the answer not in the manual?
Questions and answers