
Related Manuals for Spheros Thermo E 200


Summary of Contents for Spheros Thermo E 200
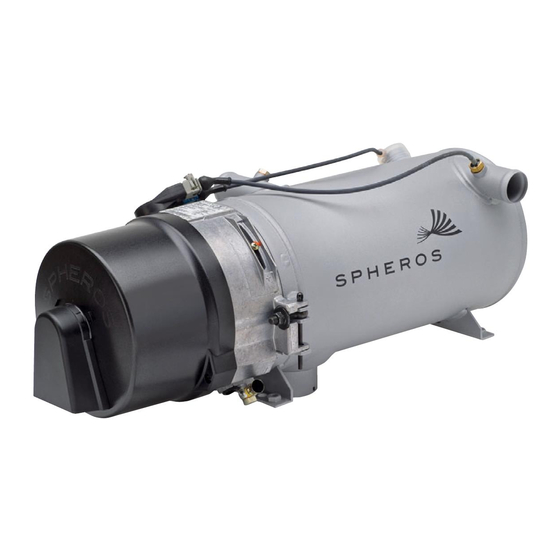
- Page 1 Water Heater Workshop Manual Thermo E 200 Thermo E 320 with Control Unit 1587 08/2011 Ident. no. 11114284B...
-
Page 3: Table Of Contents
Thermo E 200 / 320 1 Introduction Introduction Content and purpose Workshop manual validity Meaning of highlighted content Additional applicable documentation Installation and safety regulations 1.5.1 Legal installation regulations 1.5.2 General safety regulations 1.5.3 Combustion air supply 1.5.4 Exhaust line 1.5.5... - Page 4 1 Introduction Thermo E 200 / 320 Troubleshooting and error correction General General error symptoms Malfunction code output via flash code Error symptoms during functional tests with malfunction code output 5.4.1 Error symptom "No start within safety period" 5.4.2 Error symptom "Flame interruption"...
- Page 5 Thermo E 200 / 320 1 Introduction 8.10 Atomizer nozzle removal and installation 8.11 Combustion chamber removal and installation 8.12 Heat exchanger removal and installation 8.13 Heater removal and installation 8.14 Start-up after burner, heater or heat exchanger installation 8.14.1 Bleeding of the fuel system 8.14.2 Bleeding of the water circuit...
- Page 6 1 Introduction Thermo E 200 / 320...
-
Page 7: Content And Purpose
For the heaters exist type approvals according to the ECE This workshop manual is used to support personnel Regulations: briefed and/or trained by Spheros during maintenance and repair of water heaters Thermo E 200 and E 320. R10 (EMV) No. 03 5742 and R122 (Heater) No. - Page 8 1 Introduction Thermo E 200 / 320 The year of first start-up must be permanently marked on ing), the outer shell of the heater may reach a temper- the type plate by removal of not applicable dates. ature equalling the ignition temperature of diesel fuel!
- Page 9 Thermo E 200 / 320 1 Introduction Water heating circulation system - wall heater and roof channel heater Wall heater with fan Heat exchanger at the entrance Heater Circulation pump Roof heat exchanger Vehicle engine Shut-off valve Driver seat heater...
-
Page 10: Combustion Air Supply
If the exhaust line is installed in close proximity to temperature-sensitive parts, then it must be insu- lated. If exhaust fumes exit downwards under the vehicle, an exhaust gas deflection is absolutely necessary. CAUTION For permissible exhaust gas deflections for the Thermo E 200 heater, see Installation instruction. -
Page 11: Technical Data
* without circulating pump Max. continuous current of the circulating pump 8.75 A, max. peak current for 0.5 s duration = 90 A - We recommend the use of Spheros circulation pumps for highest efficiency and reliability! In order to reduce starting currents the circulating pump can be synchronized by the control unit for a short time period during activation. - Page 12 2 Technical Data Thermo E 200 / 320...
-
Page 13: Burner
The control unit controls heater activation and deactiva- tion based on the temperature sensor signals. The water heaters Spheros Thermo E 200 and E 320, are used in conjunction with the vehicle heating system The heaters of the Thermo E series mainly consist of the following main components: –... -
Page 14: Combustion Air Fan
3 Description of assemblies and components Thermo E 200 / 320 Burner 3.1.2 Fuel pump The fuel pump is responsible for fuel supply. The burner consists of components The pump is driven by the burner motor via a coupling. Fuel is compressed in the fuel pump to approx. 10 bar and •... -
Page 15: Control Unit
Thermo E 200 / 320 3 Description of assemblies and components 3.1.3 Nozzle block preheater 3.1.4 Control unit In case of very low temperatures fuel may exhibit severely The control unit 1587 ensures the operating sequence modified viscosity. Due to insufficient fuel atomization and burner operation monitoring. -
Page 16: Heat Exchanger
3 Description of assemblies and components Thermo E 200 / 320 The overheating protection integrated into the tempera- Disc ture sensor is responsible for temperature limitation. Electronic ignition unit Similar to the water temperature sensor, the coolant temperature is captured at the heat exchanger outlet as electrical resistance and transmitted to the control unit. -
Page 17: Combustion Chamber
Thermo E 200 / 320 3 Description of assemblies and components Combustion chamber Depending on heating capacity class, different combus- tion chambers are used. They have different swirler (E 200 sheet metal, E 320 cast The combustion chamber is used for generation and iron). -
Page 18: Circulating Pump
3 Description of assemblies and components Thermo E 200 / 320 Circulating pump The externally arranged circulating pump ensures coolant transport within the vehicle and/or heater circulation system. Aquavent 5000 Depending on the application, the circulating pump is (U4814) switched on via the control unit or directly via the vehicle electrical system and operated during the entire heater operation duration. -
Page 19: Fuel Filter
Thermo E 200 / 320 3 Description of assemblies and components 3.4.2 Aquavent 6000C (U4855) and Aquavent Fuel filter 6000SC (U4856) circulating pumps A heatable fuel filter is available as an option. The Aquavent 6000C (U4855) and Aquavent 6000SC The integrated filter heating is switched on below of a fuel (U4856) circulating pumps are equipped with a brushless temperature of 0.5°C and off at a temperature of 5.5°C. - Page 20 3 Description of assemblies and components Thermo E 200 / 320...
-
Page 21: General Heater Functionality Description
Thermo E 200 / 320 4 Heater functions Heater functions General heater functionality description The heater principle is based on a high-pressure atomizer burner and is monitored by an integrated control unit. The burner motor powers the fan and the fuel pump. The fuel pump is coupled to the motor using a coupling. -
Page 22: Heating Operation
4 Heater functions Thermo E 200 / 320 Operational heater sequence Process Signals Main switch Coolant temperature T > T_min T < T_min T >= T_max T < T_min T >= T_max T < T_min Actuators Operating display Combustion air motor... -
Page 23: Switching Off
Thermo E 200 / 320 4 Heater functions switching threshold for starting the controlled break is set. In addition, the burner is also switched back on again after the controlled break at a lower switching threshold. This prevents residual heat triggering the overheating protection. -
Page 24: Malfunction Interlock And Heater Interlock
4 Heater functions Thermo E 200 / 320 Malfunction interlock and heater • Heater operation outside the permissible temperature range. interlock • Voltage falling short of the low voltage threshold of approx. 20.5 V at motor start or within a duration of 20 Malfunction interlocks and heater interlocks are distin- seconds after a heating request. -
Page 25: Heater Interlock Release
NOTE Prior to restarting the heater troubleshooting must be The heater automatically starts after connecting it to performed by personnel trained by Spheros in order to the vehicle electrical system. identify the root cause. The heater can be switched off in the initial cycle. - Page 26 4 Heater functions Thermo E 200 / 320...
-
Page 27: General
General • Cable insulation damage This section describes troubleshooting and error correc- tion for Thermo E 200 and E 320 heaters. ATTENTION Prior to replacing a fuse troubleshooting needs to be performed. The heater must be disconnected from the ATTENTION... - Page 28 5 Troubleshooting and error correction Thermo E 200 / 320 Table 501: General error symptoms Error symptom Possible cause Error in the water system Circulating pump not operating (Aquavent 6000S and • Error mode activated. Aquavent 6000SC only). In case of malfunctions the motor is switched off via the error mode.
-
Page 29: Malfunction Code Output Via Flash Code
Thermo E 200 / 320 5 Troubleshooting and error correction Table 501: General error symptoms Error symptom Possible cause Error in the fuel supply No fuel delivery to the heater. • Fuel tank empty. • Bent, closed, clogged or leaking lines. - Page 30 5 Troubleshooting and error correction Thermo E 200 / 320 Table 502: Blinkcode No. of Error Error description impulses Control unit error Control unit error No start within safety period No start within safety period Flame interruption in burner operation, repeated...
-
Page 31: Error Symptoms During Functional Tests With Malfunction Code Output
Thermo E 200 / 320 5 Troubleshooting and error correction Error symptoms during functional tests with malfunction code output 5.4.1 Error symptom "No start within safety period" If due to a malfunction the heater unsuccessfully attempted to start eight times in a row, it will be inter- locked. - Page 32 5 Troubleshooting and error correction Thermo E 200 / 320 Clean and securely mount the combustion air intake Are the combustion air intake opening and line and the opening and line and the exhaust line. exhaust line clean and securely mounted? Secure fresh air supply.
-
Page 33: Error Symptom "Low Voltage
Thermo E 200 / 320 5 Troubleshooting and error correction 5.4.3 Error symptom "Low voltage" A value is stored in the control unit as smallest "permissible low voltage". It must be noted that the voltage may be lowered during heater start, and that the "low voltage" threshold may be violated. -
Page 34: Error Symptom "Extraneous Light Detected Prior To Ignition Or During Purge Cycle
5 Troubleshooting and error correction Thermo E 200 / 320 5.4.4 Error symptom "Extraneous light detected prior to ignition or during purge cycle" Open valves, refill coolant, bleed coolant circuit. Did overheating occur due to impaired Verify the circulating pump is correct controlled. -
Page 35: Error Symptom "Flame Detector Defective
Thermo E 200 / 320 5 Troubleshooting and error correction 5.4.5 Error symptom "Flame detector defective" The flame detector cannot be replaced. Optionally the control unit is to be replaced. 5.4.6 Error symptoms "Temperature sensor / overheating protection defective" and "Overheating"... -
Page 36: Individual Component Tests
5 Troubleshooting and error correction Thermo E 200 / 320 Individual component tests • Inspect combustion chamber for deformation and moisture. Individual components can basically be tested using • Inspect combustion chamber for cracks. visual inspection or manual electrical testing. -
Page 37: Fan And Combustion Air Intake Line Visual Inspection
Thermo E 200 / 320 5 Troubleshooting and error correction 5.5.6 Burner motor inspection The motor can be checked by applying 24V DC voltage. The electrical connection to the control unit must be disconnected first. Burner motor Pin 1 & 3... -
Page 38: Ignition Electrode Inspection
5 Troubleshooting and error correction Thermo E 200 / 320 Inspection • Remove burner (see 8.2) Ignition electrode 13,000 Volt • Check distance of the electrode tip to the atomizer nozzle (see Fig. 506). • Check the distance between the electrodes (see Fig. -
Page 39: Fuel Pump Inspection
Thermo E 200 / 320 5 Troubleshooting and error correction • Are the filters (screens) in the pump inlet clean? Disc • Is the fuel delivered without bubbles? Attach a transparent hose for testing. • If the specified exhaust values cannot be reached after inspection and consideration of this error sources, the fuel pump is to be replaced. -
Page 40: Solenoid Valve Inspection
5 Troubleshooting and error correction Thermo E 200 / 320 5.5.11 Solenoid valve inspection 5.5.12 Nozzle block preheater inspection ATTENTION NOTE The coil of the solenoid valve can heat up in switched- At a temperature of < 5°C the heating element in the on condition. -
Page 41: General
Thermo E 200 / 320 6 Wiring diagrams Wiring diagrams General The following figures represent heater connection options to the vehicle electrical system. The in the table below shown cable cross-sections are to be used. Cable length <7.5m Cable length 7.5 - 15m 0.75 mm²... -
Page 42: Wiring Diagrams
6 Wiring diagrams Thermo E 200 / 320 T 30 T 31 T 30 2.5mm² Heater Thermo E T 31 2.5mm² Main Switch „C“ 0.75mm² Control Device Operating Indicator 2pin 0.75mm² 2.5mm² „P“ 2pin (optional) 2.5mm² „T“ 4pin Coolant 3pin... -
Page 43: 6 Wiring Diagrams
Thermo E 200 / 320 6 Wiring diagrams Position Designation Operation indicator max. 1x5W or 2x2W Burner motor Nozzle block pre-heater Car flat-type fuse 25A acc. DIN 72581 part 3 Car flat-type fuse 5A acc. DIN 72581 part 3 Main switch... -
Page 44: 6 Wiring Diagrams
6 Wiring diagrams Thermo E 200 / 320... -
Page 45: Heater Servicing
You can find an actual overview of all technical infor- mation on the Spheros homepage under Service / • after repairs at the burner Technical Documents. - Page 46 7 Servicing Thermo E 200 / 320 E200 E320 12.0 12.0 11.0 11.0 10.0 10.0 Voltage [V] Voltage [V] Min CO [Vol%] Max CO [Vol%] Fig. 701 Diagrams CO value and dependency on voltage 5. Torque fixation screw to 1.0 + 0.5 Nm and apply locking compound.
-
Page 47: Removal And Installation
NOTE If components are disassembled to a degree not covered in this workshop manual, any warranty claim shall be voided. Only genuine Spheros spare parts should be used. Removing the burner provides access to the following components: • Atomizer nozzle •... -
Page 48: Burner Removal And Installation
8 Repair Thermo E 200 / 320 Burner removal and installation Burner installation 1. Bring burner (1, Fig. 801) in assembly position and Burner removal ensure centre alignment and correct fit. 1. Disconnect the heater from the vehicle electrical 2. Place nuts (2) and alternately tighten them slightly. -
Page 49: Burner Motor Removal And Installation
Thermo E 200 / 320 8 Repair Removal and installation of the Hood removal and installation temperature sensor with integrated overheating protection Removing the hood provides access to the following components for maintenance, inspection and repair purposes: CAUTION Risk of injuries if coolant temperature is increased. - Page 50 8 Repair Thermo E 200 / 320 Use this stud for correct positioning of the burner motor Hood Screws (2) Shaft circlip Fan wheel Burner motor Motor plug Coupling with magnets Burner housing Fuel pump 10 Disc 11 Nozzle Fig. 803 Burner motor removal and installation...
- Page 51 Thermo E 200 / 320 8 Repair Installation Electronic ignition unit and ignition 1. Position motor (5, Fig. 803) onto the housing (stud at electrode removal and installation the housing and hole in the motor flange). 2. Secure motor (5) with three countersunk screws Removal M5x35 (5 +1 Nm).
- Page 52 8 Repair Thermo E 200 / 320 Electronic ignition unit Screw (2) Ignition electrode Atomizer nozzle Disc Solenoid valve Heating element of the nozzle block preheater (optional) Thermostat of the nozzle block preheater (optional) Clamp 10 Fuel pump 11 O-rings (2)
-
Page 53: Control Unit Removal And Installation
Thermo E 200 / 320 8 Repair Control unit removal and installation 3. If required, attach new O-rings (11) and a new screen (12) to the fuel pump (10). 4. Slide the coupling (17) with magnets onto the fuel Removal pump (10) shaft. - Page 54 8 Repair Thermo E 200 / 320 Solenoid valve removal and 2. Attach solenoid valve (6, Fig. 805) to the fuel pump (10). installation 3. Using suitable tools, tighten hexagon, wrench size 16 (6, Fig. 806) of the solenoid valve with 5 Nm ± 0.5 Nm.
- Page 55 Thermo E 200 / 320 8 Repair 8.11 Combustion chamber removal and downwards (see graphic below). Dripping from nozzle fuel is so collected in a installation reservoir between disc and burner head and will be burned at the next burner operation instead to Removal soil the heater.
-
Page 56: Heater Removal And Installation
8 Repair Thermo E 200 / 320 coolant outlet (6) and secure with hose clamps 8.14.2 Bleeding of the water circuit applying a tightening torque of 6 ± 0.6 Nm. 4. If existing, open water taps. NOTE 5. Install burner (see 8.2) The water circuit must be principally bleeded 6. - Page 57 Thermo E 200 / 320 9 Modifications and retrofits Modifications and retrofits For further optimization the heaters are continuously improved. Units in the field can usually be upgraded or retrofitted. For this purpose respective modification kits will be available. For Information refer to the category...
- Page 58 9 Modifications and retrofits Thermo E 200 / 320...
-
Page 59: General
10 Packing / storage / shipping Packing / storage and shipping 10.1 General The heater or its components, which are sent to Spheros for inspection or repair, must be cleaned and packaged to ensure that handling, transport and storage will not damage them. - Page 60 10 Packing / storage / shipping Thermo E 200 / 320 Empty page for notes 1002...
-
Page 61: Appendix A
Thermo E 200 / 320 Appendix A Appendix A Periodic maintenance... - Page 62 (time of tions, the maintenance intervals may be shortened or increased heater usage due to present weather condi- extended. tions). In such cases please contact your dedicated Spheros partner for further information. Inspection / maintenance activities Important information Inspection...
Need help?
Do you have a question about the Thermo E 200 and is the answer not in the manual?
Questions and answers