Table of Contents
Advertisement
Available languages
Available languages
Quick Links
Advertisement
Table of Contents

Related Manuals for Nuova Simonelli MicoBar


Summary of Contents for Nuova Simonelli MicoBar
- Page 1 LIBRETTO ISTRUZIONI USER HANDBOOK...
- Page 2 S.p.a.
-
Page 3: Caratteristiche Tecniche
Siamo certi che il nostro modello MICROBAR accrescerà la fiducia verso la Nuova Simonelli e Lei certamente consiglierà ad altri l’acquisto di questa macchina per caffè, dal momento che il modello MICROBAR è stato scelto per aumentare la redditività del servizio caffetteria ottimizzando al massimo i costi di esercizio. -
Page 4: Table Of Contents
INDICE CARATTERISTICHE TECNICHE ..1 PROGRAMMAZIONE ....18 LEGENDA ............18 PROGRAMMAZIONE ........18 DESCRIZIONE ....... 3 USCITA DALLA PROGRAMMAZIONE .... 19 DESCRIZIONE TASTIERA CICLO DI PROGRAMMAZIONE (Configurazione standard) ......4 MODALITA’ UTENTE ........19 DESCRIZIONE INTERNA MICROBAR ....4 CICLO DI PROGRAMMAZIONE MODALITA’... -
Page 5: Descrizione
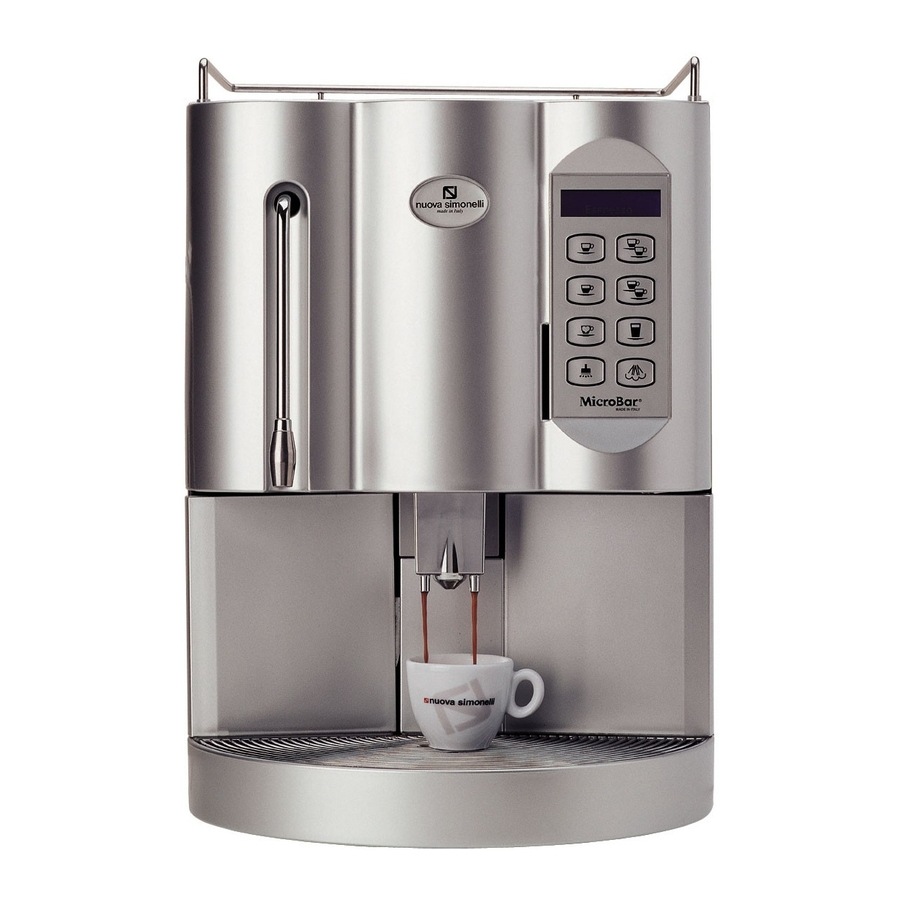
DESCRIZIONE Fig. 1 LEGENDA Tappo accesso contenitore caffè in grani 10 Sportello accesso convogliatore Pannello comandi caffè macinato Porta anteriore 11 Tubo aspirazione latte Lancia Vapore / Lancia Acqua calda 12 Rubinetto regolazione flusso latte Griglia contenitore raccogligocce 13 Sportello accesso serbatoio acqua Cassetto fondi 14 Interruttore generale (ON / OFF) Erogatori caffè... -
Page 6: Descrizione Tastiera (Configurazione Standard)
DESCRIZIONE DESCRIZIONE INTERNA TASTIERA MICROBAR (Configurazione standard) Fig. 2 Fig. 3 LEGENDA LEGENDA Chiave - Serratura porta Tasto 1 Espresso Micro apertura porta Tasto 2 Espressi Regolazione aria cappuccinatore Tasto 1 Caffè Vite regolazione macinatura caffè in grani macinino sinistro Tasto 2 Caffè... -
Page 7: Prescrizioni Di Sicurezza
PRESCRIZIONI DI SICUREZZA Il presente libretto costituisce parte inte grante ed essenziale del prodotto e dovrà essere consegnato all’utilizzatore. Leggere attentamente le avvertenze contenute nel presente libretto in quanto forniscono importanti indicazioni riguardanti la sicu rezza di installazione, d’uso e manuten Fig. - Page 8 • non tirare il cavo di alimentazione, per rizzato utilizzando esclusivamente ricambi scollegare l’apparecchio dalla rete di originali. alimentazione; Il mancato rispetto di quanto sopra può com promettere la sicurezza dell’apparecchio. All’installazione, l’elettricista munito di patentino dovrà prevedere un interruttore onnipolare come previsto dalle normative di sicurezza vigenti con distanza di apertu...
- Page 9 ATTENZIONE PERICOLO MECCANICO Non premere e/o tirare l’interruttore di sicurezza. Fig. 10 Per favorire l’areazione della macchina posizionarla a cm 15 (5,9 in)da muri o altre macchine dalla parte dell’areazione. Una volta iniziato il lavaggio della mac china, non interromperlo, possono rima...
-
Page 10: Trasporto Emovimentazione
TRASPORTO E ATTENZIONE MOVIMENTAZIONE PERICOLO DI URTO O SCHIACCIAMENTO IDENTIFICAZIONE Prima della seguente operazione verificare che il MACCHINA carico sia a posto e che con il taglio delle centine non cada. Per qualsiasi comunicazione con il costruttore Nuova L’operatore con guanti e scarpe antinfortunisti Simonelli, citare sempre il numero di matricola della che, deve procedere al taglio delle centine e allo macchina. -
Page 11: Installazionee Operazioni Preliminari
INSTALLAZIONE ATTENZIONE E OPERAZIONI PERICOLO DI CORTOCIRCUITO PRELIMINARI Prima di collegare la macchina alla rete elettrica, verificare che ci sia corrispondenza tra il vol taggio per cui essa è stata predispo sta e quello ATTENZIONE dell'impianto. PERICOLO DI INQUINAMENTO Non disperdere l’imballo nell’ambiente. INSTALLAZIONE MACCHINA VERSIONE CON TANICA... -
Page 12: Installazione Macchina Versione Ad Allaccio Diretto
ATTENZIONE ATTENZIONE La durezza dell’acqua deve essere inferiore ai La durezza dell’acqua deve essere inferiore ai 4° 6° fr (Gradi francesi). 4° 6° fr (gradi francesi). Altrimenti verranno a decadere le condizioni di Altrimenti verranno a decadere le condizioni di Garanzia della macchina. -
Page 13: Accensione
ACCENSIONE NOTA: Il tempo iniziale è circa 3 minuti. NOTA: La macchina è dotata di un sistema di NOTA: Nel caso la sequenza qui sotto descrit- sicurezza, che dopo circa 1,5 minuti di fun- ta non si verifichi, consultare il Capitolo zionamento continuo della pompa, arresta “ANOMALIE E RIMEDI”. -
Page 14: Regolazioni Del Tecnico Qualificato
Le regolazioni di seguito elencate devono essere aumentare / diminuire l’aria al cappucinatore. eseguite SOLO dal Tecnico Specializzato. La Nuova Simonelli non risponde di alcun danno a cose o persone, derivanti da una manca ta osservanza delle prescrizioni di sicurezza, descritte in questo manuale. -
Page 15: Utilizzo
UTILIZZO L’operatore deve prima di iniziare la lavorazione, • Il display LCD visualizzerà la scritta: accertarsi di aver letto e ben compreso le prescrizio- ni di sicurezza di questo manuale. ATTENZIONE • Per arrestare completamente la macchina preme- re l’interruttore generale e portarlo nella posizione Nel caso in cui l’autodiagnosi indichi anomalie o “OFF”. -
Page 16: Configurazione Selezioni
CONFIGURAZIONE PREPARAZIONE CAFFE’ SELEZIONI Impostare la funzione desiderata sui tasti a dispo- sizione n° 1 - 2 - 3 - 4 - 6 della pulsantiera (vedi La modalità di preparazione è la stessa per caffè capitolo “DISPLAY”), tramite le procedeure di pro- espresso e caffè... -
Page 17: Preparazione 2 Caffe
PREPARAZIONE PREPARAZIONE 2 CAFFE’ CAFFELATTE • Sistemare una tazza sotto ciascun erogatore. • Posizionare un contenitore con del latte a fianco della macchina. • Immergere il tubo aspirazione latte all’interno del recipiente. Fig. 30 • Premere una volta sul tasto erogazione del caffè desiderato. Fig. 31 • Posizionare la tazza che conterrà il caffelatte. • Regolare tramite il rubinetto collocato lungo il tubo, • Il caffè è in preparazione. la quantità di latte desiderata. • Il display visualizza una scritta a seconda del tipo • Premere una volta sul tasto erogazione caffelatte. -
Page 18: Macchiato (3 Strati: Latte / Caffè / Latte)
6.10 MACCHIATO • Sul display apparirà: (3 strati: latte / caffè / latte) • Premere il tasto relativo al tipo di caffè desiderato Per la realizzazione, attenersi alle procedure del seguendo la procedura del paragrafo “CAFFE’ CAFFELATTE (vedi paragrafo CAFFELATTE). ESPRESSO - CAFFE’ LUNGO”. • Il caffè è in preparazione. • Il display visualizza la seguente scritta (esempio): 6.11 LATTE CALDO Lasciare la tazzina sotto gli erogatori fino a Per la realizzazione, attenersi alle procedure del quando non scompaiono la scritta sul display. -
Page 19: Acqua Calda
6.14 ACQUA CALDA • Premere una volta sul tasto erogazione Vapore: ATTENZIONE Prima di effettuare la seguente operazione assi • Dalla lancia vapore fuoriesce l’acqua di condensa curarsi che vi sia acqua all’interno del serbatoio. residua e non appena dall’erogatore fuoriesce il In caso contrario, provvedere al ripristino. vapore utilizzarlo per il tempo desiderato. Consente l’erogazione di acqua calda per preparare • Il display visualizza la seguente scritta (esempio): tè, camomilla e tisane. -
Page 20: Programmazione
PROGRAMMAZIONE PROGRAM. ON/OFF RISPARMIO ENERGIA LEGENDA Funzioni accessibili dalla “SOLA” modalità TECNICO. Operazione eseguibile SOLO da Tecnico Specializzato. La regolazione da parte di Tecnici NON qualificati o di altre persone, potrebbe invalidare la Garanzia. Le funzionalità a cui si darà accesso nella modalità TECNICO in aggiunta alle precedenti sono: PREINFUSIONE PRESSATURA... -
Page 21: Uscita Dalla Programmazione
CICLO DI • Premere il tasto ENTER, chiudere lo sportello PROGRAMMAZIONE macchina, il display visualizza: MODALITÁ UTENTE 1 . LINGUA Premendo il tasto ENTER è possibile entrare nel sottomenù. Viene impostata la lingua di • Terminato il ciclo di espulsione, il gruppo si posi- interfaccia, tra la macchina e l’operatore, ziona in fase di riposo e il display visualizza la visualizzata dal display. - Page 22 PROG. DOSI NOTA: Nella versione co doppio macinino ponendo il parametro a 0 viene abilitato il macinino Premendo il tasto ENTER è possibile entrare sinistro. nel sottomenù. Vengono programmate le dosi di acqua utilizzate per ogni singola bevanda. PROG. MACININO 2 S Prog Dose caffè...
- Page 23 Impostato l’orario desiderato, premere ENTER per GIORNO/ORA impostare il giorno successivo. Premendo il tasto ENTER è possibile entrare Dopo il giorno SABATO premendo il tasto si torna nel sottomenù. al menù precedente. Viene programmato il giorno, l’ora ed i minuti che visualizzerà...
-
Page 24: Ciclo Di Programmazione Modalita' Tecnico
CICLO DI 11. PRESSATURA PROGRAMMAZIONE Premendo il tasto ENTER è possibile entrare MODALITÁ TECNICO nel sottomenù. Per accedere alle funzioni programmabili solo nella Viene programmata, per ogni singola bevanda, la MODALITà TECNICO scorrere tutte le funzioni compressione pastiglia (SI o NO). accessibili della MODALITà... - Page 25 14. ALLARME LAVAGGIO 17. REGOLAZ. MACININO Premendo il tasto ENTER è possibile entrare Premendo il tasto ENTER è possibile entrare nel sottomenù. nel sottomenù. Viene programmato il numero di cicli dopo il Viene programmata la possibilità di incremen- quale viene visualizzato l’avviso pulizia gruppo. tare i tempi di macinatura di 0.1 sec ogni 250 - 1000 erogazioni.
- Page 26 Tasti ▲▼ scorrono i vari totali dei cicli associati a 22. CONTEGGIO TOTALE ciascun tasto utilizzato. (Tutte le versioni) Il tasto RESET torna al menù precedente. Premendo il tasto ENTER è possibile entrare Nella prima posizione tenendo premuto il tasto ▲ nel sottomenù. Vengono visualizzati: • Il numero di cicli effettuati per ogni tasto viene visualizzato il totale assoluto delle dosi prodot- bevanda a seguito dell’utilizzo del macino te dalla macchina utilizzando il macinino destro.
- Page 27 25. FILTRO ACQUA L Premendo il tasto ENTER è possibile entrare nella funzione. Premendo il tasto ENTER è possibile entrare nel sottomenù. Il display visualizzerà: Viene programmato il numero di litri di acqua erogata per la visualizzazione del messaggio pulizia filtro acqua. Tramite i tasti ...
- Page 28 • Al termine della fase di risciacquo la macchina • Premere il tasto ENTER; visualizzerà il messaggio: • La macchina inizierà a risucchiare la soluzione dalla tanica espellendo in contemporanea acqua calda dalla lancia. • La macchina mostrerà: Attendere il riscaldamento della macchina per pochi minuti, al termine del quale la macchina si riporterà...
-
Page 29: Funzioni Speciali
FUNZIONI SPECIALI ENTER TARATURE MACCHINA e RESET il display visualizzerà: AZZERAMENTO CONTATORE LITRI DEPURATORE Mediante questa funzione è possibile azzerare il numero totale di litri d’acqua consumati. MOVIMENTAZIONE La procedura si esegue nel seguente modo: MANUALE GRUPPO • Togliere tensione alla macchina agendo sull’in- EROGAZIONE CAFFE’... -
Page 30: Pulizia Emanutenzione
PULIZIA E MANUTENZIONE ATTENZIONE Non utilizzare MAI getti d'acqua per la pulizia della macchina. PULIZIA DELLA CARROZZERIA Prima di effettuare qualsiasi operazione di pulizia, Fig. 36 bisogna portare la macchina a stato energetico “O” (cioè interruttore macchina spento e spina NOTA: Prima di eseguire il ciclo di lavaggio è... -
Page 31: Ripristino Di Un Lavaggio Interrotto
4. Premere il seguente tasto: NOTA: Durante la fase di lavaggio e risciacquo è consigliabile mettere un recipiente sotto al gruppo erogatore oppure svuotare il con- tenitore raccogligocce, alla fine del ciclo di lavaggio e risciaquo. 5. Mantenerlo premuto per circa 5 secondi fino alla visualizzazione del seguente messaggio: RIPRISTINO DI UN LAVAGGIO... -
Page 32: Pulizia Della Lancia
PULIZIA DELLA PULIZIA DEL LANCIA VAPORE CONTENITORE Pulire la lancia vapore ogni volta che lo si utilizza per RACCOGLIGOCCE riscaldare bevande. • Pulire il contenitore raccogligocce con acqua calda e sapone utilizzando eventualmente una ATTENZIONE spazzola. PERICOLO DI USTIONE NOTA: Il contenitore raccogligocce può essere lava- to utilizzando una lavastoviglie. -
Page 33: Pulizia Guarnizione Gruppo
PULIZIA GUARNIZIONE GRUPPO • Con l’utilizzo di uno spazzolino, pulire da incro- stazioni o residui di caffè il pistone e la camera del gruppo erogatore, nonchè tutte le altri parti sporche di caffè. Fig. 48 • Scollegare tutti i tubi ad esso collegati. • Smontare il cappuccinatore e lavarlo accurata- mente. Fig. 45 9.10 PULIZIA CAPPUCCINATORE... -
Page 34: Tabella Dati Impostazioni Standard
TABELLA DATI IMPOSTAZIONI STANDARD BEVANDE DOSE TEMPO DOSE PREINFUSIONE PRESSATURA NUMERO CAFFE’ MACINATURA LATTE (cc) (sec) (sec) Ristretto Sì 2 Ristretto Espresso Sì 2 Espresso Caffè Sì 2 Caffè Caffe Creme 2 Caffe Creme Cappuccino Sì Big Cappuccino Sì Macchiato Sì... -
Page 35: Messaggi Funzioni Macchina
MESSAGGI FUNZIONI MACCHINA INDICAZIONE DISPLAY CAUSA EFFETTO SOLUZIONE NOTA Estrarre il cassetto Blocco delle Cassetto fondi CASSETTO FONDI PIENO fondi e svuotarlo all’in- erogazioni tasti pieno. Il numero terno di un contenitore a base caffè. di fondi caffè pre- raccogli immondizia. senti nel cassetto Reinserire lo stes- ha raggiunto il... - Page 36 INDICAZIONE DISPLAY CAUSA EFFETTO SOLUZIONE NOTA E’ stato supera- Viene visualizza- Effettuare un ciclo NECESSITA’ DI EFFETTUARE to il numero di to il messaggio di lavaggio (vedi IL CICLO DI LAVAGGIO cicli impostato ma la macchina relativo para- dopo il quale continua ad ero- grafo “PULIZIA...
-
Page 37: Messaggi Allarme Blocchi Macchina
MESSAGGI ALLARME BLOCCHI MACCHINA INDICAZIONE DISPLAY CAUSA EFFETTO SOLUZIONE NOTA Durante la fase L’unità di control- Aprire e chiudere ALLARME GRUPPO MOTORE Se l’allarme lo blocca l’even- di movimenta- lo sportello mac- PISTONE SUPERIORE r i c o m p a r e tuale ciclo in zione gruppo il china. - Page 38 INDICAZIONE DISPLAY CAUSA EFFETTO SOLUZIONE NOTA Utilizzare Il serbatoio del- Non viene ero- Riempire il serba- ALLARME SERBATOIO VUOTO tasto Acqua l’acqua è vuoto. gato il caffè e toio dell’acqua. Calda per eli- s’interrompe la minare even- dose in corso. tuali bolle d’aria.
-
Page 39: Technical Characteristics
This means absolute reliability and simple to use. We are certain that our MICROBAR model will increase your confidence in Nuova Simonelli and that you will undoubtedly recommend others to purchase this coffee-making machine, since the MICROBAR model has been chosen to increase the profitability of the coffee shop, thus fully optimising running costs. -
Page 40: Safety Instructions
INDEX TECHNICAL PROGRAMMING ......54 CHARACTERISTICS ....37 LEGENDA ............54 PROGRAMMING ..........54 EXITING PROGRAMMING ......55 DESCRIPTION ......39 PROGRAMMING CYCLE KEYBOARD DESCRIPTION USER MODE ..........55 (Standard configuration) ......... 40 PROGRAMMING CYCLE MICROBAR INTERNAL DESCRIPTION ..... 40 TECHNICIAN MODE ........ - Page 41 DESCRIPTION Fig. 1 LEGENDA Coffee bean holder cap 10 Ground coffee Control panel conveyor hatch Front door 11 Milk suction tube Steam pipe / Hot water pipe 12 Milk flow adjusting tap Drop collecting tray grid 13 Water tank opening Coffee grounds drawer 14 Main switch (ON / OFF) Coffee nozzles...
-
Page 42: Standard Configuration
KEYBOARD MICROBAR INTERNAL DESCRIPTION DESCRIPTION (Standard configuration) Fig. 2 Fig. 3 LEGENDA LEGENDA Door Key 1 Espresso key Door microswitch 2 Espressos key Milk Foamer air regulator 1 Coffee key Coffe grinder adjusting screw left-hand grinder 2 Coffees key Coffe bean holder left-hand grinder Second Grinder, Ground coffee conveyor Decaffeinated, Clean cycle... - Page 43 SAFETY INSTRUCTIONS This book is an integral and essential part of the product and must be given to the user. Read this book carefully. It provides important information concerning safety of installation, use and maintenance. Save it carefully for future reference. Fig.
- Page 44 • do not pull the supply cord out of observe the above, could make the appliance the socket to disconnect it from the unsafe. mains; For installation, the qualified electrician must fit an omnipolar switch in accord ance with the safety regulations in force and with 3 (0,12) or more mm (in) between contacts.
- Page 45 WARNING MECHANICAL HAZARD Never press and/or pull the safety switch. Fig. 10 To ensure that the machine is properly ventilated, place it with the ventilation side at a distance of 15 cm (5,9 in) from walls or other objects. Fig.
- Page 46 Always quote the machine serial number in all com- cut, it will not fall. munications to the manufacturer, Nuova Simonelli. The operator, who must first put on work gloves and protective footwear, will proceed to cut the supports and to storing the product.
-
Page 47: Machine Installation
INSTALLATION CAUTION AND PRELIMINARY RISK OF SHORT CIRCUITS OPERATIONS Before connecting the machine to the mains power supply, please check that the supply volt CAUTION age corresponds to the machine voltage. RISK OF POLLUTION Do not dispose of packaging in the environment MACHINE INSTALLATION (VERSION WITH TANK) - Page 48 WARNING WARNING The water hardness must be less then 4° 6° fr The water hardness must be less then 4° 6° fr (french degree). (french degree). Otherwise the conditions of guarantee of the Otherwise the conditions of guarantee of the machine will expire.
-
Page 49: Switching Off
SWITCHING ON NOTE: the starting time is about 3 minutes. NOTE: The appliance is endowed with a security NOTE: in case the following procedure shouldn’t system that will stop the machine after about take effect, see the chapter on “Problems 1.5 minutes of constant functioning of the and Solutions”. -
Page 50: Milk Foamer
The adjustments listed here below may be per increase / reduce the air to the milk foamer. formed by Specialist Technical Engineers ONLY. Nuova Simonelli cannot accept any liability for damage to people or property arising from fail ure to follow the safety regulations listed in this manual. - Page 51 Before starting usage of the appliance, the operator • The LCD will read as follows: must read and fully understand the safety instruc- tions in this handbook. WARNING • To stop the machine completely, press the main switch and turn it to the “OFF” position. If the selfdiagnostic function indicates anom alies or failures, call the assistance centre. Operators must never intervene.
- Page 52 SELECTIONS HOW TO MAKE THE CONFIGURATION COFFEE’ Set the desired function on keyboard keys n. 1-2-3-4- 6 (see ‘DISPLAY’ chapter), by following the program- ming procedures (see Chapter on Programming). Keys 1-3 can correspond only to coffee beverages; The procedure for making espresso and long keys 2-4-6 can correspond to all beverages.
- Page 53 HOW TO MAKE TWO HOW TO MAKE COFFEES CAFFELATTE • Position a milk container next to the machine. • Position one cup under each nozzle. • Insert the milk suctioning tube inside the milk container. Fig. 30 • Press the desired coffee delivery key once. Fig. 31 • Position the cup. • Adjust the tap along the tube to regulate the amount of milk desired.
-
Page 54: Hot Milk
6.10 MACCHIATO • The display will read: (three layers: milk/coffee/milk) To make this, proceed as for CAFFELATTE (see • Press the key corresponding to the desired kind CAFFELATTE paragraph). of coffee following the procedure of the paragraph “HOW TO MAKE THE COFFEE”. • The coffee is being made. 6.11 HOT MILK • The display will read:... -
Page 55: Hot Water
6.14 HOT WATER • Press the Steam delivery key once. WARNING • Residual water will drip from the steam pipe and as Before proceeding with the following operations, soon as the steam starts being delivered, use it for ensure that the water tank has water in it. If it the desired time. hasn’t, proceed to filling it with water. • The display will read as follows (example): This provides delivery of hot water for brewing tea, chamomile-tea or herb teas. - Page 56 PROGRAMMING PROGRAM. ON/OFF ENERGY SAVING LEGENDA Functions that can “ONLY” be accessed from the TECHNICIAN mode. This operation may ONLY be performed by a Specialist Technician. Adjustments made by Unqualified Technicians or other people may render the Guarantee null and void. Additional functions that can be accessed from the TECHNICIAN mode are: PREINFUSION...
-
Page 57: Programming Cycle
PROGRAMMING CYCLE • Press the ENTER key, close the front panel, the USER MODE display will read: LANGUAGE Press the ENTER key to access the sub- • Once the ejection cycle is over, the unit will enter menu. resting phase position and the display will show This sets the language for operator-machine the first item on the programming menu: interface, as shown on the display. - Page 58 WATER VOLUME CC NOTE: For models with double grinder, setting this parameter to 0 will enable the grinder on By pressing the ENTER key the submenus can the left. be accessed. The doses of water to be used for each single drink can be programmed. PROG.
-
Page 59: Energy Saving
DATE/TIME Once the required time has been set, press ENTER to set the following day. Press the ENTER key to access the submenu. After SATURDAY, press the key to return to the This is used to set the date and time to be previous menu. - Page 60 TECHNICIAN MODE 11. TAMPING PROGRAMMING CYCLE Press the ENTER key to access the submenu. To access the functions that can only be programmed This allows you to program the coffee tamping using the TECHNICIAN MODE, scroll through all of for each drink (YES or NO). the functions that can be accessed from the USER Tamping Ristretto MODE until the display reads as follows:...
-
Page 61: Grinder Setting
14. CLEAN WARNING 17. GRINDER SETTING Press the ENTER key to access the submenu. Press the ENTER key to access the submenu. This allows you to program the number of This allow you to program the choice of cycles after which the group clean warning will increasing grinding times by 0.1 seconds every be displayed. - Page 62 The ▲▼ keys scroll up and down the various totals 22. TOTAL COUNT of cycles associated to each key used. (All versions) The RESET key is used to return to the preceding Pressing the ENTER key, the sub-menu can be menu. entered. The following are visualised: • The number of cycles effectuated for each In the first position and keeping the ▲ key pressed, drink key, following the use of the left and the absolute total of the doses produced by the...
-
Page 63: Setting Water Hardness
The display will then read as follows: 25. WATER FILTER L Use the keys to set (increase/reduce) the water Press the ENTER key to access the sub- menu. This allows you to program the number of litres of water to be delivered for the display of the message clean water filter. - Page 64 • At the end of the rinse cycle, the machine display • Press the ENTER key; will read as follows: • The machine will begin to suck up the solution from the tank and at the same time, to expel hot water from the nozzle. • The machine display will read as follows: Leave the machine to heat up for a few minutes; at the end of this time, the machine will return to its ready status.
-
Page 65: Scaling Functions
SPECIAL MACHINE ENTER SCALING FUNCTIONS and RESET until the display reads: RESETTING THE CLEANING FILTER LITRE COUNTER This function allows you to reset the total amount of water used. HANDLING MANUAL Proceed as follows: COFFEE DELIVERY • Release voltage by turning the main switch off GROUP (OFF). - Page 66 CLEANING AND MAINTENANCE WARNING NEVER use water jets to clean the machine. CLEANING THE OUTSIDE OF THE MACHINE Fig. 36 Before carrying out any cleaning operations, set the machine to the “O” energy level, (machine switched NOTE: Before starting the washing cycle check and off and plug removed from the mains).
-
Page 67: Washing Cycle
4. Press the following key: NOTE: During the washing and rinsing cycles keep- ing a container under the delivery unit is advisable or empty the water collector once the wash and rinse cycles have been com- pleted. 5. Keep pressing down on the key for about 5 sec- REINSTATING AN onds until the display reads: INTERRUPTED... -
Page 68: Steam Nozzle
CLEANING THE CLEANING THE WATER STEAM NOZZLE COLLECTING TRAY Clean the steam nozzle each time it is used to warm up drinks. • Clean the water collecting tray with hot water and soap, if necessary using a brush. CAUTION RISK OF BURNS OR SCALDING NOTE: The water collecting tray can be washed in the dishwasher. - Page 69 CLEANING THE GASKET • Use a small brush to clean any deposits or coffee residues off the piston and the delivery unit site or any other areas soiled with coffee. Fig. 48 • Disconnect all the tubes attached to it. • Disassemble the milk foamer and wash it care- fully. Fig. 45 9.10 CLEANING THE MILK FOAMER NOTA: Follow the instructions applied on the label on Fig.
-
Page 70: Standard Setting Table
STANDARD SETTING TABLE BEVERAGE WATER GRINDING MILK PREBREWING TAMPING NUMBER TIME TIME (cc) (sec) (sec) Ristretto 2 Ristretto Espresso 2 Espresso Caffè 2 Caffè Caffe Creme 2 Caffe Creme Cappuccino Big Cappuccino Macchiato Caffellatte Milk Hot Water Steam Grounds number Milk cleaning warning Clean warning Group 1 adjustment... - Page 71 MACHINE FUNCTIONS MESSAGES DISPLAY CAUSA EFFECT SOLUTION NOTE Pull out the grounds Keys delivering Grounds drawer GROUNDS DRAWER FULL drawer and empty it coffee based full. The number into a garbage bag. drinks of coffee grounds Put the drawer back blocked.
- Page 72 DISPLAY CAUSA EFFECT SOLUTION NOTE The set number The message will washing WASHING CYCLE of cycles pro- appear on the cycle (see para- IS NEEDEDGIO grammed before display but the graph WASHING washing, machine will con- DELIVERY been exceeded. tinue to deliver UNIT AND MILK drinks.
- Page 73 MACHINE BLOCK ALARM MESSAGES DISPLAY CAUSA EFFECT SOLUTION NOTE During the group The control unit Open and close UPPER PISTON MOTOR If the alarm will halt whatever handling phase, the machine door. GROUP ALARMORE r e a p p e a r s cycle is on by the upper piston after the sec-...
- Page 74 DISPLAY CAUSA EFFECT SOLUTION NOTE Use the Hot The water tank The coffee will Fill the water tank. WATER TANK EMPTY ALARM Water key to is empty. not be deliv- eliminate any ered and the air bubbles. dosing will be halted while in progress.
- Page 80 LLC 6940Salashan PKWY BLDG A 98248 Ferdale, WA Tel. +1.360.3662226 Macerata Italy Fax +1.3603664015 Tel. +39.0733.9501 videoconf.+1.360.3188595 Fax +39.0733-950242 www.nuovasimonelli.it www.nuovasimonelli.it info@nuovasimonelli.com E-mail: n.simonelli@nuovasimonelli.it La Nuova Simonelli si riserva di apportare tutte le modifiche ritenute necessarie. Graphics and printing by: X TYPE ENGINEERING S.r.l...
Need help?
Do you have a question about the MicoBar and is the answer not in the manual?
Questions and answers