Table of Contents
Advertisement
Advertisement
Table of Contents

Related Manuals for La Crosse Technology WT-5120 433


Summary of Contents for La Crosse Technology WT-5120 433
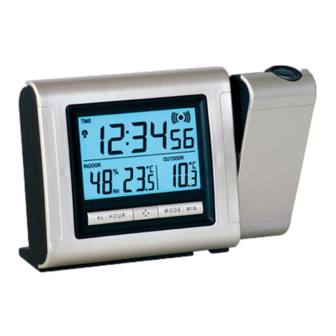
- Page 1 WT-5120 433 MHz Radio Controlled Projection Alarm Instruction Manual...
-
Page 2: Table Of Contents
TABLE OF CONTENTS Topic Inventory of Contents/ Additional Equipment About WWVB Quick Set-Up Guide Detailed Set-Up Guide Battery Installation Program Mode Programming Sequence Function Buttons Manual Time Setting Time Zone Setting Daylight Saving Time (DST) Setting Features & Operations Features Radio-Controlled Time Projection EL Backlight... -
Page 3: Inventory Of Contents/ Additional Equipment
INVENTORY OF CONTENTS WT-5120 Alarm Clock TX6U Remote temperature sensor AC adapter/transformer Instruction manual and warranty card. ADDITIONAL EQUIPMENT (not included) Two fresh 1.5V AA batteries (optional for projection alarm clock) Two fresh 1.5V AA batteries (for remote temperature sensor) FEATURES OF PROJECTION ALARM Operation of these features is in section III Radio-controlled time... -
Page 4: Quick Set-Up Guide
QUICK SET-UP GUIDE Hint: Use good quality Alkaline Batteries and avoid rechargeable batteries. 1. Have the projection alarm and remote temperature sensor 3 to 5 apart. 2. Batteries should be out of both units for 10 minutes. 3. Place the batteries into the remote temperature sensor first then into the projection alarm. -
Page 5: Detailed Set-Up Guide
DETAILED SET-UP GUIDE BATTERY INSTALLATION REMOTE TEMPERATURE SENSOR Remove the battery cover. Observing the correct polarity, install 2 AA batteries. The batteries will fit tightly (to avoid start-up problems make sure that they do not spring free during installation). Replace the battery cover. PROJECTION ALARM Remove the battery cover. -
Page 6: Program Mode
III. PROGRAM MODE To enter the Program Mode hold down the “MODE/MIN” button for 3 seconds, until the time flashes in the top of the display. The Program Mode Guide is laid out in a manner that allows you to program each function separately, or you can follow the instructions entirely to program the projection alarm. -
Page 7: Dst (Daylight Saving Time) Setting
Press and release the “MODE/MIN” button to select the appropriate time zone. There are 24 time zones to choose from (based relative to the international time standard of GMT (“Greenwich Mean Time). NOTE: The U.S. time zones will show abbreviations as opposed to the numerical time zone indicator. -
Page 8: Features & Operations Features
FEATURES & OPERATIONS FEATURES Radio-controlled time Projection of time and/or remote temperature LED backlight Display of indoor temperature/humidity or alarm time Indoor temperature and humidity Remote outdoor temperature Time alarm RADIO-CONTROLLED TIME The projection alarm will automatically search for the time signal upon initial set-up and every night. -
Page 9: El Backlight
EL BACKLIGHT The projection alarm has an EL backlight designed for night-viewing. This will light up for 4 seconds whenever the snooze button is pressed. The EL backlight cannot be turned on constantly; this would drain the batteries. INDOOR TEMPERATURE The projection alarm measures indoor temperature with an internal sensor. -
Page 10: Time Alarm
TIME ALARM SETTING THE ALARM Press and hold “AL/HOUR” button for three seconds until the alarm time is flashing. Press and release “AL/HOUR” to advance the hour, and “MODE/MIN” to advance the minute. The time will display “PM” if set to PM, and nothing if set to The projection alarm will revert to normal operation when no buttons are pressed for 15 seconds. -
Page 11: Mounting With Screws
Do not submerge in water. Immediately remove all low powered batteries to avoid leakage and damage. Replace with new batteries only, and of recommended size. Opening the casings invalidates the warranty. Do not try to repair the units. Contact La Crosse Technology for Repairs. -
Page 12: Troubleshooting
3) Interference from an outside source (cordless telephone, etc.) 4) Contact La Crosse Technology. Note: For any questions not answered, contact La Crosse Technology with the contact information found at the end of this instructional manual. general direction of Ft. Collins, Colorado. -
Page 13: Specifications
SPECIFICATIONS FOR WT-5120 Temperature: Measuring range: Checking intervals: Humidity: Measuring range: Checking intervals: Power source: AC Adapter (included) Battery type: Battery life: Dimensions (H x W x D): Projection Alarm Clock Remote Temperature Sensor 14°F to 99°F with 0.2°F resolution (indoor) -21.8°F to 156.2°F with 0.2°F resolution (outdoor) Every 10 seconds indoor, 2 times in 10 minutes for remote temperature. -
Page 14: Warranty And Contact Information
La Crosse Technology, Ltd or La Crosse Technology, Ltd’s authorized service center. La Crosse Technology, Ltd will repair or replace this product, at our option and at no charge as stipulated herein, with new or reconditioned parts or products if found to be defective during the limited warranty period specified above. -
Page 15: Fcc Disclaimer
THE FOLLOWING TWO CONDITIONS: 1. THIS DEVICE MAY NOT CAUSE HARMFUL INTERFERENCE, AND 2. THIS DEVICE MUST ACCEPT INTERFERENCE RECEIVED, INCLUDING INTERFERENCE THAT MAY CAUSE UNDESIRED OPERATION. La Crosse Technology, Ltd 2809 Losey Blvd S. La Crosse, WI 54601 Phone: 608.782.1610 Fax: 608.796.1020...
Need help?
Do you have a question about the WT-5120 433 and is the answer not in the manual?
Questions and answers