Table of Contents
Advertisement
Advertisement
Table of Contents

Related Manuals for Kodak 8800


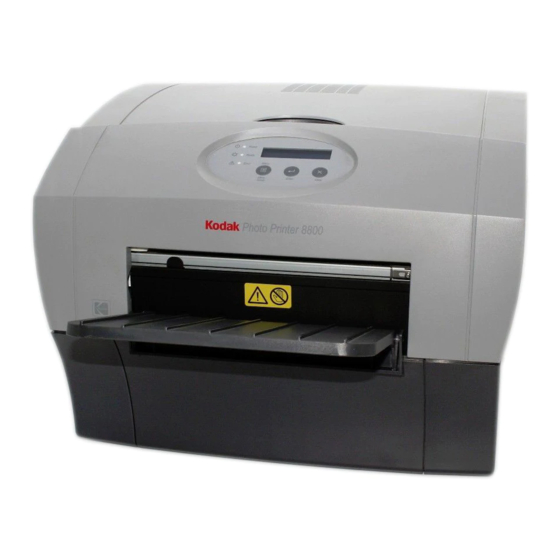
Summary of Contents for Kodak 8800
- Page 1 KODAK Photo Printer 8800 User Guide...
- Page 2 Eastman Kodak Company 343 State Street Rochester, New York 14650 © Eastman Kodak Company, 2006 Kodak is a trademark of Eastman Kodak Company. P/N 4J2007 Rev B December 12, 2006...
-
Page 3: Table Of Contents
Table of Contents 1 Setting Up the Printer Before You Begin .............................1-1 Recommended Air Flow Clearances ......................1-1 Loading the Paper ............................1-2 Loading the Ribbon............................1-6 Installing the Print Catcher..........................1-7 Connecting the Cables ............................1-8 Connecting the power cable ........................1-8 Connecting the USB cable...........................1-8 Turning On the Printer.............................1-8 2 Operating the Printer Understanding the Operator Panel Lights ......................2-1... -
Page 5: Setting Up The Printer
Setting Up the Printer Before You Begin Have the following items available before you begin your printer setup: • A KODAK Photo Print Kit that contains the correct size paper and ribbon for your printer. • USB cable (included). The printer weighs 18 kg (40 lbs). Use caution when lifting IMPORTANT: or moving the printer. -
Page 6: Loading The Paper
Setting Up the Printer Loading the Paper To load the paper into the printer: Open the printer cover. If necessary, remove the ribbon from the printer. Move the lever to the unlocked position. Lever Remove the trim tray. To keep your prints dust-free and to prevent paper jams, IMPORTANT: empty the trim tray each time you change the paper. - Page 7 Setting Up the Printer Attach the paper flanges provided with the printer to each end of the Blue paper flange paper roll. Notches Line up the lugs on the blue paper flange with the notches on the left side of the paper roll. Place the blue paper flange on the left side of the paper roll.
- Page 8 Setting Up the Printer Red lines White arrows Feed the paper in the direction of the white arrows until the paper wraps around the back of the printer and touches the red lines. SIDE VIEW Hold the paper in place between the red lines with your hand. Make sure the paper edges do not extend over the red lines.
- Page 9 Setting Up the Printer Install the trim tray. Trim tray July 2006 4J2007...
-
Page 10: Loading The Ribbon
Setting Up the Printer Loading the Ribbon To load the ribbon into the printer: If you are replacing a ribbon, remove the used ribbon from the printer. NOTE: Images remain on the ribbon after printing. If you need to maintain confidentiality, dispose of the used ribbon appropriately. -
Page 11: Installing The Print Catcher
Setting Up the Printer Label/wrapper Remove the label/wrapper from the ribbon. Take-up spool Push the right side of the take-up spool into the rear spool holder on the right. Place the left side of the take-up spool into the rear spool holder on the left. -
Page 12: Connecting The Cables
Setting Up the Printer Connecting the Cables Connecting the power You may have received more than one power cable with your printer. Be sure cable to use the correct power cable required for your country. Check that the power switch is turned off ( ). CAUTION The power outlet must be grounded. -
Page 13: Operating The Printer
Operating the Printer Understanding the Operator Panel Lights Light Color Printer Status Power Orange The printer power is on. Ready Green The printer is ready to make prints. Error An error has occurred. Using Setup Mode to Review Printer Settings Use the operator panel to review printer settings in Setup mode. -
Page 14: Accessing The Printer Settings
Operating the Printer Accessing the Printer Press Menu Scroll repeatedly to scroll through the printer settings in the Settings following order. Printer Setting Operator Panel Display Action Required Printer ready Ready None. The printer is on and ready to make prints. Making a test print Test Print Mode Press Enter to enter test print mode. -
Page 15: Changing The Quantity Of Test Prints
Operating the Printer Changing the quantity Press Menu once until Test Print Mode appears. of test prints Press Enter once until Pattern appears. Press Menu once until Count appears. Press Enter once to select the test print count. Press Menu to cycle through the number of test print copies you want. Press Clear to accept the value you just selected. -
Page 17: Appendix A: Important Printer Information
Appendix A: Important Printer Information Printer Specifications Dimensions Width 17 in. (432 mm) Depth 19 in. (483 mm) - without Print Catcher 25 in. (635 mm) - with Print Catcher Height 13 in. (330 mm) Weight 18 kg (40 lbs) (without ribbon and paper) Ambient Operating Temperature 15 - 35°C (59 - 95°F) -
Page 19: Appendix B: Safety And Regulatory Information
Appendix B: Safety and Regulatory Information Important Safety Information CAUTION Use of controls or adjustments, or performance of procedures other than those specified in this manual may result in injury and/or damage to the printer. • The power outlet should be easily accessible and installed near the printer. -
Page 20: Safety Labels
Safety and Regulatory Information Safety Labels Please observe the important safety warnings that are posted on the printer. WARNING SHARP EDGES Keep hands and fingers away. Regulatory and Safety Compliance Safety Complies with UL 60950-1 First Edition—CAN/CSA C22.2 No. 60950-1-3 First Edition EN 60950-1 IEC 60950-1... -
Page 21: Noise Emission
In the European Union, this symbol indicates that when the last user wishes to discard this product, it must be sent to appropriate facilities for recovery and recycling. Contact your local Kodak representative or refer to www.kodak.com/go/recycle for additional information on the collection and recovery programs available for this product. - Page 23 Index ready/green light, 2-1 setup mode, 2-2 air flow clearances, 1-1 standby timeout, 2-2 cables paper connecting, 1-8 loading, 1-2 power, 1-8 power USB, 1-8 cable, 1-8 connecting cables, 1-8 requirements, A-1 turning on, 1-8 printer disposal, B-3 operating, 2-1 setting up, 1-1 settings, 2-1 humidity...
- Page 24 Index printer specifications, A-1 test print, making, 2-2 USB cable, connecting, 1-8 4J2007 July 2006...
- Page 26 Eastman Kodak Company Rochester, NY 14650 Kodak is a trademark of Eastman Kodak Company. © Eastman Kodak Company, 2006 Rev B December 12, 2006...
Need help?
Do you have a question about the 8800 and is the answer not in the manual?
Questions and answers