Table of Contents
Advertisement
Quick Links
Advertisement
Table of Contents

Related Manuals for Swann SW248-LM8


Summary of Contents for Swann SW248-LM8
-
Page 1: Instruction Manual
8” LCD Monitor Instruction Manual SW248-LM8 MLM8050510E... - Page 2 Ensure the vents on the sides and back of the unit are not covered Do not use near heat sources such as heaters, stoves, fireplaces If the product has been damaged do not attempt to repair it yourself - contact Swann Technical Support for assistance...
-
Page 3: Table Of Contents
5. Remote Control Layout 6. Monitor Connections 6.1 Connecting the Power Adapter 6.2 Connecting the AV Cable 7. Menu Operations 7.1 Picture Menu 7.2 Option Menu 7.3 Clock Menu 7.4 System Menu 8. Troubleshooting Guide 9. Technical Specifications Warranty Swann Technical Support -ii-... -
Page 4: Before You Begin
2. Do not submerge this product in liquids or expose to rain Special Notice Do not attempt to repair or disassemble, there are no user serviceable parts inside this device. Contact Swann Technical support if this monitor malfunctions or fails to operate correctly... -
Page 5: Package Contents
Car Power Adapter Power Adapter Remote Control AAA Batteries for Remote Control A / V Cable Monitor Stand Instruction Manual If any of the above accessories are damaged or missing, contact Swann Communications for assistance. -
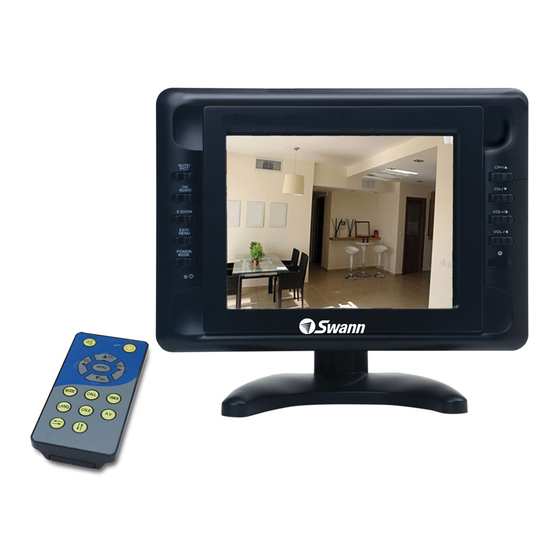
Page 6: Monitor Layout
3. Monitor Layout 1. LCD Screen 2. AV1/AV2 Button 3. AUTO Button 4. PICT Button 5. MENU Button POWER Button UP Button DOWN Button VOL+ / Right Button 10. VOL- / Left Button IR Remote Sensor Monitor Stand Bracket 14. AV2 in jack 15. -
Page 7: Monitor Controls
4. Monitor Controls AV1/AV2: Switches input from AV1 to AV2 AUTO: Press to cycle between AV1 and AV2 inputs at 4, 6 or 8 seconds – push again to turn PICT: Choose from 5 image settings: Standard, Soft, Vivid, Light and Personal ... -
Page 8: Remote Control Layout
Remote Control Layout POWER: Turn the monitor on/off MUTE: Press to disable sound, press MUTE again or press VOL to enable sound ▲: Move selection up ▼: Move selection down ◄/VOL-: Decrease volume / move left ►/VOL+: Increase volume / move right MENU: Press to enter / exit the Menu MODE: Change image settings from Standard, Soft, Vivid, Light and Personal... -
Page 9: Monitor Connections
6. Monitor Connections 6.1 Connecting the Power Adapter: Connect the Power Adapter plug to the input on the side of the monitor marked DC 12V. Plug the other end of the adapter to a power point or cigarette lighter if applicable 6.2 Connecting the AV Cable: AV conversion cable Insert the mini-jack end of the AV... -
Page 10: Menu Operation
7. Menu Operation Press MENU to display following options: PICTURE OPTION CLOCK SYSTEM PRESET 7.1 PICTURE – CONTRAST, BRIGHT, COLOR, SHARP, TINT to select the item and press ◄ or ► to adjust the value Press Notice The TINT option will appear on NTSC Monitors only 7.2 OPTION –... - Page 11 7.3 CLOCK TIME – Set the current time ON-TIME – Set time to turn monitor on OFF-TIME – Set time to turn monitor off ATTENTION – Set an alarm time / reminder to appear at a specified time Notice If you wish to use the Timer features TIME must be set first. Times appear in 24 hour clock format.
-
Page 12: Picture Menu
8. Troubleshooting Guide If your monitor appears to be malfunctioning or is not responding correctly, consult the Troubleshooting Guide below for possible solutions before contacting Technical Support for repair. Problem Possible Causes Check power connection from power No picture, no sound adapter or car adapter. -
Page 13: Technical Specifications
9. Technical Specifications Product Code: SW248-LM8 Display Type: Color TFT-LCD Video Format: NTSC, PAL, SECAM Video Inputs: AV inputs x 2 Display Resolution: 800 x 600 8” Diagonal Display Size: Aspect Ratio: Audio Inputs: L/R AV inputs x 2 Speakers:... -
Page 14: Warranty
Swann. The end user is responsible for all freight charges incurred to send the product to Swann’s repair centers. The end user is responsible for all shipping costs incurred when shipping from and to any country other than the country of origin. -
Page 15: Swann Technical Support
Swann Technical Support Worldwide email support tech@swannsecurity.com UNITED STATES toll free AUSTRALIA toll free 1-800-627-2799 1300 138 324 (Su, 2pm-10pm US PT) (M 9am-5pm AUS ET) (M-Th, 6am-10pm US PT) (Tu-F 1am-5pm AUS ET) (F 6am-2pm US PT) (Sa 1am-9am AUS ET) USA Exchange &... - Page 16 © Swann Communications 2010 SR247-LM8-10006-170309...
Need help?
Do you have a question about the SW248-LM8 and is the answer not in the manual?
Questions and answers