
Subscribe to Our Youtube Channel
Related Manuals for Sony HT-DDW3000


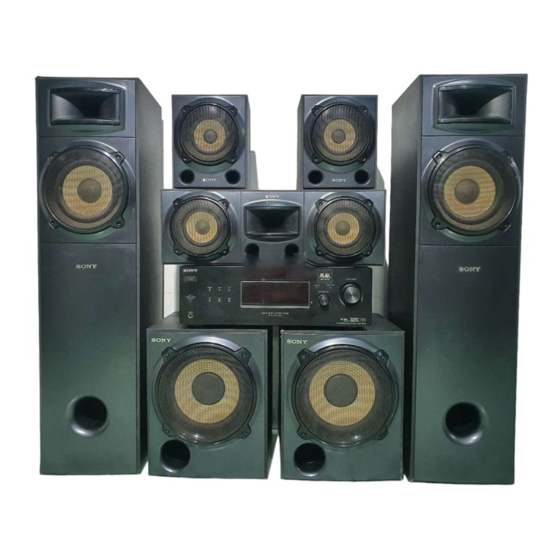
Summary of Contents for Sony HT-DDW3000
- Page 1 3-292-325-11(1) Home Theatre System Operating Instructions HT-DDW3000 ©2008 Sony Corporation...
- Page 2 WARNING To reduce the risk of fire or electric shock, do not expose this apparatus to rain or moisture. To reduce the risk of fire, do not cover the ventilation opening of the apparatus with newspapers, tablecloths, curtains, etc. Do not place the naked flame sources such as lighted candles on the apparatus.
-
Page 3: About This Manual
About This Manual • The instructions in this manual are for model HT-DDW3000. In this manual, models of area code SP is used for illustration purposes unless stated otherwise. Any difference in operation is clearly indicated in the text, for example, “Models of area code SP only”. -
Page 4: Table Of Contents
Table of Contents Getting Started Enjoying Surround Sound Description and location of parts....5 Enjoying Dolby Digital and DTS surround sound (AUTO FORMAT DIRECT)..39 1: Installing the speakers ......12 Selecting a pre-programmed sound field ..40 2: Connecting the speakers ......14 Using only the front speakers and subwoofers 3: Connecting the audio/video (2CH STEREO) ........ -
Page 5: Getting Started
Getting Started Description and location of parts Receiver Front panel MASTER VOLUME DISPLAY INPUT MODE DIMMER SLEEP INPUT SELECTOR VIDEO IN/ PORTABLE AUDIO IN/ AUTO CAL MIC A.F.D. MOVIE MUSIC PHONES qs qa Name Function Name Function A ?/1 H INPUT Press to turn the receiver on or Turn to select the input source (on/standby) - Page 6 About the indicators on the display PLII MEMORY COAX D.RANGE MONO Name Function Name Function A SW F DTS Lights up when the audio signal Lights up when the receiver is is output from the decoding DTS signals. SUBWOOFER jack. Note When playing a DTS format B LFE...
- Page 7 Name Function L Playback The letters (L, C, R, etc.) channel indicate the channels being indicators played back. The boxes around the letters vary to show how the receiver downmixes the source sound. Front Left Front Right Center (monaural) Surround Left Surround Right Surround (monaural or the surround components obtained...
-
Page 8: Rear Panel
Rear panel DIGITAL ANTENNA OPTICAL COAXIAL DVD/BD SPEAKERS SUBWOOFER SURROUND CENTER FRONT SA-CD/CD A DIGITAL INPUT section D AUDIO INPUT section OPTICAL IN Connects to a DVD AUDIO IN Connects to a CD jack player, etc. The White (L) jacks player, etc. -
Page 9: Auto Cal
TV (on/standby) Remote Commander to operate the receiver on or off. and to control the Sony audio/video AV ?/1 Press to turn on or off the components that the remote is assigned to Sony audio/video components... - Page 10 Name Function Name Function H AMP MENU Press to display the menu of Press to pause playback or the receiver. Then, use V, v, recording of the VCR, CD B, b and (P) to perform player, DVD player or Blu-ray menu operations.
- Page 11 DVD player or Blu-ray disc player. Press TOOLS/OPTIONS and TV (N) at the same time to display the options applicable to the Sony TV. S -/-- Press to select the channel entry mode, either one or two digit of the VCR.
-
Page 12: 1: Installing The Speakers
1: Installing the speakers This receiver allows you to use a 5 channel Installing the speakers on a flat speaker with 2 subwoofers system. surface To fully enjoy theater-like multi channel surround sound requires five speakers (two Before you install the center speaker, surround front speakers, a center speaker and two speakers and subwoofers, be sure to attach the surround speakers) and a subwoofer (5.1... - Page 13 Fasten the screws to the wall. material or screws to be used. The screws should protrude 5 • Sony is not responsible for accident or damage to 7 mm. caused by improper installation, insufficient wall strength or improper screw installation, natural calamity, etc.
-
Page 14: 2: Connecting The Speakers
2: Connecting the speakers Before connecting the cords, be sure to disconnect the AC power cord. SPEAKERS SUBWOOFER SURROUND CENTER FRONT 10 mm A Speaker cord (supplied) AFront speaker (left) * Use the long speaker cords to connect the surround speakers and the short speaker cords to connect the BFront speaker (right) front and center speakers. -
Page 15: 3: Connecting The Audio/Video Components
To connect the speakers 3: Connecting the audio/ correctly Check the speaker type by referring to the video components speaker label* at the rear panel of the speakers. Character on Speaker type speaker label How to hook up your Front left components Front right This section describes how to hook up your... -
Page 16: Connecting Audio Components
Before connecting the cords, be sure to Connecting audio components disconnect the AC power cord. The following illustration shows how to connect audio components such as MP3 player, Super Audio CD player or CD player. Super Audio CD player/CD player DIGITAL ANTENNA OPTICAL... - Page 17 Notes • When listening to a component connected to the VIDEO IN/PORTABLE AUDIO IN/AUTO CAL MIC jack, sound may be distorted or interrupted. This is not a malfunction and will depend on the connected component. • If the sound from the component connected to the VIDEO IN/PORTABLE AUDIO IN/AUTO CAL MIC jack is very soft, you may increase the volume level.
-
Page 18: Connecting Video Components
Before connecting the cords, be sure to Connecting video components disconnect the AC power cord. The following illustration shows how to connect video components such as DVD player, Blu-ray disc player, satellite tuner, etc. It is not necessary to connect all the cords. Connect audio and video cords according to the jacks of your components. - Page 19 If you connect a Blu-ray disc player • Be sure to change the factory setting of the DVD/BD input button on the remote so that you can use the button to control your Blu- ray disc player. For details, see “Changing button assignments”...
-
Page 20: 4: Connecting The Antennas
4: Connecting the antennas Connect the supplied AM loop antenna and FM wire antenna. Before connecting the antennas, be sure to disconnect the AC power cord. FM wire antenna (supplied) AM loop antenna (supplied) DIGITAL ANTENNA OPTICAL COAXIAL DVD/BD SPEAKERS SUBWOOFER SURROUND CENTER... -
Page 21: 5: Preparing The Receiver And The Remote
Performing initial setup 5: Preparing the receiver operations and the remote Before using the receiver for the first time, initialize the receiver by performing the following procedure. This procedure can also Connecting the AC power cord be used to return settings you have made to their factory defaults. -
Page 22: 6: Calibrating The Appropriate Settings Automatically (Auto Calibration)
Inserting batteries into the 6: Calibrating the remote appropriate settings Insert two R6 (size-AA) batteries in the automatically RM-AAU026 Remote Commander. Observe the correct polarity when installing (AUTO CALIBRATION) batteries. The DCAC (Digital Cinema Auto Calibration) function allows you to perform automatic calibration such as: •... - Page 23 Notes Performing Auto Calibration • The Auto Calibration function does not work when headphones are connected. • If the muting function is on when we perform Auto Calibration, the muting function will turn off TV ?/1 SLEEP TV INPUT AV ?/1 automatically.
- Page 24 Measurement starts. Tips • When Auto Calibration starts: The measurement process will take a few – Stand some distance from the speakers and the minutes to complete. listening position to avoid measurement failure. The table below shows the display when This is because test signals are output from the measurement starts.
- Page 25 Error codes and remedies Warning codes and solutions Warning Explanation and solution Error code Cause and remedy code ERROR 10 The environment is too noisy. WARN. 40 The environment is noisy. Make Make sure the environment is quiet sure the environment is quiet during Auto Calibration.
-
Page 26: 7: Adjusting The Speaker Levels And Balance (Test Tone)
Press V/v repeatedly to select 7: Adjusting the speaker “T. TONE Y”. The test tone is output from each speaker levels and balance in sequence as follows: Front left t Center t Front right t (TEST TONE) Surround right t Surround left t Subwoofer You can adjust the speaker levels and balance while listening to the test tone from your... -
Page 27: Playback
Selected input Components that can [Display] be played back Playback VIDEO MP3 player, etc., [VIDEO/ connected to the VIDEO Selecting a component PORTABLE IN/PORTABLE AUDIO AUDIO]* IN/AUTO CAL MIC jack DVD/BD DVD player, etc., TV ?/1 [DVD/BD] connected to the DVD/BD SLEEP TV INPUT AV ?/1 jack... -
Page 28: Listening/Watching A Component
Turn on the Super Audio CD player or CD • The operation is described for a player, then place the disc on the tray. Sony Super Audio CD player. • Refer to the operating Turn on the receiver. instructions supplied with the Super Audio CD player or CD Press SA-CD/CD. - Page 29 Watching a DVD/Blu-ray disc TV ?/1 SLEEP TV INPUT AV ?/1 SYSTEM STANDBY VIDEO DVD/BD SA-CD/CD TUNER A.F.D. MOVIE MUSIC MASTER VOLUME DVD/BD MENU DISPLAY INPUT MODE AUTO CAL DIMMER SLEEP INPUT SELECTOR D.TUNING VIDEO IN/ D.SKIP PORTABLE AUDIO IN/ >10/ MEMORY AMP MENU...
-
Page 30: Amplifier Operations
To return to the previous display Amplifier Operations Press B. Navigating through To exit the menu menus Press AMP MENU. Note By using the amplifier menus, you can make Some parameters and settings may appear dimmed various adjustments to customize the receiver. on the display. -
Page 31: Overview Of The Menus
Overview of the menus The following options are available in each menu. For details on navigating through menus, see page 30. Menu Parameters Settings Initial [Display] [Display] setting LEVEL Test tone* [T. TONE] T. TONE N, T. TONE Y T. TONE N [1-LEVEL] Front speaker balance* BAL. - Page 32 Menu Parameters Settings Initial [Display] [Display] setting AUDIO Digital audio input decoding DEC. PCM, DEC. AUTO DEC. AUTO [5-AUDIO] priority* [DEC. PRI.] (page 35) Digital broadcast language DUAL M/S, DUAL M, DUAL S, DUAL M selection* [DUAL] DUAL M+S Synchronizes audio with video A.V.SYNC.
-
Page 33: Adjusting The Level (Level Menu)
x D. RANGE (Dynamic range compressor) Adjusting the level Lets you compress the dynamic range of the (LEVEL menu) sound track. This may be useful when you want to watch movies at low volumes late at night. Dynamic range compression is possible You can use the LEVEL menu to adjust the with Dolby Digital sources only. -
Page 34: Adjusting The Tone (Tone Menu)
Adjusting the tone Settings for the surround sound (TONE menu) (SUR menu) You can use the TONE menu to adjust the tonal quality (bass/treble level) of the front You can use the SUR menu to select the sound speakers. field you want for your listening pleasure. Select “2-TONE”... -
Page 35: Settings For The Tuner (Tuner Menu)
Settings for the tuner Settings for the audio (TUNER menu) (AUDIO menu) You can use the TUNER menu to set the FM You can use the AUDIO menu to make station receiving mode and to name preset settings for the audio to suit your preference. stations. -
Page 36: Settings For The System (System Menu)
x DUAL (Digital broadcast language selection) Settings for the system Lets you select the language you want to listen (SYSTEM menu) to during digital broadcast. This feature only functions for Dolby Digital sources. • DUAL M/S (Main/Sub) You can use the SYSTEM menu to set the Sound of the main language will be output distance of the speakers connected to this through the front left speaker and sound of... - Page 37 x SUR POS. (Surround speaker position) The distance between the center speaker and the listening position B cannot be more than 1.5 meters Lets you specify the location of your surround closer than the one between the listening position speakers for proper implementation of the and the front speaker A.
-
Page 38: Calibrating The Appropriate Settings Automatically (A. Cal Menu)
Calibrating the Surround speaker position is designed specifically for implementation of the CINEMA STUDIO EX appropriate settings modes. For other sound fields, speaker position is not so critical. automatically Those sound fields were designed under the premise that the surround speakers would be located behind (A. -
Page 39: Enjoying Surround Sound
Enjoying Surround Sound Enjoying Dolby Digital and DTS surround sound (AUTO FORMAT DIRECT) The Auto Format Direct (A.F.D.) mode allows you to listen to higher fidelity sound and select the decoding mode for listening to a 2 channel stereo sound as multi channel sound. VIDEO DVD/BD SA-CD/CD TUNER... -
Page 40: Selecting A Pre-Programmed Sound Field
Selecting a pre- programmed sound field You can take advantage of surround sound simply by selecting one of the receiver’s pre- programmed sound fields. They bring the exciting and powerful sound of movie theaters and concert halls into your home. VIDEO DVD/BD SA-CD/CD TUNER... - Page 41 Sound field Effect [Display] Movie CINEMA STUDIO EX A Reproduces the sound characteristics of the Sony Pictures DCS [C.ST.EX A] Entertainment “Cary Grant Theater” cinema production studio. This is a standard mode, great for watching almost any type of movie.
-
Page 42: Using Only The Front Speakers And Subwoofers (2Ch Stereo)
Using only the front Resetting sound fields to speakers and subwoofers the initial settings (2CH STEREO) Be sure to use the buttons on the receiver for this operation. In this mode, the receiver outputs the sound from the front left/right speakers and the subwoofers. -
Page 43: Tuner Operations
Press TUNER repeatedly to Tuner Operations select the FM or AM band. You can also use INPUT SELECTOR on Listening to FM/AM radio the receiver. Press TUNING + or TUNING –. You can listen to FM and AM broadcasts Press TUNING + to scan from low to through the built-in tuner. -
Page 44: Direct Tuning
Direct tuning Presetting radio stations You can enter the frequency of a station directly by using the numeric buttons. You can preset up to 30 FM stations and 30 AM stations. Then you can easily tune in the VIDEO DVD/BD stations you often listen to. -
Page 45: Tuning To Preset Stations
Press the numeric buttons to Tuning to preset stations select a preset number. You can also press PRESET + or PRESET – repeatedly to select a preset VIDEO DVD/BD number. SA-CD/CD TUNER If “MEMORY” goes out before you select the preset number, start again from A.F.D. -
Page 46: Naming Preset Stations
To create an index name Naming preset stations Use V/v/B/b to create an index name. Press V/v to select a character, then press B/b to move the cursor to the next position. VIDEO DVD/BD SA-CD/CD TUNER If you made a mistake Press B/b until the character you want to A.F.D. -
Page 47: Other Operations
Naming inputs Other Operations You can enter a name of up to 8 characters for Switching between inputs and display it on the receiver’s display. digital and analog audio This is convenient for labeling the jacks with the names of the connected components. (INPUT MODE) Press the input button to select the input you want to create an... -
Page 48: Changing The Display
Changing the display Using the Sleep Timer You can check the sound field, etc., by You can set the receiver to turn off changing the information on the display. automatically at a specified time. Be sure to use the buttons on the receiver for Press SLEEP repeatedly while the this operation. -
Page 49: Using The Remote
ENTER/ Example: Press 3. MEMORY Now you can use the SAT button to Sony VCRs are operated with a VTR 2 or VTR 3 control the DVD player. setting which corresponds to 8 mm and VHS respectively. Sony DVD recorders are operated with a DVD1 or DVD3 setting. -
Page 50: Dolby Digital
Digital Cinema Sound (DCS) for theaters developed by DTS, Inc. It A unique sound reproduction technology for compresses audio less than Dolby Digital, home theater developed by Sony, in delivering a higher quality sound cooperation with Sony Pictures Entertainment, reproduction. -
Page 51: Precautions
x Sampling frequency Precautions To convert analog audio to digital, analog data should be quantified. This process is called sampling, and the number of times per second On safety the analog data is quantified is called the sampling frequency. A standard music CD Should any solid object or liquid fall into the stores data quantified at 44,100 times per cabinet, unplug the receiver and have it... - Page 52 If you have any questions or problems antenna. Therefore, we recommend using an concerning your receiver, please consult your outdoor antenna.) nearest Sony dealer. • Use caution when placing the receiver or speakers on surfaces that have been specially treated (with wax, oil, polish, etc.) as staining or discoloration of the surface may result.
-
Page 53: Troubleshooting
There is no sound from one of the front Troubleshooting speakers. • Connect a pair of headphones to the PHONES jack to verify that sound is If you experience any of the following output from the headphones. If only one difficulties while using the receiver, use this channel is output from the headphones, the troubleshooting guide to help you remedy the... - Page 54 Video There is severe hum, interrupted noise or distortion from the component There is no picture or an unclear connected to the VIDEO IN/PORTABLE picture appears on the TV screen. AUDIO IN/AUTO CAL MIC jack. • Make sure you have connected the video •...
-
Page 55: Error Messages
• Replace all the batteries in the remote with If the problem persist new ones, if they are weak. Consult your nearest Sony dealer. Note that if • Make sure you select the correct input on service personnel changes some parts during the remote. -
Page 56: Specifications
Inputs Specifications Analog Sensitivity: 800 mV/ 50 kohms Digital (Coaxial) Impedance: 75 ohms Amplifier section Tone Models of area code SP, TH1 Gain levels ±6 dB, 1 dB step Power Output Reproduction frequency range: Stereo mode (rated) (6 ohms, 1 kHz, THD 1%) 28 –... - Page 57 Speaker section Supplied speakers • Front speaker (2) • Front speaker (SS-MSP3000) • Center speaker (1) Speaker system 2-way, Bass reflex, • Surround speaker (2) Magnetically shielded • Subwoofer (2) Speaker unit Woofer: 160 mm, cone type Supplied accessories Tweeter: 25 mm, horn type Operating instructions (this manual) Rated Impedance...
-
Page 58: Index
Index Numerics 2CH STEREO 42 Menu TEST TONE 26 5.1 channel 12 A. CAL 38 Tuner AUDIO 35 connecting 20 LEVEL 33 Tuning SUR 34 automatically 43 AUTO CALIBRATION 22 SYSTEM 36 directly 44 AUTO FORMAT DIRECT TONE 34 to preset stations 45 (A.F.D.) 39 TUNER 35 Muting 27... - Page 60 Sony Corporation Printed in Malaysia...
Need help?
Do you have a question about the HT-DDW3000 and is the answer not in the manual?
Questions and answers