Table of Contents
Advertisement
Advertisement
Table of Contents

Related Manuals for Seascape 18


Summary of Contents for Seascape 18
- Page 1 Users Manual 16.11.2011...
- Page 3 WARNINGS! Make sure your 1:2 main hallyard is not tangled before hoisting the mainsail. In this case you may experience problems while taking the mainsail down. If the hallyard is wrapped several times you will not be able to release it and recover the mainsail. After use take your rudder blades out of the water and dry them.
- Page 4 1. Introduction Congratulations with your new Seascape 18. We hope you are going to enjoy sailing her as much as we enjoyed in her creation. Although she is very simple in concept, we believe that proces of discovering her potentials will give you plenty of satisfaction and fun for many years.
-
Page 5: General Information
1.2. General information Manufacturer: ISSA d.o.o. Model: Seascape 18 Category C: A boat designed to operate on winds up to force 6 on the Beaufort scale and associated wave heights (significant waves up to 2 metres) Such conditions may be encountered on exposed inland water, in estuaries and in coastal waters in moderate weather conditions. -
Page 6: Recommendations And Information For Proper Operation
1.4. Recommendations and information for proper operation 1.4.1. Danger from overhead power lines and other obstacles When rigging and moving your boat, please look up and inspect the overhead area. Observe the location of overhead power lines and trees. These obstacles can damage your boat are potentially dangerous to yourselves. -
Page 7: Tools Needed
2. Assembly 2.1. Glossary Aft: Back of the boat. Gennaker: Asymetric nylon sail hoisted when sailing downwind. Bow: Front of the boat. Bowsprit: the pole, which extends from the bow to fly the asymetric spinnaker. Bobstay: dyneema rope that prevents bowsprit to bend up when fully extended. Batten: Thin strip which fits into a long narrow pocket in the sail. - Page 8 2.3. Supplied equipement All equipement supplied with your Seascape is Racing grade. Please take time to carefully read this instructions and allow yourself 3-4 hours for first assembly of your boat. All consecutive assemblies are considerably quicker and should after some practice take you 30-60 minutes. Please note that rope colours and diameters and block types can change without notice.
- Page 9 2.3.2. Jib parts: From left to right and top to bottom: Jib furler with 2 shackles, adjustement ladder and spring pin, top jib furler, trapeze block for jib cunningham with 2mm dyneema, jib cunningham line, jib hallyard, jib furling line, two 30mm blocks for jib sheet, composite shackle, jib sheet. 2.3.3.
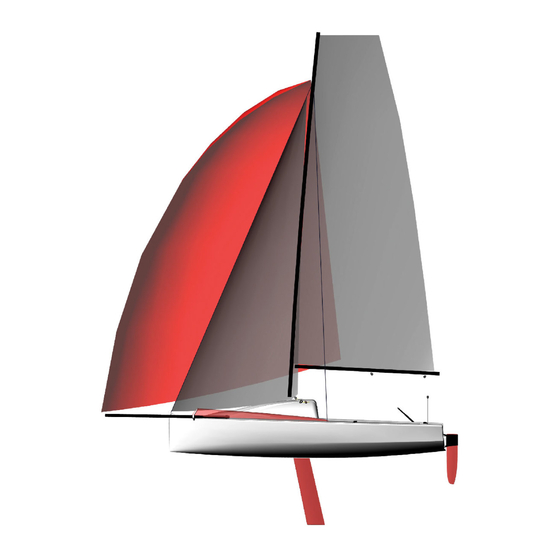
- Page 10 2.3.4. Sails: From left to right: jib (pentex), Gennaker (nylon), main+ battens (pentex). 2.3.5. Standing rigging: Forestay and shrouds with 2 trunbuckles and 4 smart pins. 2.3.6. Footstraps: From left to right: elastic rope, 2 carbon support tubes, 6 dyneema ropes, 2 footstraps.
-
Page 11: Stepping The Mast
2.4. Stepping the mast Attach furler to the bow chainplate and prepare the furling line: Attach trapeze cleat to the furler with dyneema line. Second photo is showing finished assembly. Use electric tape on all sharp points (shackle, spring-pin...) to prevent tear of gennaker while retrieving. - Page 12 Start by assembling the shrouds. Insert the pin and secure it with the safety splice. When you finish protect it with the electric tape. On the bottom part of the shrouds attach turnbuckles to the chainplates as shown on the next photos.
- Page 13 Lead hallyards trough top fittings only. You’ll organize them when the mast is raised. Tie a knot on the bottom to prevent them from falling trough top blocks. You begin with jib halyard: Mainsail hallyard is next. It has 2:1 purchase so later you will need a shackle to attach it to the head of the mainsail: Lead spinnaker hallyard trough the top block end secure the loose ends with a knot.
- Page 14 Before raising make shure all the hallyards and shrouds are set correctly and that they are not tangled or caught under the trailer. Operation can be done by single person if you use support instead of the person standing in the back of the boat. It is much easier to do it by two people. Remove the pin from the mast step and tape the swiveling cleats for hallyards to prevent them catching between the mast and the coachroof when raising the mast: Then you remove the mast from its support and move it towards the back of the boat:...
- Page 15 You raise the mast to its final position. Make sure that the shrouds and hallyards are not caught on the trailer or other gear.
- Page 16 Attach the forestay to the ladder to achieve the desired rake of the mast while one person is supporting the mast. Then tension the shrouds using 6 and 13mm keys and insert smartpins.
- Page 17 2.4. Boom You start with outhaul which you guide trough the boom tube as shown: Attach boom to the goosneck...
- Page 18 Vang (kicker): Attach the double block on the mast foot and lead the composite shackle trough the holes. The system suplied is 1:6 purchase. In stronger wind (20-25+ knots) this system allowes significant force to be put to the boom so be advised that you can damage the boom if you overtension the vang in this conditions.
- Page 19 Attach aft main sheet blocks like shown on the photo: Assemble A-frame for the Main sheet as expalained on photo:...
- Page 20 Run mainsheet trough the blocks (make shure the ratched in the middle of the cockpit is turned corectly).
- Page 21 2.5. Jib You attach two 30mm block to the clew using a composite schakle. On the photo you see one of the possible ways to do so. Then you attach the tack on the forestay ladder using a small shackle. Tie both ends of the hallyard on the head of the jib.
- Page 22 Zip first 15cm of the luff and run the remaining halyard trough the pocket. Pull on the part of the hallyard that hoists the sail and zip the luff as the sail is being hoisted.
- Page 23 Make a half knot on the halyard and use jib cunningham to tension the luff. Put the remaining halyard and the cunningham line in the zip pocket and zip the luff all the way. You run the sheet as it is shown on the photo. the end is tied on the attachment point for 40mm blocks.
- Page 24 2.4. Main Unroll the main on a flat surface you first swept and make sure it doesn’t have sharp objets that could damage the sail. Unpack the battens and place them on the main in the right order. Slide the battens all the way into the pockets and put them under tension. Note that different sails use different systems to tension the battens.
- Page 25 Use the big shackle to attach 1:2 halyard on the head. Make sure that halyard is not wraped or tangled before hoisting. Clew is fixed on the boom with the velcro strap and outhaul is fixed in the way shown on the photo giving 1:2 transmision.
- Page 26 Tack is also fixed to the mast using the velcro strap. 1:6 Cuningham control is used to control the mast bend and main camber. After all 3 points of the main are fixed you can hoist the sail.
- Page 27 2.6. Gennaker Start by running a tail of the Gennaker hallyard trough a 20mm block you fixed on the attachment point aft of the chanplate. Then you run it trough the snuffer bag. It is easier to do so while the bag is not attached.
- Page 28 Attach snuffer bag to the snuffer ring using a 2-3mm dyneema line. Aft part of the snuffer is attached to the same attachemnt point as 20mm block. Put it under medium tension.
- Page 29 Use attachment points on the bag to secure it from sagging if the gennaker gets wet due to the waves or rain. Note that bags have different number of attachment points. Always use all of them. Continue by attaching gennaker blocks and running the sheets trough them. Not that silver ones have ratchet action and have to be turned the right way - so that they hold the sheet in direction towards the gennaker and release it towards the trimmer.
- Page 30 Use composite shackle to secure the tack. Make sure gennaker is oreinted correctly. Salimakers logo and color of the luff (green) helps you identifying that. Attach hallyard to the head using bowline knot. You can find it since luff (green) and leech (red) join in this point.
- Page 31 Run the retriver line (end of the gennaker halyard) from the snuffer trough the bottom patch on the gennaker and fix it to the top one with a knot. Note that patches can be on one or the other side of the gennaker depending on the model. Attach sheets to the clew.
- Page 32 After that slowly snuff the gennaker. Make sure you don’t catch it on the trailer or other sharp edges when you do it on the land. Also note that with a new boat things will go a little bit harder. Applying dry lubricant on the bag and the snuffer ring helps a bit.
- Page 33 2.7 Footstraps Fix the central part of the footstrap with the dyneema line. Note that footstrap is not symetrical - measuring from the middle to the end one part is longer than the other so make sure footstrap is oriented corectly before you fix the center. Use carbon tube to raise the point to allow easier hooking with your feet.
- Page 34 3. Using the Seascape 18 3.1. Protecting the sails On the bow there are several pointy things that can tear gennaker if not properly protected. Use the electrical or self vulcanizing tape to protect all the sharp objects in the way of the gennaker.
- Page 35 After you lowered the keel to working (down) position, apply the safety pin which prevents the keel from folding in case of a capsize. Pin is designed to break in case of grounding but holds the keel in place if the worst happen.
Need help?
Do you have a question about the 18 and is the answer not in the manual?
Questions and answers