Yamaha TSX-130 Owner's Manual
Hide thumbs
Also See for TSX-130:
- Service manual (87 pages) ,
- Owner's manual (68 pages) ,
- Owner's manual (25 pages)
Table of Contents
Advertisement
Quick Links
Advertisement
Table of Contents

Related Manuals for Yamaha TSX-130


Summary of Contents for Yamaha TSX-130
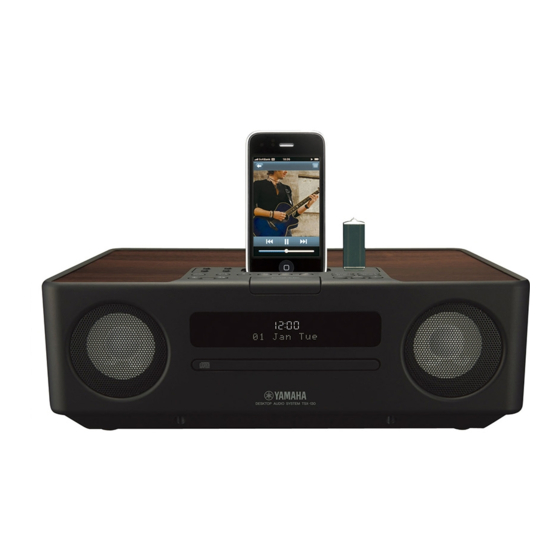
- Page 1 DESKTOP AUDIO SYSTEM TSX-130 OWNER’S MANUAL...
- Page 2 ■ For U.K. customers CAUTION Use of controls or adjustments or performance of procedures If the socket outlets in the home are not suitable for the plug other than those specified herein may result in hazardous supplied with this appliance, it should be cut off and an radiation exposure.
- Page 3 Beam divergence 60 degrees and may cause fire, damage to this unit, and/or personal injury. Yamaha will not be held responsible for any damage resulting from use of this unit with a voltage CAUTION other than specified.
-
Page 4: Table Of Contents
In case of differences between the manual and the product, the product has priority. ■ Supplied accessories This product includes the following accessories. Make sure you have all of the following parts. Remote control Owner’s manual DESKTOP AUDIO SYSTEM TSX-130 OWNER’S MANUAL... -
Page 5: Preparation
PREPARATION PREPARATIONS BEFORE USING THIS UNIT 1 Source buttons: USB, CD, DAB/FM, iPod (☞ P. 9) 2 ON/OFF: System on/off (☞ P. 4) 3 VOLUME: Volume control buttons (☞ P. 9) 4 Audio control buttons (☞ P. 9) 5 iPod dock (☞ P. 10) 6 USB port (☞... -
Page 6: Before Using The Remote Control
PREPARATIONS BEFORE USING THIS UNIT ■ Before using the remote control 1 Remove the battery insulation sheet before using the remote control. 2 Remove the transparent sheet before using the remote control. ■ Using the remote control Use the remote control within 6 m (20’) of this unit and point it toward the remote control sensor. -
Page 7: Turning On/Off The System
PREPARATIONS BEFORE USING THIS UNIT Turning on/off the system Adjusting the clock The clock is not set at the factory. Connect the power cable to the wall outlet. Press ON/OFF to turn on the system. When the system is on: “Hello” appears, then clock and other information are displayed. -
Page 8: Operation
OPERATION USING USEFUL FUNCTIONS Using the alarm functions Set the alarm time. The unit has the dual alarm function. Each alarm time always appears on the right/left sides of the clock on the front panel display. When the alarm is set to on, the alarm indicator and time light up. - Page 9 USING USEFUL FUNCTIONS 2 Select the beep sound. 5 kinds of beep sounds are stored on the unit. Audio CD: Set a track number. The BEEP screen is skipped automatically if you select MUSIC/BEEP+MUSIC in step 1. MP3/WMA CD: Set a folder number. Music starts from the beginning of the selected folder (☞...
-
Page 10: Using The Snooze Function
USING USEFUL FUNCTIONS ■ Using the snooze function ■ Stopping the alarm sound When the beep sound, music, or both are played back, you You can stop the alarm sound in the 3 ways as follows. can set the snooze function. When you stop alarm sound, the system is set to off. -
Page 11: Setting Sleeping Mode
USING USEFUL FUNCTIONS Setting sleeping mode Select the desired dimmer level. You can set the time to turn off the system automatically. Select the sleep time. Press repeatedly. Switching DSP mode When the sleep function is on, the SLEEP indicator lights You can switch the sound mode according to the environment or your preference. -
Page 12: Basic Operation
BASIC OPERATION *1*2 :Press one of the Source buttons to select the desired source. :Press to control the volume. :Press to play/pause.* :Press to stop playback.* : Press to skip backward/forward. :Press to turn off the :Press to choose a sound. -
Page 13: Listening To Music
LISTENING TO MUSIC ■ Selecting music on iPod with the remote Listening to your iPod™ control You can also operate with your iPod only when LIST DISP is set to iPod (☞ P. 11). Notes • The unit is compatible with iPod touch, iPod (Click Wheel including iPod classic), iPod nano, iPod mini, iPhone and iPhone 3G. - Page 14 LISTENING TO MUSIC ■ Switching the playback information ■ Switching the playback list display display LIST DISP allows you to select iPod or the front panel display of the unit to display the list. Example: When LIST DISP is set to F.PANEL If you set LIST DISP to iPod, you can also control playback operations and display the menu list on the iPod.
-
Page 15: Listening To A Cd
LISTENING TO MUSIC Listening to a CD Switch repeat mode. ■ Playing back normally Press repeatedly. Open the disc tray and place your disc. If the selected music source contains folders, you can also select FOLDER. ■ Switching the playback information display Switch the display in CD playback Close the disc tray. -
Page 16: Listening To A Usb Device
(such as USB chargers or USB hubs), PCs, card Album name readers, an external HDD, etc. ↓ • Yamaha will not be held responsible for any damage to or data loss on the USB device occurring while the device is File name connected to this unit. -
Page 17: Listening To Dab Stations
LISTENING TO DAB STATIONS DAB (Digital Audio Broadcasting) uses digital signals for Setting the antenna clearer sound and more stable reception compared to analog signals. DAB is broadcast in blocks of data called ‘ensembles’ Indoor DAB/FM antenna containing up to several radio stations that are simultaneously broadcast. -
Page 18: Preparing For Dab Reception
LISTENING TO DAB STATIONS Preparing for DAB reception Tuning DAB stations Before tuning into DAB stations, an initial scan must be performed. When you select the DAB as the source for the first time, the initial scan is performed automatically. Turn on DAB. -
Page 19: Dab Station Information
LISTENING TO DAB STATIONS ■ Descriptions of information type DAB station information STATION LABEL Displays the name of the current DAB station. ■ Switching the information display of DLS (Dynamic Label Segment) Displays information about the current DAB station, such as the name of the song, artist and speaker, etc. -
Page 20: Presetting Dab Stations
LISTENING TO DAB STATIONS ■ Adjusting the time automatically Presetting DAB stations This function sets the clock automatically based on DAB or RDS (☞ P. 21) information. You can store your favorite DAB stations with the preset U.K. model only function. -
Page 21: Using Dab Function
LISTENING TO DAB STATIONS The following are operation examples. Using DAB FUNCTION ■ Operation example 1 You can set the following functions in DAB FUNCTION PRESET DELETE, STATION ORDER and DRC MODE menu. While receiving DAB, select the function you want to use from the Function Description FUNCTION menu. -
Page 22: Tune Aid
LISTENING TO DAB STATIONS ■ TUNE AID DAB frequency information The following explains the TUNE AID operation. This unit can receive Band III only. While receiving DAB, select TUNE AID from the FUNCTION menu. Frequency Channel label 174.928 MHz 176.640 MHz 178.352 MHz 180.064 MHz 181.936 MHz... -
Page 23: Listening To Fm Radio Stations
LISTENING TO FM RADIO STATIONS Tuning radio stations Presetting radio stations You can store your favorite FM stations with the preset function. Turn on FM. ■ Auto preset Press and hold MEMORY for more Pressing the DAB/FM button switches the FM mode to the than 2 seconds in FM mode. -
Page 24: Selecting Preset Radio Stations (Preset Tuning)
LISTENING TO FM RADIO STATIONS Receiving Radio Data System Select the preset number you want stations (U.K. model only) to store to. ■ Switching the information display of Radio Data System While receiving Radio Data System, switch the information display. Note Press repeatedly. -
Page 25: Additional Information
In case of a problem with the unit, check the following list first. If you cannot solve your problem with the suggested solutions or if your problem is not listed below, turn off and unplug the unit, and consult the nearest authorized Yamaha dealer or service center. -
Page 26: Ipod
TROUBLESHOOTING iPod™ Problem Cause Solution “iPod Connect Error” There is a problem with Turn off the system and reconnect your appears on the front panel communication between the unit and iPod to the unit. display. your iPod. The iPod does not charge The iPod is set in the iPod dock Remove the iPod from the unit, then set improperly. -
Page 27: Usb Playback
TROUBLESHOOTING USB playback Problem Cause Solution MP3/WMA file in the USB The USB device is not recognized. Set the system to off, and turn it on device does not play. again (☞ P. 4). Disconnect the device while the system is off. -
Page 28: Radio Reception
TROUBLESHOOTING Problem Cause Solution The DAB station information The DAB station may be temporarily Contact the DAB broadcaster. does not appear or is out of service, or the DAB station inaccurate. information is not provided by the DAB broadcaster. Radio reception Problem Cause Solution... -
Page 29: Notes On Discs And Usb Devices
NOTES ON DISCS AND USB DEVICES • Do not expose a disc to direct Disc information sunlight, high temperature, Caution high humidity, or a lot of dust. This unit is designed for use with audio CD, CD-R*, and CD-RW*. Also, this unit can play back 8 cm (3 inch) compact discs. -
Page 30: Glossary
GLOSSARY ■ MP3 (MPEG Audio Layer-3) ■ PCM (Pulse Code Modulation) One of the audio compression methods used by MPEG. A signal that is changed to digital format without It employs an irreversible compression method, which compression. A CD is recorded with 16-bit sound at achieves a high compression rate by thinning out the data 44.1 kHz. - Page 31 (http://www.yamaha-hifi.com/ or http://www.yamaha-uk.com/ for U.K. resident). The product is guaranteed to be free from defects in workmanship or materials for a period of two years from the date of the original purchase. Yamaha undertakes, subject to the conditions listed below, to have the faulty product or any part(s) repaired, or replaced at Yamaha’s discretion, without any charge for parts or labour.
- Page 32 Printed in Malaysia WQ45790...
Need help?
Do you have a question about the TSX-130 and is the answer not in the manual?
Questions and answers