Yamaha TSX-112 Owner's Manual
Desktop audio system
Hide thumbs
Also See for TSX-112:
- Owner's manual (164 pages) ,
- Owner's manual (43 pages) ,
- Owner's manual (41 pages)
Table of Contents
Advertisement
Advertisement
Table of Contents

Related Manuals for Yamaha TSX-112


Summary of Contents for Yamaha TSX-112
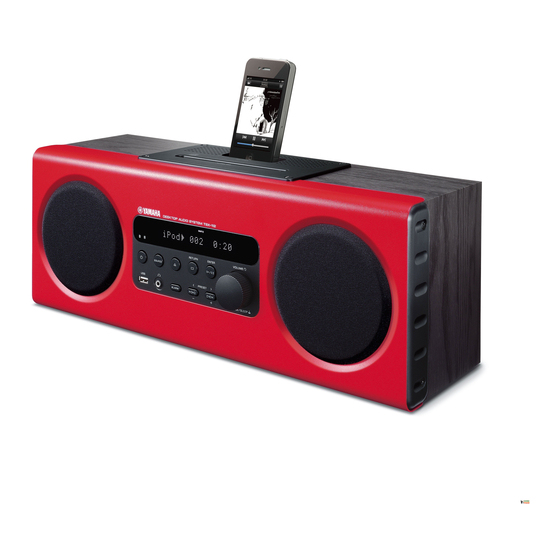
- Page 1 DESKTOP AUDIO SYSTEM TSX-112 OWNER’S MANUAL...
- Page 2 Using this unit with a higher voltage than specified is dangerous and may cause fire, damage to this unit, and/or personal injury. Yamaha will not be held responsible for any damage resulting from use of this unit with a voltage other than specified.
-
Page 3: Table Of Contents
CONTENTS NAMES OF PARTS AND THEIR USING ALARM FUNCTION..... 15 FUNCTIONS..........2 SHUFFLE/REPEAT PLAYBACK ..... 17 CONNECTING AN iPod ......6 LISTENING TO EXTERNAL SOURCE..18 ADJUSTING THE CLOCK......7 USING SLEEP FUNCTION...... 18 LISTENING TO iPod ........7 USING OPTION MENU ......19 LISTENING TO CD AND USB DEVICE ..8 TROUBLESHOOTING ...... -
Page 4: Names Of Parts And Their Functions
PREPARATION NAMES OF PARTS AND THEIR FUNCTIONS Top panel, front panel IPod/iPhone LABEL SIDE IPod/iPhone LABEL SIDE RETURN ENTER VOLUME SOURCE PRESET ALARM SNOOZE SLEEP RETURN ENTER VOLUME SOURCE PRESET ALARM SNOOZE SLEEP 1 iPod dock: Set an iPod. : Ejecting the CD. 2 Disc slot (☞... -
Page 5: Front Panel Display
NAMES OF PARTS AND THEIR FUNCTIONS Front panel display SLEEP PRESET STEREO AUTO SHUFFLE REPEAT MUTE TUNED MEMORY ARTISTS ALBUMS SONGS 1 SLEEP indicator: Lights up when the sleep timer is 8 Multi information display: Shows the various on. (☞ P. 18) information. - Page 6 NAMES OF PARTS AND THEIR FUNCTIONS Rear panel (Connecting antenna) SET ON 1 DAB/FM antenna (supplied) 5 Power cable: Connect to a wall outlet. 2 DAB/FM antenna terminal: Connect the supplied Notes DAB/FM antenna. • The antenna should be stretched out. •...
-
Page 7: Using The Remote Control
NAMES OF PARTS AND THEIR FUNCTIONS Remote control 1 Infrared signal transmitter 2 SNOOZE/SLEEP: Snooze/sleep setting. (☞ P. 16, 18) Press and hold this button, then press Cursor ENTER to set the sleep function. 3 ALARM: Alarm on/off (☞ P. 16) SNOOZE / SLEEP 4 Source buttons: Change sources. -
Page 8: Connecting An Ipod
CONNECTING AN iPod Set your iPod in the iPod dock. An iPod is charged when set in the iPod dock. During power save mode, the iPod is not Dock Adaptor charged. Notes • To secure the connection, attach a compatible Dock Adapter supplied with the iPod or an iPod Universal Dock Adapter (sold separately), and remove the protective case... -
Page 9: Adjusting The Clock
ADJUSTING THE CLOCK Set CLOCK to SET. Set the time. ENTER PRESET – Press to set the hour and then press ENTER. Set the minutes in the same way. Rear panel Front panel • While setting the clock, press RETURN to return to the previous setting. -
Page 10: Listening To Cd And Usb Device
OPERATION LISTENING TO CD AND USB DEVICE Listening to CD Set SOURCE to CD. Insert a CD. Playback starts automatically. Playback operations are available with the remote control and this unit. SOURCE IPod/iPhone Playback for Data Disc starts in alphanumeric order of LABEL SIDE files. -
Page 11: Switching The Display
SWITCHING THE DISPLAY You can switch the playback information shown on the front panel display. Some special characters may not be shown properly. Press DISPLAY repeatedly during playback. Press repeatedly DISPLAY Remote control iPod CD/USB Song number and elapsed time (default setting) Track/file number and elapsed time of the current song (default setting) Song number and remaining time... -
Page 12: Listening To Dab Stations
LISTENING TO DAB STATIONS DAB (Digital Audio Broadcasting) uses digital signals for clearer sound and more stable reception compared to analog signals. This unit can also receive DAB+ (an upgraded version of DAB) that allows for more stations using MPEG-4 audio codec (AAC+), which has a more efficient transmission method. -
Page 13: Presetting Dab Stations
LISTENING TO DAB STATIONS Some stations have sub (secondary) stations. The secondary indicator lights up when a secondary audio station is selected. Secondary indicator Note When the unit cannot receive the DAB signal, “Off Air” is displayed on the front panel display. Presetting DAB stations You can store your favorite DAB stations with the preset function. -
Page 14: Dab Station Information
LISTENING TO DAB STATIONS DAB station information While listening the DAB station. Press DISPLAY repeatedly. Press repeatedly DISPLAY Remote control STATION LABEL Displays the name of the current DAB station and preset number. DLS (Dynamic Label Segment) Displays information about the current DAB station, such as the name of the song, artist and speaker, etc. This data is continuously updated by the DAB broadcaster, thus changing often with every new song or program. -
Page 15: Listening To Fm Stations
LISTENING TO FM STATIONS DAB frequency information This unit can receive Band III only. Frequency Channel label Frequency Channel label 174.928 MHz 208.064 MHz 176.640 MHz 209.936 MHz 178.352 MHz 211.648 MHz 180.064 MHz 213.360 MHz 181.936 MHz 215.072 MHz 183.648 MHz 216.928 MHz 185.360 MHz... -
Page 16: Presetting Fm Stations
LISTENING TO FM STATIONS Presetting FM stations You can store your favorite 30 FM stations with the preset function. Automatic preset tuning Set SOURCE to FM. Press and hold Press and hold MEMORY for more than 2 seconds. ENTER MEMORY SOURCE To cancel the preset, press MEMORY again Remote control... -
Page 17: Using Alarm Function
USING ALARM FUNCTION Alarm features This unit can play back your favorite music and/or beep sound at the set time. Alarm features on this unit are described below. • This unit has 3 alarm types combining music and beep sound: SRC+BEEP Selected audio source and the beep sound are played at the set time. -
Page 18: Using The Snooze Function
USING ALARM FUNCTION Select a track or radio station (as required). (As required) When the source is CD/USB/DAB/ FM, select a track or radio station for ENTER PRESET alarm. • To select the last song or radio station you listened to, select “---”. •... -
Page 19: Shuffle/Repeat Playback
SHUFFLE/REPEAT PLAYBACK Stopping the alarm Press ALARM or • Unless you stop the alarm, the alarm stops ALARM after 60 minutes automatically. • The alarm function turns off when you stop the alarm, but settings such as the alarm time are saved for convenient use next time. -
Page 20: Listening To External Source
LISTENING TO EXTERNAL SOURCE Connect your portable audio device to AUX using a commercially available 3.5 mm (1/8 in) mini plug cable. SOURCE Note Turn down the volume of this unit and your portable audio device before connection. Rear Panel Set SOURCE to AUX. -
Page 21: Using Option Menu
USING OPTION MENU The option menu appears on the front panel display by pressing OPTION on the remote control. You can set various useful functions with option menu. Option menu Parameter or control range Reference page PRESET DELETE (Displays only when the input source is set to DAB/FM.) 14, 20 DAB CLEAR* (Displays only when the input source is set to DAB.) -
Page 22: Using Dab Option Menu
USING OPTION MENU Using DAB option menu Performing DAB CLEAR and INIT SCAN Press OPTION. MENU Select desired option menu with OPTION ENTER ENTER Confirm with ENTER. Remote control Remote control Remote control “Press ENTER” appears. ENTER Press to perform Exit option menu with OPTION. -
Page 23: Troubleshooting
In case of a problem with the unit, check the following list first. If you cannot solve your problem with the suggested solutions or if your problem is not listed below, turn off and unplug the unit, and consult the nearest authorized Yamaha dealer or service center. General... -
Page 24: Dab Reception
TROUBLESHOOTING DAB reception Problem Cause Solution Cannot tune into any DAB The initial scan operations were not Perform the initial scan operations performed. (☞ P. 10). stations. There is no DAB coverage in your area. Check with your dealer or WorldDMB Online at “http://www.worlddab.org”... - Page 25 TROUBLESHOOTING iPod Note In case of a transmission error without a status message appearing in the front panel of this unit, check the connection to your iPod (☞ P. 6). Status message Cause Remedy iPod Connecting This unit is in the middle of recognizing If the message continues to appear in the the connection with your iPod.
-
Page 26: Disc Playback
TROUBLESHOOTING Disc playback Problem Cause Solution Disc cannot be inserted. The system is set to power save mode (☞ P. 2). Set CLOCK to ON on the rear panel to cancel power save mode (☞ P. 4). Some button operations The disc loaded into the unit may not be Use a disc supported by the unit (☞... -
Page 27: Notes On Discs And Usb Devices
HDD, etc. • CD-R/RW cannot be played back unless finalized. • Yamaha will not be held responsible for any damage to or • Some discs cannot be played back depending on the disc data loss on the USB device occurring while the device is characteristics or recording conditions. -
Page 28: Specifications
SPECIFICATIONS PLAYER SECTION LASER SAFETY This unit employs a laser. Due to possible eye injury, only a iPod (Digital connection) qualified service person should remove the cover or attempt • Made for ..iPod touch (1st, 2nd, 3rd, and 4th generation) to service this device. - Page 29 Information for Users on Collection and Disposal of Old Equipment and Used Batteries These symbols on the products, packaging, and/or accompanying documents mean that used electrical and electronic products and batteries should not be mixed with general household waste. For proper treatment, recovery and recycling of old products and used batteries, please take them to applicable collection points, in accordance with your national legislation and the Directives 2002/96/EC and 2006/66/EC.
- Page 30 Australia model CAUTION Use of controls or adjustments or performance of procedures other than those specified herein may result in hazardous radiation exposure. U.K. model • The name plate is located on the back of the unit.
- Page 31 ■ For U.K. customers If the socket outlets in the home are not suitable for the plug supplied with this appliance, it should be cut off and an appropriate 3 pin plug fitted. For details, refer to the instructions described below. Note The plug severed from the mains lead must be destroyed, as a plug with bared flexible cord is hazardous if engaged in a live...
- Page 32 © 2011 Yamaha Corporation Printed in Malaysia WY87350...
Need help?
Do you have a question about the TSX-112 and is the answer not in the manual?
Questions and answers
Не горит индикаторная панель