
Related Manuals for Yamaha TSX-132


Summary of Contents for Yamaha TSX-132
- Page 1 DESKTOP AUDIO SYSTEM SYSTEME AUDIO DESKTOP TSX-132 M a y OWNER’S MANUAL MODE D’EMPLOI BEDIENUNGSANLEITUNG BRUKSANVISNING MANUALE DI ISTRUZIONI MANUAL DE INSTRUCCIONES GEBRUIKSAANWIJZING ИНСТРУКЦИЯ ПО ЭКСПЛУАТАЦИИ...
- Page 2 TO REDUCE THE RISK OF FIRE OR ELECTRIC injury. Yamaha will not be held responsible for any SHOCK, DO NOT EXPOSE THIS UNIT TO RAIN OR damage resulting from use of this unit with a voltage other MOISTURE.
-
Page 3: Table Of Contents
CONTENTS NAMES OF PARTS AND THEIR FUNCTIONS ..2 LISTENING TO EXTERNAL SOURCES ....11 Top panel / Front panel ..........2 USING THE ALARM FUNCTION......12 Front panel display............3 Using “DTA Controller” to set the alarm .......12 Rear panel..............3 Setting the alarm ............13 Remote control...............4 Operations while the alarm sound is playing....14 TURNING THE SYSTEM ON ........5... -
Page 4: Names Of Parts And Their Functions
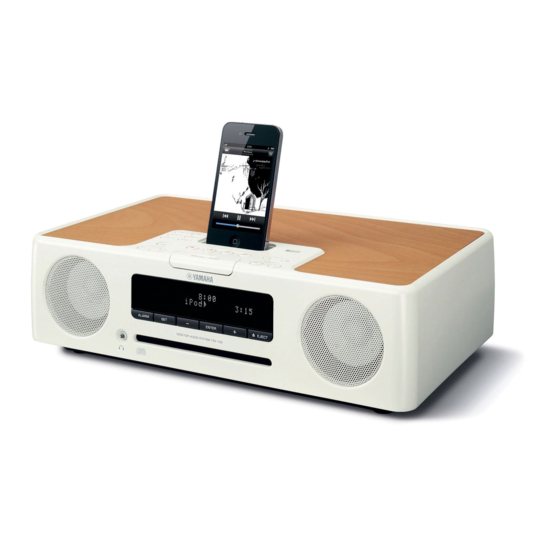
NAMES OF PARTS AND THEIR FUNCTIONS Top panel / Front panel a VOLUME – / + h PRESET / Adjust the volume. Use these buttons to select a FM station (preset) that you’ve stored (☞ P. 11). (Power) Press to turn the system on/off (☞ P. 5). i TUNING Tune the FM (☞... -
Page 5: Front Panel Display
NAMES OF PARTS AND THEIR FUNCTIONS Front panel display ~ ~ ~ ~ ~ ~ ~ ~ ~ ~ ~ ~ a Illumination sensor e Remote control signal receiver Detect ambient lighting. Do not cover this sensor. Make sure that this sensor is not obstructed (☞ P. 1). b Alarm time f Sleep indicator This indicates the alarm time. -
Page 6: Remote Control
NAMES OF PARTS AND THEIR FUNCTIONS Remote control a Remote control signal transmitter (Power) Press to turn the system on/off (☞ P. 5). c SNOOZE/SLEEP Set the sleep timer or switch the alarm to snooze mode (☞ P. 14, 15). d ALARM Switch the alarm on/off (☞... -
Page 7: Turning The System On
TURNING THE SYSTEM ON Connect the power cable to an AC outlet, and press The system will turn on, and will be ready to play audio sources. To turn the system off, press once again. If you set the rear panel CLOCK switch to the OFF position (☞... -
Page 8: Listening To Your Ipod
操 操 LISTENING TO YOUR iPod Playing music from your iPod • For details on compatible iPod models, refer to “SPECIFICATIONS” (P. 19). • Your iPod can also play back music and recharge while connected to the USB port (☞ P. 8). Press the iPod source button to switch the audio source to iPod. -
Page 9: Listening To Cd And Usb Devices
LISTENING TO CD AND USB DEVICES The unit will operate as follows when playing back tracks/files on CD/USB devices. • If the CD/USB device being played back is stopped, the track that was being played back will start playing from the beginning of the track the next time playback begins. -
Page 10: Listening To A Usb Device
LISTENING TO CD AND USB DEVICES Listening to a USB device Press the USB source button to switch the audio source to USB. If a USB device is already connected, playback will start. RADIO Connect a USB device to the USB port. Playback starts automatically. -
Page 11: Listening To Fm Stations
LISTENING TO FM STATIONS Selecting an FM station Connect the antenna if you want to listen to the FM (☞ P. 3). Press the FM source button to switch the audio source to FM. Tuning FM stations. RADIO Automatic tuning: Press and hold TUNING Manual tuning: Press TUNING repeatedly. -
Page 12: Presetting Fm Stations (Remote Control Only)
LISTENING TO FM STATIONS Presetting FM stations (remote control only) Use the preset function to store your favorite 30 stations. Auto preset This method tunes automatically, and automatically presets only the stations that have good reception. Press and hold down MEMORY on the remote control. -
Page 13: Selecting Preset Fm Stations
LISTENING TO EXTERNAL SOURCES Selecting preset FM stations Press the FM source button to switch the Main unit audio source to FM. RADIO You can also switch the audio source by pressing RADIO on the remote control. Press PRESET / to select the FM station iPod that you want to listen. -
Page 14: Using The Alarm Function
When entering the playlist name, use single-byte spaces to separate words, and enter iPod single-byte characters, taking care that uppercase/lowercase letters are used correctly. If the “ALARM Yamaha DTA” playlist cannot be found within the iPod, the unit Resume resumes play from the last track you played. -
Page 15: Setting The Alarm
USING THE ALARM FUNCTION Setting the alarm Set the alarm time and alarm type Alarm settings cannot be made when the unit is in power saving. If you want to use the alarm function, set the rear panel CLOCK switch to the ON position. -
Page 16: Operations While The Alarm Sound Is Playing
USING THE ALARM FUNCTION Switching the alarm on/off Press ALARM to turn the alarm on/off. When the alarm is on, the alarm indicator ( ) will light, and the alarm time will be shown. If you press ALARM again, the alarm indicator ( and the alarm will turn off. -
Page 17: Using The Sleep Timer
USING THE SLEEP TIMER When the specified time has elapsed, the system will turn off automatically. Press SNOOZE/SLEEP repeatedly to specify Press repeatedly the time after which the system will turn off. You can specify 30, 60, 90 or 120 minutes. When you select a time, the sleep timer is turned on, and the sleep indicator ( ) is shown in the front panel display. -
Page 18: Troubleshooting
If there is a problem with the unit, check the following list first. If you cannot resolve the problem with the suggested solutions or if the problem is not listed below, turn off and unplug the system, and consult the nearest authorized Yamaha dealer or service center. -
Page 19: Usb Device Playback
TROUBLESHOOTING CD playback Problem Cause Solution CD cannot be inserted. Another disc is already inserted. Unload the disc with EJECT. You are attempting to insert a disc that cannot be Use a disc supported by the unit (☞ P. 18). used by this unit. -
Page 20: Notes On Discs And Usb Devices
(such as USB chargers or USB hubs), PCs, card readers, an external HDD, etc. * ISO 9660 format CD-R/RW • Yamaha will not be held responsible for any damage to or data loss on the USB device occurring while the device is connected to this unit. -
Page 21: Specifications
SPECIFICATIONS PLAYER SECTION AMPLIFIER SECTION • Maximum output power ..15 W + 15 W (6 Ω 1 kHz, 10 % THD) iPod (Digital connection) [As of July, 2012] • Headphones ..3.5 mm STEREO mini jack (Impedance 16 to 32 Ω) •... - Page 22 VAROITUS CAUTION Muiden kuin tässä esitettyjen toimintojen säädön tai asetusten Use of controls or adjustments or performance of procedures muutto saattaa altistaa vaaralliselle säteilylle tai muille vaarallisille other than those specified herein may result in hazardous toiminnoille. radiation exposure. AVERTISSEMENT Advarsel: Usynlig laserstråling ved åbning når sikkerhedsafbrydere er ude af funktion.
- Page 23 ■ For U.K. customers • The name plate is located on the bottom of the unit. If the socket outlets in the home are not suitable for the plug • La plaque signaletique se trouve sur le dessous de supplied with this appliance, it should be cut off and an appropriate l’appareil.
- Page 24 © 2012 Yamaha Corporation Printed in Malaysia ZD83530...
Need help?
Do you have a question about the TSX-132 and is the answer not in the manual?
Questions and answers