Table of Contents
Advertisement
Quick Links
Table Of Content:
FCC COMPLIANCE
This device complies with Part 15 of the FCC rules and with RSS-210 of Industry Canada.
1. This device may not cause harmful interference, and
operation.
Warning!
Changes or modifications not expressly approved by the party responsible for
compliance could void the user's authority to operate the equipment
NOTE: The manufacturer is not responsible for any radio or TV interference caused by unauthorized modifica-
tions to this equipment. Such modifications could void the user's authority to operate the equipment
PATENTED: www.voxxintl.com/company/patents
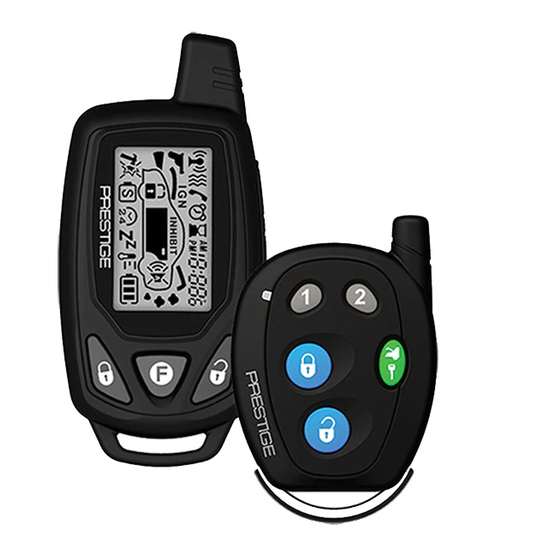
Model APS-922E
Owners Guide
2 Way LCD Vehicle Security
& Remote Start System
Page 2-3
Page 4
Page 5
Page 5-6
Page 6
Page 7
Page 7-8
Page 9
Page 9
Page 9-10
Page 10-11
Page 11-12
Page 12
Page 12-13
Page 13
Page 16-18
Page 18
Page 19
Page 20
Page 21
Page 1
128-9363
1 of 24
Advertisement
Table of Contents

Related Manuals for Prestige APS-922E


Summary of Contents for Prestige APS-922E
-
Page 1: Table Of Contents
Model APS-922E Owners Guide 2 Way LCD Vehicle Security & Remote Start System Table Of Content: Features and Options Page 2-3 Arming The System Page 4 Protection While The System Is Armed Page 5 Disarming Your System Page 5-6 Intrusion Warning Signals Page 6 Valet Override, Programming &... -
Page 2: Features And Options
5 Button Remote Start Security System With Plug-In Shock Sensor & Starter Disable IMPORTANT! In order to provide you with the highest level of security to your vehi- cle, this system is equipped with selectable manual override circuitry. It is possible that you will need to override you security system if the transmitter becomes lost, or inoperative due to battery failure. - Page 3 Car Horn Output For Additional Alarm Response (Improved Timing To Minimize RF Interference.) Additional Negative Trigger Input (Hood and Trunk) RF Inhibit With Ignition On Parking Light Flasher (Relay On Board) Plug In Dual Stage Shock Sensor (Pre-detect, Full Trigger and “City Mode”) ...
-
Page 4: Arming The System
system is programmed for separate lock and unlock buttons. Also reference will be made to the icons as shown on the but- tons left. NOTE: The LCD based remote will be explained in detail fur- ther in this manual. See "System Status" described later in this manual. -
Page 5: Protection While The System Is Armed
you should refer to the section titled “ELIMINATING THE ARM / DISARM CHIRPS“ in this manual. Doors Lock - Optional Door locking during passive arming is a selectable feature. The alarm can be programmed to allow the doors to lock only when arming using the keychain transmitter and they will not automatically lock during passive arming. -
Page 6: Intrusion Warning Signals
If the siren sounds 4 chirps, then the alarm was triggered in your absence. Before turning the key on, examine the LED and refer to the INTRUSION WARNING SIGNALS section of this manual to identify which zone was triggered. If the siren did not sound when disarming, then the chirps have been turned off and you should refer to the section titled “ELIMINATING THE ARM / DISARM CHIRPS“... -
Page 7: Valet Override, Programming & Safety Control Switch
3. To return to normal operation, press and release the Push Button switch any time the ignition is on. NOTE: Always remember to return the vehicle to the valet off position. This will ensure that the vehicle remains protected at all times. MANUALLY OVERRIDING YOUR SYSTEM: USING THE RECEIVERS PUSH BUTTON OVERRIDE SWITCH Your Security System can be disarmed without the use of the keychain transmit-... - Page 8 CUSTOM CODE PROGRAMMING EXAMPLE To Change the code from the factory pre-assigned code of 11 to “52” you would do the following: 1. Disarm the system by use of the transmitter, or by use of the emergency override sequence. 2. Turn the ignition switch to the on position. 3.
-
Page 9: Eliminating The Normal Arm/Disarm Chirps
ELIMINATING THE NORMAL ARM/DISARM CHIRPS You can selectively eliminate the normal arm & disarm chirps by holding the trans- mitter button slightly longer when arming or disarming. This will prevent the siren chirps for one arm or disarm cycle. If you find this inconvenient and wish to eliminate these chirps permanently, 1. -
Page 10: Push Button Led Receiver Control Switch
immediately after arming. There are 4 modes of operation that can be selected by the operator: 1. Normal Operation (default mode) In this mode, any strong vibrations will cause the siren to sound (full detect) for 30 seconds. Any lesser vibration will cause the siren to emit about 6 short warn away chirps, (pre-detect). -
Page 11: Remote Starting Your Vehicle
3) The LED begins to flash two short flashes followed by one long flashes and continues this pattern until returned to normal mode of operation. This puts the unit into the R/S Override mode indicating that the remote start is in the service mode and will not start from RF or any other input Posse or other- wise. -
Page 12: Automatic Start Timer Operation
OPERATING ON AUTOMATIC START UP TIMER MODE Your system has the ability to automatically start the vehicle every 2 or 4 hours over a 48 hour period. This feature is especially useful in cold climates where the only means to keep the engine and engine fluids warm is to periodically start the engine. WARNING! Be certain that the vehicle is outdoors before using this or any remote vehicle starting device. -
Page 13: Turbo Timer Mode Operation
intended to activate the trunk release option, any other optional devices may be connected to this channel. Consult your installation center for more information about this output. ADDITIONAL REMOTE FUNCTION ( CHANNEL 4 ) Controlled By: Trunk/Key Button Option Button Lock + Unlock Buttons ... -
Page 14: Two Way Remote (Transceiver) Screen Icons & Indications
TRANSCEIVER ICONS AND THEIR INDICATIONS When Disarmed, press the Arm/Lock button to Lock and Arm the System. The Lock Icon is displayed on the LCD panel & the parking lights flash once. When Armed, press the Disarm/Unlock button to Unlock and Disarm the System. The Unlock Icon is displayed on the LCD panel &... - Page 15 If the alarm system has been triggered, the icon displayed on the transmitter LCD will indicate which zone has been activated, as well sound the beep tones, or vibrate dependent upon the setting as shown above. The following trigger patterns will be displayed. Triggered and the entry attempt was made to one of the vehicle Doors.
-
Page 16: Two Way Remote Features & Functions
ADDITIONAL REMOTE FEATURES: The two way remote control unit allows you to access status information from the vehicle, check temperature, light the display, toggle the transmitter from beep tones to vibrate mode, initiate daily start timer, and temperature start. Selection of these and other features are shown below: NOTE: Transmitter must be within operating range of the vehicle, approximately 1000 ft. - Page 17 Timing Count Down The unit offers an additional count down timer for situations where an alert tone may be needed to remind you of something important. For instance you may have a meeting 4 hours from now and you want a reminder in 3 Hrs and 45 Mins. This additional count down timer allows you to set the count down up 19 Hours and 59 Minutes from the current time and when the timer reaches zero, the trans- mitter will emit a tone or vibrate dependent on your preferred setting.
-
Page 18: Hour Time Start Setup, Operation, & Use
Other icons that will be displayed at times when certain functions and features are active in the vehicle or on the remote. RANGE INDICATOR The range indicator will have bars to the side of the icon if the unit is out of range. -
Page 19: Functions At A Glance
APS 922E SYSTEM FUNCTIONS AT A GLANCE DASH LED INDICATORS RAPID FLASHING PASSIVE ARMING/ACTIVE REARMING SLOW FLASHING ARMED DISARMED ON SOLID VALET MODE 3 FLASH...PAUSE INTRUSION ZONE 3 2 FLASH...PAUSE INTRUSION ZONE 2 1 FLASH...PAUSE INTRUSION ZONE 1 SIREN CHIRP INDICATORS 1 CHIRP * 2 CHIRPS * DISARM... -
Page 20: Two Way Remote Function Program Chart
TRANSMITTER TRANSMITTER ICON TONE/VIBRATE FUNCTION BUTTON DISPLAYED SELECTION PRESS FOR 18:88 TIMING ADJUST 2 BEEP TONES 5 SECONDS MODE (HRS) TIMING ADJUST 18:88 USE KEY BUTTON OR OPTION PRESS 1X MODE (MINS) BUTTON TO SELECT ALARM CLOCK 18:88 USE KEY BUTTON OR OPTION PRESS 2X ADJUST MODE (HRS) BUTTON TO SELECT... -
Page 21: Replacement Or Additional Transmitter Programming
PROGRAMMING NEW OR REPLACEMENT TRANSMITTERS (BANK 1) Transmitter Model Name, 5BCR14P & 08SP, are Found On Back Of Their Re- spective Transmitter Case. To Program Additional Transmitters: 1) Turn the ignition key to the on position. 2) Press and release the valet/programming switch 3 times (Siren Chirps). 3) Press the Lock Button of each transmitter you want programmed until you hear a chirp from the horn or siren. - Page 22 NOTES Page 22 128-9363 22 of 24...
- Page 23 NOTES Page 23 128-9363 23 of 24...
- Page 24 © 2014 Voxx Electronics Corp. 150 Marcus Blvd. Hauppauge, NY 11788 128-9363 Page 24 128-9363 24 of 24...
Need help?
Do you have a question about the APS-922E and is the answer not in the manual?
Questions and answers