
Related Manuals for Pfaff 260C


Summary of Contents for Pfaff 260C
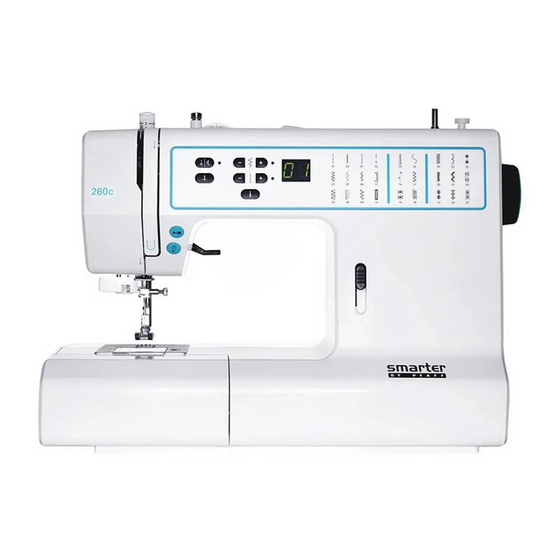
- Page 1 Owner's Manual 260c ™ SMARTER BY PFAFF – inspired and developed by the premier PFAFF® sewing machine brand...
-
Page 2: Important Safety Instructions
This household sewing machine is designed to comply with IEC/EN 60335-2-28 and UL1594. IMPORTANT SAFETY INSTRUCTIONS When using an electrical appliance, basic safety precautions should always be followed, including the following: Read all instructions before using this household sewing machine. Keep the instructions at a suitable place close to the machine. - Page 3 • If the LED lamp is damaged or broken, it must be replaced by the manufacturer or its service agent or a similarly qualified person, in order to avoid a hazard. • If the supply cord connected with the foot control is damaged, it must be replaced by the manufacturer or its service agent or a similarly qualified person, in order to avoid a hazard.
-
Page 4: Table Of Contents
TABLE OF CONTENTS Introduction ..........5 Three-step zigzag stitch........ 25 Overcast stitch..........26 Machine overview...........5 Closed overlock stitch ........26 Front............. 5 Elastic blindhem .......... 27 Top parts ............6 Sewing on patches and appliqués ....27 Rear side ............6 Darning with the three-step zigzag stitch .. -
Page 5: Introduction
1 Introduction Machine overview Front 1. Threading slots 11. Needle screw 2. Thread cutter 12. Needle thread guide 3. LED lamp 13. Presser foot bar and presser foot holder 4. Built-in needle threader 14. Presser foot 5. Buttonhole lever 15. Accessory tray 6. -
Page 6: Top Parts
Top parts 1. Presser foot pressure dial 5. Bobbin winder lever and bobbin 8. Bobbin winder tension disc spindle 2. Thread guides 9. Thread tension dial 6. Take-up lever 3. Spool caps 7. Thread tension discs 4. Hole for auxiliary spool pin Rear side 1. -
Page 7: Accessories
Accessories Included accessories 1. Bobbins (3) (#416475801) 2. Felt pad 3. Screwdriver for needle plate 4. Multi-purpose tool 5. Spool cap, large 6. Spool cap, small 7. Seam ripper & brush (as one) 8. Edge/Quilting guide 9. Auxiliary spool pin Included accessories not in picture •... -
Page 8: Stitch Overview
Stitch Overview Utility Stitches Stitch № Presser Thread Name Description foot tension 4–6 Straight For seaming and topstitching. Select from 15 different needle stitch positions. 3–5 Zigzag stitch Reinforce seams, clean finish, stretch sewing, lace insertion. 2–4 Closed Seam and overcast in one step, patch, hem. overlock 3–5 Stretch tricot... -
Page 9: Quilt Stitches
Quilt stitches № Presser Name Description Stitch Thread foot tension 3–5 Pin stitch Decorative edge. 3–5 Quilt stitch Quilting stitch using monofilament needle thread and increase needle thread tension. 3–5 Antique quilt Decorative quilting stitch. stitch 3–5 Wave quilt Quilting or decorative. stitch 2–4 Antique quilt... -
Page 10: Preparations
2. Remove all outer packing material and the plastic bag. Note: Your SMARTER BY PFAFF™ 260c machine is adjusted to provide the best stitch result at normal room temperature. Extreme hot and cold temperatures can affect the sewn result. -
Page 11: Pack Away After Sewing
Pack away after sewing 1. Switch the main switch off. Note: After switching off, residual power may still remain in the machine. This may cause the light to stay on for a few seconds while the power is consumed. This is normal behavior for an energy efficient appliance. -
Page 12: Spool Pins
Spool pins Your machine has two spool pins, a main spool pin and an auxiliary spool pin. The spool pins are designed for all types of thread. The main spool pin is used in a horizontal position (the thread reels off the spool) and the auxiliary spool pin in a vertical position (the thread spool rotates). -
Page 13: Threading The Machine
Threading the machine Make sure that the presser foot is raised and the needle is in its highest position. 1. Place the thread on the spool pin and fit the appropriately sized spool cap. 2. Pull the thread into the thread guide (A) from front to back and thread guide (B) from back to front. -
Page 14: Needle Threader
Needle threader The needle threader allows you to thread the needle automatically. The needle must be in its highest position to use the built-in needle threader. Press the needle up/ down button to make sure the needle is fully raised. We also recommend lowering the presser foot. -
Page 15: Threading For Twin Needle
Threading for twin needle Replace the sewing needle with a twin needle. Make sure that the presser foot is raised and the needle is in its highest position. 1. Place one thread spool on the spool pin and fit the appropriately sized spool cap. -
Page 16: Bobbin Winding
Bobbin winding 1. Place the thread spool on the spool pin. Slide a spool cap tightly against the spool. 2. Place the thread into the thread guide (A) from front to back. Pull the thread clockwise around the bobbin winder tension disc (B). 3. -
Page 17: Inserting The Bobbin
Inserting the bobbin Make sure that the needle is fully raised and the machine is turned off before inserting or removing the bobbin. 1. Open the bobbin cover by pushing the release button to the right (A). Remove the cover (B). 2. -
Page 18: Thread Tension
Thread tension To set the thread tension, turn the thread tension dial as illustrated. Depending on the fabric, batting, thread, etc, the tension may need to be adjusted. See Stitch Overview, page 8 for thread tension recommendation for all stitches. For the best stitch appearance and durability, make sure the needle thread tension is correctly adjusted. -
Page 19: Needles
Needles The sewing machine needle plays an important role in successful sewing. Use only quality needles. We recommend needles of system 130/705H. The needle package included with your machine contains needles of the most frequently used sizes. Universal needle Universal needles have a slightly rounded point and come in a variety of sizes. -
Page 20: Lowering Feed Dogs
Lowering feed dogs You can lower the feed dogs by moving the switch at the back of the free arm to the left. Move the switch to the right if you wish to raise the feed dogs. Note: The feed dogs will not raise immediately when the lever is switched. -
Page 21: Function Buttons And Indicators
Function buttons and indicators 1. Reverse 5. Needle stop up/down 9. Direct selection buttons 2. Start/stop 6. Stitch width or stitch positioning 3. Speed control lever 7. Stitch length 4. Immediate tie-off/Tie-off 8. Info button Reverse Needle stop up/down If you press the reverse button while sewing, the Press this button to move the needle up or down. -
Page 22: Sound/Warning Messages
Restart the sewing machine by switching the ON/ OFF switch to the OFF position and then ON again. Note: If the problem is still not solved, please contact your local authorized PFAFF® dealer. -
Page 23: Sewing
3 Sewing When the machine is turned on, straight stitch 01 is selected by default. Select a stitch By pressing one of the 27 buttons you select the stitch illustrated on that button immediately. The stitch overview on page 8 shows the recommended thread tension and presser foot for each stitch. -
Page 24: Start To Sew - Straight Stitch
Start to sew — Straight stitch Set your machine for straight stitch 01 (see Select a stitch, page 23). Raise the presser foot and position the fabric under it. Align the edge of the fabric with one of the seam allowance guide lines on the needle plate. The guide line for a 1/4"... -
Page 25: Sewing Techniques
Sewing techniques Reinforced straight stitch The reinforced or triple straight stitch is a very durable and elastic stitch. It can be used for seaming heavy fabrics, including stretch fabrics. Use it instead of the regular straight stitch in areas where there will be additional stress on the fabric. -
Page 26: Overcast Stitch
Overcast stitch The overcast stitch sews the seam and finishes the edge all at the same time. It is perfect for stretch fabrics. The sewn result is more elastic than normal seams, very durable and quickly done. Use foot number 3. Tip: When sewing, guide the fabric edge along the metal pin of the foot. -
Page 27: Elastic Blindhem
Elastic blindhem The blindhem stitch is used to make invisible hems on skirts, trousers, draperies and more. The elastic blindhem stitch is especially suitable for stretchy fabrics, because the zigzag in the stitch lets the stitch stretch, but it can also be used on woven fabrics. Use foot number 3. Elastic blindhem stitch 11 Finish the edge of the hem if sewing on a woven fabric. -
Page 28: Darning With The Three-Step Zigzag Stitch
Darning with the three-step zigzag stitch A small hole or tear is easily darned with the three-step zigzag stitch. Sew over the damaged area in rows until it is well covered. Make sure that the rows overlap. Tip: To make the darning even sturdier, place a fabric underneath the hole/tear before sewing. -
Page 29: Standard Buttonhole
4. Press the foot control and sew six to eight stitches. Reduce the stitch width to 0 and tie-off the threads with a few stitches. 5. Raise feed dogs when button sewing is completed. Note: Use the multi-purpose tool to create a thread shank for your button. -
Page 30: Corded Buttonhole
Corded buttonhole Corded buttonholes that are sewn with gimp threads are more stable, durable and have a professional appearance. Use pearl cotton or a regular gimp thread. 1. Loop a piece of heavy thread or pearl cotton over the finger at the back of the foot (A). Pull the thread tails under the foot, toward the front, then secure around the finger at the front of the foot (B). -
Page 31: Sewing Zippers
Sewing zippers The Zipper Foot 4 can be attached on either the right or the left of the needle, making it easy to sew both sides of the zipper. To sew the left side of the zipper, attach the foot in the right presser foot position (A). -
Page 32: Maintenance
4 Maintenance Cleaning the machine To keep your sewing machine operating well, clean it often. No lubrication (oiling) is needed. Wipe the exterior surface of your machine with a soft cloth to remove any dust or lint built up. Cleaning the bobbin area Raise the needle, lower the feed dogs and turn off the machine. -
Page 33: Troubleshooting
Is the needle too small for the thread? Make sure the needle is correct for the thread and fabric. Are you using poor thread with slubs or thread which Change to a new higher quality thread purchased from has become dry? an authorized PFAFF® dealer. -
Page 34: Technical Specification
Is a correct spool cap used? Attach a spool cap of the right size for the actual thread spool. Is the stitch plate hole damaged? Change the stitch plate. Bobbin thread breaks Did you insert the bobbin properly? Check the bobbin thread. Is the stitch plate hole damaged? Change the stitch plate. -
Page 35: Intellectual Property
Such modifications, however, will always be to the benefit of the user and the product. INTELLECTUAL PROPERTY PFAFF, and SMARTER BY PFAFF are trademarks of KSIN Luxembourg II, S.ar.l. Please note that on disposal, this product must be safely recycled in accordance with relevant National legislation relating to electrical/ electronic products. - Page 36 www.pfaff.com...
Need help?
Do you have a question about the 260C and is the answer not in the manual?
Questions and answers