Table of Contents
Advertisement
Quick Links
Advertisement
Table of Contents

Subscribe to Our Youtube Channel
Related Manuals for Lava Iris win1


Summary of Contents for Lava Iris win1
- Page 1 USER MANUAL Iris win1...
-
Page 2: Preface
Preface Thank you for purchasing this cellular phone. Please follow the instruction in this manual for proper working of cellular phone and avoid malfunction. Follow all safety warnings to avoid wear & tear or product damage. Screen displays and illustrations in this user’s manual are designed to help you to operate phone. We continuously strive to improve our products. -
Page 3: Welcome
Welcome Exciting Features Congratulations on becoming a proud owner of iris Win1 mobile phone. You have now joined the millions of satisfied customers spread across the Globe. Your iris Win1 offers you these exciting features and much more: Windows 8.1 ... -
Page 4: Table Of Contents
Table of content Preface........................... 2 Welcome..........................3 Table of content........................4 Important safety precautions....................6 Appearance and Key Function....................9 Introduction..........................11 Call Functions........................14 Personalization........................19 People..........................20 Messaging..........................24 Connectivity......................... 29 Internet Explorer........................31 Outlook..........................33 Store............................. 34 Camera..........................35... - Page 5 Photos..........................36 Music............................38 FM Radio..........................39 Calendar..........................40 Alarm Clock.......................... 41 Data Sense..........................43 Storage Sense........................44 Troubleshooting........................45 Safety Information and Notices....................48 Lava warranty certificate...................... 54...
-
Page 6: Important Safety Precautions
Important safety precautions Failure to comply with the following precautions may be dangerous or illegal. Please carefully read and observe the terms below: Safe power on Do not use your mobile phone where it is forbidden to use or you might cause a disturbance or danger. Safe transportation first Please observe all related local laws andregulations. - Page 7 Turn off when at a gasoline station Do not use your mobile phone at a filling stationor around fuels or chemicals. Turn off around exposure Area Please observe related limitations and do notuse your mobile phone around an area where explosion scan occur.
- Page 8 Waterproof Your mobile phone is not waterproof. Please keep itaway from water. Connect to other devices Please read the user manual of the device to get more detailed security instructions beforeconnecting to other devices and do not connect tounmatched product. Authorized connection Please read the user manual of the device to get more detailed security instructions before connecting to other devices and do not connect to unauthorized connection.
-
Page 9: Appearance And Key Function
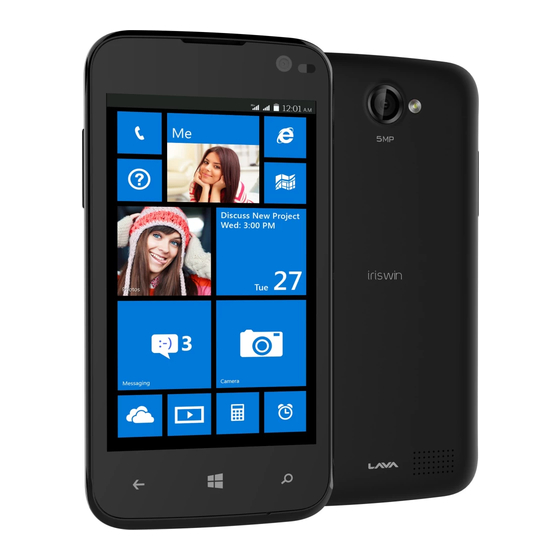
Appearance and Key Function Receiver Front camera Rear Camera USB jack Power Volume key Earphone jack Flash light Volu Screen Speaker Search Back Home... - Page 10 SIM Cards Airplane mode Bluetooth icon Wifi Notification Rotation icon Access settings Cancel all the notifications SIM notification As long as the apps have notification functions, when there is something new will be shown here.
-
Page 11: Introduction
Introduction Installation of the SIM Card Warning: Please keep the SIM card out of the reach of children. The SIM card and its contact are easily damaged due to scratching or bending. Please use caution when carrying, installing or taking out the SIM card. NB: Please contact your cellular phone service provider directly to obtain your SIM card. - Page 12 Power On and Off On - Please ensure the SIM card has been properly inserted into the phone. Long press the Power key to switch on the phone Off - In standby mode, long press on Power key until an options menu appears. Slide the screen down to completely power off the phone.
- Page 13 Turn ON password.
-
Page 14: Call Functions
Call Functions Making a Call Note: You can make a call only when the network is available. At the dial keyboard, enter the phone number and then click the dial key. If dialing an extension, you may click the dial pad icon in the bottom of the screen to open the interface and enter the number of the extension. You may also press and hold the 0 key to add a (+) sign when adding an international dialing prefix. - Page 15 Click the “Phone” application; you can enter into call logs penal. In every called and received calls will be saved in the phones call log and there are five options at the bottom of the call log panel. Menu key You can use those options to access phone book and dialog panel directly.
- Page 16 Use in-call options 1. During a call, more than one in-call option can be used at a time. 2.To turn off an in-call option that's turned on, tap the button for the option. Switch video call Use a Bluetooth accessory to go Mute the call hands-free Add another...
- Page 17 3. To swap or answer a second call, tap the hold button. 4. To merge a call or make a conference call, tap the add call button. 5. To reject or hang up a call, tap the end call button. Signing In Sign in with a Microsoft account to download apps, back up contacts and more.
- Page 18 Add an account after clicking email Sign in...
-
Page 19: Personalization
Personalization On Windows Phone, Start is your home base: you can keep all of your important things just where you need it, perform a task with a click or two, and then press the Start button to zoom right back to the Start screen. You can fill the Start screen with links, contacts, maps and apps, or just a few basics. -
Page 20: People
Tip: Some colors look little different against the dark background than compare to light background, so if you switch between them, try revisiting different theme colors. Finding your Apps 1. On Start, swipe over to the App list. 2. Click Search to find a specific app, or click a letter to jump to that section. Note: To find your games, go to the App list, and then click Games. - Page 21 chat or view the calendar, notes or photo album or open up a group to see what's new with the members or send them a quick group email or text. Add Contact Search Click the Search icon to enter the contact search interface. Any numbers or letters associated with any of the contacts saved in the list will be shown in the search results.
- Page 22 Add New Contact - Click the add contact icon (+) to add contact. - You may enter different contact details which include adding a picture, name, telephone number, group, address, and email among other options. Edit contact detail Communicate with a contact Note: Saving your contacts to your Outlook account facilitates both storage and synchronization...
- Page 23 Delete Contact Click on the Contacts icon to enter the phonebook. Long press the contact you wish to delete. Click delete to eliminate contact from phonebook. Import Contacts The phone allows you to import contacts to synchronize information between different storage types that include the SIM card, Outlook account and your phone.
-
Page 24: Messaging
Messaging You may use this function to exchange text messages and multimedia messages with your family and friends. The messages to and from the same contact or phone number will be saved into a single conversation so you may see the entire message history conveniently. - Page 25 Click this icon to mark the message Delete icon. Select icon, enter into delete penal...
- Page 26 Send an MMS When creating message, the default message style is SMS. Click the attachment icon in the messaging interface. Click to add attachments (photos, videos, capture picture, capture videos, voice note, record audio, contact, my location) and create an MMS message. Just as the following pictures showed. All you need to do is click the attachment icon.
- Page 27 Settings Messaging Controls The above two pictures showed how to access message settings. Just click the menu.
-
Page 28: Connectivity
Connectivity Bluetooth is a short-range wireless communications technology that devices can use to exchange information and connect to different types of devices which include headsets and other devices. Power on Bluetooth Settings » Bluetooth and select to power on Bluetooth. The Bluetooth icon will appear in the notification bar. - Page 29 Power on Wi-Fi Settings » Wi-Fi and select ON to power on Wi-Fi Go to Menu> System settings> wireless & networks and then tap Wi-Fi. Next, go to Menu> settings> wireless & networks>Wi-Fi Settings and then enable Wi-Fi. Next, select the WIFI connection listed under Wi-Fi networks.
-
Page 30: Internet Explorer
Connect PC to transfer files from handset When you try to transfer your files(for instance photos, audios, videos) from your handsets, all you need to do is following the steps: Connect your handsets with PC through the USB cable. Then the PC will find your device automatically. And pop-up a dialog box automatically. - Page 31 Share Page This menu option shares the webpage Pin to Start This menu option pins to start Recent This menu option displays recent webpage activity. Settings This menu option displays internet explorer settings...
-
Page 32: Outlook
Click menu to access the internet browser options. Outlook Outlook is Microsoft’s free email service. To access the Outlook program, click the applications menu and click on the Outlook icon and either sign in with your existing account or create a new one. Note: In order to keep accounts streamlined with Microsoft services, your Outlook account user name and password may be used for some Microsoft programs. -
Page 33: Store
The Outlook inbox is separated in different categories Scroll Outlook to view different categories. Store Windows Store allows you to download programs and games directly to your device. To access the Store, click on the Store icon and search the specific category. -
Page 34: Camera
Search and select between different Store categories Camera Prior to use: Insert SD card before using the camera or video camera. All photos or videos taken by the phone should be stored in the memory card for large storage capacity of images and videos. Click the Applications Menu »... -
Page 35: Photos
Switch to video mode if you want to record videos. Take Pictures Aim at the object that the picture will be taken. Press the Shutter button on the screen to capture image. After taking the picture, the file will be saved in the default save location. Camera Modes Pictures are stored in different album... - Page 36 Share & send image You may share pictures by sending them through different types of installed applications. You may also send pictures through the MMS message function by attaching a picture and also via Bluetooth. Open the album and select the images or open an image, press menu and select share.
-
Page 37: Music
Music Open Music Application Menu » Music Search Music You may choose to search for music from media folder through artist name, song name, album name among other options. Shuffle Play Playback Loop Play Playback Song Status Click on pause... -
Page 38: Fm Radio
FM Radio FM Radio Through this function, you may listen to FM radio on the device. :The FM radio uses the wired headphones as an antenna in order to receive signal. Before using this function, NOTE connect the original equipment headphones that came with the phone. Open FM radio Press the FM Radio icon to open the application. -
Page 39: Calendar
FM Radio as Background Click on the Start key to move the FM Radio to the background. Calendar The calendar helps keep track of your life’s most important moments in one application. Click the (+) button to enter a new event Click the calendar button to change views... -
Page 40: Alarm Clock
Alarm Clock In settings, click on Alarm to enter the alarm clock settings This option allows you to add and edit alarms. Click to edit an alarm Turn on/off button Click the (+) button to add an alarm... - Page 41 Click to select ringtone or vibrate Click to save Click to delete an settings alarm...
-
Page 42: Data Sense
Data Sense The data sense shows the cellular and WLAN usage and helps to find more efficient ways to use cellular data. et cellular data limit to conserve the usage... -
Page 43: Storage Sense
Storage Sense Connect the phone with the USB cable provided. Once connected, a connection interface will appear. In the connection mode interface, select one of the available options to transfer files to your computer. You may select to transfer files through USB connection. -
Page 44: Troubleshooting
Make sure that the battery is inserted correctly. Ensure that the battery being used is LAVA approved battery. Double check if the charger connector is properly connected to the phone and the socket Note: Connect charger only after the battery has been inserted. - Page 45 The standby time is too short Please keep in mind that standby time relates directly to phone usage (Internet, Text, Voice Calls, Maps, etc.). Batteries typically have to be replaced after a year of use. The phone cannot connect to the network (Voice or Data) ...
- Page 46 Make sure that your phone is connected to a network. Check the phones Call Divert and Call barring settings (Check with your service provider for these settings and codes) The caller ID does not display on incoming calls ...
-
Page 47: Safety Information And Notices
Safety Information and Notices Certification Information (RoHS) We at L AVA take our social responsibility seriously and are committed to the cause of saving our environment, it is in keeping with these commitments that we are proud to state that L AVA phones are RoHS complaint. Certification Information (SAR) Your phone is designed not to exceed the limits of emission of radio waves recommended by international guidelines. - Page 48 Prefer to use your cell phone when the signal quality is good. People having active medical implants should Preferably keep the cell phone at least 15 cm away from the implant. Maintain a preferable distance of 15 mm from the device. Using the Cell Phone and Charger Danger: Only use the battery and charger approved by the manufacturer.
- Page 49 Using the Cell Phone Warning: Do not use the phone while you are driving. Pull over and stop your automobile to dial or listen to a phone call. Usage of cell phones in aircrafts or in hospitals is prohibited. Switch the phone off to prevent interference with electronic medical devices.
- Page 50 Using the Battery Danger: Do not dispose of the battery into a fire. Doing so may cause battery explosion or even fire. If you have difficulties installing the battery, do not force the installation. This may cause battery leakage, overheating, explosion or even fire. Keep metal objects away so they don’t come in contact with the battery or its connectors as it may cause the battery to short circuit, overheat or explode.
- Page 51 Do not leave the product or its battery inside a vehicle or in places where the temperature may exceed 60°C (140°F), such as on a car dashboard, window sill, or behind a glass that is exposed to direct sunlight or strong ultraviolet light for extended periods of time.
- Page 52 Do not place heavy objects on the power cord. This may cause electric shock or fire. Hold the plug while unplugging the power cord; this will avoid any potential damage or even fire. Requirements for Cell Phone Avoid using your mobile phone in extremely high or low temperature. Use the phone in a temperature range from -10~55℃and humidity of 35%~85%.
-
Page 53: Lava Warranty Certificate
LAVA Warranty: Subject to the conditions of this Limited Warranty, LAVA warrantsa product to be free from defects in design, material and workmanship pat the time of its original purchase by you, and for a subsequent period of one (1) year... - Page 54 - The product serial no. code or the accessories date code has been removed, defaced or altered. - The product has been used with or connected to an accessory (i)Not supplied by Lava or its affiliates, (ii) Not fit for use with the product or (iii) Used otherwise than in manner intended.
- Page 55 - Present this Lava Warranty Certificate along with original proof of purchase whenever you require any warranty services. In case Lava product needs service, please visit the nearest Lava service centers given in the service guide. Please visit our Websitewww.lavamobiles.com for updated list of Authorized Service Centers near to your location.
Need help?
Do you have a question about the Iris win1 and is the answer not in the manual?
Questions and answers