Table of Contents
Advertisement
Quick Links
Advertisement
Table of Contents

Related Manuals for Lava kkt10


Summary of Contents for Lava kkt10
- Page 2 © 2013. All rights are reserved. No part of this document may be reproduced without permission. While all efforts have been made to ensure the accuracy of all contents in this manual, we assume no liability for errors or omissions or statements of any kind in this manual, whether such errors or omissions or statements resulting from negligence, accidents, or any other cause.
-
Page 3: Table Of Contents
TABLE OF CONTENT WELCOME ............................- 5 - PRECAUTIONS ........................... - 6 - 1. GENERAL INFORMATION ......................- 8 - 2. IMPORTANT INFORMATION ......................- 12 - 3. GETTING STARTED........................- 13 - 3.1 B ......................- 13 - ATTERY NSTALLATION 3.2 SIM C /T-F... - Page 4 5.5 M ..........................- 21 - ESSAGES 5.6 M ............................ - 24 - EDIA 5.6.1 Audio Player ........................ - 24 - 5.6.2 Video Player ........................ - 24 - 5.6.3 Video Recorder ......................- 24 - 5.6.4 Camera ........................- 25 - 5.6.5 Image ..........................
-
Page 5: Welcome
Torch, Super Loud Speaker, Hindi Language Input & Display and more. Your phone can also connect to a PC, laptop, or other device using a USB data cable. You can read the manual for complete knowledge about the use of the KKT10 mobile phone and experiencing the well-established functions and simple operation method. Please use the original accessories in order to achieve best results.Use of non-original components may cause damage to... -
Page 6: Precautions
Precautions Safe power on Do not use your mobile phone where it is forbidden to use or it might cause disturbance or danger. Safe transportation first Please observe all local laws and regulations. Do not use your mobile phone while driving. Safe transportation should be considered first when driving. - Page 7 Please do not touch the antenna area of your phone. Use qualified after sales service Only a qualified technician can install or repair your mobile phone. Please contact LAVA authorized service center in case of phone failure. Accessories and batteries Only use the authorized accessories and batteries.
-
Page 8: General Information
Use only batteries, chargers and accessories approved by the LAVA for use with this particular model. The use of any other types will invalidate any approval or warranty applying to the phone, and may be dangerous. - Page 9 Privacy The shoot or recording of photos, images or sounds privately may be prohibited by law and/or subject to criminal prosecution. We recommend you to be responsible and respectful of privacy laws when you are taking photos or shooting videos. Know Your Phone The Symbols above indicate: 1−...
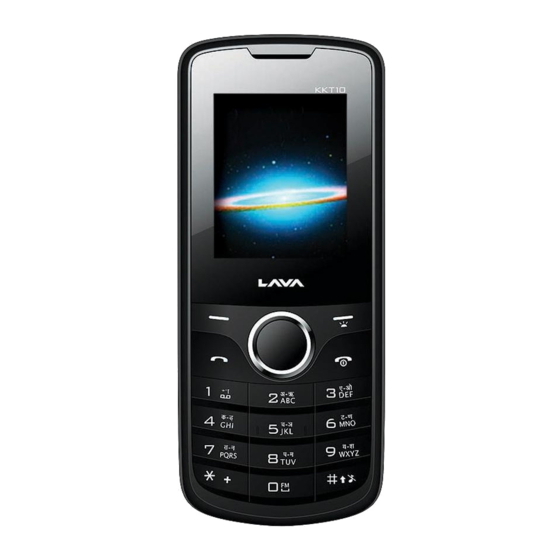
- Page 10 3− Left Soft Key 4−Dial Key 5− Number Keys 6−* Key/Bluetooth Shortcut 7− Navigation Keys 8− Right Soft Key 9− Power Key/End key 10− OK Key 11− # Key/Silent Profile Shortcut 12−Camera 13−Speaker 14−Battery Cover Keypad & Shortcut Description Definitions Left Soft key / 1.
-
Page 11: Standby Screen And Icons
2. In standby mode, press to access All calls. Number Keys 1. Use these keys to input numbers or letters. 2. In standby mode, long press the 0 key to enter FM radio (with earphone inserted). Torch Key 1. In the standby mode, long press right soft key to turn on/off torch. -
Page 12: Important Information
Figure of Icons Icon Indicates Icon Indicates Signal strength Battery level New text message Flight mode activated Call divert enabled Missed calls Bluetooth turned on Headset connected Alarm enabled Ring only enabled Slient profile activated Vibrate only enabled Vibrate and ring enabled Vibrate then ring enabled Keypad locked MicorSD card inserted... -
Page 13: Getting Started
3. Getting Started 3.1 Battery Installation Caution: Install according to the illustration above to avoid breaking the battery connectors. 3.2 SIM Card/T-Flash Card Installation Caution: Do not bend or scratch your SIM card and T-Flash card. Avoid exposing your SIM card and - 13 -... -
Page 14: Charging The Battery
T-Flash card to static electricity, water, or dirt. Tips: Face the gold color contact point of SIM card towards the cell phone and push the SIM card into the slot. With the metal contacts facing down, gently slide the T-Flash card into the slot. Press and pull the cover up to lock it. -
Page 15: Basic Functions
4. Basic Functions 4.1 Making a Call In standby mode, press numerical keys to input phone number to dial. If you have installed two SIM cards, both network carriers will appear on the screen. The upper left icons on the screen indicate the signal intensity of the two SIM cards (strongest when full). The call quality is easily impaired by stumbling blocks. -
Page 16: Rejecting A Call
The name and phone number of the caller is shown on the screen if the network supports the service. You may answer or reject the call. If call waiting is ON when you are on the phone and there is another incoming call, your phone will notify you with a short tone. -
Page 17: Call Log
Delete: Confirm whether to delete the contact Copy: Copy the contact To Phone, To SIM1, To SIM2, or To file Add to blacklist: Add the contact to Blacklist Mark several: Select to mark one or more contacts ... -
Page 18: Phone Settings
5.3.3 Phone Settings ― Time and Date You can select Set home city, Set time/date, Auto update time, Set format, and Update with time zone. ― Language You can choose several languages under this function. ― Preferred Input Method Select one input method as preferred input method. ―... -
Page 19: Call Settings
5.3.4 Call Settings ― SIM1/2 Call Settings Call Waiting Set the mode of call waiting, this function need to be activated. Call Divert When the call divert is activated, incoming calls will be diverted to voice mail or other phone numbers according to the call divert settings. -
Page 20: Network Settings
5.3.5 Network Settings ― SIM1/SIM2 Network selection This function can let you select the network manually or automatically. 5.3.6 Security Settings ― SIM 1/SIM 2 Security PIN lock PIN number setting can avoid unauthorized usage of SIM card. If PIN number has been wrongly inputted for 3 times, the SIM card will be locked. -
Page 21: Restore Factory Settings
― Mobile Tracker Enter password to activate mobile tracker function. When user activated this function and lost the mobile, if someone pick-up the mobile and insert new SIM, the anti steal will send SMS to predetermined numbers to show detail of the lost mobile. 5.3.7 Restore Factory Settings Input default password 4321 to restore factory settings. - Page 22 5.5.2 Inbox After entering the Inbox, press navigation key to select messages. Press OK key to check the details of message, or press left soft key to access Options: ― View: Check the message ― Reply: Reply message to the sender ―...
- Page 23 5.5.4 Outbox Checks the information of unsuccessfully sent message in outbox. Press left soft key to access to Options: ― View: Check the message ― Resend: Send the message once more ― Edit: Edit the message ― Delete: Confirm whether to delete the message ―...
-
Page 24: Media
― SIM1/SIM2: Set SMSC address, Validity period, Message type, Delivery report, and Reply path ― Memory status: Check the message memory of SIM cards and phone ― Save Sent Message ― Preferred storage: Select SIM or Phone as preferred storage ―... -
Page 25: Camera
5.6.4 Camera Press left soft key or OK key to enter. The photo can be previewed in the screen; press OK key to shoot and right soft key to back, left soft key to access Options. 5.6.5 Image Enter image, you can choose photos to view or return. Press left soft key to access to Options: View, Image information, Browse style, Send, Use as, Rename, Delete, Sort by and Storage. -
Page 26: Tasks
5.7.3 Tasks To check tasks in the list or add new ones. 5.7.4 Alarm The alarm clock feature sounds an alert or makes a vibration alert at a time you specify. There are 5 alarm clocks can be edit and set. 5.7.5 World Clock By pressing left/right navigation keys to change time zone on world map, you can check time and date of different cities and regions. -
Page 27: Fun
5.8 Fun 5.8.1 Games The phone has a built-in game. And you can enter the menu to set games settings. 5.9 STK If your SIM card supports STK function, the phone can display different first level menu according to different STK card. This function needs the network provider support. If user finds STK function can't operate normally, please contact the network provider. -
Page 28: Care And Maintenance
Number Entry Mode can input the number in the text, such as telephone number. Tap the proper number and input it. 7. Care and Maintenance Battery care • Your device is powered by a rechargeable battery. When the power is weak, please charge the battery. In order to extend the lifespan of the battery, use all the battery's power before recharging. - Page 29 • Keep the device dry. Precipitation, humidity, and all types of liquids or moisture can contain minerals that will corrode electronic circuits. If your device does get wet, remove the battery and allow the device to dry completely before replacing it. •...
-
Page 30: Technical Information
Using the Charger Danger: • Only use the lava charger that came with the phone. Using a different charger may cause the phone to breakdown or explode. • If the charger short circuits, a fire may occur. -
Page 31: Sar Information
The highest SAR value for this mobile phone is <1.6 W/Kg, in accordance with the requirements of the ICNIRP. The recommended s limit for exposure to radio waves is 1.6 watts/kilogram (W/kg) averaged over 1 gramoftissue. For more information, please visit Lava’s website www.lavamobiles.comto read about Safety precautions:... - Page 32 People having active medical implants should preferably keep the cell phone at least 15cm away from the implant - 32 -...
-
Page 33: Troubleshooting
Troubleshooting Service Center number No.:+919560394002 Kindly note please send area code of place through SMS to this No. and in return you will get address of service center nearest to you by SMS - 33 -... -
Page 34: Frequently Asked Questions
Frequently Asked Questions Frequently Asked Cause and Solution Questions Press the power key for over 1 second. Fail to turn Check if the battery is properly connected. Please remove and install it again and retry; Check if battery is appropriately charged. In case of Weak signal, please try and move to a location with strong signal and try connecting Fail to to the network again;... - Page 35 The standby duration is relative to the network systems. While the mobile phone is in an area with poor signal strength and cannot receive the signal, the handset will continuously search for Standby a base station. This will significantly reduce battery charge. It is recommended that you turn off duration your mobile in area with no signal reception to save battery.
-
Page 36: Lava Warranty Certificate
The product serial no. code or the accessories date code has been removed, defaced or altered. The product has been used with or connected to an accessory (i) Not supplied by Lava or its affiliates, (ii) Not fit for use with the product or (iii) Used otherwise than in manner intended. - Page 37 Present this Lava Warranty Certificate along with original proof of purchase whenever you require any warranty services. In case Lava product needs service, please visit the nearest Lava service centers given in the service guide. Please visit our Website www.lavamobiles.com for updated list of Authorized Service Centers near to your location.
Need help?
Do you have a question about the kkt10 and is the answer not in the manual?
Questions and answers