Table of Contents
Advertisement
Quick Links
Advertisement
Table of Contents

Related Manuals for Lava Xolo X900


Summary of Contents for Lava Xolo X900
- Page 1 user guide...
-
Page 2: Table Of Contents
contents contents ..................2 6 Take Photos & Videos ................28 1 Getting Started ..................... 4 6.1 Change Picture & Video Settings ..........29 1.1 Your Phone .................4 6.2 View Your Pictures & Video ............31 1.2 Phone Buttons ................5 7 Browsing the Web ..................33 1.3 Phone Slots, Ports &... - Page 3 15.3 Sound settings ................57 15.4 Display Settings ..............58 15.5 Location & Security Settings ............58 15.6 Applications settings ...............58 15.7 Accounts & Sync Settings ............59 15.8 Privacy Settings ..............59 15.9 Storage settings ..............59 15.10 Language & Keyboard Settings ..........60 15.11 Accessibility Settings .............60 15.12 Date &...
-
Page 4: Getting Started
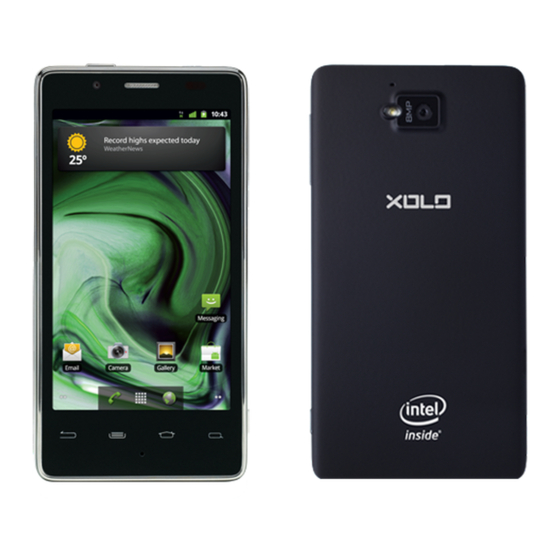
1 getting stArted 1.1 Your Phone Congratulations on your new phone purchase. This guide will help you to quickly come up to speed on the important features of your phone. Keep in mind your phone has: • Fast Processor: Featuring the 1.6GHz Intel Atom Processor that enables ®... -
Page 5: Phone Buttons
1.2 Phone Buttons Buttons Press to go back to the previous screen or to close a menu or dialog box. Press to display actions and settings specific to the current screen. Press to return to the center panel of the Home screen. -
Page 6: Charge The Battery
1.4 chArge the BAtterY 1.5 insert Micro-siM cArd Before using your phone for the first time, charge the phone for eight hours. If your micro-SIM card is not already installed in your phone, follow these procedures to insert a micro-SIM card. To charge the battery: To insert the micro-SIM card: 1. -
Page 7: Using The Headset
1.6 using the heAdset To turn the phone off: • Hold down the power button and touch Power Off. You can use your headset to listen to music or make phone calls. To use the headset: 1. Plug the headset into the audio jack on your phone. 2. -
Page 8: Touchscreen
1.10 touchscreen NOTE: If you press the power button for too long, you’ll see the power off menu. Use your fingers on the touchscreen to perform actions, open objects, slide the screen, and more. To wake the phone: Below are the different ways of interacting with your touchscreen. 1. -
Page 9: Home Screen & Basic Features
2 hoMe screen & BAsic FeAtures The Home screen is a gateway to all of your phone’s applications and features, and displays whenever you turn on your phone. Touch and hold an empty spot to add shortcuts and widgets, or to change the wallpaper. -
Page 10: Customizing Your Home Screen
2.1 custoMizing Your hoMe screen TIP: Rearrange items on your screen by touching and holding them and then dragging them to a new location. You can also delete them by touching and You can easily customize your Home screen—adding and removing items, holding and then dragging them to the trash. - Page 11 Touch to clear notifications. 2.2.1 stAtus icons Below are the status and notification icons you can expect to see. Drag down to NOTE: Installed apps may use their own unique notification icons. display notifications. Connected to mobile Speakerphone on network Touch a notification to Mobile network in use Vibrate mode...
-
Page 12: Search
2.2.2 notiFicAtion icons 2.3 seArch Search on your phone and on the web with the built-in Search function. New text or Call in progress multimedia message Problem with text Call in progress using a or multimedia Bluetooth headset message delivery New voicemail Missed call Upcoming event... -
Page 13: Securing Your Phone
2.3.1 seArch settings 2.4 securing Your Phone You can change the default Search settings. You can configure your phone to require a password, pin, or pattern in order to turn it on or wake it up. Securing your phone can help keep its To change Search settings: contents private. -
Page 14: Using The App Launcher
2.5 using the APP lAuncher 2.6 using the PlAY store Apps are small programs that add features to your phone. Many apps come Almost any app you can imagine is available for purchase (and often for free) preinstalled, and additional apps can be purchased in the Play Store. in the Play Store. -
Page 15: Onscreen Keyboard Basics
3 onscreen keYBoArd BAsics onscreen keYBoArd oPtions While using the onscreen keyboard, the following options are available. The onscreen keyboard lets you use your touchscreen to dial numbers, type Switch keyboard display Touch the ?123 key to enter numbers and emails, enter URLs, and more. -
Page 16: Swype Keyboard
To turn on suggestions and/or auto-complete: 3.2 sWYPe keYBoArd • From the Home Screen, press Settings Language & keyboard Swype(TM) is a powerful tool that lets you ‘swipe’ your finger across the Android Keyboard, then select Show Suggestions or Auto-complete. keyboard to spell out and enter words. -
Page 17: Making & Answering Calls
4 MAking & AnsWering cAlls 4.1 using the Phone tAB The Phone app’s Phone tab lets you make and manage calls. The Phone app allows you to make calls and easily store and find your contacts. To make a call: 1. -
Page 18: Working With Multiple Calls
The following actions are available while you are on a call. 4.1.1 Working With MultiPle cAlls To hold a call Touch Hold to hold or resume the current call. You can make another call while on a call. To mute a call Touch Mute to mute or unmute the call. -
Page 19: Answering & Rejecting Calls
The following options are available when on a conference call. 4.2 AnsWering & reJecting cAlls To drop a Touch Manage, then touch When you receive a call, you will see the following screen. participant To talk privately Touch Manage, then touch . -
Page 20: Using The Call Log Tab
4.3 using the cAll log tAB The following options are available from the call log. To see more details Touch an entry. The call log lists calls you have made, missed, and received. It also lets you call entries, send messages, and add caller information to contacts. To call the entry Touch To send a text... -
Page 21: Using The Contacts Tab
4.4 using the contActs tAB To communicate with contacts: • Touch the contact, then touch one of the following icons: The Contacts tab displays the contacts from your accounts along with any contacts you have added. Touch to call a contact. Touch to send a text message. -
Page 22: Import Contacts From Your Micro-Sim Card
2. Touch OK to confirm. TIP: Log into your Google account to manage your contacts online. Add, edit or remove contacts, and they’ll automatically sync to your phone. NOTE: Read-only contact information—such as that from an external app— will only be hidden, not deleted. To join contacts: 1. -
Page 23: Quick Contacts
4.6 Quick contActs 4.7 contAct settings You can fine-tune how contacts are displayed with the following settings. To set display options: • From the Contacts tab, touch Display Options. Only contacts with phones Display only contacts with phone numbers. Some applications let you use Quick Contacts to easily call, message, or otherwise communicate with a contact. -
Page 24: Using The Favorites Tab
4.8 using the FAVorites tAB The Favorites tab displays the contacts you communicate with most frequently. To use the Favorites tab: • From within the Phone app, touch the Favorites tab. To communicate with a favorite: • Touch the contact, then touch an icon, as described under Using the Contacts Tab. -
Page 25: Sending & Receiving Messages
5 sending & receiVing MessAges 5.1 sending MessAges The Message app allows you to send and receive text and multimedia messaging threads (groups of sent and received messages). To open the messaging app: • From the Home screen, touch To send a message: 1. -
Page 26: Managing Messages
To attach multimedia to a message: 5.2 MAnAging MessAges 1. Press Attach. To delete a messaging thread: 2. Select the desired type of attachment (for example, a music file or a • Open the messaging window, and touch and hold a messaging thread. Then captured picture), then follow the prompts to send the message. - Page 27 text MessAge (sMs) settings notiFicAtion settings Notifications Receive a notification whenever a new message Delivery reports Request a delivery report whenever you send a is received. text message. Select ringtone Select the ringtone that plays when you receive a Manage SIM card Open a window where you can work with message notification.
-
Page 28: Take Photos & Videos
6 tAke Photos & Videos Camera buttons and icons Once opened, the Camera app displays the following icons and buttons: The Camera app lets you take and share pictures and videos. Touch the to switch between camera and video To start the Camera app mode. -
Page 29: Change Picture & Video Settings
6.1 chAnge Picture & Video settings To optimize settings for Touch (second from the right) and select specific scenes from a list of common photographic subjects, You can use the Camera app’s settings to help capture the perfect photo. such as fireworks or the beach. The Camera app Most of these settings are available only on the back-facing camera. - Page 30 To change the white To change advanced The following advanced settings are available: Touch (fourth from the right) to either balance settings automatically or manually choose the correct • Touch to select the exposure time in ambient light setting (such as Daylight or seconds.
-
Page 31: View Your Pictures & Video
6.2 VieW Your Pictures & Video • Enable to correct the lighting in photos where the subject is standing in front of a Pictures and videos you take with the camera app are stored in the Gallery window or other brightly lit background. app, and can be previewed within the main camera screen. - Page 32 6.2.1 Work With A Photo or Video Share album(s) Select at least one album, then touch Share and select the application or device you wish After opening a photo or video, you can share it, delete it, and more. to use to share the album, such as Gmail to mail it.
-
Page 33: Browsing The Web
7 BroWsing the WeB To navigate the browser: • Press to move to the previous page. The browser application lets you surf the web on your Android phone. • Press Forward to move to the next page. To open the browser application: • Press Refresh to refresh a page. -
Page 34: Bookmarks, Most Visited & History
7.1 BookMArks, Most Visited & historY 7.3 set Your hoMe PAge You can bookmark frequently-visited sites, as well as viewing your bookmarks, Your home page opens when the browser is first launched, or when you open a history, and most-visited sites. new browser window. - Page 35 Clear cache Touch Clear Cache to delete cache files. NOTE: Browser stores text and images (a “cache”) from the websites you visit, in order to load them more quickly when you revisit the page. Accept cookies Uncheck to prevent sites from storing cookies on your phone.
-
Page 36: Playing Music
8 PlAYing Music To view music on your phone: • Touch one of the four tabs at the top of the screen to display artists, The Music app lets you listen to your music, see your music library, and albums, songs, or playlists. create and listen to playlists. -
Page 37: Working With Playlists
Remove songs from a playlist: To see the current playlist Touch 1. From the music library, touch the Playlist tab, then touch a playlist. To play your songs in Touch 2. Touch and hold a song, then touch Remove from Playlist. random order Rename or delete a playlist: To repeat a playlist or song... -
Page 38: Connections
9 connections NOTE: If the network is secured, enter the security information by touching Open (under Security) and selecting the type of network security which the network uses (for example, WEP or WPA). Then enter the requested security Your Android phone can connect to Wi-Fi networks, Bluetooth wireless information, such as a password. -
Page 39: Transfer Files Between Your Phone & Computer
To disconnect a Bluetooth wireless technology-enabled product: 9.3 trAnsFer Files BetWeen Your Phone & coMPuter 1. From the Home screen, press Settings Wireless & networks You can transfer files between your phone and your computer by connecting Bluetooth settings. your phone to your computer’s USB port. 2. -
Page 40: Connecting To Virtual Private Networks
NOTE: While your phone is connected to your computer, any applications To connect to a previously-added VPN that require access to your phone’s files (such as Gallery and Music) will 1. From the Home screen, press Settings Wireless & networks be unusable. - Page 41 9.5.1 shAre Your Phone’s dAtA connection ViA usB tethering 9.5.2 shAre Your Phone’s dAtA connection As A Wi-Fi hotsPot You can share your phone’s data connection with a single computer via the You can turn your phone into a Wi-Fi Hotspot to let other computers and USB port.
-
Page 42: Accounts
10 Accounts To remove an account from your phone: 1. From Accounts & sync, touch the account to remove. You can keep your phone synchronized with your Google, email, and corporate 2. Touch Remove Account. accounts, as well as synchronizing contacts with other applications. 3. -
Page 43: Email
11 eMAil NOTE: If you have more than one email account, you will be able to work with an account’s inbox or a combined inbox. This is described under Working with the Accounts screen. The Email app allows you to access your web-based email (such as Yahoo or TIP: To work with multiple messages in your inbox, touch the checkbox next to Hotmail) and your corporate accounts (using Microsoft Exchange). - Page 44 To read a message: To star a message Touch • Touch a message to open it. To open next or Touch at the top of the screen. previous message To send a message: 1. Press Compose. 2. Enter the recipient, subject, and message text. 3.
-
Page 45: Working With Accounts
11.1 Working With Accounts touch a folder to open it. If you have more than one Email account, you can switch between inboxes NOTE: Only folders containing messages are displayed. using the Accounts screen. 11.1.1 Account settings NOTE: Adding and removing accounts is described in Accounts. To change an account’s settings: To open the Accounts screen: • From the Accounts screen, touch and hold the account whose settings you... -
Page 46: Calendar
12 cAlendAr 12.1 VieWing Your eVents The Calendar has four views: The Calendar app lets you create and manage events, meetings and • Agenda: Lists an agenda of your events in chronological order. appointments. By default, your Calendar app automatically synchronizes with any Google or Microsoft Exchange accounts you’ve added to your phone. -
Page 47: Storing & Displaying Calendars
To create an event: 1. In any of the calendar views, press More New Event. ALTERNATE: In Day, Week, or Month view, touch and hold a spot on the calendar, then touch New Event. 2. Specify the event name and time. Enter any details, such as guest emails to invite to the event or a reminder you want to set. -
Page 48: Changing Calendar Settings
12.3 chAnging cAlendAr settings To change calendar settings: • Press More Settings. You can change any of the following settings: Hide declined Don’t show events which you have declined to attend. events Use home When travelling, continue to show events in your home time zone time zone rather than the local time zone. -
Page 49: Gmail
13 gMAil To view account folders: • Touch the name of the currently-opened folder (in the upper right corner of You can create a Gmail account for your phone, or sync your phone with your the screen), then touch a folder to open it. existing Gmail account. -
Page 50: Gmail Settings
To send a message 1. From the inbox, Press Compose. 2. Enter the recipient, subject, and message text. 3. Touch Send to send the message. TIP: Touch Discard to discard the to save the draft, or touch draft. TIP: Add an attachment (such as a picture) to a message by pressing Attach and selecting an attachment. -
Page 51: Other Phone Functions
14 other Phone Functions TIP: You can uncheck the selected checkboxes by touching Clear Selection. To cancel downloads: Your phone has several other functions, including downloads, navigation, and automatic updates. • Press Cancel All Downloads. 14.1 uPdAting soFtWAre 14.3 MAnAging APPlicAtions As updated versions of your phone’s software become available, you can The Manage Applications screen lets you see and manage your installed download them directly onto your phone. -
Page 52: Clock
2. Touch the application you want to stop. 14.4 clock 3. Touch Force Stop. The Clock app displays the time and allows you to set alarms. Important. Forcibly stopping an application may cause temporary errors on your To open the Clock app: phone, and require you to restart your phone to restore full functionality. -
Page 53: Calculator
14.5 cAlculAtor 14.5.1 MAPs The calculator app lets you use your phone as a calculator. Google Maps lets you find any location using your phone. To use the calculator app To use Google Maps 1. Touch in the App Launcher. • Touch , then touch You can use the touchscreen to enter numbers, perform operations,... - Page 54 14.5.2 nAV Google Nav turns your phone into a GPS navigation device. To use Google Nav 1. Touch in the App Launcher. 2. Enter an address. 3. Touch TIP: Select a contact or starred place to quickly navigate to a favorite location. 14.0 other Phone Functions PAge : 54...
-
Page 55: Changing Phone Settings
15 chAnging Phone settings 15.1 Wireless & netWorks settings The Wireless & networks section configures your phone’s connections, such as The settings window displays all of the settings that effect how your phone Wi-Fi and Bluetooth wireless technology. looks and works. Airplane mode Disable all wireless connections, including To open the settings window:... - Page 56 Bluetooth settings Configure your Bluetooth connection with the Touch to enable Near Field Communications, which following settings. allows you to exchange information with other nearby smartphones and similar devices. • Device name. Give your phone a custom device name, visible on some Bluetooth wireless NFC settings Configure your NFC with the following setting: technology-enabled products.
-
Page 57: Call Settings
15.2 cAll settings 15.3 sound settings Call settings let you configure features related to making calls, such as call Sound settings let you configure your phone’s sounds. forwarding and voicemail. Silent mode Silence all sounds except media (such as videos and music) and alarms. -
Page 58: Display Settings
15.4 disPlAY settings 15.6 APPlicAtions settings The Display settings configure your phone’s screen, such as its brightness The Applications settings screen lets you view and configure the applications or rotation. installed on your phone. Brightness Adjust the screen’s brightness automatically, or Unknown sources Permit installing applications from locations other select the desired brightness. -
Page 59: Accounts & Sync Settings
15.7 Accounts & sYnc settings 15.8 PriVAcY settings The Accounts & Sync settings screen lets you add, remove, and manage your Use the Privacy settings to manage your personal information. accounts (including Google and Microsoft Exchange accounts). For more information on working with accounts and synchronizing data, see Accounts. Back up my data Back up some of your personal data to Google servers. -
Page 60: Language & Keyboard Settings
15.10 lAnguAge & keYBoArd settings 15.12 dAte & tiMe settings The Language & keyboard settings let you set the default language for your The Date & time settings screen lets you configure how the date and time phone, and configure how your Onscreen Keyboard displays and functions. For are displayed on your phone. -
Page 61: Troubleshooting
16 trouBleshooting The device beeps and the battery icon flashes: • Your battery is low. Recharge or replace the battery to continue using the Use the following tips to troubleshoot any issues on your phone. device. Outgoing calls are not connected: Phone doesn’t respond: • Ensure that you have touched [phone icon] to dial the number. - Page 62 The Bluetooth® word mark and logos are registered trademarks owned by Bluetooth SIG, Inc. and any use of such marks by Intel is under license. * Other names and brands may be claimed as the property of others. For more information, see the User Guide at www.xolo.in.
- Page 63 P/N: XXXXXX-001...
Need help?
Do you have a question about the Xolo X900 and is the answer not in the manual?
Questions and answers