Table of Contents
Advertisement
Quick Links
Digital Still Camera
Thank you for your purchase. For the correct usage of this product,
please read this User's Manual and warranty card carefully and
keep them in a safe place for future reference.
Before accepting the warranty card, please make sure that the
date of purchase and the dealer's details have been completed.
User Manual
Advertisement
Table of Contents

Subscribe to Our Youtube Channel
Related Manuals for Konica Minolta KD-25


Summary of Contents for Konica Minolta KD-25
-
Page 1: User Manual
Digital Still Camera Thank you for your purchase. For the correct usage of this product, please read this User's Manual and warranty card carefully and keep them in a safe place for future reference. Before accepting the warranty card, please make sure that the date of purchase and the dealer's details have been completed. -
Page 2: Table Of Contents
Table Of Contents Getting Started ---------------------------------------------------------4 Important Safety Precautions ------------------------------------- 5-9 Introduction--------------------------------------------------------10-14 Accessories Included ---------------------------------------------------10 External View -----------------------------------------------------------11 Mode Dial (Working Modes) ------------------------------------------- 12 Focus Range ------------------------------------------------------------ 12 TFT LCD Monitor Icon Definition ------------------------------------- 13 Icon Index --------------------------------------------------------------- 14 Preparation For Taking Pictures ------------------------------- 15 -18 How To Switch On Or Off The Camera -------------------------------- 15 Loading The Batteries ------------------------------------------------- 15 Using An AC Adapter (Optional)--------------------------------------- 17... -
Page 3: Getting Started
Getting Started Please be sure to read this manual before use. Test shooting Be sure to take some test shots before taking important pictures (such as business or weddings) to make sure that the camera is working properly. Results are not guaranteed In the unlikely event that a problem arises in shooting or reproducing pictures due to the camera or memory card used, please understand that no compensation can be made. - Page 4 Important Safety Precautions Warning Should any of the following occur, stop using the product immediately. Remove the batteries from the unit and disconnect the AC adapter. If using the AC adapter, disconnect the power plug from the wall outlet. Consult the dealer from whom you bought the product for further assistance.
- Page 5 Important Safety Precautions Caution When taking a picture, wipe off the flash surface and be careful not to cover the flash. If the flash surface is dirty or you take a shot with the flash covered, it is possible for the flash surface quality or color to change, due to the high temperature of the flash.
-
Page 6: Introduction
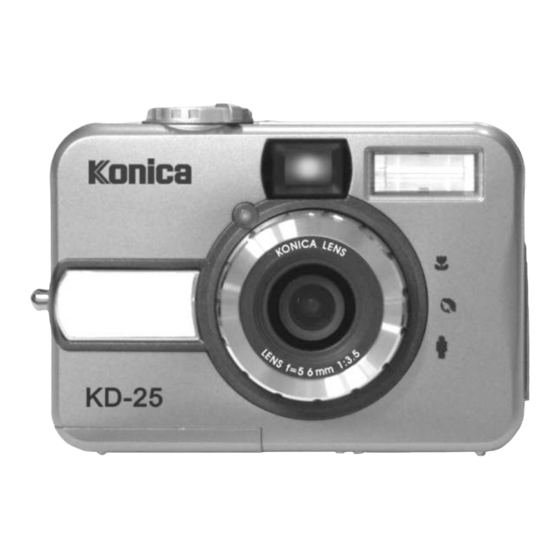
Introduction Accessories Included Safety Notes Digital Camera Camera Driver & Ulead Software & User Manual Camera Pouch Wrist Strap Quick Start Guide USB Cable Introduction 2 x AA Batteries Front Quick Start Guide Bottom Safety Notes External View Shutter Button... -
Page 7: Mode Dial (Working Modes)
Introduction Back Power Switch View Finder Indicator TFT LCD Monitor Up ( Down ( Left ( Right ( TFT LCD Button Mode Dial Shooting Mode Playback Mode Movie Clip Mode Setup Mode Focus Range Macro : 0.18m~0.25m Portrait : 0.8m~1.3m Normal : 1.3m~infinity Introduction... -
Page 8: Icon Index
Introduction Safety Notes Icon Index Working Mode Focus Range Flash Modes Digital Zoom Thumbnails Self-timer Movie Clip Memory Card Inside Battery Status Image Size (Resolution) Image Quality White Balance AUTO Exposure Protected Image Print (DPOF) Preparation For Taking Pictures How to Switch On Or Off The Camera Safety Notes To switch on the camera, slide the Power Switch to the side and hold it for 1 second. -
Page 9: Using An Ac Adapter (Optional)
Preparation For Taking Pictures Note Do not change the battery with wet hands, as there is a danger of electric shock. 2. Warning When you continue using the camera for a long time, the batteries become hot. Contact with the batteries can lead to burns. -
Page 10: Inserting An Sd Card
Preparation For Taking Pictures Inserting An SD Card 1. Switch off the camera. 2. Open the Battery / Memory Card Cover. 3. Insert the SD card into the card slot and press it down until you hear a click sound. 4. -
Page 11: Setting Up Functions Before Taking Pictures
Preparation For Taking Pictures Important In the event of malfunction or damage, it is possible that data may be lost. Konica can not accept responsibility in any way for such data loss. Always back-up important data. When using SD Memory Cards on a PC, do not change the attributes(read-only, etc.) of the files (image data) on the card. -
Page 12: Setting Up Self-Timer
Setting Up Functions Before Taking Pictures Setting Up Self-timer (Preset : off) To activate the self-timer or cancel the self-timer, press Up ( Direction Button. Self-timer will be activated when the Shutter Button is pressed. This function can delay the shutter from release for 10 seconds. -
Page 13: Setting Up White Balance
Setting Up Functions Before Taking Pictures Setting Up White Balance (Preset : Auto White Balance) Please set the Mode Dial at Shooting Mode Button to enter "Still Image" menu table. 1. Select "White Balance" 2. Five modes can be selected as follows: Auto White Balance: The camera will adjust the white AUTO balance by itself. -
Page 14: Printing Out An Image With A Printer Without Going Through
Setting Up Functions Before Taking Pictures Setting An Image At Protect Status (Preset : Unlock) To set an image at protect status can prevent the selected image from being erasing. 1. Select "Protect". 2. Select "Lock" to protect the selected image. 3. -
Page 15: Setting Up Beep Sound
Setting Up Functions Before Taking Pictures Safety Notes Setting Up Beep Sound (Preset : On) Please set the Mode Dial at Set Up Mode 1. Select "Beep". 2. Press Right Direction Button 3. Select "On" to activate the beep sound or select "No" to disable the beep sound. -
Page 16: Taking Pictures
Taking Pictures 1. Switch on the power by sliding the Power Switch to the side, Safety Notes holding it for 1 second, and letting it go. 2. Set the Mode Dial at Shooting Mode for still image capture or Movie Clip Mode for videos. -
Page 17: Playing A Recorded Movie Clip
Playback / Erasing Playing A Recorded Movie Clip Please set the Mode Dial at Playback Mode and Down Direction Buttons to select a movie clip. Select a recorded movie clip. Press Right Direction Button to play the movie clip. Note You can press Right Direction Button to pause the playing and press Right Direction Button... - Page 18 Installing Camera Driver 3. A welcome window appears and please click "Next" to got to next step. 4. The computer will start the installation. 5. Click "Finish" to start the installation of DirectX8.1 . Installing Camera Driver 6. Click "Yes" to proceed the installation of DirectX8.1. 7.
-
Page 19: Under Microsoft Windows 2000
Installing Camera Driver 9. Please click "OK" to restart the PC. Installing Camera Driver Under Microsoft Windows 2000 1. Turn on the computer. 2. Insert the CD into the CD-ROM Drive. If the PC is set to auto run the program, simply click "Driver" to start the installation. - Page 20 Installing Camera Driver 3. Click "OK" to proceed the installation of DirectX8.1. 4. A license agreement appears and please read the content of the agreement. If you accept the terms of the license agreement, click "Yes" to go the next step. Or you can click "No" to cancel the installation of Ulead Explorer 7.0 SE Platinum 5.
-
Page 21: Under Microsoft Windows Me / Xp
Installing Camera Driver Under Microsoft Windows ME / XP Windows ME and Windows XP do not need to install this driver. Please skip the driver installation and go to page 33 for installation of Ulead Photo Explorer or go to page 52 to download the stored image(s) onto the PC. -
Page 22: Installing Ulead Photo Explorer
Installing Ulead Photo Explorer Under Windows Operating System (Windows 98/98SE/2000/ME/XP) 1. Insert the CD into the CD-ROM Drive. 2. Click "Photo Explorer 7.0 SE Platinum" . 3. Click "Install Ulead Photo Explorer 7.0 SE Platinum" . Installing Ulead Photo Explorer Choose operating language. - Page 23 Installing Ulead Photo Explorer 6. A window of license agreement appears and please read the content and click "Yes" to go to next step if you accept the terms of the agreement. Or you can click "No" to cancel the installation of Ulead Explorer 7.0 SE Platinum.
- Page 24 Installing Ulead Photo Explorer 10. The computer will add a new program folder named "Ulead Photo Explorer 7.0 SE Platinum" . Click "Next" to go to next step. 11. Set up the default TV system. Please select the country you are in.
-
Page 25: Under Macintosh Operating System (Mac 9.X Or Later)
Installing Ulead Photo Explorer 14. If the operating system you are using is Windows 98, 98SE or ME, you'll have to restart the computer to complete the installation of Ulead Photo Exlorer 7.0 SE Platinum. It is suggested to restart the computer now. Click "Finish" to complete the installation and restart the computer. - Page 26 Installing Ulead Photo Explorer 4. Choose "Ulead Photo Explorer" and copy this file to the desktop. 5. Click on the newly created "Ulead Photo Explorer" icon on the desktop and double click on "Photo Explorer" folder to start Ulead Photo Explorer. Installing Ulead Photo Explorer If a warning window shows please visit Apple's official web-site http://kbase.info.apple.com...
-
Page 27: About Ulead Photo Explorer
About Ulead Photo Explorer Photo Explorer Software license The software described in this document is furnished under a License Agreement which is included with the product. This Agreement specifies the permitted and prohibited uses of the product. Licenses and trademarks ICI Library 1991-1992 C-Cube Microsystems. - Page 28 About Ulead Photo Explorer The Browser Just like Windows Explorer, Photo Explorer's Browser shows the hierarchy of drives and folders in your computer at the left hand side and displays the files in a selected folder at the right. What's special about Photo Explorer's Browser is that multimedia files can be shown as visual thumbnails for easier identification.
- Page 29 About Ulead Photo Explorer Z o o m i n Z o o m o u t Or igina l s i z e F i t t o s c re e n R o t a t e l e ft P r e v i e w Pa n e I n v e r t R o t a t e r ig h t...
- Page 30 About Ulead Photo Explorer The Viewer Photo Explorer has a built-in Viewer integrated with the Browser. You can use the built-in Viewer to: Get a full-size or full-screen view of images. Navigate through images using the keyboard, toolbar buttons, or menu commands, or let Viewer automatically step through the images.
-
Page 31: Downloading The Image(S) Onto Your Pc
About Ulead Photo Explorer Using the Ulead Photo Explorer Viewer: Area Icon Function Describe Function Open E xplorer Open Print Image First image Previous Next Last image Main Toolbar Zoom In Zoom Out Fit to screen Origin al size Auto Advance Full Screen Properties Downloading Image(s) Onto Your PC... -
Page 32: Downloading Image(S) Through Ulead Photo Explorer
Downloading Image(s) Onto Your PC Downloading Image(s) Through Ulead Photo Explorer 1. Connect the camera to the PC with USB cable under any working mode. Please make sure the USB cable is well connected to the PC and camera. 2. Start Ulead Photo Explorer 7.0 SE Platinum . 3. -
Page 33: Downloading Image(S) Through Ulead Photo Explorer
Downloading Image(s) Onto Your PC Downloading Image(s) Through Ulead Photo Explorer 1. Connect the camera to the PC with USB cable under any working mode. Please make sure the USB cable is well connected to the PC and camera. 2. Start Ulead Photo Explorer 7.0 SE Platinum . 3. -
Page 34: Specifications
Kodak Co., Ltd., Fuji Photo Film Co., Ltd., and Matsushita Electric Industrial Co., Ltd. is a standard for recording specified information such as the images or quantity to print from the images taken by a digital camera on a recording medium. -
Page 35: Warranty And After-Sales Service
Specifications System Requirments CPU:better than MMX Pentium 233MHz For Windows XP : Pentium II 300MHz Windows 98/98SE/2000/ME/XP Minimum 32MB RAM (XP: 128MB) 110MB of available hard-disk space USB port , CD-ROM drive 800x600 pixels,16-bit color display compatible monitor (24-bit color display recommended) Power Mac G3 or later For Macintosh Mac OS 9.X or... -
Page 36: Canada Only
Warranty and After-sales Service FCC Compliance Statement: Declaration of Conformity Responsible party: KONICA PHOTO IMAGING Address: 725 Darlington Avenue Mahwah, NJ 07430, U.S.A. Telephone number: (201) 574-4000 This device complies with Part 15 of the FCC Rules. Operation is subject to the following two conditions: (1) this device may not cause harmful interference and (2) this device must accept any interference received, including interference that...
Need help?
Do you have a question about the KD-25 and is the answer not in the manual?
Questions and answers