Table of Contents
Advertisement
Digital Still Camera
User's Guide
Thank you for your purchase. For the correct usage of this product,
please read this User's Manual and warranty card carefully and
keep them in a safe place for future reference.
Before accepting the warranty card, please make sure that the
date of purchase and the dealer's details have been completed.
Advertisement
Table of Contents

Related Manuals for Konica Minolta Digital Revio KD-400Z


Summary of Contents for Konica Minolta Digital Revio KD-400Z
- Page 1 Digital Still Camera User’s Guide Thank you for your purchase. For the correct usage of this product, please read this User’s Manual and warranty card carefully and keep them in a safe place for future reference. Before accepting the warranty card, please make sure that the date of purchase and the dealer’s details have been completed.
-
Page 2: Getting Started
Getting Started Please be sure to read this manual before use. • Test shooting Do be sure to take some test shots before taking important pictures (such as business or weddings) to make sure that the camera is working properly. •... -
Page 3: Table Of Contents
Contents Important Safety Precautions ..........6 Preparation Necessary Accessories ............11 Names of Parts ..............14 Camera Body ............... 14 Operation Buttons ............... 16 Attaching the Strap ............... 17 Preparing the Power Supply ..........18 Charging the (supplied) Battery Pack ......... 18 Installing the (supplied) Battery Pack ......... - Page 4 Contents (Cont’d) Selecting the Image Size ............ 42 Shooting Movies ..............44 Adjusting the Brightness of the LCD Monitor ..... 46 Selecting the Set-up Menu ..........47 Setting with the REC (DETAILS) Menu ......48 Returning to Default Settings ..........49 Selecting a Combination of Image Sizes and Compression Ratios .............
- Page 5 Contents (Cont’d) Using the After Recording Function ........88 Selecting the Set-up Menu ..........88 Advanced Operations Using the Set-up Menu ............89 Formatting a Memory Card ..........90 REC Menu Settings ............. 91 Quick View Settings ............. 91 Make so the Image Information is not displayed ....92 Setting the Operation Sounds ..........
-
Page 6: Important Safety Precautions
Important Safety Precautions This product has been designed with safety in mind; however, please read the following display marks, warnings and cautions for its correct usage. The following warning and caution symbols are to prevent damage to the user, other persons and property. Definitions of the symbols The following categories explain the degree of danger or damage that may occur if the displayed content is not... - Page 7 Important Safety Precautions (Cont’d) Warning Should any of the following occur, stop using the product immediately. Remove the batteries from the unit and disconnect the AC adapter. If using the AC adapter, disconnect the power plug from the wall outlet. Consult the dealer from whom you bought the product for further assistance.
- Page 8 Important Safety Precautions (Cont’d) Warning Do not directly look at the sun through the viewfinder. Loss of or impaired eyesight may result. Do not touch the metal parts on the camera during thunder and lighting. Death may occur if lighting strikes the camera. Do not use AC adapters other than those specified.
- Page 9 Important Safety Precautions (Cont’d) Caution When taking a picture, wipe off the flash surface and be careful not to cover the flash. If the flash surface is dirty or you take a shot with the flash covered, it is possible for the flash surface quality or color to change, due to the high temperature of the flash.
- Page 10 Important Safety Precautions (Cont’d) Caution Remove the batteries when the camera will not be used for an extended period. Do not use force when operating the camera. The camera may become damaged, causing personal injury as a result. Do not rotate the camera when mounting on a tripod. About battery fluid leakage •...
-
Page 11: Necessary Accessories
Necessary Accessories Checking the Packing Contents The following accessories should be packed with your new camera; please make sure all are enclosed after opening the packaging. In the unlikely event that something is missing, please contact the sales outlet. × 1 1) Lithium-ion battery (Model No. - Page 12 Necessary Accessories (Cont’d) Compatible Recording Media This camera comes with 2 MB of memory installed, but if you would like to use additional memory, the following cards are compatible: • SD Memory Card • MultiMedia Card • Memory Stick About the SD Memory Card/Multi-Media Card/Memory Stick Caution SD Memory Cards, Multi-Media Cards and Memory Stick are...
- Page 13 (Cont’d) Important • In the event of malfunction or damage, it is possible that data may be lost. However, Konica can not accept responsibility in any way for such data loss. • Always back-up important data. • When using SD Memory Cards/Multi-Media Cards/Memory Stick on a PC, do not change the attributes(read-only, etc.) of the files (image...
-
Page 14: Names Of Parts
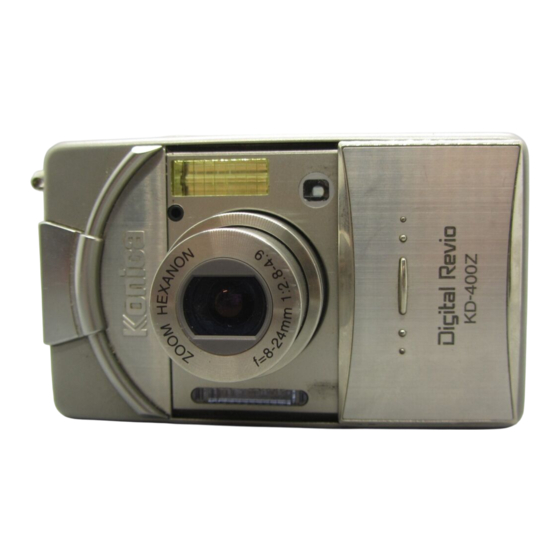
Names of Parts Camera Body Microphone Flash Shutter Button Viewfinder Light Window Sensor Lens Cover (Main Strap Holder Switch) USB Terminal Cover Lens Self-timer LED... - Page 15 Names of Parts (Cont’d) Viewfinder Eyepiece Delete Button (→ P.16) Green LED Display Button (→ P.16) Red LED Zoom Buttons Play Button(→ P.16) (→ P.16) Speaker LCD Monitor 4-way Button )(→ P.16) Battery Sub-cap Tripod Socket Battery/Card Cover Menu/Set Button (→ P.16)
-
Page 16: Operation Buttons
Names of Parts (Cont’d) Operation Buttons LCD Monitor q Play Button ( Use this button for playing back images, or setting up the play menu. This button can be used whether the camera’s power is ON or OFF (p.23). w Display Button For turning the LCD monitor on and off. -
Page 17: Attaching The Strap
Attaching the Strap 1. Push the loop on the small end of the strap through the strap holder. 2. Pass the other end of the strap through the loop that is sticking out from the strap holder. Warning: When using the camera with the strap attached, take care so that it does not wrap around the neck. -
Page 18: Preparing The Power Supply
Preparing the Power Supply Charging the (supplied) Battery Pack - Charge the battery pack before you use it for the first time and when the LCD monitor indicates, “BATTERY ERROR”. Charging display LED to an outlet 1. Connect the power cord to the charger. 2. -
Page 19: Installing The (Supplied) Battery Pack
Preparing the Power Supply (Cont’d) Installing the (supplied) Battery Pack - Before installing or changing battery packs, make sure the power is OFF (p.23), check that the LCD monitor is not lit and turn off all switches. 1. Open the battery/card cover by sliding it in the direction of the arrow. - Page 20 Preparing the Power Supply (Cont’d) Battery life guide (reference) Number of Pictures Continuous Playback Time With LCD Monitor On With LCD Monitor Off About 100 About 200 About 90 Minutes * Our test conditions: Normal humidity and temperature, flash intensity 50%, shot every 20 sec.
- Page 21 Preparing the Power Supply (Cont’d) Please co-operate in recycling the lithium battery. • This product uses a lithium battery. • This battery is recyclable and a valuable resource. • For recycling exhausted batteries or batteries removed from a used product, as a precaution against a short circuit, that could result in smoke or fire, please tape the terminals to insulate them or put them in a plastic bag and take them to a retailer participating in a recycling program, where you can...
-
Page 22: Connecting The Ac Adapter (Sold Separately)
Preparing the Power Supply (Cont’d) Connecting the AC Adapter (sold separately) - If you do not want to worry about battery consumption, we recommend using the specified AC adapter (sold separately, model#DR-AC4) when shooting pictures, during playback, or when transferring data (USB connection). - Only use the AC adapter (sold separately) specified for your camera as use of any other device may result in a breakdown, fire or electrical shock. -
Page 23: Turning The Power On/Off
Turning the Power ON/OFF 1. Gently slide the lens cover (main switch) in the direction indicated by the arrow until it stops. 2. Once the lens extends to the shooting position (wide-angle side), the power will come on. • With the power on it is possible to shoot pictures. Also, the LCD display will be lit. -
Page 24: Setting The Menu Language/Date And Time
Setting the Menu Language/Date and Time - The first time that you use your camera, a screen will automatically appear and prompt you to set the time, date and language. To make those settings, please follow the steps below. - You can select from among four languages, Japanese, English, French, and German. - Page 25 Setting the Menu Language/Date and Time (Cont’d) 4. (1) Once the “YEAR” has been adjusted, press to move to the “MONTH” setting mode. (2) Use to adjust the month in the same way as Step 3 on page 24. • By repeating procedures (1) and (2) above, adjust the date-and-time setting, and set the date format.
-
Page 26: Inserting/Removing Cards
Inserting/Removing Cards - 2 MB of memory are built into this camera as recording media for image data, and other information, such as date and time, so even without a card inserted, the camera can record in an emergency. If you wish to use an aftermarket card, any of the following are appropriate: SD Memory Card, Multi-Media Card, Memory Stick. - Page 27 Inserting/Removing Cards (Cont’d) Card Removal 1. Open the battery/card cover. 2. If you gently push in on the card, the lock will release and the card will come out a little. Then carefully draw the card out. 3. Again, close the battery/card cover. Warning! Insert or remove cards only after making sure that absolutely all power is OFF as indicated by the viewfinder LED being off.
-
Page 28: Basic Operation
Basic Operation Taking Pictures Holding Your Camera - Hold the camera securely with both hands and your elbows against your body for a stable position. - To take a vertical picture, hold the camera so that the flash is at the top. Please be careful that your fingers, hair, or the strap do not cover the lens, flash, or the light sensor. - Page 29 Taking Pictures (Cont’d) Viewfinder LED Indicators When the LED Indicators light, they mean the following: • Green LED: (On) Camera ready to shoot (Flashing) Warning that the camera cannot auto-focus (AF) • Red LED: (On) Flash charging, Formatting the card (Flashing) Warning that your hands are shaking •...
-
Page 30: Taking Pictures Using The Viewfinder
Taking Pictures (Cont’d) Taking Pictures using the Viewfinder 1. Opening the lens cover turns ON the power. When the power comes ON, the LCD monitor will be on. If you will be using the viewfinder, to conserve your battery, press the DISPLAY button and the LCD monitor will turn off. - Page 31 Taking Pictures (Cont’d) 4. Take a picture by pressing the shutter button further. When it makes a sound, the shot has been taken, and the image will be recorded on the card (or built-in memory). • The beep will not sound if the beeper setting is turned off (p.93).
- Page 32 Taking Pictures (Cont’d) When you press the shutter halfway and the green LED flashes… This may suggest that the focusing on the subject is difficult, and/or the subject is too dark. Should this be the case, please take the following steps. •...
-
Page 33: Shooting With Focus Lock
Taking Pictures (Cont’d) Shooting with Focus Lock - If the subject you wish to focus on is not in the center of the screen, use the focus lock mode. 1. Align the auto focus mark on the subject, and push the shutter button half-way. The green LED light will come on, locking the focus position. -
Page 34: Taking Pictures Using The Lcd Monitor
Taking Pictures (Cont’d) Taking Pictures using the LCD Monitor - You can take a picture while looking at the LCD monitor as through the viewfinder. - Using the LCD monitor consumes battery power at a high rate, so it is recommended to have a spare charged battery on hand (sold separately, model # DR-LB4), or to use the AC adapter (sold separately, model # DR- AC4). -
Page 35: Image Display
Taking Pictures (Cont’d) Image Display Shooting with the LCD monitor displays the picture and the following other information: • You can set the camera so information is not displayed (p.92). q Recording Media Display r Battery Remaining Display This shows the media type. If the batter y is being used, the •... - Page 36 Taking Pictures (Cont’d) About Auto Power Off Function If you do not operate for a certain period of time with the camera power on and the lens cover open, the auto power off function (pause status) will be activated and power will be turned off (with the lens still out). By pressing the shutter button, zoom button, or another button, the camera will return to the shooting mode.
-
Page 37: Selecting The Shooting Mode
Selecting the Shooting Mode - Selecting different shooting modes enables you to create the best shooting condition for your subject. - Once a mode is set (apart from the self-timer), you can shoot continuously. It is recommended that the mode should be returned to AUTO mode (no display) after shooting. -
Page 38: Auto (Auto Flash)
Selecting the Shooting Mode (Cont’d) Switching the Flash Mode AUTO (Auto Flash) - This is the normal mode. When the camera is turned ON, it is set at Auto (Auto Flash). No symbol will be displayed on the LCD monitor. - The flash will operate automatically when it is dark. -
Page 39: Fill-In
Selecting the Shooting Mode (Cont’d) Fill-In - Use this mode when a shadow falls on the subject’s face due to shade or artificial lighting, or when taking a picture against the light. - Regardless of the brightness of the surroundings, the flash will always comes on. -
Page 40: Macro-Photo Mode
Selecting the Shooting Mode (Cont’d) Shooting Close Up/Long Range Macro-photo Mode - Use this mode when you want to be close to the subject. - If the distance between the camera and the subject is close, there will be a difference between the image in the viewfinder and the picture that is actually taken. -
Page 41: Advanced Shooting
Advanced Shooting Using the REC Menu - By using the REC menu, you can take pictures with your desired settings. You can set the camera using the “REC (BASIC) menu” (default setting), or “REC (DETAILS)” (p.48). - The settings made with each menu will be maintained, even when power is turned off, until the settings are changed, unless otherwise described. -
Page 42: Selecting The Image Size
Using the REC Menu (Cont’d) Selecting the Image Size - You can select from among three image sizes. - All on the same card, you can choose a different image size for every picture. Every time you change the image size, the number of remaining photos also changes, which is displayed on the LCD monitor. - Page 43 Using the REC Menu (Cont’d) Image size and pixel count (width) × (height) 1) 2304 × 1704 pixels (approximately 3,920,000 pixels) This is the highest quality image. Use this mode for important pictures you want to keep, for images you want to edit on your computer, etc. As it is the largest, it is also ideal for printing out your enlarged photos.
-
Page 44: Shooting Movies
Using the REC Menu (Cont’d) Shooting Movies - Set your camera to this mode to shoot movies. - You can take a movie with sound for approximately 15 seconds. Your camera records an image with a 320 × 240 pixel count. - While you are shooting a movie, the LCD monitor stay on. - Page 45 Using the REC Menu (Cont’d) 4. When you press the shutter button, your movie will start recording. You can record for about 15 seconds. • You need not hold the shutter button down. • When the remaining time runs out, the camera stops recording automatically.
-
Page 46: Adjusting The Brightness Of The Lcd Monitor
Using the REC Menu (Cont’d) Adjusting the Brightness of the LCD Monitor - You can adjust the brightness of the LCD Monitor to suit your shooting location. 1. Select “MONITOR” and press 2. The through image mode is entered and on the bottom of the screen the brightness adjustment bar appears. -
Page 47: Selecting The Set-Up Menu
Using the REC Menu (Cont’d) Selecting the Set-up Menu - By setting each item on the set-up menu to your preferences, you can customize your camera to suit you. 1. Select “SETUP” and press 2. You will enter the SET UP Menu mode. For details, see “Using the Set-up Menu”... -
Page 48: Setting With The Rec (Details) Menu
Using the REC Menu (Cont’d) Setting with the REC (DETAILS) Menu - If you set your camera to REC (DETAILS) menu mode in advance, you can make most of the menu settings. See page 91 for how to make mode settings. -
Page 49: Returning To Default Settings
Using the REC Menu (Cont’d) Returning to Default Settings - You can easily change all the settings you made in the REC menu back to their initial settings. 1. Select “RESET” and press 2. A confirmation screen will appear. To change settings back, use to select “YES”... -
Page 50: Selecting A Combination Of Image Sizes And Compression Ratios
Using the REC Menu (Cont’d) Selecting a Combination of Image Sizes and Compression Ratios - You can select a combination of three image sizes and two compression ratios. - While using the same card, you can change the picture quality settings for every photo.
Need help?
Do you have a question about the Digital Revio KD-400Z and is the answer not in the manual?
Questions and answers