Advertisement
Quick Links
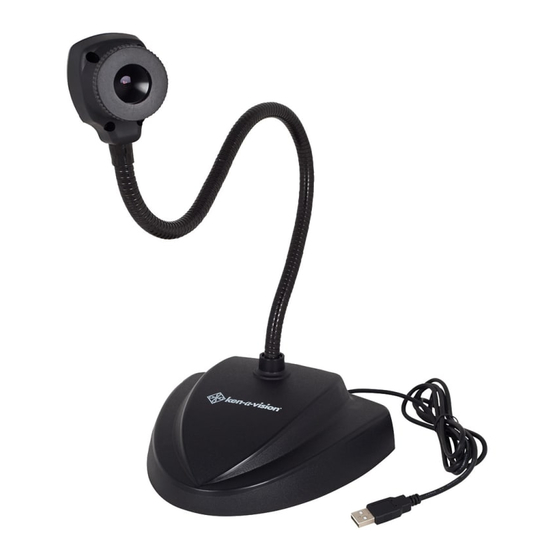
Ken-A-Vision
1
Ken-A-Vision Doc Cam
Task Training Manual
This material was developed for the exclusive use of USD 233 staff. Copies can be made for instructional purposes in
USD 233 only. Further reproduction or distribution is prohibited without written permission from USD 233.
Advertisement

Related Manuals for Ken A Vision Doc Cam


Summary of Contents for Ken A Vision Doc Cam
- Page 1 Ken-A-Vision Ken-A-Vision Doc Cam Task Training Manual This material was developed for the exclusive use of USD 233 staff. Copies can be made for instructional purposes in USD 233 only. Further reproduction or distribution is prohibited without written permission from USD 233.
- Page 2 Ken-A-Vision Table of Contents Task 1 (Creating a Default Folder)……………...pgs 3-6 Task 2 (Live Video Mode)…………………….pgs 7-9 Task 3 (Capture and Save Images)…………….pgs 10-13 Task 4 (Modify Images from Gallery)…………...pgs 14-18 Task 5 (Capture Video)………………………pgs 19-22 Task 6 (Timelapse Video)……………………..pgs 23-25 Task 7 (Timelapse Photos)…………………..pgs 26-29...
- Page 3 Ken-A-Vision Ken-A-Vision Tasks (Try to complete the tasks in each section of this manual) Task 1: Create a Default Folder for Images and Videos 1. Create a default folder to house your pictures and videos Browse to your h Browse to your h- - - -...
- Page 4 Ken-A-Vision 3. Close h- drive Select the X to Select the X to Select the X to Select the X to close out of h close out of h- - - - drive close out of h close out of h...
- Page 5 Ken-A-Vision 6. Browse to h-drive Select default Select default Select default Select default gallery folder gallery folder gallery folder gallery folder b b b b utton utton utton utton 7. Select h- drive Highlight d Highlight d Highlight d Highlight drive...
- Page 6 Ken-A-Vision 9. Set default path Your default gallery Your default gallery Your Your default gallery default gallery folder is s folder is set et et et, , , , folder is s folder is s Select OK K K K...
- Page 7 Note: Click Clicking ing ing ing the Note: Note: Click Click the the Doc Cam Icon Doc Cam Icon Doc Cam Icon Doc Cam Icon will will will will return you to return you to live return you to return you to...
- Page 8 Ken-A-Vision 3. In Live video mode go to full screen view Select tools icon Select tools icon Select tools Select tools icon icon and the vid the vid the vid the video eo eo eo window will appear. window will appear.
- Page 9 Ken-A-Vision 5. Congrats! You have completed task 2!☺ ☺ ☺ ☺...
- Page 10 Ken-A-Vision Task 3: Using Camera to Capture and Save Images 1. In live video mode place an object in view of the camera lens Select the camera Select the camera Select the camera Select the camera icon to photograph icon to photograph...
- Page 11 Ken-A-Vision 3. Browse to h-drive and select default folder Select your default Select your default Select your default Select your default folder and then folder and then folder and then folder and then select open select o select o select o 4.
- Page 12 Ken-A-Vision 5. View photo Photo will appear in Photo will appear in Photo will appear in Photo will appear in th th th the image viewer e image viewer e image viewer e image viewer window window window window 6. View...
- Page 13 8. Return to live video mode Select Select the Select Select the the the doc cam doc cam doc cam doc cam i i i i co co co con n n n 9. Congrats! You have completed task 3!☺ ☺ ☺ ☺...
- Page 14 Ken-A-Vision Task 4: Retrieving and Modifying Images from Gallery 1. In live video mode open the image gallery Select the image Select the image Select the image Select the image g g g g allery icon allery icon allery icon allery icon 2.
- Page 15 Ken-A-Vision 3. View image in clean screen mode Select tools Select t ools then then Select t Select t ools ools then then clean s clean screen clean s clean s creen creen creen 4. Photo will appear in clean screen...
- Page 16 Ken-A-Vision 5. Modify the photo using drawing tools Select tools then Select tools then Select Select tools then tools then drawing then t t t t ools drawing then ools drawing then drawing then ools ools p p p p allete...
- Page 17 Ken-A-Vision 8. Re-name modified photo and save Type in a different Type in a different Type in a different Type in a different name for your new name for your new name for your new name for your new modified photo and...
- Page 18 Ken-A-Vision 10. Return to live video mode Select the d Select the doc cam oc cam Select Select the d the d oc cam oc cam i i i i con 11. Congrats! You have completed task 4!☺ ☺ ☺ ☺...
- Page 19 Ken-A-Vision Task 5:Capturing Video 1.Manually direct camera lens at object/s to be video recorded and start recording Focus camera lens Focus camera lens Focus camera lens Focus camera lens on o on object on o on o bject bject then...
- Page 20 Ken-A-Vision 3. Save video in default folder Type in name of Type in name of Type in name of Type in name of movie then select movie then select movie then select movie then select s s s s ave.
- Page 21 Ken-A-Vision 5. Select movie NOTE: AT TIMES AT TIMES AT TIMES AT TIMES MOVIES MAY TAKE MOVIES MAY TAKE MOVIES MAY TAKE MOVIES MAY TAKE A FEW MOMENTS A FEW MOMENTS A FEW MOMENTS A FEW MOMENTS TO APPEAR IN...
- Page 22 Ken-A-Vision 5. Return to live video mode Select the Select the doc cam doc cam Select Select the the doc cam doc cam i i i i con 6. Congrats! You have completed task 5!☺ ☺ ☺ ☺...
- Page 23 Ken-A-Vision Task 6: Capturing Timelapse Video 1. In live video mode place object to be recorded in view of camera and parameters Select Select timelapse Select Select timelapse timelapse timelapse i i i i con con to set up to set up...
- Page 24 Ken-A-Vision 3. End the recording Select the t Select the time Select the t Select the t imelapse lapse lapse lapse i i i i c c c c on on on on again again to stop to stop again...
- Page 25 Ken-A-Vision 6. Return to live video mode Select the do Select the doc cam c cam Select Select the do the do c cam c cam i i i i con 7. Congrats! You have completed task 6!☺ ☺ ☺ ☺...
- Page 26 Ken-A-Vision Task 7:Capturing Time Lapse Photos 1. In live video mode place an object to be photographed in camera view and set timelapse parameters Select t Select timelapse Select t Select t imelapse imelapse imelapse i i i i con 2.
- Page 27 Ken-A-Vision 3. End the recording Select the Select the timelapse Select the Select the timelapse timelapse timelapse icon again to stop icon again to stop icon again to stop icon again to stop the recording the r ecording the r...
- Page 28 7. Return to live video mode Select the Select the doc cam doc cam Select Select the the doc cam doc cam i i i i con...
- Page 29 Ken-A-Vision 8. Congrats! You have completed task 7!☺ ☺ ☺ ☺ 9. Close software Select X to close Select X to close Select X Select X to close to close out of applied out of applied out of applied out of applied...
- Page 30 Ken-A-Vision Check Your Work! 1. Open your default folder on your h- drive Select s Select start Select s Select s tart tart menu tart menu menu menu then my c then my computer omputer then then my c my c...
- Page 31 Vision Doc Cam ☺ ☺ ☺ ☺ Ken- - - - A A A A - - - - Vision Doc Cam Vision Doc Cam Vision Doc Cam...
Need help?
Do you have a question about the Doc Cam and is the answer not in the manual?
Questions and answers