Table of Contents
Advertisement
Advertisement
Table of Contents

Related Manuals for Minolta Maxxum 9


Summary of Contents for Minolta Maxxum 9
- Page 1 INSTRUCTION MANUAL...
-
Page 2: For Proper And Safe Use
Maxxum / Dynax 9 has been designed with precission in mind to help you capture your photographic vision. As you use the Maxxum / Dynax 9, you will find that its performance and reliability compliment your own photographic expertise and in raising your skills to a higher level. -
Page 3: Table Of Contents
TABLE OF CONTENTS Table of Contents ...2 Names of Parts ...4 Strap...8 GETTING STARTED Diopter Adjustment ...9 Loading Film...15 Taking Pictures in Full-Auto ...18 BASIC OPERATION Focus Signals ...19 Special Focus Situations...20 Focus Hold ...21 FOCUS Predictive Focus Control ...27 Autofocus Modes ...28... -
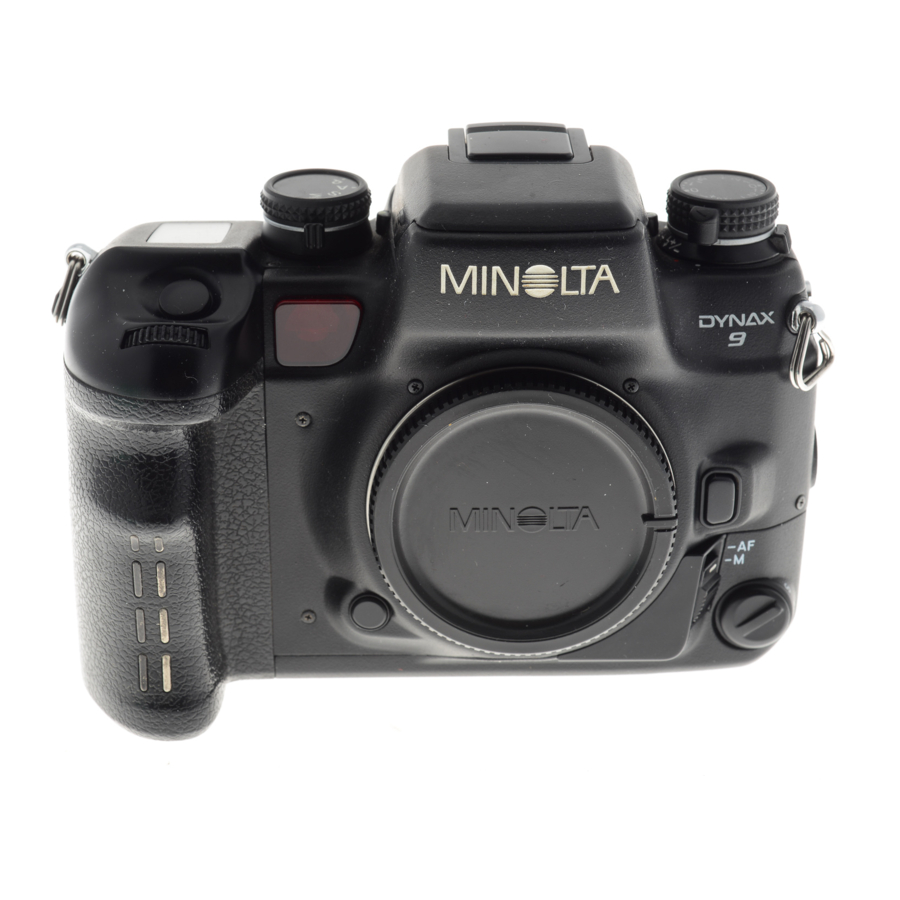
Page 4: Names Of Parts
AF button (32) Back-cover release (15) AF mode dial (28) Battery-chamber lock (10) Battery-chamber door (10) Vertical control grip contacts Tripod socket Diopter adjustment dial (9) Exposure mode dial (36-43) Dirve mode dial (54-61) Data Panel Data-panel illuminator (82) Rear control dial... -
Page 5: Control Panel
Aperture display (Exposure compensation /Bracketing) Battery condition indicator (11) Frame counter Film transport signals Frames remaining counter (last 9 frames only) AE-lock indicator (48) Aperture display Shutter speed display Focus signals (19) Focus-area indicator Wireless/Remote flash indicator (70-74) Flash ready indicator (22) -
Page 6: Diopter Adjustment
GETTING STARTED STRAP Use the upper eyelets if you want the camera to hang horizontally. Use the side eyelets if you want the camera to hang vertically. Attach the strap through the strap eyelets as shown. Pull firmly on the strap to make sure it is secure. -
Page 7: Installing The Batteries
BATTERIES Installing the Batteries Your camera uses two 3V CR123A lithium batteries to supply power for all camera operations. 1. Lift and turn the battery-chamber lock to OPEN, then open the battery- chamber door. 2. Insert the batteries as indicated by the + and –... -
Page 8: Handling The Camera
LENS Attaching the Lens 1. Remove the body and rear lens caps. 2. Align the mounting indexes. 3. Insert the lens into the mount and turn it clockwise until it clicks into the locked position. • Do not press the lens release when mounting the lens. -
Page 9: Loading Film
BASIC OPERATION LOADING FILM Check the film window before loading film. If film is loaded, do not open the back cover. Refer to Manual Rewind on page 24 to remove a partially exposed roll. • Load film in the shade to reduce the chances of fogging the film. •... - Page 10 LOADING FILM 2. Insert a film cartridge into the film chamber. Refer to page 93 to reload a partially exposed roll. 3. Extend the leader between the guide rails to the index mark. • If the film tip extends beyond the index mark, push the excess film back into the cartridge.
-
Page 11: Special Focus Situations
• Use focus hold (p.21) if your subject is outside the focus frame. • The number of frames remaining is displayed in the viewfinder for the last 9 frames on the roll. The countdown does not appear for non-DX coded film. -
Page 12: Special Focus Situations
SPECIAL FOCUS SITUATIONS The camera may not be able to focus in situations like those described below. When the focus signal blinks, use focus hold (p.21) or manual focus (p.33). See page 19 for an explanation of the focus signals. If the subject within the focus frame is very bright, or low in contrast. -
Page 13: Flash Range
(3.3 ~ 14.1 ft.) 1.0 ~ 3.4m f/3.5 (3.3 ~ 11.2 ft.) 1.0 ~ 3.0m (3.3 ~ 9.8 ft.) 1.0 ~ 2.1m f/5.6 (3.3 ~ 6.9 ft.) Lens Shadowing Lens shadowing occurs when the lens or lens hood blocks part of the output from the built-in flash. -
Page 14: Rewinding The Film
REWINDING THE FILM Automatic Rewind The film is automatically rewound after the last frame is exposed (or 36 exposures). When the film is completely rewound, the motor will stop and data panel indicating it is safe to open the back of the camera. 1. - Page 15 FOCUS - Predictive Focus Control Predictive Focus Control determines the subject’s speed, position, and acceleration changes from the focus sensor data, then sets the best focus at the predicted point of exposure. Predictive focus control is always active in the Automatic and Continuous autofocus modes.
- Page 16 FOCUS — Autofocus Modes Selecting the Autofocus Mode 1. Set the focus mode switch to AF. 2. Turn the AF mode dial to the desired mode. Automatic Autofocus (A) Designed to work well in almost any situation, Automatic Autofocus is especially suited to moving subjects that stop suddenly.
-
Page 17: Local Focus Area
FOCUS — Focus Area Wide Focus Area The camera’s standard focus mode, wide focus area uses the camera’s three focus sensors to automatically focus on your subject. Wide focus area’s greater framing flexibility makes it easier for the camera to focus on moving subjects. •... -
Page 18: Metering
FOCUS — AF Lock Press the AF button to lock focus on moving or stationary subjects using the current focus mode. The focus remains locked until the AF button is released. • Exposure is also locked if 14-segment metering (p.45) is selected. •... - Page 19 FOCUS — AF Illuminator In low-light / low subject contrast situations, the AF illuminator automatically projects a pattern of lines onto the subject for the camera’s AF sensors to focus on. • Do not to obstruct the AF illuminator. • Pressing the AF button (p.32) also activates the AF illuminator. •...
-
Page 20: Metering
EXPOSURE — P-Mode Select P-mode (Programmed Autoexposure) when you want to give your full attention to your subject and composition. The Program mode software analizes the subject’s size, motion, and magnification as well as the focal length of your lens, then sets the shutter speed and aperture according to the requirements of the scene. -
Page 21: Metering
EXPOSURE — A-Mode A-mode flash When the built-in flash is up or an attached accessory flash is on, it will fire each time the shutter is released. The camera’s TTL automatic flash metering system will ensure proper exposure. 1. Raise the built-in flash. •... -
Page 22: Metering
EXPOSURE — S-Mode S-mode Flash When the built-in flash is up or an attached accessory flash is on, it will fire each time a picture is taken. Flash exposure is controlled by the camera’s TTL automatic flash metering system. 1. Raise the built-in flash. •... -
Page 23: Metering In Manual Mode
EXPOSURE — M-Mode Metering in Manual Mode The meter index displays the EV difference between your settings and the ‘correct’ exposure determined by the camera. The 0 position (null point) represents the recommended exposure using the currently selected metering pattern (pp.45-47). •... - Page 24 METERING METERING — Selectable Metering 14 Segment Honeycomb Pattern Metering Fourteen-Segment Honeycomb-Pattern Metering uses information from the autofocus system to set the metering pattern according to the position of the main subject. The light metered by each applicable segment is then evaluated to determine the degree of spot-lighting or backlighting present in your scene.
-
Page 25: Spot Metering
METERING — Selectable Metering Spot Metering Spot metering uses only the center honeycomb segment to meter the image. • The spot-metering area indicates the metering area. Selecting Spot Metering Turn the metering mode switch to Center Weighted Average Metering Center-weighted average mode bases the exposure on an average of the readings from each of the honeycomb segments - with emphasis placed on the center of the image. - Page 26 METERING — Automatic Exposure Lock (AEL) Press the AE-lock button to lock the exposure using the currently selected metering pattern without locking the focus. The exposure remains locked until the AE-lock button is released. • Pressing the AE-lock button sets the flash to slow sync mode (p.64).
- Page 27 METERING – Exposure Compensation Especially helpful when using the spot or center weighted metering patterns, exposure compensation lets you manually adjust the metered exposure +/– 3 EVs in 1/2 or +/– 2 EVs in 1/3 EV increments. Compensated Exposure More exposure is recommended when the scene is primarily white tones.
-
Page 28: Drive
METERING — Setting the ISO Manually Set the ISO manually to override the DX-coded ISO or when using non-DX coded film. • Non-DX coded film is initially set to the previous roll’s ISO. Film must be loaded before the ISO can be changed. 1. -
Page 29: Drive
Test conditions: Shutter speed set to 1/250 or faster, with fresh batteries • The maximum drive speed drops to 5 frames per second when Data Memory is activated. • The optional Quartz Data Back QD-9 may imprint the date or time only on the first frame of a motor advanced series. -
Page 30: Drive
DRIVE – Self-Timer Use the self-timer to delay the shutter release for 2 or 10 seconds (approx.) after the shutter-release button is pressed all the way down. In addition to delaying release of the shutter, the 2 second delay pops the mirror up two seconds before the shutter opens to reduce blur caused by camera vibration. -
Page 31: Drive
DRIVE – Exposure Bracketing Exposure bracketing automatically exposes a series of frames with exposures above and below the metered exposure value. Bracket your exposures when shooting slides and other films with a low tolerance for exposure error. • This camera can expose a 3, 5, or 7 frame brackets in increments of 0.3, 0.5, 0.7, or 1.0 •... -
Page 32: Drive
DRIVE — Multiple Exposure The multiple exposure function makes it possible to expose 2 or more images on the same frame. 1. Turn the drive-mode lever to ME. • appears in the frame counter. 2. Compose the scene, then press the shutter-release button all the way down to take the first exposure. - Page 33 FLASH FLASH — Four Segment Flash Metering Four segment flash metering uses data from the focus sensors to control the output of the built-in and/or attached accessory flashes. 4-Segment Flash Metering All four segments are used to meter the flash, but Conventional Flash weighting is heaviest on the segment containing the active focus sensor.
-
Page 34: Flash - Slow Sync
FLASH – Slow Sync In P and A-modes, slow-shutter sync sets a slower shutter speed to increase the background or ambient exposure in a flash picture. Flash output is automatically decreased to maintain correct subject exposure. Slow-shutter Sync 1. Raise the built-in flash or turn the accessory flash on. - Page 35 FLASH — High Speed Sync The maximum sync speed for this camera is 1/300. However, with the 5400HS accessory flash (sold separately) shutter speeds up to 1/12000 can be used. High-speed sync (HSS) allows faster shutter speeds when fill flash is used on moving subjects outdoors.
-
Page 36: Drive
• Exposure is locked on the first frame of the series. 9. Repeat steps 7 and 8 until the series is complete. • The bracket number is indicated in the data panel. • Turn the main switch to LOCK, change the drive mode, push the built-in flash down, or turn off the accessory flash to cancel the bracketed series. -
Page 37: Setting Wireless/Remote Flash Mode
FLASH — Wireless/Remote Off-Camera Wireless/Remote Flash is available with the Minolta 5400HS, 5400xi, and 3500xi accessory flashes. Wireless/Remote flash lets you experience the creative control available with an accessory flash. In Wireless/Remote flash mode, the off-camera flash is triggered by a coded signal from the camera’s built-in flash when you press the Normal Flash shutter-release button. -
Page 38: Taking Pictures In Wireless/Remote Flash Mode
FLASH — Wireless/Remote Off-Camera Taking Pictures in Wireless/Remote Flash Mode The off-camera flash will provide all of the exposure. 1. Position your camera and 3500xi flash unit using the information on this page. • If you are not using the 3500xi flash, refer to your flash instruction manual for the correct camera to subject and flash to subject distances. - Page 39 FLASH — Wireless/Remote Off-Camera Cancelling Wireless/Remote Flash Mode 1. Attach the accessory flash to the camera, then turn the camera and flash on. 2. Select another flash mode. 3. Detach the accessory flash. ADDITIONAL FEATURES...
- Page 40 OTHER — Eye-Start Eye-start automatically activates the camera’s focus and exposure systems as you bring the camera to your eye. 1. Slide the eye-start switch to ON. 2. Turn the main switch to ON. • The grip sensor and data panel are activated. …Touching the grip sensor activates the eyepiece sensor.
-
Page 41: Taking Time Exposures
OTHER — Taking Time Exposures (bulb) Set the shutter speed to bulb when you want to take time exposures. When selected, the shutter remains open as long as the shutter- release button is held down. 1. Mount the camera on a tripod. 2. -
Page 42: Remote Release Terminal
OTHER — Remote Release Terminal Attach either the Remote Cord RC-1000S or RC-1000L (sold separately) to reduce blur when taking long exposures. 1. Slide the remote-control-terminal cover down. 2. Insert the plug into the terminal. OTHER — PC Terminal Flash units which can not be connected to the accessory shoe can be connected to the camera via the PC terminal. -
Page 43: Data Panel Illuminator
OTHER — Data Panel Illuminator Use the data panel illuminator to light up the information in the data panel in low- light situations. Slide the data panel illuminator switch as shown. The data panel illuminator shuts off approx. five seconds after the last camera operation. Custom Function Notes Select setting 2 to extend the display duration to 10 seconds. -
Page 44: Data Memory
DATA MEMORY When selected, Data Memory stores the following exposure information for each frame on up to seven 36-exposure rolls. Shutter Speed Aperture Focal Length Exposure Compensation Value (Bracketing Increment included) Exposure Mode Flash Compensation Value (Bracketing Increment included) Metering Mode Data is stored in seven separate film areas. -
Page 45: Recalling Data
DATA MEMORY Overwriting appears in the data panel before the data for the first exposure in Area 1 is overwritten. • disappears after the first exposure. • Old data is erased one frame ahead of the current frame. Area appears only when the film area changes from 7 to 1 and disappears after the data from the first exposure is recorded. - Page 46 DATA MEMORY 4. Turn the front control dial to select the desired frame number. – The shutter speed and aperture for the selected frame are displayed in the data panel. Shutter Speed Display Aperture Display 5. Turn the rear control dial one click to display the focal length and exposure compensation / bracketing increment for the...
-
Page 47: Custom Functions
DATA MEMORY Deleting Stored Data The data in all of the film areas will be deleted. Film areas cannot be cleared individually. 1. Open the control panel door. 2. Press the data-memory adjust buttons until appears and data panel. 3. Press the data-memory button again. - Page 48 CUSTOM FUNCTIONS Cust 1 — AF/Release priority 1 – AF priority Shutter will not release until appears in the viewfinder. 2 – Release Priority Shutter releases even if the focus cannot be confirmed. Use release priority when photographing moving subjects. •...
- Page 49 CUSTOM FUNCTIONS Cust 4 — DX Memory 1 – DX Memory Off Film speed is always set to the DX-coded ISO. Non-DX-coded film is set to the previous roll’s ISO. 2 – DX Memory On Changes to the film speed for a DX coded roll are saved and applied to future rolls with the same DX coded ISO.
- Page 50 • A 5 frame bracket in 1/2EV increments is exposed in the following order… -1.0EV -0.5EV Normal +0.5EV +1.0EV Cust 12 — Rewind Speed 1 – Fast Rewind Rewinds a 36 exposure roll in approximately 6 seconds. 2 - Slow (silent) Rewind Rewinds a 36 exposure roll in approximately 9 seconds.
- Page 51 CUSTOM FUNCTIONS Cust 13 — Meter / Data Panel Illuminator Display Duration • Selecting longer display durations reduces battery performance. 1 – 5 sec 2 – 10 sec 3 – 30 sec Cust 14 — AF Area Display • Press and hold the AF button to display the focus area LEDs. •...
- Page 52 CUSTOM FUNCTIONS Cust 18 — Control Dial Tasking 1 – Default operation Control Dial Tasking Exposure Mode Front Control Dial P – Mode no function A – Mode aperture S – Mode shutter speed 2 – Creative Program Creative program control (P / Ps) lets you override the exposure settings selected by the camera in P–...
- Page 53 CUSTOM FUNCTIONS Cust 19 — Control Dial - Exchanged Control 1 – Unchanged from Cust 18. 2 – Front and rear control dial functions exchanged. • Control dial tasking does not change for bracketing, data memory, and custom functions. Cust 20 — Flash Metering 1 –...
-
Page 54: Focusing Screen
Four new focusing screens have been introduced for exclusive use with the Maxxum / Dynax 9. The G (standard), L, and S screens use Minolta’s new spherical acute matte surface, designed to produce less image shading in the center of the focusing screen. -
Page 55: Exposure Warnings
ACCESSORY INFORMATION This camera is designed to work specifically with lenses and accessories manufactured and distributed by Minolta. Using incompatible accessories with this camera may result in unsatisfactory performance or damage the camera and accessories. Compatibility of Accessories Lenses • All Minolta AF lenses can be used with this camera. •... -
Page 56: Batteries
TROUBLE SHOOTING PROBLEM CAUSE Batteries are loaded incorrectly. No display appears when the camera is switched on. Batteries are exhausted. Situation is unsuitable for autofocus. Autofocus does not work when shutter-release Camera is set to manual focus mode. button is pressed partway down. -
Page 57: Care And Storage
CARE AND STORAGE Operating Temperature and Conditions • This camera is designed for use from –20 to 50 °C (4 to 122 °F). • Never leave your camera where it may be subjected to extreme temperatures such as the glove compartment of a car. •... -
Page 58: Specifications
30 rolls 23 rolls 15 rolls 15 rolls 14 rolls 9 rolls 9 rolls Test Conditions : Lens (24-85 f/3.5-4.5) is focused from infinity to 2m three times and the shutter-release button held partway down for ten seconds before each exposure. - Page 59 Minolta Co., Ltd. 3-13, 2-Chome, Azuchi-Machi, Chuo-Ku, Osaka 541-8556, Japan Minolta Europe GmbH Minoltaring 11, D-30855 Langenhagen, Germany Reparatur/Repair Senator-Helmken-Strasse 1, D-28279 Bremen, Germany Minolta France S.A. 365 Route de Saint-Germain, F-78420 Carrieres-Sur-Seine, France Minolta (UK) Limited 7 Tanners Drive, Blakelands, Milton Keynes, MK14 5BU, England Minolta Austria Ges.
Need help?
Do you have a question about the Maxxum 9 and is the answer not in the manual?
Questions and answers