Shindaiwa C344 Owner's/Operator's Manual
Hide thumbs
Also See for C344:
- Owner's/operator's manual (32 pages) ,
- Owner's/operator's manual (28 pages)
Table of Contents
Advertisement
Advertisement
Table of Contents

Related Manuals for Shindaiwa C344


Summary of Contents for Shindaiwa C344
- Page 1 SHINDAIWA OWNER’S/OPERATOR’S MANUAL C344 BRUSHCUTTER WARNING! Minimize the risk of injury to yourself and others! Read this manual and familiarize yourself with the contents. Always wear eye and hearing protection when operating this unit. X7502833300 12/14...
-
Page 2: Table Of Contents
If you have questions regarding your H4 series hand-held power equipment, or if you do not understand something in this manual, contact Shindaiwa at the address printed on the back of this Manual. -
Page 3: Safety
ANSI B175.3. IMPORTANT! Safety and Operation Information Labels: Make sure all information labels are undamaged and readable. Immediately replace damaged or missing information labels. New labels are available from your local authorized Shindaiwa dealer. - Page 4 Safety (continued) The Properly Equipped Operator Always wear eye protection such as Wear hearing protection devices and a broad-brimmed hat or helmet. A helmet goggles or safety glasses to shield is required when using a blade-equipped against thrown objects. brushcutter to clear small trees. Always wear a harness when operating the unit .
-
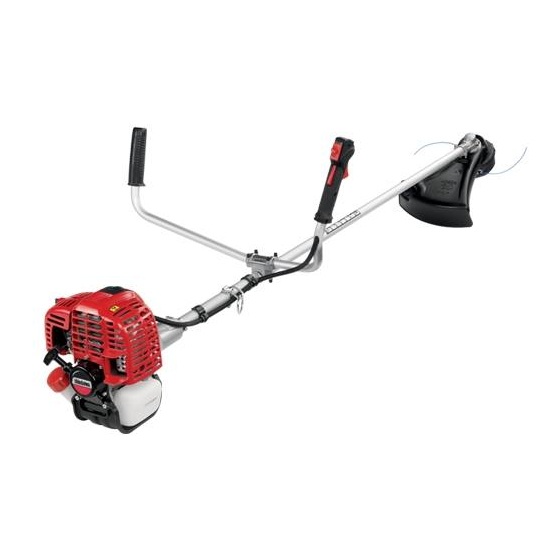
Page 5: Product Description
Dry Weight (Without guard and strap) 7.16 kg (15.8 lb.) Bore x Stroke 38 x 30 mm (1.49 x 1.18 in.) Displacement 34 cc (2.07 cu. in.) 50:1 Shindaiwa Red Armor ISO-L-EGD (ISO/CD 13738) and ® J.A.S.O. Fuel/Oil Ratio M345- FD, two-stroke, air-cooled engine oil. -
Page 6: Emission Control
Emission Control (Exhaust & Evaporative) EPA 2010 and Later and/or C.A.R.B. TIER III The emission control system for the engine is EM (engine modification) and, if the second to last character of the Engine Family on the Emission Control Information label (sample below) is “C”, “K”, or “T”, the emission control system is EM and TWC (3-way catalyst). - Page 7 Assembly (continued) Lock Throttle Linkage and Ignition Cable Leads Adjuster Adjust throttle trigger free play The throttle trigger free play should 4 - 6 mm be approximately 4 - 6 mm (3/16 - 1/4 inch) Throttle Free Play (3/16 - 1/4 inch). Make sure that the throttle lever operates smoothly without binding.
-
Page 8: To Advance Trimmer Line
Assembly (continued) Install trimmer head Parts required: adapter plate, trimmer head NOTE: Use the 4 mm hexagonal wrench as a gear housing locking tool. 1. Assemble adapter plate (D) onto PTO shaft. 2. Align locking hole in adaptor plate with notch in edge of gear housing and insert head locking tool (H). -
Page 9: Blade Installation
You must install the U-Handle and all Blade Conversion parts shown in the following instructions before operating this unit with a metal blade, otherwise serious injury may result. NOTE Model C344 includes U-Handle, and necessary blade conversion parts. Blades are not provided with trimmer/brushcutters and must be selected for type of cutting being performed. Install Metal Shield... - Page 10 Install Blade Parts Required: Upper plate w/25 mm diameter pilot, lower blade mounting plate, 10 mm Left Hand thread hex nut, 2 x 25 mm cotter pin, blade w/25 mm arbor diameter. 1. Install adapter plate (D) on splined PTO shaft, pilot side down. Blade installation requires Upper Plate (D) with 25 mm pilot.
-
Page 11: Mixing Fuel
IMPORTANT! Shindaiwa Red Armor engine oil may be mixed at 50:1 ratio for application in all Shindaiwa engines sold in the past, regardless of ratio specified in those manuals. IMPORTANT! Stored fuel ages. Do not mix more fuel than you expect to use in thirty (30) days, ninety (90) days when a fuel stabilizer is added. -
Page 12: Filling The Fuel Tank
Mixing Fuel (continued) IMPORTANT! Spilled fuel is a leading cause of hydrocarbon emissions. Some states may require the use of automatic fuel shut-off containers to reduce fuel spillage. After use • DO NOT store a unit with fuel in its tank. Leaks can occur. Return unused fuel to an approved fuel storage container. -
Page 13: Starting The Engine
Starting the Engine IMPORTANT! Engine ignition is controlled by a two position switch mounted on the throttle housing labeled, “I” for ON or START and “O” for OFF or STOP. WARNING! Starting the Engine Never start the engine from IMPORTANT! the operating position. -
Page 14: Stopping The Engine
YOU idle speed NEVER allow the engine to run at high the unit to your Shindaiwa dealer for MUST ALWAYS GUARD AGAINST NEVER use a cracked or warped RPM without a load. Doing so could inspection. -
Page 15: Shoulder Strap
3. Adjust the length of the shoulder strap so that you can hold and operate the machine comfortably. Cutting grass with a trimmer head Your Shindaiwa unit may be equipped Trimmer head styles: with one of several Shindaiwa trimmer NOTE: head models, each with features for Semi-automatic. -
Page 16: Using A Blade
OK To Cut When cutting wood with a blade, feed the blade slowly—never strike or “slam” a spinning blade against the wood. Eight O'clock WARNING! DO NOT use 2-tooth or non-Shindaiwa approved 4-tooth cutting Five O'clock blades with Shindaiwa trimmers and brushcutters. -
Page 17: Maintenance
DEALER OR SERVICE CENTER Muffler The H4 engine that powers your AUTHORIZED BY ECHO, INC. THE Shindaiwa model is a hybrid 4-stroke USE OF PARTS THAT ARE NOT This unit must never be operated with engine. As a hybrid, the engine is... - Page 18 Maintenance (continued) 10-Hour maintenance (more frequently in dusty Loosen conditions) fasteners 1. Remove the air filter cover by Prefilter loosening the cover screw(s) and lifting. 2. Remove and inspect the pre-filter. If the pre-filter is torn or otherwise damaged, replace it with a new Filter element one.
- Page 19 ■ Combustion chamber should be decarbonized, and the valve clearance should be adjusted. It is highly recommended that this is done by a Shindaiwa-trained service technician. ■ Replace the spark plug annually: Use only the type recommended in the ”Specifications” section or an equivalent resistor type spark plug of the correct heat range.
-
Page 20: Carburetor Adjustment
This engine has been factory adjusted to maintain satisfactory starting, emission, and durability performance up to 1,100 feet above sea level (ASL) (96.0 kPa). To maintain proper engine operation and emission compliance above 1,100 feet ASL the carburetor may need to be adjusted by an authorized Shindaiwa service dealer. IMPORTANT! If the engine is adjusted for operation above 1,100 feet ASL, the carburetor must be re-adjusted when operating the engine below 1,100 feet ASL, otherwise severe engine damage may result. -
Page 21: Blade Sharpening
If the idle speed cannot be adjusted NOTE: by the procedure described here, Carburetor fuel mixture adjustments return the unit to your Shindaiwa are preset at factory and cannot be dealer for inspection. serviced in the field. Blade Sharpening... -
Page 22: Long Term Storage
IMPORTANT! When the wear indicators located at the bottom of the Speed-Feed head are worn smooth, replacement of the cover or the entire Speed-Feed head is required. Wear Indicators Wear Indicators Indicadores de desgaste Indicadores de desgaste Long Term Storage Whenever the unit will not be used for 30 days or longer, use the following procedures to prepare it for storage: ■... -
Page 23: Troubleshooting Guide
Adjust valves. Valve clearance too loose. ENGINE DOES NOT START What To Check Possible Cause Remedy Consult with an authorized Shindaiwa servicing dealer. Faulty recoil starter. Does the engine crank? Fluid in the crankcase. Internal damage. Tighten and re-test. - Page 24 89 or higher mixed with an air cooled engine oil that meets or exceeds ISO-L-EGD and/or JASO FD classifi ed oils at 50:1 gasoline/oil ratio. Piston seizure. Consult with an authorized Shindaiwa servicing dealer. Faulty carburetor and/or diaphragm. Overheating condition. Consult with an authorized Shindaiwa servicing dealer.
- Page 25 Adjust idle. Check Specifi cations page for correct Idle set too high. Engine will not idle idle speed. down. Consult with an authorized Shindaiwa servicing Engine has an air leak. dealer. Adjust idle. Check Specifi cations page for correct idle Engine idle too high.
-
Page 26: Warranty
The owner shall demonstrate reasonable care and use, and follow preventative maintenance, storage, fuel and oil usage as pre- scribed in the operator’s manual. Should a product difficulty occur, you must, at your expense, deliver or ship your Shindaiwa unit to an authorized Shindaiwa servicing dealer for warranty repairs (within the applicable warranty period), and arrange for pick-up or return of your unit after the repairs have been made. -
Page 27: Warranty Statements
89 octane or higher. Gasohol which contains a maximum 10% ethanol (grain alcohol) or 15% MTBE (methyl/tertiary/butyl/ether) is also approved. The prescribed mixing ratio of gasoline to oil is listed on the Shindaiwa oil label and covered in your operator’s manual. - Page 28 NOTES...
-
Page 29: Product Registration
Thank you for choosing Shindaiwa Power Equipment Please go to http://www.shindaiwa-usa.com to register your new product on-line. It's FAST and EASY! NOTE: your information will never be sold or misused by ECHO, Inc. Registering your purchase enables us to contact you in the unlikely event of a service update or product recall, and verifies your ownership for warranty consideration. - Page 30 NOTES...
- Page 31 NOTES...
-
Page 32: Servicing Information
Genuine Shindaiwa Parts and Assemblies for your Shindaiwa products are available only from an Authorized Shindaiwa Dealer. When you do need to buy parts always have the Model Number, Type and Serial Number of the unit with you. You can find these numbers on the engine. For future reference, write them in the space provided below.
Need help?
Do you have a question about the C344 and is the answer not in the manual?
Questions and answers