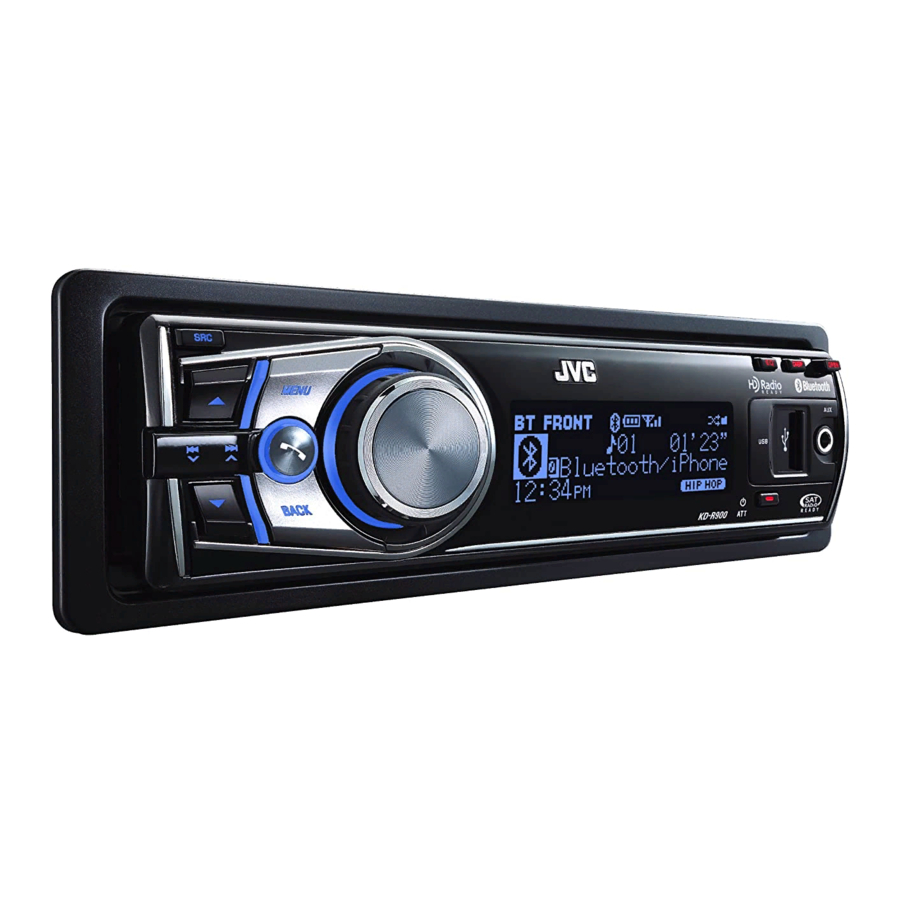
JVC KD-R900 Instructions Manual
Cd receiver
Hide thumbs
Also See for KD-R900:
- Instructions manual (151 pages) ,
- Installation & connection manual (6 pages) ,
- Specification sheet (2 pages)
Table of Contents
Advertisement
CD RECEIVER
RECEPTOR CON CD
RÉCEPTEUR CD
For canceling the display demonstration, see page 4.
Para cancelar la demostración en pantalla, consulte la página 4.
Pour annuler la démonstration des affichages, référez-vous à la page 4.
For installation and connections, refer to the separate manual.
Para la instalación y las conexiones, refiérase al manual separado.
Pour l'installation et les raccordements, se référer au manuel séparé.
INSTRUCTIONS
MANUAL DE INSTRUCCIONES
MANUEL D'INSTRUCTIONS
KD-R900
KD-R900
KD-R900
For customer Use:
Enter below the Model
No. and Serial No. which
are located on the top or
bottom of the cabinet. Retain
this information for future
reference.
Model No.
Serial No.
GET0608-001A
[J]
Advertisement
Chapters
Table of Contents
Troubleshooting

Related Manuals for JVC KD-R900


Summary of Contents for JVC KD-R900
- Page 1 CD RECEIVER KD-R900 RECEPTOR CON CD KD-R900 RÉCEPTEUR CD KD-R900 For canceling the display demonstration, see page 4. Para cancelar la demostración en pantalla, consulte la página 4. Pour annuler la démonstration des affichages, référez-vous à la page 4. For installation and connections, refer to the separate manual.
- Page 2 – Connect the equipment into an outlet on a circuit different from that to which the receiver is connected. – Consult the dealer or an experienced radio/TV technician for help. Caution: Changes or modifications not approved by JVC could void the user’s authority to operate the equipment. IMPORTANT FOR LASER PRODUCTS 1. CLASS 1 LASER PRODUCT 2.
-
Page 3: Detaching The Control Panel
• < > is used to indicate the available items/ settings/operations in the <SET UP> menu. KD-R900 is equipped with the steering wheel remote control function. • See the Installation/Connection Manual (separate Attaching the control panel volume) for connection. -
Page 4: Introductions
Preparation Canceling the display demonstration and setting the clock • See also page 29. Turn on the power. Cancel the display demonstrations Select <DEMO>, then <Off>. Press and hold until the Set the clock main menu is called up. • Select <Clock>, then <Set Clock>. Adjust the hour, then press control dial once to proceed to adjust the minute. -
Page 5: Table Of Contents
CONTENTS Detaching the control panel ......3 SETTINGS Attaching the control panel ......3 Selecting a preset sound mode ...... 27 How to reset your unit ........3 Menu operations ..........29 How to forcibly eject a disc ......3 •... -
Page 6: Basic Operations
Basic operations Using the control panel • FM/AM: Select preset station. • CD/USB FRONT/USB REAR/iPod • HD RADIO: Select channel. FRONT/iPod REAR : Pause/resume playback * • SIRIUS/XM: Select category. [Press]. • BT FRONT/BT REAR (Audio) : Resume • CD/USB FRONT/USB REAR/CD-CH: playback * [Press]. -
Page 7: Using The Remote Controller (Rm-Rk50)
• BT FRONT/BT REAR (Audio) : Pause You can still adjust the volume during pause when the playback. selected source is CD/USB FRONT/USB REAR/ • Enter “Call Menu” screen. iPod FRONT/iPod REAR/BT FRONT/BT • Enter <Quick Call> preset method [Hold]. (See REAR/iPod. - Page 8 • Searches for stations if pressed briefly. • Fast-forwards or reverses the track if pressed and held. • Changes the tracks if pressed briefly. • While listening to the satellite (SIRIUS or XM) radio: – Changes the channels if pressed briefly. –...
-
Page 9: Listening To The Radio
Listening to the radio Select “FM” or “AM.” Search for a station to listen—Auto Search. When a station is tuned in, searching stops. To stop searching, press the same button again. • You can also search for a station manually—Manual Search. Hold either one of the buttons until “M”... -
Page 10: Disc Operations
Manual presetting (FM/AM) You can preset up to 18 stations for FM and 6 stations for AM. Ex.: Storing FM station of 92.5 MHz into preset number “4.” Selecting preset station Select preset number “4.” [Turn] [Press] Disc operations Turn on the power. Insert a disc. -
Page 11: Selecting The Playback Modes
Pressing (or holding) the following buttons allows you Selecting the playback modes to... You can use only one of the following playback modes [Press] Pause/resume playback at a time. Enter “PLAYBACK MENU” screen. MP3/WMA: Select folder [Turn] [Press] [Press] Select track [Hold] Reverse/fast-forward track Repeat Random... -
Page 12: Usb Operations
USB operations This unit is equipped with two USB input terminals (on the control panel and USB cable from the rear of the unit). You can use these two terminals at the same time. • You can also connect a USB Bluetooth Adapter (KS-UBT1) and/or an Apple iPod/iPhone to the USB input terminal(s). -
Page 13: Using The Bluetooth ® Devices
Cautions: • Avoid using the USB device if it might hinder your safety driving. • While “Reading” is shown on the display: – Do not pull out and attach the USB device repeatedly. – Do not pull out or attach another USB device. •... -
Page 14: Connecting A Bluetooth Device For The First Time
Connecting a Bluetooth device for the first time Preparation: • Connect the supplied USB Bluetooth Adapter (KS-UBT1) to one of the USB input terminals of the unit. • Operate the device to turn on its Bluetooth function. Turn on the power. Connect the USB Bluetooth Adapter, KS-UBT1. -
Page 15: Deleting Registered Device
Select <New Pairing>. The device remains registered even after you disconnect the device. Use <Connect Phone> or <Connect Audio> (or activate <Auto Connect>) [Turn] [Press] to connect the same device from next time on. (See pages 35 and 36.) Enter a PIN (Personal Identification Number) code to the unit. -
Page 16: Using The Bluetooth Cellular Phone
• “Phonebook”: Shows the name/phone Select a device you want to connect. number of the phone book of the unit. Go to the following step. To copy the phone book memory, [Turn] [Press] see pages 35 and 36. • “Dial Number”: Shows the “Dial Number” screen. - Page 17 How to delete phone number When <Auto Answer> is activated..The unit answers the incoming calls automatically, see • Only when <Manual Trans> is selected for pages 35 and 36. <Phonebook Select> in Bluetooth setting menu • To answer the incoming call when <Auto Answer> (see page 36).
-
Page 18: Using The Bluetooth Audio Player
• Refer also to pages 15 and 16 for connecting/ Select group/folder * disconnecting/deleting a registered device. Bluetooth Information: If you wish to receive more information about Bluetooth, visit the following JVC web site: [Press] Reverse skip/forward <http://www.jvc.co.jp/english/car/> (English skip website only). -
Page 19: External Devices
Listening to the HD Radio ™ Broadcast Before operating, connect HD Radio tuner box, Select your desired channel. KT-HD300 (not supplied) to the CD changer jack on the rear of the unit. What is HD Radio Technology? Searching for HD Radio stations HD Radio Technology can deliver high-quality digital sound—AM digital will have FM-like quality (in stereo) only... -
Page 20: Listening To The Cd Changer
<Analog> Tuning to analog audio only Listening to the CD changer It is recommended to use a JVC MP3-compatible CD changer (not supplied) with your unit. You can connect a CD changer to the CD changer jack on the rear of the unit. -
Page 21: Listening To The Satellite Radio
Before operating, connect either one of the following (not supplied) to the CD changer jack on the rear of this unit. • JVC SIRIUS satellite radio System, SC-C1 and KS-SRA100, PnP, SC-VDOC1 and KS-SRA100, for listening to the SIRIUS Satellite radio. - Page 22 Activate your SIRIUS subscription after Activate your XM subscription after connection connection • Only Channel 0, 1, and 247 are available before activation. Select “SIRIUS.” Select “XM.” SIRIUS Satellite radio starts updating all the SIRIUS channels. Once completed, SIRIUS Satellite radio tunes in to XMDirect ™...
-
Page 23: Storing Channels In Memory
Checking the XM Satellite radio ID Listening to a user channel While selecting “XM,” select “Channel 0.” Enter “LIST” screen. The display alternately shows “RADIO ID” and the 8-digit (alphanumeric) ID number. Select “Preset” list. To cancel the ID number display, select any channel other than “Channel 0.”... -
Page 24: Listening To The Ipod/Iphone
Listening to the iPod/iPhone You can connect the iPod/iPhone using the following cable or adapter: Cable/adapter To operate USB 2.0 cable (accessory of the iPod/iPhone) to the USB input terminal See “When connected with the USB input on the control panel or USB cable from the rear of the unit terminal”... - Page 25 Pressing (or holding) the following buttons allows you When connected with the to... interface adapter [Press] Pause/resume playback. Preparation: Make sure <Changer> is selected in the <Source Select> <Ext Input> setting, see page 33. [Press] Select track Select “iPod.” [Hold] Reverse/fast-forward track Playback starts automatically.
-
Page 26: Listening To The Other External Components
Pressing (or holding) the following buttons allows you Selecting the playback modes to... See page 25 for operations. Pause/resume playback • “Random Album” functions only if you select “All Albums” for “Albums” in the main menu. [Press] Select track [Hold] Reverse/fast-forward track Listening to the other external components You can connect an external component to: •... -
Page 27: Settings
Selecting a preset sound mode You can select a preset sound mode suitable to the music genre. • See page 30 for <Fad (fader)/Bal (balance)/Loud/Volume Adjust> settings. Selecting from <SET UP> menu. PURE USER ROCK CLASSIC POPS HIP HOP JAZZ (back to the beginning) [Turn]... - Page 28 Storing your own sound mode Adjust the sound elements of the selected frequency range. You can store your own adjustments in memory. ¢ Press to adjust the Select <EQ>. frequency. ∞ Press to adjust the level. Turn the control dial to djust the Q-slope. Range/selectable items Sound elements...
-
Page 29: Menu Operations
Menu operations Call up the <SET UP> Select the desired item. Repeat step 2 if necessary. menu. • To confirm the setting, press the control dial. [Turn] [Press] • To return to the previous menu, press BACK. • To exit from the menu, press DISP or MENU. - Page 30 Category Menu items Selectable settings, [reference page] : Select a preset sound mode suitable to the music genre, [27]. Equalizer Off, User, Rock, Classic, Pops, Hip Hop, Jazz Color Select Color 01 : Select one of the preset or user color for display and —...
- Page 31 Category Menu items Selectable settings, [reference page] ¢ Subwoofer • LPF/Level : Press to select the cutoff frequency to the subwoofer. Off: All signals are sent to the subwoofer. LPF 55Hz/LPF 85Hz/LPF 120Hz: Frequencies higher than 55 Hz/85 Hz/120 Hz are cut off. Turn the control dial to adjust the subwoofer output level.
- Page 32 Category Menu items Selectable settings, [reference page] Scroll * • Once : Scrolls the displayed information once. • Auto : Repeats scrolling (at 5-second intervals). • Off : Cancels. Pressing DISP for more than one second can scroll the display regardless of the setting.
- Page 33 : Activate monaural mode to improve FM reception, but stereo effect will be lost, [9]. Ext Input * • Changer : To use a JVC CD changer, [20], or an Apple iPod/iPhone, External input [24]. • Ext In : To listen to a portable audio player (connected to the CD changer jack), [26].
-
Page 34: Creating Your Own Color-User Color
Creating your own color Select a primary color, then adjust the level. —User Color <Red> <Green> You can create your own colors—<Day Color> or <Blue> <Night Color>. <Day Color> : Color for the display and buttons. <Night Color> : Color for the display and buttons when the display is dimmed. -
Page 35: Setting The Time For Dimmer
Setting the time for dimmer Changing the Bluetooth setting You can set the start/end time for dimmer. You can change the settings listed on the following according to your preference. Preparation: • Connect the supplied USB Bluetooth Adapter (KS-UBT1) to one of the USB input terminals of the [Turn] [Press] unit. - Page 36 <Settings> menu ( : Initial) MIC Setting Only for the device being connected for “BT FRONT/ Quick Call BT REAR.” You can preset the Quick Call method. Hold to enter Adjust the volume of the microphone connected to the the selected method. unit.
-
Page 37: Title Assignment
Information JVC Device Name: Shows the unit name. JVC Address: Shows address of USB Bluetooth Adapter. JVC Software Ver.: Shows the software version. Connected Phone *: Shows connected phone name. Connected Audio *: Shows connected audio device name. * Displayed only when a Bluetooth phone/audio player is connected. -
Page 38: More About This Unit
More about this unit Basic operations Disc/USB operations Turning on the power Caution for DualDisc playback • By pressing SRC on the unit, you can also turn on the • The Non-DVD side of a “DualDisc” does not comply power. If the source is ready, playback also starts. with the “Compact Disc Digital Audio”... - Page 39 – There are improper recording conditions (missing • This unit cannot play back the following files: data, etc.) or media conditions (stained, scratched, – MP3 files encoded in MP3i and MP3 PRO format. warped, etc.). – MP3 files encoded in an inappropriate format. •...
-
Page 40: Bluetooth Operations
• This unit can play back MP3/WMA/WAV files meeting Bluetooth operations the conditions below: General MP3: • While driving, do not perform complicated operation – Bit rate: 32 kbps — 320 kbps (MPEG-1) such as dialing the numbers, using phone book, etc. 8 kbps —... -
Page 41: Satellite Radio
• If the iPod does not play correctly, please update your Satellite radio iPod software to the latest version. For details about • You can also connect the JVC SIRIUS radio PnP updating your iPod, visit <http://www.apple.com>. (Plug and Play), using the JVC SIRIUS radio adapter, •... - Page 42 • The Bluetooth word mark and logos are owned by REAR.” the Bluetooth SIG, Inc. and any use of such marks by Victor Company of Japan, Limited (JVC) is under Notice: license. Other trademarks and trade names are those When operating an iPod, some operations may not of their respective owners.
-
Page 43: Troubleshooting
Troubleshooting What appears to be trouble is not always serious. Check the following points before calling a service center. Symptoms Remedies/Causes • Sound cannot be heard from the speakers. • Adjust the volume to the optimum level. • Check the cords and connections. •... - Page 44 Symptoms Remedies/Causes • A longer readout time is required Do not use too many hierarchical levels and folders. (“Reading” keeps flashing on the display). • Tracks do not play back in the order you The playback order is determined by the file name. Folder have intended them to play.
- Page 45 Symptoms Remedies/Causes • “Cannot Play” appears on the display. • Check whether the connected USB device or the iPod/ • “No USB” appears on the display. iPhone is compatible with this unit. • The unit cannot detect the USB device. •...
- Page 46 Symptoms Remedies/Causes • Sound quality changes when receiving Fix the reception mode either to <Digital> or <Analog> HD Radio stations. (see pages 19, 20 and 33). • No sound can be heard. • <Analog> is selected when receiving all digital broadcast of HD Radio station.
- Page 47 Symptoms Remedies/Causes • “No Name” appears on the display while No text information for the selected channel. listening to the SIRIUS Satellite radio. • “---” appears on the display while listening to the XM Satellite radio. • “CHANNEL ---” or “CH UNAVL” appears Selected channel is no longer available or is on the display for about 2 seconds, then unauthorized.
- Page 48 Then, connect it again. • “Reset 08” appears on the display. Check the connection between the adapter and this unit. JVC bears no responsibility for any loss of data in an iPod/iPhone and/or USB mass storage class device while using this System.
-
Page 49: Maintenance
Maintenance How to clean the connectors To keep discs clean Frequent detachment will deteriorate the connectors. A dirty disc may not play correctly. To minimize this possibility, periodically wipe the If a disc does become dirty, wipe it with connectors with a cotton swab or cloth moistened with a soft cloth in a straight line from center alcohol, being careful not to damage the connectors. -
Page 50: Specifications
Specifications Power Output: 20 W RMS × 4 Channels at 4 Ω and ≤ 1% THD+N Signal-to-Noise Ratio: 80 dBA (reference: 1 W into 4 Ω) Load Impedance: 4 Ω (4 Ω to 8 Ω allowance) Tone Control Range: Low: ±12 dB (50 Hz, 100 Hz, 200 Hz) Q0.7, Q1.0, Q1.4, Q2.0 Mid:... - Page 51 Type: Compact disc player Signal Detection System: Non-contact optical pickup (semiconductor laser) Number of Channels: 2 channels (stereo) Frequency Response: 5 Hz to 20 000 Hz Dynamic Range: 96 dB Signal-to-Noise Ratio: 98 dB Wow and Flutter: Less than measurable limit MP3 Decoding Format: (MPEG1/2 Audio Layer 3) Max.
- Page 52 Having TROUBLE with operation? Please reset your unit Refer to page of How to reset your unit Still having trouble?? USA ONLY Call 1-800-252-5722 http://www.jvc.com We can help you! EN, SP, FR © 2009 Victor Company of Japan, Limited 0209DTSMDTJEIN...
- Page 53 NEGATIVA. Si su vehículo no posee continu de 12 V à masse NEGATIVE. Si votre véhicule n’offre pas ce voltage inverter is required, which can be purchased at JVC car audio este sistema, será necesario un inversor de tensión, que puede ser type d’alimentation, il vous faut un convertisseur de tension, que vous...
-
Page 54: Removing The Unit
JVC car audio dealer or a company supplying kits. instalación, consulte con su concesionario de JVC de equipos de audio d’installation, consulter votre revendeur d’autoradios JVC ou une •... -
Page 55: Electrical Connections
ELECTRICAL CONNECTIONS CONEXIONES ELECTRICAS RACCORDEMENTS ELECTRIQUES PRECAUTIONS on power supply and speaker PRECAUCIONES sobre las conexiones de la PRECAUTIONS sur l’alimentation et la connections: fuente de alimentación y de los altavoces: connexion des enceintes: • DO NOT connect the speaker leads of the power cord to the •... -
Page 56: Localizacion De Averias
Au fil de télécommande de l’autre appareil ou à l’antenne Fil d’alimentation à distance (bleu avec bande blanche) automatique s’il y en a une Front speakers JVC Amplifier Altavoces delanteros Amplificador de JVC Enceintes avant JVC Amplificateur Subwoofer Subwoofer JVC Amplifier... - Page 57 Connecting to the steering wheel remote controller / Conexión al control remoto del volante de dirección / Connexion de la télécommande de volant If your car is equipped with the steering wheel remote controller, Si su automóvil está equipado con control remoto en el volante de Si votre voiture est équipée d’une télécommande de volant, vous you can operate this unit using the controller.
- Page 58 You can connect the following JVC components to the CD changer Puede conectar los siguientes componentes JVC al jack del cambiador Vous pouvez connecter les appareils JVC suivants à la prise de jack.
- Page 59 CD RECEIVER RÉCEPTEUR CD KD-R901 For canceling the display demonstration, see page 4. Pour annuler la démonstration des affichages, référez-vous à la page 4. For installation and connections, refer to the separate manual. Pour l’installation et les raccordements, se référer au manuel séparé. INSTRUCTIONS MANUEL D’INSTRUCTIONS GET0610-003A...
- Page 60 Thank you for purchasing a JVC product. Please read all instructions carefully before operation, to ensure your complete understanding and to obtain the best possible performance from the unit. IMPORTANT FOR LASER PRODUCTS 1. CLASS 1 LASER PRODUCT 2. CAUTION: Do not open the top cover. There are no user serviceable parts inside the unit; leave all servicing to qualified service personnel.
- Page 61 How to read this manual: Detaching the control panel • is used to indicate turn the control dial Avoid touching the connectors. to make a selection, then press to confirm the selection. • < > is used to indicate the available items/ settings/operations in the <SET UP>...
- Page 62 Preparation Canceling the display demonstration and setting the clock • See also page 27. Turn on the power. Cancel the display demonstrations Select <DEMO>, then <Off>. Press and hold until the Set the clock main menu is called up. • Select <Clock>, then <Set Clock>. Adjust the hour, then press control dial once to proceed to adjust the minute.
- Page 63 CONTENTS SETTINGS Detaching the control panel ......3 Attaching the control panel ......3 Selecting a preset sound mode ...... 26 How to reset your unit ........3 Menu operations ..........27 How to forcibly eject a disc ......3 •...
-
Page 64: Using The Control Panel
Basic operations Using the control panel • FM/AM: Select preset station. • CD/USB FRONT/USB REAR/iPod • DAB: Select DAB service. FRONT/iPod REAR: Pause/resume playback * • CD/USB FRONT/USB REAR/CD-CH: [Press]. Select folder. • BT FRONT/BT REAR (Audio): Resume • iPod: Enter the main menu/Pause playback * playback * [Press]. - Page 65 • Return to the previous menu. Also known as “Control dial” in this manual. • iPod FRONT/iPod REAR: Switch the You can still adjust the volume during pause when setting between <Headunit Mode> and the selected source is CD/USB FRONT/USB <iPod Mode>...
- Page 66 • Searches for stations/DAB services if pressed briefly. • Searches for DAB ensembles if pressed and held. • Fast-forwards or reverses the track if pressed and held. • Changes the tracks if pressed briefly. • While listening to an iPod (in menu selecting mode): Connected with the interface adapter: –...
-
Page 67: Listening To The Radio
Listening to the radio Select “FM” or “AM.” Search for a station to listen—Auto Search. When a station is tuned in, searching stops. To stop searching, press the same button again. • You can also search for a station manually—Manual Search. Hold either one of the buttons until “M”... -
Page 68: Using The Standby Receptions
Manual presetting (FM/AM) The following features are available only for FM You can preset up to 18 stations for FM and 6 stations Radio Data System stations. for AM. Ex.: Storing FM station of 92.5 MHz into preset number Searching for FM Radio Data “4.”... - Page 69 To activate TA Standby Reception Tracing the same programme— The TP (Traffic Programme) Network-Tracking Reception indicator either lights up or When driving in an area where FM reception is not flashes. sufficient enough, this unit automatically tunes in to • If the TP indicator lights up, TA Standby Reception is another FM Radio Data System station of the same activated.
-
Page 70: Disc Operations
Disc operations Turn on the power. Insert a disc. All tracks will be played repeatedly until you change the source or eject the disc. Stop playing and ejecting the disc Selecting a track/folder • “No Disc” appears. Press SRC to listen to another playback source. -
Page 71: Usb Operations
Track : Repeats current track [Turn] [Press] Folder : MP3/WMA/AAC: Repeats current folder Repeat Random Folder : MP3/WMA/AAC: Randomly plays all tracks of current folder, then tracks of next folders [Turn] [Press] : Randomly plays all tracks • To cancel repeat play or random play, select “Off”. •... -
Page 72: Using The Bluetooth ® Devices
If a USB device has been attached... • Do not start the car engine if a USB device is connected. • This unit may not be able to play the files depending Playback starts from where it has been stopped on the type of USB device. -
Page 73: Connecting A Bluetooth Device For The First Time
Features You can operate Bluetooth devices through the unit as follows: • Receiving a call • Making a call—from phone book, from call history (dialed number/received call), by dialing number, by voice command • Informing you of the arrival of a SMS (Short Message Service) •... - Page 74 Pairing and PIN code Use the Bluetooth device to search and When you connect a Bluetooth device to the unit connect. for the first time, make pairing between the unit On the device to be connected, enter the same PIN code you have just entered for this unit.
-
Page 75: Using The Bluetooth Cellular Phone
• “Dialed Calls” *: Shows the list of the phone Connecting a registered device numbers you have dialed. Go to the following Select <Connect Phone> or step. <Connect Audio>. • “Received Calls” *: Shows the list of the received calls. Go to the following step. •... - Page 76 Move the entry position. Receiving/ending a phone call When a call comes in..The source is automatically changed to “BT FRONT/ Repeat steps until you finish BT REAR.” entering the phone number. • The display will flash in blue (see <Ring Color> on page 28 for setting).
-
Page 77: Using The Bluetooth Audio Player
Bluetooth Information: [Press] Reverse skip/forward skip If you wish to receive more information about [Hold] Reverse search/forward Bluetooth, visit the following JVC web site: search <http://www.jvc.co.jp/english/car/> (English website only). * Operation maybe different according to the connected device. - Page 78 Listening to the CD changer It is recommended to use a JVC MP3-compatible CD changer (not supplied) with your unit. You can connect a CD changer to the CD changer jack on the rear of the unit. • You can only play conventional CDs (including CD Text) and MP3 discs.
-
Page 79: External Devices
Listening to the iPod/iPhone You can connect the iPod/iPhone using the following cable or adapter: Cable/adapter To operate USB 2.0 cable (accessory of the iPod/iPhone) to the USB input terminal See “When connected with the USB input on the control panel or the USB cable from the rear of the unit terminal”... -
Page 80: When Connected With The Interface Adapter
Pressing (or holding) the following buttons allows you When connected with the to... interface adapter [Press] Pause/resume playback. Preparation: Make sure <Changer> is selected in the <Source Select> <Ext Input> setting, see page 31. [Press] Select track Select “iPod.” [Hold] Reverse/fast-forward track Playback starts automatically. -
Page 81: Listening To The Dab Tuner
[Press] Select track [Hold] Reverse/fast-forward track Listening to the DAB tuner Before operating, connect the JVC DAB tuner, KT-DB1000 (not supplied) to the CD changer jack on the rear of the unit. Preparation: Make sure <Changer> is selected in the <Source Select>... -
Page 82: Alternative Frequency Reception
Tuning in to a preset DAB service To show the Dynamic Label Segment (DLS) information While listening to an ensemble that supports DLS..[Turn] [Press] Lights up when receiving a service providing Dynamic Label Segment (DLS)—DAB radio text. Activating/deactivating TA/PTY Standby Reception •... -
Page 83: Listening To The Other External Components
Listening to the other external components You can connect an external component to: • EXT IN: CD changer jack on the rear of this unit using the following adapters (not supplied): – KS-U57: For connecting the component with pin jacks –... -
Page 84: Selecting A Preset Sound Mode
Selecting a preset sound mode You can select a preset sound mode suitable to the music genre from the <SET UP> menu. • See page 39 for the preset value for each sound mode. [Turn] [Press] <EQ> <Off/User/Rock/Classic/Pops/ Hip Hop/Jazz> •... -
Page 85: Menu Operations
Menu operations Call up the <SET UP> Select the desired item. Repeat step 2 if necessary. menu. • To confirm the setting, press the control dial. [Turn] [Press] • To return to the previous menu, press BACK. • To exit from the menu, press DISP or MENU. - Page 86 Category Menu items Selectable settings, [reference page] Ring Color * • On : When a call comes in, the display will flash in blue. • The display will change to the original color when you answer the call or the incoming call stops. When the unit receive a SMS, the display only illuminate in blue.
- Page 87 Category Menu items Selectable settings, [reference page] Amplifier Gain * • High Power : Vol 00 – Vol 50 • Low Power : Vol 00 – Vol 30 (Select if the maximum power of each speaker is less than 50 W to prevent damaging the speaker.) Dimmer •...
- Page 88 Category Menu items Selectable settings, [reference page] Device (See pages 15 – 17 for settings.) Settings (See pages 33 and 34 for settings.) IF Band • Auto : Increases the tuner selectivity to reduce interference Intermediate noises between adjacent stations. (Stereo effect may be frequency band lost.) •...
-
Page 89: Creating Your Own Color-User Color
Category Menu items Selectable settings, [reference page] Ext Input * • Changer : To use a JVC CD changer, [20], an Apple iPod/iPhone, External input [21], or DAB tuner, [23]. • Ext In : To listen to a portable audio player (connected to the CD changer jack), [25]. -
Page 90: Setting The Time For Dimmer
Repeat this procedure until you have adjust all the Select <Day Color> or <Night Color>. three primary colors. If <00> is selected for all the primary colors, [Turn] [Press] nothing appear on the display. Confirm the settings. Day Color Ex.: When < >... -
Page 91: Changing The Bluetooth Setting
Changing the Bluetooth setting You can change the settings listed on the following <Settings> menu ( : Initial) according to your preference. Quick Call You can preset the Quick Call method. Hold to enter Preparation: the selected method. • Connect the supplied USB Bluetooth Adapter •... -
Page 92: More About This Unit
SMS comes in. No: Cancels • Tone 1/2/3 Information In Phone: Your phone rings to alert you when a call/SMS comes in. JVC Device Name: Shows the unit name. JVC Address: Shows address of USB Phonebook Trans Bluetooth Adapter. -
Page 93: Tuner Operations
• If no operation is done for about 30 seconds after General pressing MENU button or control dial, the operation • This unit has been designed to reproduce will be canceled. CDs/CD Texts, and CD-Rs (Recordable)/CD-RWs (Rewritable) in audio CD (CD-DA), MP3/WMA/AAC Tuner operations formats. - Page 94 • Do not use the following CD-Rs or CD-RWs: – WMA files which are not based upon Windows – Discs with stickers, labels, or a protective seal stuck Media ® Audio. to the surface. – WMA files copy-protected with DRM. –...
- Page 95 Reset the unit and try the operation again. If “Please cleared. Reset...” appears again, consult your nearest JVC car • This unit may not work for some Bluetooth devices. audio dealers. • Connecting condition may vary depending on the circumstances around you.
- Page 96 When operating an iPod, some operations may not – iPod nano (3rd Generation) * be performed correctly or as intended. In this case, – iPod nano (4th Generation) * visit the following JVC web site: – iPod Touch * <http://www.jvc.co.jp/english/car/> (English – iPod Touch (2nd Generation) * website only) –...
- Page 97 Jazz Freq.: Frequency Q: Q-slope Available characters on the display Upper case Lower case Numbers and symbols JVC bears no responsibility for any loss of data in an iPod/iPhone and/or USB mass storage class device while using this System. REFERENCES...
-
Page 98: Troubleshooting
Troubleshooting What appears to be trouble is not always serious. Check the following points before calling a service center. Symptoms Remedies/Causes • Sound cannot be heard from the speakers. • Adjust the volume to the optimum level. • Check the cords and connections. •... - Page 99 Symptoms Remedies/Causes • Disc cannot be played back. • Use a disc with MP3/WMA/AAC tracks recorded in a format compliant with ISO 9660 Level 1, Level 2, Romeo, or Joliet. • Add the extension code <.mp3>, <.wma>, or <.m4a> to the file names. •...
- Page 100 Symptoms Remedies/Causes • “No File” appears on the display. Check whether the selected folder, the connected USB device, or the iPod/iPhone contains a playable file. • “Read Failed” appears on the display. The connected USB device is not working properly. Connect the USB device again.
- Page 101 Symptoms Remedies/Causes • The sound is interrupted or skipped • Reduce the distance between the unit and the Bluetooth during playback of a Bluetooth audio audio player. player. • Disconnect the device connected for Bluetooth Phone. • Turn off, then turn on the unit. •...
- Page 102 • The Bluetooth word mark and logos are owned by the Bluetooth SIG, Inc. and any use of such marks by Victor Company of Japan, Limited (JVC) is under license. Other trademarks and trade names are those of their respective owners.
-
Page 103: Maintenance
Maintenance How to clean the connectors To keep discs clean Frequent detachment will deteriorate the connectors. A dirty disc may not play correctly. To minimize this possibility, periodically wipe the If a disc does become dirty, wipe it with connectors with a cotton swab or cloth moistened with a soft cloth in a straight line from center alcohol, being careful not to damage the connectors. -
Page 104: Specifications
Specifications Maximum Power Output: Front/Rear: 50 W per channel Continuous Power Output (RMS): Front/Rear: 19 W per channel into 4 Ω, 40 Hz to Front/Rear: 20 000 Hz at no more than 0.8% total harmonic distortion. Load Impedance: 4 Ω (4 Ω to 8 Ω allowance) Tone Control Range: Low: ±12 dB (50 Hz, 100 Hz, 200 Hz) - Page 105 Type: Compact disc player Signal Detection System: Non-contact optical pickup (semiconductor laser) Number of Channels: 2 channels (stereo) Frequency Response: 5 Hz to 20 000 Hz Dynamic Range: 96 dB Signal-to-Noise Ratio: 98 dB Wow and Flutter: Less than measurable limit MP3 Decoding Format: (MPEG1/2 Audio Layer 3) Max.
- Page 106 électromagnétique et à la sécurité électrique. European representative of Victor Company of Japan, Limited Représentant européen de la société Victor Company of Japan, Limited: JVC Technical Services Europe GmbH JVC Technical Services Europe GmbH Postfach 10 05 04 Postfach 10 05 04...
- Page 107 • Assurez-vous de raccorder de nouveau la mise à la masse de cet appareil au châssis de la voiture après l’installation. Notes: • Replace the fuse with one of the specified rating. If the fuse blows frequently, consult your JVC IN-CAR Remarques: ENTERTAINMENT dealer.
- Page 108 L’illustration suivante est un exemple d’installation typique. Si vous avez des questions ou avez besoin regarding installation kits, consult your JVC IN-CAR ENTERTAINMENT dealer or a company supplying d’information sur des kits d’installation, consulter votre revendeur d’autoradios JVC ou une compagnie kits.
- Page 109 ELECTRICAL CONNECTIONS RACCORDEMENTS ELECTRIQUES If your car is equipped with the ISO For some VW/Audi or Opel (Vauxhall) automobiles / Pour certaines automobiles VW/Audi ou connector / Si votre voiture est équippée Opel (Vauxhall) d’un connecteur ISO You may need to modify the wiring of the supplied power cord as illustrated. •...
- Page 110 Si votre voiture est munie d’une télécommande de volant, vous pouvez commander cet autoradio en controller. To do it, a JVC’s OE remote adapter (not supplied) which matches with your car is required. utilisant la télécommande. Pour le faire, un adaptateur pour télécommande au volant JVC (non fourni) Consult your JVC IN-CAR ENTERTAINMENT dealer for details.
- Page 111 Connecting the USB devices / Connexion des périphériques USB You can connect the iPod/iPhone to the USB terminal using the USB 2.0 cable (accessory of the iPod/ Vous pouvez connecter le iPod/iPhone à la prise USB en utilisant le câble USB 2.0 (accessoire du iPod/ iPhone).
- Page 112 Avant de connecter les appareils extérieurs, assurez-vous que l’appareil est hors tension. You can connect the following JVC components to the CD changer jack. Vous pouvez connecter les appareils JVC suivants à la prise de changeur de CD. JVC component...
- Page 113 CD RECEIVER KD-R905 KD-R905 For canceling the display demonstration, see page 4. For installation and connections, refer to the separate manual. INSTRUCTIONS GET0609-001A...
- Page 114 Thank you for purchasing a JVC product. Please read all instructions carefully before operation, to ensure your complete understanding and to obtain the best possible performance from the unit. IMPORTANT FOR LASER PRODUCTS 1. CLASS 1 LASER PRODUCT 2. CAUTION: Do not open the top cover. There are no user serviceable parts inside the unit; leave all servicing to qualified service personnel.
- Page 115 How to read this manual: Detaching the control panel • is used to indicate turn the control dial Avoid touching the connectors. to make a selection, then press to confirm the selection. • < > is used to indicate the available items/ settings/operations in the <SET UP>...
- Page 116 Preparation Canceling the display demonstration and setting the clock • See also page 25. Turn on the power. Cancel the display demonstrations Select <DEMO>, then <Off>. Press and hold until the Set the clock main menu is called up. • Select <Clock>, then <Set Clock>. Adjust the hour, then press control dial once to proceed to adjust the minute.
- Page 117 CONTENTS Detaching the control panel ......3 SETTINGS Attaching the control panel ......3 Selecting a preset sound mode ...... 23 How to reset your unit ........3 Menu operations ..........25 How to forcibly eject a disc ......3 •...
-
Page 118: Using The Control Panel
Basic operations Using the control panel • BT FRONT/BT REAR (Audio) : Resume • FM/AM: Select preset station. playback * • CD/USB FRONT/USB REAR/CD-CH: [Press]. Select folder. • CD/USB FRONT/USB REAR/iPod • iPod: Enter the main menu/Pause playback * FRONT/iPod REAR/BT FRONT (Audio) * BT REAR (Audio) * Confirm selection. - Page 119 Also known as “Control dial” in this manual. • Enter “Call Menu” screen. • Enter <Quick Call> preset method [Hold]. (See You can still adjust the volume during pause when the page 32.) selected source is CD/USB FRONT/USB REAR/ • BT FRONT/BT REAR (Phone): iPod FRONT/iPod REAR/BT FRONT/BT –...
- Page 120 • Searches for stations if pressed briefly. • Fast-forwards or reverses the track if pressed and held. • Changes the tracks if pressed briefly. • While listening to an iPod (in menu selecting mode): Connected with the interface adapter: – Selects an item if pressed briefly. (Then, press ∞...
-
Page 121: Listening To The Radio
Listening to the radio Select “FM” or “AM.” Search for a station to listen—Auto Search. When a station is tuned in, searching stops. To stop searching, press the same button again. • You can also search for a station manually—Manual Search. Hold either one of the buttons until “M”... -
Page 122: Disc Operations
Manual presetting (FM/AM) You can preset up to 18 stations for FM and 6 stations for AM. Ex.: Storing FM station of 92.5 MHz into preset number “4.” Selecting preset station Select preset number “4.” [Turn] [Press] Disc operations Turn on the power. Insert a disc. - Page 123 Pressing (or holding) the following buttons allows you Selecting the playback modes to... You can use only one of the following playback modes [Press] Pause/resume playback at a time. Enter “PLAYBACK MENU” screen. MP3/WMA: Select folder [Press] Select track [Turn] [Press] [Hold] Reverse/fast-forward track Repeat...
-
Page 124: Usb Operations
USB operations This unit is equipped with two USB input terminals (on the control panel and USB cable from the rear of the unit). You can use these two terminals at the same time. • You can also connect a USB Bluetooth Adapter (KS-UBT1) and/or an Apple iPod/iPhone to the USB input terminal(s). -
Page 125: Using The Bluetooth ® Devices
Cautions: • Avoid using the USB device if it might hinder your safety driving. • While “Reading” is shown on the display: – Do not pull out and attach the USB device repeatedly. – Do not pull out or attach another USB device. •... -
Page 126: Connecting A Bluetooth Device For The First Time
Connecting a Bluetooth device for the first time Preparation: • Connect the supplied USB Bluetooth Adapter (KS-UBT1) to one of the USB input terminals of the unit. • Operate the device to turn on its Bluetooth function. Turn on the power. Connect the USB Bluetooth Adapter, KS-UBT1. - Page 127 Select <New Pairing>. The device remains registered even after you disconnect the device. Use <Connect Phone> or <Connect Audio> (or activate <Auto Connect>) [Turn] [Press] to connect the same device from next time on. (See pages 31 and 32.) Enter a PIN (Personal Identification Number) code to the unit.
-
Page 128: Using The Bluetooth Cellular Phone
• “Phonebook”: Shows the name/phone Select a device you want to connect. number of the phone book of the unit. Go to the following step. To copy the phone book memory, [Turn] [Press] see pages 31 and 32. • “Dial Number”: Shows the “Dial Number” screen. - Page 129 How to delete phone number When <Auto Answer> is activated..The unit answers the incoming calls automatically, see • Only when <Manual Trans> is selected for pages 31 and 32. <Phonebook Select> in Bluetooth setting menu • To answer the incoming call when <Auto Answer> (see page 32).
-
Page 130: Using The Bluetooth Audio Player
• Refer also to pages 15 and 16 for connecting/ Select group/folder * disconnecting/deleting a registered device. Bluetooth Information: If you wish to receive more information about Bluetooth, visit the following JVC web site: [Press] Reverse skip/forward <http://www.jvc.co.jp/english/car/> (English skip website only). -
Page 131: External Devices
Listening to the CD changer It is recommended to use a JVC MP3-compatible CD changer (not supplied) with your unit. You can connect a CD changer to the CD changer jack on the rear of the unit. • You can only play conventional CDs (including CD Text) and MP3 discs. -
Page 132: Listening To The Ipod/Iphone
Listening to the iPod/iPhone You can connect the iPod/iPhone using the following cable or adapter: Cable/adapter To operate USB 2.0 cable (accessory of the iPod/iPhone) to the USB input terminal See “When connected with the USB input on the control panel or USB cable from the rear of the unit terminal”... - Page 133 Pressing (or holding) the following buttons allows you When connected with the to... interface adapter [Press] Pause/resume playback. Preparation: Make sure <Changer> is selected in the <Source Select> <Ext Input> setting, see page 29. [Press] Select track Select “iPod.” [Hold] Reverse/fast-forward track Playback starts automatically.
-
Page 134: Listening To The Other External Components
Pressing (or holding) the following buttons allows you Selecting the playback modes to... See page 21 for operations. Pause/resume playback • “Random Album” functions only if you select “All Albums” for “Albums” in the main menu. [Press] Select track [Hold] Reverse/fast-forward track Listening to the other external components You can connect an external component to: •... -
Page 135: Selecting A Preset Sound Mode
Selecting a preset sound mode You can select a preset sound mode suitable to the music genre. • See page 26 for <Fad (fader)/Bal (balance)/Loud/Volume Adjust> settings. Selecting from <SET UP> menu. PURE USER ROCK CLASSIC POPS HIP HOP JAZZ (back to the beginning) [Turn]... - Page 136 Storing your own sound mode Adjust the sound elements of the selected frequency range. You can store your own adjustments in memory. ¢ Press to adjust the Select <EQ>. frequency. ∞ Press to adjust the level. Turn the control dial to djust the Q-slope. Range/selectable items Sound elements...
-
Page 137: Menu Operations
Menu operations Call up the <SET UP> Select the desired item. Repeat step 2 if necessary. menu. • To confirm the setting, press the control dial. [Turn] [Press] • To return to the previous menu, press BACK. • To exit from the menu, press DISP or MENU. - Page 138 Category Menu items Selectable settings, [reference page] Color Select Color 01 : Select one of the preset or user color for display and — Color 29, button (except EQ/DISP/OPEN/ ) illumination. User (For customized color settings, <User>, see page 30.) Menu Color •...
- Page 139 Category Menu items Selectable settings, [reference page] ¢ Subwoofer • LPF/Level : Press to select the cutoff frequency to the subwoofer. Off: All signals are sent to the subwoofer. LPF 55Hz/LPF 85Hz/LPF 120Hz: Frequencies higher than 55 Hz/85 Hz/120 Hz are cut off. Turn the control dial to adjust the subwoofer output level.
- Page 140 Category Menu items Selectable settings, [reference page] Scroll * • Once : Scrolls the displayed information once. • Auto : Repeats scrolling (at 5-second intervals). • Off : Cancels. Pressing DISP for more than one second can scroll the display regardless of the setting.
- Page 141 Category Menu items Selectable settings, [reference page] Ext Input * • Changer : To use a JVC CD changer, [19], or an Apple iPod/iPhone, External input [20]. • Ext In : To listen to a portable audio player (connected to the CD changer jack), [22].
-
Page 142: Creating Your Own Color-User Color
Creating your own color Select a primary color, then adjust the level. —User Color <Red> <Green> You can create your own colors—<Day Color> or <Blue> <Night Color>. <Day Color> : Color for the display and buttons. <Night Color> : Color for the display and buttons when the display is dimmed. -
Page 143: Setting The Time For Dimmer
Setting the time for dimmer Changing the Bluetooth setting You can set the start/end time for dimmer. You can change the settings listed on the following according to your preference. Preparation: • Connect the supplied USB Bluetooth Adapter (KS-UBT1) to one of the USB input terminals of the [Turn] [Press] unit. - Page 144 <Settings> menu ( : Initial) MIC Setting Only for the device being connected for “BT FRONT/ Quick Call BT REAR.” You can preset the Quick Call method. Hold to enter Adjust the volume of the microphone connected to the the selected method. unit.
-
Page 145: Title Assignment
Information JVC Device Name: Shows the unit name. JVC Address: Shows address of USB Bluetooth Adapter. JVC Software Ver: Shows the software version. Connected Phone *: Shows connected phone name. Connected Audio *: Shows connected audio device name. * Displayed only when a Bluetooth phone/audio player is connected. -
Page 146: More About This Unit
More about this unit Basic operations Disc/USB operations Turning on the power Caution for DualDisc playback • By pressing SRC on the unit, you can also turn on the • The Non-DVD side of a “DualDisc” does not comply power. If the source is ready, playback also starts. with the “Compact Disc Digital Audio”... - Page 147 – There are improper recording conditions (missing • This unit cannot play back the following files: data, etc.) or media conditions (stained, scratched, – MP3 files encoded in MP3i and MP3 PRO format. warped, etc.). – MP3 files encoded in an inappropriate format. •...
- Page 148 • This unit can play back MP3/WMA/WAV files meeting Bluetooth operations the conditions below: General MP3: • While driving, do not perform complicated operation – Bit rate: 32 kbps — 320 kbps (MPEG-1) such as dialing the numbers, using phone book, etc. 8 kbps —...
- Page 149 Reset the unit and try the operation again. If “Please – Communication between the iPod and the unit is Reset...” appears again, consult your nearest JVC car not stable. audio dealers. • If the text information includes more than 16 characters, it scrolls on the display.
- Page 150 Bluetooth SIG, Inc. and any use of such marks In this case, change the <Dimmer> setting to any by Victor Company of Japan, Limited (JVC) is under other than <Auto>. license. Other trademarks and trade names are those •...
-
Page 151: Troubleshooting
Troubleshooting What appears to be trouble is not always serious. Check the following points before calling a service center. Symptoms Remedies/Causes • Sound cannot be heard from the speakers. • Adjust the volume to the optimum level. • Check the cords and connections. •... - Page 152 Symptoms Remedies/Causes • A longer readout time is required Do not use too many hierarchical levels and folders. (“Reading” keeps flashing on the display). • Tracks do not play back in the order you The playback order is determined by the file name. Folder have intended them to play.
- Page 153 Symptoms Remedies/Causes • “Cannot Play” appears on the display. • Check whether the connected USB device or the iPod/ • “No USB” appears on the display. iPhone is compatible with this unit. • The unit cannot detect the USB device. •...
- Page 154 Symptoms Remedies/Causes • “No Disc” appears on the display. Insert a disc into the magazine. • “No Magazine” appears on the display. Insert the magazine. • “Reset 08” appears on the display. Connect this unit and the CD changer correctly and press the reset button of the CD changer.
-
Page 155: Maintenance
Maintenance How to clean the connectors To keep discs clean Frequent detachment will deteriorate the connectors. A dirty disc may not play correctly. To minimize this possibility, periodically wipe the If a disc does become dirty, wipe it with connectors with a cotton swab or cloth moistened with a soft cloth in a straight line from center alcohol, being careful not to damage the connectors. -
Page 156: Specifications
Specifications Maximum Power Output: Front/Rear: 50 W per channel Continuous Power Output Front/Rear: 19 W per channel into 4 Ω, 40 Hz to 20 000 Hz at no (RMS): more than 0.8% total harmonic distortion. Load Impedance: 4 Ω (4 Ω to 8 Ω allowance) Tone Control Range: Low: ±12 dB (50 Hz, 100 Hz, 200 Hz) - Page 157 Type: Compact disc player Signal Detection System: Non-contact optical pickup (semiconductor laser) Number of Channels: 2 channels (stereo) Frequency Response: 5 Hz to 20 000 Hz Dynamic Range: 96 dB Signal-to-Noise Ratio: 98 dB Wow and Flutter: Less than measurable limit MP3 Decoding Format: (MPEG1/2 Audio Layer 3) Max.
- Page 158 Having TROUBLE with operation? Please reset your unit Refer to page of How to reset your unit EN, TH © 2009 Victor Company of Japan, Limited 0209DTSMDTJEIN...
- Page 159 „™È æ ‘ ° — ¥ ®”‡æ“–·∑πøî « À“°øî « Ï ¢ “¥∫Ë Õ ¬ „ÀÈ ª √÷ ° …“√È “ π¢“¬‡§√◊ Ë Õ ß‡ ’ ¬ ß√∂¬πµÏ • Replace the fuse with one of the specified rating. If the fuse blows frequently, consult your JVC car audio 50 W ( dealer.
- Page 160 ¿“æµ— « Õ¬Ë “ ßµË Õ ‰ªπ’ È · ¥ß∂÷ ß °“√µ‘ ¥ µ— È ß ·∫∫∑— Ë « ‰ª À“°§ÿ ≥ ¡’ ª í ≠ À“À√◊ Õ µÈ Õ ß°“√¢È Õ ¡Ÿ ≈ ‡°’ Ë ¬ «°— ∫ ™ÿ ¥ µ‘ ¥ µ— È ß °√ÿ ≥ “ª√÷ ° …“°— ∫ ºŸ È ¢ “¬‡§√◊ Ë Õ ß‡ ’ regarding installation kits, consult your JVC car audio dealer or a company supplying kits.
- Page 161 “¬µ–°— Ë « •–¬–‰°• ’ π È ” ‡ß‘ π ≈“¬¢“« µË Õ “¬°— ∫ Õÿ ª °√≥Ï Õ ◊ Ë π À√◊ Õ ‡ “Õ“°“»Õ— µ ‚π¡— µ ‘ ∂ È “ ¡’ JVC Amplifier Front speakers ‡§√◊ Ë Õ ß¢¬“¬‡ ’ ¬ ß...
- Page 162 œ≈œ You can also connect the following components through the various JVC adapters or system. “¡“√∂‡™◊ Ë Õ ¡µà Õ Õÿ ª °√≥å ‡ √‘ ¡ µà Õ ‰ªπ’ È ‡ ¢â “ °— ∫ Õ–·¥ª‡µÕ√å µ à “ ßÊ À√◊ Õ √–∫∫¢Õß...
- Page 163 Срок службы (годности), кроме срока хранения дополнительных космети ческих материалов, упомянутых в предыдущих двух пунктах, не затрагивает никаких других прав потребителя, в частности, гарантийного свидетельства JVC, которое он может получить в соответствии с законом о правах потребителя или других законов, связанных с ним. For canceling the display demonstration, see page 4.
- Page 164 Thank you for purchasing a JVC product. Please read all instructions carefully before operation, to ensure your complete understanding and to obtain the best possible performance from the unit. IMPORTANT FOR LASER PRODUCTS 1. CLASS 1 LASER PRODUCT 2. CAUTION: Do not open the top cover. There are no user serviceable parts inside the unit; leave all servicing to qualified service personnel.
- Page 165 How to read this manual: Detaching the control panel • is used to indicate turn the control dial Avoid touching the connectors. to make a selection, then press to confirm the selection. • < > is used to indicate the available items/ settings/operations in the <SET UP>...
- Page 166 Preparation Canceling the display demonstration and setting the clock • See also page 24. Turn on the power. Cancel the display demonstrations Select <DEMO>, then <Off>. Press and hold until the Set the clock main menu is called up. • Select <Clock>, then <Set Clock>. Adjust the hour, then press control dial once to proceed to adjust the minute.
- Page 167 CONTENTS Detaching the control panel ........................3 Attaching the control panel ........................3 How to reset your unit .......................... 3 How to forcibly eject a disc ........................3 INTRODUCTIONS Preparation ............................4 OPERATIONS Basic operations ............................ 6 • Using the control panel ..........................6 •...
-
Page 168: Basic Operations
Basic operations Using the control panel • FM/AM/FM-LOW: Select preset station. Display window • CD/USB FRONT/USB REAR: Select folder. USB (Universal Serial Bus) input terminal • BT FRONT/BT REAR (Phone): Adjust • Activate/deactivate TA Standby Reception. the microphone volume (during a phone call •... -
Page 169: Using The Remote Controller (Rm-Rk50)
• Enter “Call Menu” screen. Also known as “Control dial” in this manual. • Enter <Quick Call> preset method [Hold]. (See For Bluetooth devices that support AVRCP 1.3. page 30.) You cannot select these sources if they are not ready or not connected. - Page 170 Warning (to prevent accidents and damage): • Do not install any battery other than CR2025 or its equivalent. • Do not leave the remote controller in a place (such as dashboards) exposed to direct sunlight for a long time. • Store the battery in a place where children cannot reach.
-
Page 171: Listening To The Radio
Listening to the radio Select “FM,” “AM” or “FM-LOW” Search for a station to listen—Auto Search. When a station is tuned in, searching stops. To stop searching, press the same button again. • You can also search for a station manually—Manual Search. Hold either one of the buttons until “M”... - Page 172 Manual presetting (FM/AM/FM-LOW) The following features are available only for FM You can preset up to 12 stations for FM, 6 stations for Radio Data System stations. FM-LOW, and 6 stations for AM. Ex.: Storing FM station of 92.5 MHz into preset number Searching for FM Radio Data “4.”...
- Page 173 To activate TA Standby Reception Tracing the same programme— The TP (Traffic Programme) Network-Tracking Reception indicator either lights up or When driving in an area where FM reception is not flashes. sufficient enough, this unit automatically tunes in to • If the TP indicator lights up, TA Standby Reception is another FM Radio Data System station of the same activated.
-
Page 174: Disc Operations
Disc operations Turn on the power. Insert a disc. All tracks will be played repeatedly until you change the source or eject the disc. Stop playing and ejecting the disc Selecting a track/folder • “No Disc” appears. Press SRC to listen to another playback source. -
Page 175: Usb Operations
Track : Repeats current track [Turn] [Press] Folder : MP3/WMA/AAC: Repeats current folder Repeat Random Folder : MP3/WMA/AAC: Randomly plays all tracks of current folder, then tracks of next folders [Turn] [Press] : Randomly plays all tracks • To cancel repeat play or random play, select “Off”. •... -
Page 176: Using The Bluetooth ® Devices
If a USB device has been attached... • Do not start the car engine if a USB device is connected. • This unit may not be able to play the files depending Playback starts from where it has been stopped on the type of USB device. -
Page 177: Connecting A Bluetooth Device For The First Time
Features You can operate Bluetooth devices through the unit as follows: • Receiving a call • Making a call—from phone book, from call history (dialed number/received call), by dialing number, by voice command • Informing you of the arrival of a SMS (Short Message Service) •... - Page 178 Pairing and PIN code Use the Bluetooth device to search and connect. When you connect a Bluetooth device to the unit On the device to be connected, enter the same PIN for the first time, make pairing between the unit code you have just entered for this unit.
-
Page 179: Using The Bluetooth Cellular Phone
• “Dialed Calls” *: Shows the list of the phone Connecting a registered device numbers you have dialed. Go to the following Select <Connect Phone> or step. <Connect Audio>. • “Received Calls” *: Shows the list of the received calls. Go to the following step. •... - Page 180 Move the entry position. Receiving/ending a phone call When a call comes in..The source is automatically changed to “BT FRONT/ Repeat steps until you finish BT REAR.” entering the phone number. • The display will flash in blue (see <Ring Color> on page 25 for setting).
-
Page 181: Using The Bluetooth Audio Player
Bluetooth Information: [Press] Reverse skip/forward skip If you wish to receive more information about [Hold] Reverse search/forward Bluetooth, visit the following JVC web site: search <http://www.jvc.co.jp/english/car/> (English website only). * Operation maybe different according to the connected device. -
Page 182: Listening To The Ipod/Iphone
Listening to the iPod/iPhone There are two control terminals in “iPod FRONT/iPod REAR” source. • <Headunit Mode> : Control by this unit. • <iPod Mode> : Control by the connected iPod/iPhone. Preparation: Select the controlling terminal, <Headunit Mode> or <iPod Mode> for iPod playback: •... - Page 183 Caution: Selecting the playback modes • Avoid using the iPod/iPhone if it might hinder your Enter “PLAYBACK MENU” screen. safety while driving. • Make sure all important data has been backed up to avoid losing the data. Pressing (or holding) the following buttons allows you to...
-
Page 184: Listening To The Other External Components
Listening to the other external components You can connect an external component to the AUX (auxiliary) input jack on the control panel. Preparation: Make sure <Show> is selected in the <Source Select> <AUX Source> setting, see page 28. Select “AUX IN.” Turn on the connected component and start playing the source. -
Page 185: Selecting A Preset Sound Mode
Selecting a preset sound mode You can select a preset sound mode suitable to the music genre from the <SET UP> menu. • See page 36 for the preset value for each sound mode. [Turn] [Press] <EQ> <Off/User/Rock/Classic/Pops/ Hip Hop/Jazz> •... -
Page 186: Menu Operations
Menu operations Call up the <SET UP> Select the desired item. Repeat step 2 if necessary. menu. • To confirm the setting, press the control dial. [Turn] [Press] • To return to the previous menu, press BACK. • To exit from the menu, press DISP or MENU. - Page 187 Category Menu items Selectable settings, [reference page] Ring Color * • On : When a call comes in, the display will flash in blue. • The display will change to the original color when you answer the call or the incoming call stops. When the unit receive a SMS, the display only illuminate in blue.
- Page 188 Category Menu items Selectable settings, [reference page] Beep • On : Activates the key touch tone. Key touch tone • Off : Deactivates the key touch tone. Amplifier Gain * • High Power : Vol 00 – Vol 50 • Low Power : Vol 00 –...
- Page 189 Category Menu items Selectable settings, [reference page] Device (See pages 15 – 17 for settings.) Settings (See pages 30 and 31 for settings.) IF Band • Auto : Increases the tuner selectivity to reduce interference Intermediate noises between adjacent stations. (Stereo effect may be frequency band lost.) •...
-
Page 190: Creating Your Own Color-User Color
Category Menu items Selectable settings, [reference page] AM Source * • Show : Enable “AM” in source selection, [6]. • Hide : Disable “AM” in source selection. AUX Source * • Show : Enable “AUX IN” in source selection, [6]. •... -
Page 191: Setting The Time For Dimmer
Repeat this procedure until you have adjust all the Select <Day Color> or <Night Color>. three primary colors. If <00> is selected for all the primary colors, [Turn] [Press] nothing appear on the display. Confirm the settings. Day Color Ex.: When < >... -
Page 192: Changing The Bluetooth Setting
Changing the Bluetooth setting You can change the settings listed on the following <Settings> menu ( : Initial) according to your preference. Quick Call You can preset the Quick Call method. Hold to enter Preparation: the selected method. • Connect the supplied USB Bluetooth Adapter •... - Page 193 BT REAR (Phone).” No: Cancels Adjust the volume of the microphone connected to the Information unit. Level 01/02/03 JVC Device Name: Shows the unit name. JVC Address: Shows address of USB Ringing Tone Bluetooth Adapter. You can preset the ringing source when a call/SMS JVC Software Ver.:...
-
Page 194: More About This Unit
More about this unit FM Radio Data System operations Basic operations • Network-Tracking Reception requires two types Turning on the power of Radio Data System signals—PI (Programme • By pressing SRC on the unit, you can also turn on the Identification) and AF (Alternative Frequency) power. - Page 195 Playing a CD-R or CD-RW Bit rate of MP3/WMA/AAC: 5 kbps — 320 kbps Sampling frequency of MP3: • Use only “finalized” CD-Rs or CD-RWs. – 48 kHz, 44.1 kHz, 32 kHz (for MPEG-1) • This unit can only play back files of the same type as –...
- Page 196 • Depending on the shape of the USB devices and • The unit cannot recognize a USB mass storage class connection ports, some USB devices may not be device whose rating is other than 5 V and exceeds attached properly or the connection might be loose. 500 mA.
- Page 197 Notice: Reset the unit and try the operation again. If “Please When operating an iPod, some operations may not Reset...” appears again, consult your nearest JVC car be performed correctly or as intended. In this case, audio dealers. visit the following JVC web site: <http://www.jvc.co.jp/english/car/>...
- Page 198 • The Bluetooth word mark and logos are owned by the Bluetooth SIG, Inc. and any use of such marks by Victor Company of Japan, Limited (JVC) is under license. Other trademarks and trade names are those of their respective owners.
-
Page 199: Troubleshooting
Troubleshooting What appears to be trouble is not always serious. Check the following points before calling a service center. Symptoms Remedies/Causes • Sound cannot be heard from the speakers. • Adjust the volume to the optimum level. • Check the cords and connections. •... - Page 200 Symptoms Remedies/Causes • Disc cannot be played back. • Use a disc with MP3/WMA/AAC tracks recorded in a format compliant with ISO 9660 Level 1, Level 2, Romeo, or Joliet. • Add the extension code <.mp3>, <.wma>, or <.m4a> to the file names. •...
- Page 201 Symptoms Remedies/Causes • “Reading” keeps flashing on the display. • Readout time varies depending on the USB device. • Do not use too many hierarchy or folders. • Turn off the power then on again. • Do not pull out or connect the USB device repeatedly while “Reading”...
- Page 202 Symptoms Remedies/Causes • Echo or noise occurs. Adjust the microphone unit’s position. • Phone sound quality is poor. • Reduce the distance between the unit and the Bluetooth cellular phone. • Move the car to a place where you can get a better signal reception.
-
Page 203: Maintenance
Maintenance How to clean the connectors To keep discs clean Frequent detachment will deteriorate the connectors. A dirty disc may not play correctly. To minimize this possibility, periodically wipe the If a disc does become dirty, wipe it with connectors with a cotton swab or cloth moistened with a soft cloth in a straight line from center alcohol, being careful not to damage the connectors. -
Page 204: Specifications
Specifications Maximum Power Output: Front/Rear: 50 W per channel Continuous Power Output (RMS): Front/Rear: 19 W per channel into 4 Ω, 40 Hz to Front/Rear: 20 000 Hz at no more than 0.8% total harmonic distortion. Load Impedance: 4 Ω (4 Ω to 8 Ω allowance) Tone Control Range: Low: ±12 dB (50 Hz, 100 Hz, 200 Hz) - Page 205 Type: Compact disc player Signal Detection System: Non-contact optical pickup (semiconductor laser) Number of Channels: 2 channels (stereo) Frequency Response: 5 Hz to 20 000 Hz Dynamic Range: 96 dB Signal-to-Noise Ratio: 98 dB Wow and Flutter: Less than measurable limit MP3 Decoding Format: (MPEG1/2 Audio Layer 3) Max.
- Page 206 Having TROUBLE with operation? Please reset your unit Refer to page of How to reset your unit Затруднения при эксплуатации? Пожалуйста, перезагрузите Ваше устройство Для получения информации о перезагрузке Вашего устройства обратитесь на соответствующую страницу Маєте ПРОБЛЕМУ з функціонуванням? Повторно налаштуйте систему Див.
- Page 207 постоянного напряжения с минусом на массе. Если Ваш постійного струму; з електричними системами, що мають voltage inverter is required, which can be purchased at JVC IN-CAR автомобиль не имеет этой системы, требуется инвертор заземлення ВІД’ЄМНОГО полюсу. Якщо ваше авто не...
-
Page 208: In-Dash Mounting
Если у Вас есть какие-либо вопросы, касающиеся установки, встановлення. У разі будь яких запитань або потреби у consult your JVC IN-CAR ENTERTAINMENT dealer or a company обратитесь к Вашему дилеру автомобилнего специалиста інформації щодо набору інструментів та спорядження, supplying kits. - Page 209 РУССКИЙ УКРАЇНА ENGLISH ЭЛЕКТРИЧЕСКИЕ ПОДКЛЮЧЕНИЯ ELECTRICAL CONNECTIONS ЕЛЕКТРИЧНІ З’ЄДНАННЯ If your car is equipped with the ISO For some VW/Audi or Opel (Vauxhall) automobiles / Для некоторых автомобилей VW/Audi connector / Если автомобиль оснащен или Opel (Vauxhall) / Для деяких авто марки VW/Audi або Opel (Vauxhall) разъемом...
- Page 210 На провідник зовнішнього пристрою іншого обладнання або на антену (якщо встановлена) Remote lead (blue with white stripe) Провод внешнего устройства (синий с белой полосой) Провідник зовнішнього пристрою (синій із білою смужкою) JVC Amplifier Front speakers JVC-усилитель Передние громкоговорители Передні гучномовці Підсилювач JVC Subwoofer Низкочастотный...
Need help?
Do you have a question about the KD-R900 and is the answer not in the manual?
Questions and answers