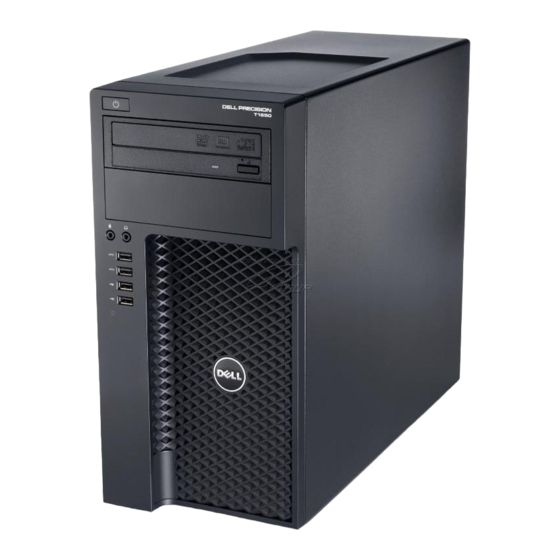
Dell Precision Workstation T1650 Owner's Manual
Hide thumbs
Also See for Precision Workstation T1650:
- Setup & features manual (6 pages) ,
- Owner's manual (61 pages) ,
- Technical manualbook (41 pages)
Table of Contents
Advertisement
Quick Links
Advertisement
Table of Contents

Related Manuals for Dell Precision Workstation T1650


Summary of Contents for Dell Precision Workstation T1650
- Page 1 Инструкция для Dell Precision T1650 Перейти в карточку товара 8 800 775 98 98...
- Page 2 Dell Precision Workstation T1650 Owner's Manual Regulatory Model: D09M Regulatory Type: D09M004...
-
Page 3: Notes, Cautions, And Warnings
Trademarks used in this text: Dell , the DELL logo, Dell Precision , Precision ON ,ExpressCharge , Latitude , Latitude ON , OptiPlex , Vostro , and Wi-Fi Catcher are trademarks of Dell Inc. Intel , Pentium , Xeon , Core , Atom , Centrino , and Celeron are registered trademarks or trademarks of Intel Corporation in the U.S. -
Page 4: Table Of Contents
Contents Notes, Cautions, and Warnings 1 Working on Your Computer ........................5 Before Working Inside Your Computer ............................6 Turning Off Your Computer ........................6 After Working Inside Your Computer 2 Removing and Installing Components ..............................7 Recommended Tools ..............................7 Removing the Cover ..............................7 Installing the Cover ..........................8 Removing the Intrusion Switch... - Page 5 Deleting or Changing an Existing System and/or Setup Password ..........................42 Disabling a System Password 4 Diagnostics..........................43 ................43 Enhanced Pre-Boot System Assessment (ePSA) Diagnostics 5 Troubleshooting Your Computer ............................45 Power LED Diagnostics ................................46 Beep Code ..............................46 Error Messages 6 Technical Specifications 7 Contacting Dell...
-
Page 6: Working On Your Computer
Damage due to servicing that is not authorized by Dell is not covered by your warranty. Read and follow the safety instructions that came with the product. -
Page 7: Turning Off Your Computer
CAUTION: To connect a network cable, first plug the cable into the network device and then plug it into the computer. Connect any telephone or network cables to your computer. Connect your computer and all attached devices to their electrical outlets. Turn on your computer. If required, verify that the computer works correctly by running the Dell Diagnostics. -
Page 8: Removing And Installing Components
Removing and Installing Components This section provides detailed information on how to remove or install the components from your computer. Recommended Tools The procedures in this document may require the following tools: • Small flat-blade screwdriver • Phillips screwdriver • Small plastic scribe Removing the Cover Before Working Inside Your Computer . -
Page 9: Removing The Intrusion Switch
Removing the Intrusion Switch Before Working Inside Your Computer . Follow the procedures in Remove the cover. Press the clip inwards to release and disconnect the intrusion cable from system board. Figure 2. Slide the intrusion switch toward the chassis bottom and remove it from the chassis. Figure 3. -
Page 10: Removing The Front Panel
Install the cover. After Working Inside Your Computer . Follow the procedures in Removing the Front Panel Before Working Inside Your Computer . Follow the procedures in Remove the cover. Pry the front panel retention clips away from the chassis located at the edge of front panel. Figure 4. -
Page 11: Installing The Front Panel
Installing the Front Panel Insert the hooks along the bottom edge of the front panel into the slots on the chassis front. Push the panel towards the computer chassis to engage the front-panel retention clips, until they click into place. Install the cover. -
Page 12: Installing The Expansion Card
Installing the Expansion Card Insert the expansion card into the slot on the system board and press down until the dent in the card settles on the slot correctly. Push the card retention clip inward, until it clicks to secure the card. Install the cover. -
Page 13: Removing The Coin-Cell Battery
Removing the Coin-Cell Battery Before Working Inside Your Computer . Follow the procedures in Remove the: a) cover b) expansion card(s) Press the release latch away from the battery to allow the battery to pop-up from the socket and lift the coin-cell battery out of the computer. -
Page 14: Installing The Hard Drive
Flex the hard-drive bracket and remove the hard drive from the bracket. Repeat the steps 3 to 5 to remove the second hard drive, if available. Installing the Hard Drive Insert the hard drive into the hard-drive bracket. Press both the securing tabs inward and slide the hard-drive bracket into the bay. Connect the data and power cables to the back of the hard drive. - Page 15 Figure 10. Slide down the optical drive latch to release the optical drive. Figure 11. Pull the optical drive out from the computer.
-
Page 16: Installing The Optical Drive
Figure 12. Repeat steps 4 to 6 to remove the second optical drive (if available). Installing the Optical Drive Slide the optical drive inside the drive bay, until the latch secures the drive. Connect the data cable and power cables to the back of the optical drive. Install the: a) front panel b) cover... -
Page 17: Installing The Speakers
Press down the speaker-securing tab and slide the speaker upwards to remove it. Installing the Speakers Secure the speaker, by sliding it into the slot. Thread the cable into the chassis clip and connect the speaker cable to the system board. Replace the cover. - Page 18 Figure 13. Disconnect the cable(s) from the hard drive and remove the cables from the clips. Figure 14. Press the clip and disconnect the 24-pin cable from the system board. Figure 15.
- Page 19 Remove the screws that secure the power supply unit to the computer. Figure 16. Press the release tab at the bottom of the power supply and slide the power supply towards the front of the computer. Figure 17. Lift the power supply out of the computer.
-
Page 20: Installing The Power Supply
Figure 18. Installing the Power Supply Place the power supply in the chassis and slide towards the back of the computer to secure it. Tighten the screws to secure the power supply to the back of the computer. Connect the 24-pin power cable to the system board. Thread the power cables into the chassis clips. -
Page 21: Installing The Heat Sink
Figure 19. Loosen the captive screws that secure the heat sink to the system board and lift the heat sink away from the computer. Figure 20. Installing the Heat Sink Place the heat sink into the chassis. Tighten the captive screws to secure the heat sink to the system board. Connect the heat sink cable to the system board. -
Page 22: Removing The Processor
Removing the Processor Before Working Inside Your Computer . Follow the procedures in Remove the: a) cover b) heat sink Press the release lever down and then move it outward to release it from the retention hook. Lift the processor cover and remove the processor from the socket, and place it in an antistatic bag. -
Page 23: Installing The System Fan
Pry and remove the system fan away from the grommets securing it to the back of the computer. Installing the System Fan Place the chassis fan in the chassis. Insert the grommets through the fan vent and slide outward along the groove to secure in place. Connect the fan cable to the system board. - Page 24 Release the thermal sensor cable from the chassis clip. Press the tabs from both sides to release and remove the thermal sensor away from the chassis.
-
Page 25: Installing The Front Thermal Sensor
Installing the Front Thermal Sensor Secure the thermal sensor to the slot in the chassis. Thread the thermal sensor cable into the chassis clip. Connect the thermal sensor cable to the system board. Install the cover. After Working Inside Your Computer . Follow the procedures in Removing the Power Switch Before Working Inside Your Computer . - Page 26 Release the power-switch cable from the chassis clips.
- Page 27 Press the clips on both side of the power switch to release it from the chassis and pull the power switch out of the computer. Slide the power switch along with its cable out through the front of the computer.
-
Page 28: Installing The Power Switch
Installing the Power Switch Slide the power-switch cable in through the front of the computer. Secure the power-switch cable to the chassis. Thread the power-switch cable into the chassis clips. Connect the power-switch cable to the system board. Install the: a) optical drive b) front panel c) cover... - Page 29 Figure 21. Remove the screw that secures the I/O panel to the computer. Figure 22. Slide the I/O panel towards the left of the computer to release it and pull the I/O panel along with its cable out of the computer.
-
Page 30: Installing The Input/Output (I/O) Panel
Figure 23. Installing the Input/Output (I/O) Panel Insert the I/O panel into the slot on the chassis front. Slide the I/O panel towards the right of the computer to secure to the chassis. Tighten the screw to secure the I/O panel to the chassis. Thread the I/O panel/FlyWire cable into the chassis clip. - Page 31 Remove the screws that secure the system board to the computer. Slide the system board towards the front of the computer.
-
Page 32: Installing The System Board
Tilt the system board to 45–degrees, and lift the system board out of the computer. Installing the System Board Align the system board to the port connectors on the rear of the chassis and place the system board in the chassis. Tighten the screws to secure the system board to the chassis. -
Page 33: System Board Components
System Board Components The following image displays the system board components. Figure 24. 1. PCI Express x16 (wired as x4) connector 12. Power Switch Connector (PWR_SW) 2. PCI Card connector 13. System Power Connector (Mini_PWR) 3. PCI Express x1 Card connector 14. -
Page 34: System Setup
Boot Sequence allows you to bypass the System Setup defined boot device order and boot directly to a specific device (for example: optical drive or hard drive). During the Power-on Self Test (POST), when the Dell logo appears, you can: •... -
Page 35: System Setup Options
Keys Navigation <Enter> Allows you to select a value in the selected field (if applicable) or follow the link in the field. Spacebar Expands or collapses a drop down list, if applicable. <Tab> Moves to the next focus area. NOTE: For the standard graphics browser only. <Esc>... - Page 36 Option Description • Enabled w/PXE NOTE: Depending on the computer and its installed devices, the items listed in this section may or may not appear. Serial Port Allows you to define the serial port settings. You can set the serial port to: •...
- Page 37 Option Description Miscellaneous Devices Allows you to enable or disable various on-board devices. • Enable PCI Slot - This option is enabled by default. Table 4. Security Option Description Admin Password This field lets you set, change, or delete the administrator (admin) password (sometimes called the setup password).
- Page 38 Option Description Password Change Allows you to determine whether changes to the system and hard disk passwords are permitted when an administrator password is set. • Allow Non-Admin Password Changes - This option is enabled by default. TPM Security This option lets you control whether the Trusted Platform Module (TPM) in the system is enabled and visible to the operating system.
- Page 39 Option Description Intel TurboBoost mode of the processor. Intel TurboBoost Allows you to enable or disable • Disabled - Does not allow the TurboBoost driver to increase the performance state of the processor above the standard performance. • Enabled - Allows the Intel TurboBoost driver to increase the performance of the CPU or graphics processor.
- Page 40 Option Description • Disabled - Does not allow the system to power on by special LAN signals when it receives a wake-up signal from the LAN or wireless LAN. • LAN Only - Allows the system to be powered on by special LAN signals. This option is Disabled by default.
-
Page 41: Updating The Bios
Automatically detect my Service Tag for me b) Choose from My Products and Services List c) Choose from a list of all Dell products On the application and drivers screen, under the Operating System drop-down list, select BIOS. Identify the latest BIOS file and click Download File. -
Page 42: System And Setup Password
RTCRST pin 1 and 2 Real-time clock reset. This feature can be used for troubleshooting. System and Setup Password You can create a system password and a setup password to secure your computer. Password Type Description System password Password that you must enter to log on to your system. Setup password Password that you must enter to access and make changes to the BIOS settings of your computer. -
Page 43: Deleting Or Changing An Existing System And/Or Setup Password
Deleting or Changing an Existing System and/or Setup Password Ensure that the Password Status is Unlocked (in the System Setup) before attempting to delete or change the existing System and/or Setup password. You cannot delete or change an existing System or Setup password, if the Password Status is Locked. -
Page 44: Diagnostics
Power-on the computer. As the computer boots, press the <F12> key as the Dell logo appears. On the boot menu screen, select the Diagnostics option. The Enhanced Pre-boot System Assessment window is displayed, listing all devices detected in the computer. The diagnostics starts running the tests on all the detected devices. -
Page 46: Troubleshooting Your Computer
Troubleshooting Your Computer You can troubleshoot your computer using indicators like Diagnostic Lights, Beep Codes, and Error Messages during the operation of the computer. Power LED Diagnostics The power button LED located on the front of the chassis also functions as a bicolored diagnostic LED. The diagnostic LED is only active and visible during the POST process. -
Page 47: Beep Code
Alert! Previous attempts at booting this The computer failed to complete the boot routine three consecutive times for system have failed at checkpoint the same error. Contact Dell and report the checkpoint code (nnnn) to the [nnnn]. For help in resolving this support technician problem, please note this checkpoint and contact Dell Technical Support. - Page 48 Error Message Description Diskette subsystem reset failed The floppy drive controller may be faulty. Gate A20 failure One or more memory modules may be faulty or improperly seated. Reinstall the memory modules and, if necessary, replace them. General failure The operating system is unable to carry out the command. This message is usually followed by specific information—for example, Printer out of paper.
- Page 49 The keyboard controller may be malfunctioning or a memory module may be mode loose. WARNING: Dell's Disk Monitoring During initial startup, the drive detected possible error conditions. When your System has detected that drive [0/1] on computer finishes booting, immediately back up your data and replace your the [primary/secondary] EIDE hard drive (for installation procedures, see "Adding and Removing Parts"...
-
Page 50: Technical Specifications
Technical Specifications NOTE: Offerings may vary by region. For more information regarding the configuration of your computer, click Start Help and Support, and then select the option to view information about your computer. Table 13. Processor Feature Specification Processor type •... - Page 51 Table 16. Audio Feature Specification Integrated two channel high definition audio Table 17. Network Feature Specification Integrated Intel 82579LM ethernet capable of 10/100/1000 Mb/s communication Table 18. System Information Feature Specification System Chipset Intel C216 chipset DMA Channels two 82C37 DMA controllers with seven independently programmable channels Interrupt Levels Integrated I/O APIC capability with 24 interrupts...
- Page 52 Table 21. Drives Feature Specification Externally Accessible 5.25–inch drive bays Internally accessible USB 2.0: 3.5–inch SATA drive bays 2.5–inch SATA drive bays ( using interposer in four 3.5" bay) Table 22. External Connectors Feature Specification Audio: front panel two connectors for microphone and headphone back panel two connectors for line-out and line-in/microphone Network Adapter...
- Page 53 Feature Specification PCI Express x16 data width (maximum) — 16 PCI Express one 164-pin connector lanes Serial ATA four 7-pin connectors Memory four 240-pin connectors Internal USB one 10-pin connector System Fan one 5-pin connector Front panel control one 6 pins and two 20 pins connectors Thermal Sensor one 2-pin connector Processor...
- Page 54 Feature Specification Power supply diagnostic light Green light — The power supply is turned on and is functional. The power cable must be connected to the power connector (at the back of the computer) and the electrical outlet. NOTE: You can test the health of the power system by pressing the test button.
- Page 55 Feature Specification Storage 2.2 GRMS Maximum shock: Operating 40 G Storage 105 G Altitude: Operating –15.2 m to 3048 m (–50 ft to 10,000 ft) Storage –15.2 m to 10,668 m (–50 ft to 35,000 ft) Airborne contaminant level G1 or lower as defined by ANSI/ISA-S71.04-1985...
-
Page 56: Contacting Dell
2. Verify your country or region in the Choose a Country/Region drop-down menu at the bottom of the page. 3. Click Contact Us on the left side of the page. 4. Select the appropriate service or support link based on your need. 5. Choose the method of contacting Dell that is convenient for you. - Page 57 Dell Precision T1650 Описание Характеристики...
Need help?
Do you have a question about the Precision Workstation T1650 and is the answer not in the manual?
Questions and answers