Advertisement
Dell OptiPlex XE2
Setup And Features Information
About Warnings
WARNING: A WARNING indicates a potential for property damage, personal injury, or death.
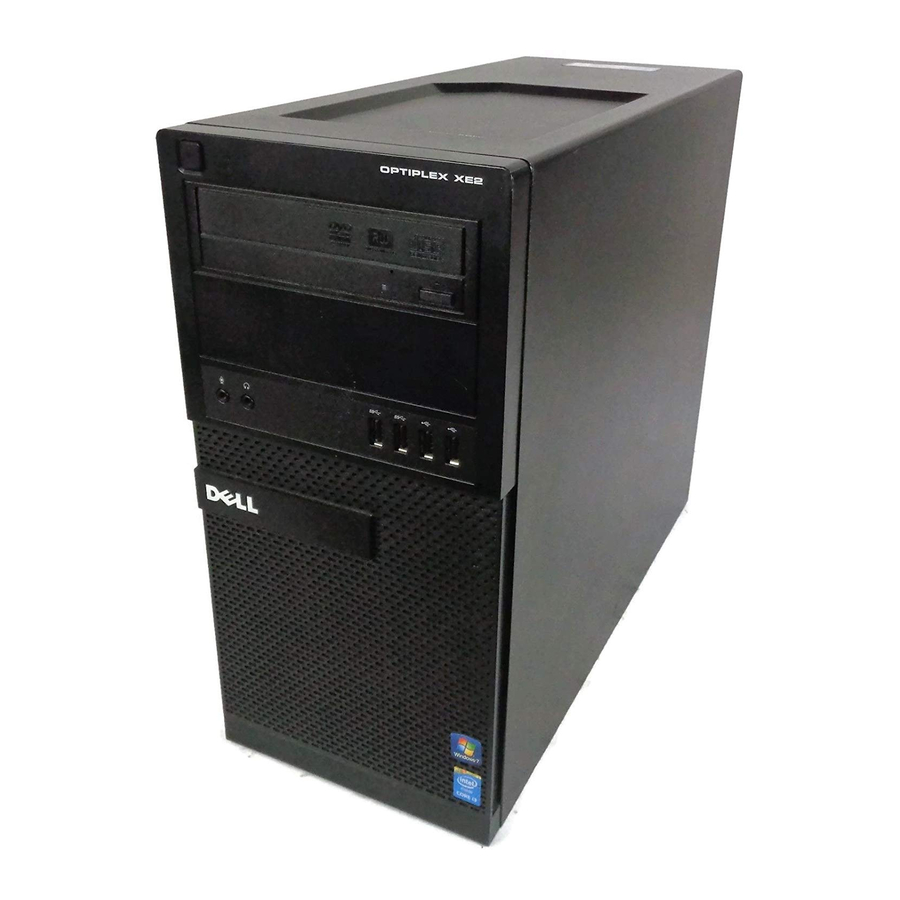
Mini-Tower — Front and Back View
Figure 1. Front and Back View Of Mini-Tower
1. power button, power light
2. optical-drive bay
3. headphone connector
4. microphone connector
5. optical drive (optional)
6. optical-drive eject button
7. USB 2.0 connectors (2)
8. USB 3.0 connectors (2)
9. drive activity light
10. power-supply diagnostic light
11. power-supply diagnostic button
12. power connector
13. back panel connectors
14. expansion-card slots (4)
15. security-cable slot
16. padlock ring
Regulatory Model: D13M, D07S
Regulatory Type: D13M001, D07S001
2013 - 03
Advertisement
Table of Contents

Related Manuals for Dell OptiPlex XE2


Summary of Contents for Dell OptiPlex XE2
-
Page 1: Front And Back View
Dell OptiPlex XE2 Setup And Features Information About Warnings WARNING: A WARNING indicates a potential for property damage, personal injury, or death. Mini-Tower — Front and Back View Figure 1. Front and Back View Of Mini-Tower 1. power button, power light 10. - Page 2 Mini-Tower — Back Panel View Figure 2. Back Panel View of Mini-Tower 1. mouse connector 8. keyboard connector 2. network link integrity light 9. USB 2.0 connectors (2) 3. network connector 10. DisplayPort connectors (2) 4. network activity light 11. USB 3.0 connectors (2) 5.
-
Page 3: Back Panel View
WARNING: Before you begin any of the procedures in this section, read the safety information that shipped with your computer. For additional best practices information, see www.dell.com/regulatory_compliance NOTE: Some devices may not be included if you did not order them. - Page 4 Figure 6. DisplayPort Cable Figure 7. VGA To DisplayPort Adapter Connect the USB keyboard or mouse (optional). Figure 8. USB Connection Connect the network cable (optional). Figure 9. Network Connection Connect the power cable(s). Figure 10. Connecting Power Press the power buttons on the monitor and the computer.
-
Page 5: Specifications
Figure 11. Turning On Power Specifications NOTE: Offerings may vary by region. The following specifications are only those required by law to ship with your computer. For more information regarding the configuration of your computer, click Start → Help and Support and select the option to view information about your computer. -
Page 6: Finding More Information And Resources
Blu-ray Disc Association (BDA) and licensed for use on discs and players. The Bluetooth word mark is a registered ® trademark and owned by the Bluetooth SIG, Inc. and any use of such mark by Dell Inc. is under license. Wi-Fi is a registered ® ®...
Need help?
Do you have a question about the OptiPlex XE2 and is the answer not in the manual?
Questions and answers