Table of Contents
Advertisement
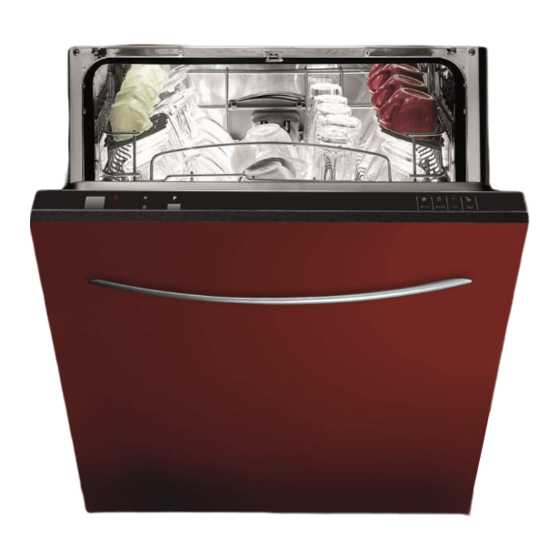
USER MANUAL FOR YOUR
BYDI630 60 cm Fully
integrated full height dishwasher
NOTE
: This User Instruction Manual contains important
information, including safety & installation points, which will
enable you to get the most out of your appliance. Please keep it
in a safe place so that it is easily available for future reference; for
you or any person not familiar with the operation of the appliance.
GS 30/09/13
Advertisement
Table of Contents

Related Manuals for Baumatic BYDI630


Summary of Contents for Baumatic BYDI630
- Page 1 USER MANUAL FOR YOUR BYDI630 60 cm Fully integrated full height dishwasher NOTE : This User Instruction Manual contains important information, including safety & installation points, which will enable you to get the most out of your appliance. Please keep it in a safe place so that it is easily available for future reference;...
-
Page 2: Table Of Contents
Contents Environmental note Important safety information 5 – 7 Specifications 8 – 9 Dimensions Specifications 8 – 9 Electrical details Description of the appliance 10 – 11 Control panel Using your dishwasher 11 - 21 Before first use Filling with dishwasher salt 11 –... -
Page 3: Environmental Note
ENVIRONMENTAL NOTE Note : Before discarding an old appliance, switch off and disconnect it from the power supply. Cut off and render any plug useless. Cut the cable off directly behind the appliance to prevent misuse. This should be undertaken by a competent person. Disable the door lock to make sure that children cannot get stuck inside the appliance. -
Page 4: Important Safety Information
IMPORTANT SAFETY INFORMATION Your safety is of the utmost importance to us. Please make sure that you read this instruction booklet before attempting to install or use the appliance. If you are unsure of any of the information contained in this booklet, please contact the Advice Line. - Page 5 o Care should be taken not to trap the power supply cable underneath the appliance whilst installing it. o No attempt should be made to alter or modify the specifications of this appliance. In daily use o This appliance is only designed to wash normal domestic washloads.
- Page 6 Child Safety o Your dishwasher should only be used by adults. You should not allow children in the area of the machine unsupervised. You should not let them touch the controls or play with the appliance. o It could be possible for a child or pet to gain access to the dishwasher if the door is left open.
-
Page 7: Specifications
Specifications Product dimensions Height: 820 - 850 mm Width: 595 mm Depth: 540 mm Aperture dimensions Height: 820 mm (min) Width: 600 mm Depth: 580 mm (min) Product specifications o 12 Place settings o 4 functions: Normal Economy Rapid All in 1 (3 in 1) o 4 temperatures: 40°C, 50°C, 55°C, 65°C o Self-cleaning stainless steel micro-filter o Anti-leak device... -
Page 8: Electrical Details
Electrical details Rated voltage: 230 Vac 50 Hz Supply connection: 10 A (double pole switched fused outlet with 3 mm contact gap) Optional extra o DWD600SS- Stainless steel door with mark resistant coating and bar handle. -
Page 9: Description Of The Appliance
Description of the appliance Upper basket Spray arms Lower basket Water softener Main filter Detergent dispenser Cup shelf Cutlery basket Coarse filter Rinse aid dispenser Drain pipe connector Inlet pipe connector... -
Page 10: Control Panel
Control panel ON/OFF button Salt warning neon Rinse aid warning neon Program button Program indicator lights Using your dishwasher Before first use o Install the appliance as per the installation instructions contained within this booklet. o Fill the water softener with ½ litre of tap water and then fill with specialist dishwasher salt. -
Page 11: Setting The Water Softener Level
IMPORTANT: It is only necessary to do this when you fill the container with salt for the first time. o Pour salt into the water softener, using the funnel that is supplied with the appliance. You should add approximately 1 kg of salt into the water softener. -
Page 12: Filling With Rinse Aid
To alter the amount of salt that is released by the water softener, you should:- o Within 60 seconds of supplying power to the appliance, press and hold the program button (4) for 5 seconds. o The machine will enter the salt adjustment mode and the salt and rinse aid warning lights will flicker. -
Page 13: Setting The Rinse Aid Level
o To access the rinse aid dispenser, you should turn the cap anticlockwise and it will pop out of the hole (1). Then slowly pour in liquid rinse aid (2). o You should continue to fill with rinse aid, until the level indicator turns completely black. -
Page 14: Filling With Dishwasher Detergent
Filling with dishwasher detergent The detergent dispenser must be refilled at the start of each wash cycle. Press the release button to open the lid. o The section marked A in the diagram is for the main wash cycle detergent. Only one detergent tablet should be placed in the dispenser at any one time. -
Page 15: Concentrated Detergent
oncentrated detergent o The use of the Normal wash program in combination with concentrated detergents reduces pollution and is good for your dishes. The Normal program is specifically matched to the dirt- dissolving p roperties of the enzymes of the concentrated detergent. -
Page 16: Adjusting The Upper Basket
djusting the upper basket Your dishwasher has an adjustable upper basket which you can alter to the most suita ble position for the items you are going to wash in the pper basket. o The height of the upper basket can be a djusted by removing the upper basket from the guide supports. -
Page 17: Loading The Lower Basket
pper position o If the lower wheels are placed in the guide supports, then the basket is in the upper position. o For accommodating items such as glass tumblers and wine glasses. Wine glasses should be placed upside down, so that t stem of the glass rests in one of the grooves on the side flap. -
Page 18: The Cutlery Basket
The cutlery basket Cutlery should be placed inside of the cutlery basket. The cutlery basket should then be placed in the appropriate position in the lower basket. Forks Soup spoons Dessert spoons Teaspoons Knives Serving spoon Gravy ladle Serving fork o For the best washing performance, cutlery should be placed through the slots in the top... -
Page 19: Loading Dishes And Cutlery
Loading dishes and cutlery Household cloths, sponges or any other object that may absorb water SHOULD NOT be washed in a dishwasher. o Remove leftovers and soften the remnants of burnt food in pans, prior to loading dishes in the appliance. o Once the dishwasher has been loaded, check that the spray arms can move freely. -
Page 20: Program Table
The following items are not always suitable for washing inside a dishwasher:- o Stoneware should only be washed if the manufacturer of the item has marked it as dishwasher safe. o Plastic items (such as lunchboxes) should only be washed if the manufacturer has marked it as dishwasher safe. -
Page 21: Setting A Wash Program
Rapid A shorter Wash wash for (40°C) 20 g lightly soiled Rinse minutes loads that do Rinse not need (40°C) drying. *EN 50242. This programme is the test cycle. * The wash program times that are quoted are intended as a guide only. -
Page 22: Changing A Wash Program
Changing the wash program IMPORTANT: This should only be attempted when the cycle has only just started, otherwise the detergent tablet may have already released or you could have hot water escaping. o Slightly open the door of the appliance to stop the current cycle. o Press and hold down the program selection button (4) for 3 seconds to cancel the wash program. -
Page 23: Rinse Aid And Salt Indicator Neons
o It is normal for the dishwasher to be wet inside. o Empty the lower basket first and then the upper one. This will avoid water dripping from the upper basket onto the dishes in the lower one, causing streaking. Rinse aid and salt indicator neons o The rinse aid and salt indicator neons on the control panel will let you know when the appliance needs rinse aid or salt adding to it. -
Page 24: Cleaning The Filters
Coarse filter- Larger items such as pieces of bone or glass, which could clog the drain, are trapped in this filter. Fine filter- This filter holds soil and food residue in the sump area and prevents it from being redeposited on the dishes during a wash cycle. -
Page 25: Cleaning The Spray Arms
IMPORTANT: If a glass gets smashed inside of the appliance, you must check there is no glass in the filter before the machine is used again as this can cause a drainage failure. IMPORTANT: THE DISHWASHER SHOULD NEVER BE SET ON A WASH CYCLE WITHOUT THE FILTERS BEING INSIDE OF THE APPLIANCE. -
Page 26: Cleaning The Door
Cleaning the door o To clean the edge around the outside of the door, you should use a soft, damp cloth only. o To prevent water from penetrating the door lock or electrical components, DO NOT use a spray cleaner of any kind. o DO NOT use any abrasive cleaner or scouring pads on the inner or outer surfaces, as they may cause damage to them. -
Page 27: Preparing And Connecting The Furniture Door
o The aperture that your dishwasher needs to be installed into should resemble the one shown in the above drawing. o There should be no less than a 50 mm gap between the top of the dishwasher and the underneath of the worktop. Preparing and connecting the furniture door o IMPORTANT: The furniture door is not supplied with the appliance. - Page 28 o Use the installation template supplied with the appliance to mark up and then drill out the necessary holes in the furniture door. o Attach the upper hooks onto the furniture door. o Attach the lower hooks onto the furniture door.
-
Page 29: Adjusting The Tension Of The Door Spring
Adjusting the tension of the door spring o The door of the dishwasher is attached to springs. These are set at the factory to ensure that they are at the proper tension, so that the door open close smoothly. o After the furniture door has been fitted, you will need to adjust the tension of the door spring. -
Page 30: Connecting To The Mains Water Supply
Connecting to the mains water supply IMPORTANT: Do not connect the appliance to your mains water supply using an old or an existing water inlet hose. The inlet hose supplied with the dishwasher is the ONLY one that should be us DO NOT CONNECT THE WATER INLET HOSE TO A HOT WATER TAP. -
Page 31: Connecting To The Water Outlet
Connecting to the water outlet Secure the drain hose, so that it cannot move whilst the dishwasher is in use. The drain hose can be hung in positions A, B or C. Place the end of the drain hose on your drain pipe. Push it a short way down into your drain pipe. -
Page 32: Applying The Condensation Strip
DO NOT REMOVE THE RATING PLATE AS THE INFORMATION ON IT IS IMPORTANT. The moulded plug that is supplied with the appliance must be placed into an earthed and insulated socket. Broken or damaged power leads must only be replaced by a suitably qualified person. -
Page 33: Positioning The Dishwasher
Positioning the dishwasher o Place the feet of the dishwasher into the slide rails. o Carefully slide the dishwasher back into position, underneath the worktop. Levelling the appliance o IMPORTANT: Your dishwasher must be level for it to operate properly. o Make sure that the dishwasher is supported whilst it is being levelled, otherwise it may tip over. -
Page 34: Securing The Dishwasher
o Use a spirit level to check that appliance is level. o Check that appliance level from side to side. o Check that appliance level from front to back. Securing the dishwasher The dishwasher must be secured to the worktop, this can be done in one of two ways:- o Standard worktop- Secure the dishwasher to the underside of the worktop by using two wood screws. -
Page 35: Before First Use
Before first use You should check the following before using the appliance for the first time:- o That the dishwasher is level and fixed in position. o That the water tap is fully open. o That there are no leaks at either end of the drain or inlet hoses. o That the inlet and outlet hose are fully tightened. - Page 36 IF THE FAULT CODE REAPPEARS AFTER FOLLOWING THE ABOVE ADVICE AND CLEARING THE FAULT CODE. YOU SHOULD TURN OFF THE APPLIANCE; DISCONNECT THE APPLIANCE FROM YOUR MAINS SUPPLY. THEN ARRANGE FOR AN ENGINEER TO ATTEND THE APPLIANCE. YOU SHOULD CONTACT THE ADVICE LINE ON TELEPHONE NUMBER (0118) 933 6918.
-
Page 37: General Troubleshooting
General troubleshooting Problem Possible causes What to do Technical problems Fuse blown or the circuit Replace fuse or rest circuit breaker. breaker acted. Remove any other appliances sharing the same circuit with the dishwasher. Power supply is not turned Make sure the dishwasher is turned on Dishwasher does and the door is closed securely. - Page 38 Unsatisfactory washing results The dishes were not See “Loading the dishwasher baskets” loaded correctly. section. The program was not Select a more intensive program. See the powerful enough. “wash cycle table”. Not enough detergent was Use more detergent or change your dispensed.
-
Page 39: Technical Data
Technical Data Manufacturer HOMEKING Model Number BYDI630 Standard Place Settings Energy Efficiency Class (1) Annual Energy Consumption (2) 291 kWh Energy Consumption of the Standard 1.02 kWh Cleaning Cycle Power Consumption of Off Mode 0.00 W Power Consumption of Left-On Mode 0.40 W... -
Page 40: Contact Details
United Kingdom 6 Bennet Road, Reading, Berkshire RG2 0QX United Kingdom Customer Care (0118) 933 6918...
Need help?
Do you have a question about the BYDI630 and is the answer not in the manual?
Questions and answers