Minolta DYNAX 5 Instruction Manual
Hide thumbs
Also See for DYNAX 5:
- Technical specifications (8 pages) ,
- Instruction manual (65 pages) ,
- Manual (121 pages)

Related Manuals for Minolta DYNAX 5


Summary of Contents for Minolta DYNAX 5
- Page 1 CUSTOM DETAILED CREATIVE SUBJECT / AUTOMATIC GETTING APPENDIX FUNCTIONS OPERATION EXPOSURE DRIVE OPERATION STARTED...
-
Page 2: Table Of Contents
9222-2163-11 MM-B108 (E).qxd 01.8.3 16:11 Page 2 TABLE OF CONTENTS FULLY-AUTOMATIC OPERATION The GETTING STARTED section describes how to prepare the camera for HANDLING THE CAMERA ..........26 use. The FULLY-AUTOMATIC OPERATION chapter shows how to take Pressing the Shutter-release Button ......26 photographs quickly and simply by using the camera’s automatic Holding the Camera ............ - Page 3 9222-2163-11 MM-B108 (E).qxd 01.8.3 16:11 Page 4 TABLE OF CONTENTS CREATIVE EXPOSURE MODES SETTING THE ISO MANUALLY ........86 EXPOSURE BRACKETING ..........87 APERTURE CONTROL ..........52 Continuous Advance Bracketing ........ 88 SHUTTER CONTROL ............ 53 Single Frame Advance Bracketing......88 EXPOSURE MODES ............
-
Page 4: For Proper And Safe Use
Page 6 FOR PROPER AND SAFE USE Thank you for purchasing the Minolta Maxxum/Dynax 5. Please take time Read and understand all warnings and cautions before using this to read this manual so that you can enjoy all the features of your new product. - Page 5 • If the product emits a strange odor, heat, or smoke, discontinue use. Immediately remove the batteries taking care not to burn yourself. The continued use of a damaged product or part may cause injuries. • Take the product to a Minolta Service Facility when repairs are required.
-
Page 6: Quick Operation
9222-2163-11 MM-B108 (E).qxd 01.8.3 16:11 Page 10 QUICK OPERATION Insert batteries. Set full-auto operation. • This camera uses two CR2 lithium •Press the program-reset button to set p.18 batteries. the camera to fully automatic p.30 operation. Center your subject in the Attach the lens. -
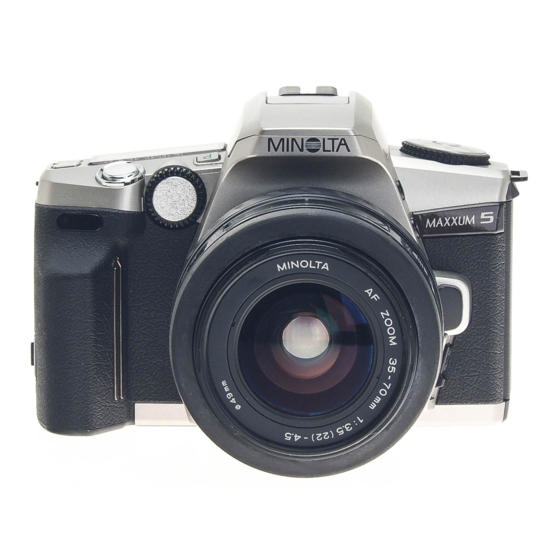
Page 7: Names Of Parts
9222-2163-11 MM-B108 (E).qxd 01.8.3 16:11 Page 12 NAMES OF PARTS Body *This camera is a sophisticated optical instrument. Care should be taken to keep these surfaces clean. Please read the care and storage For information on specific parts, refer to the page shown in instructions in the back of this manual (p. -
Page 8: Data Panel
9222-2163-11 MM-B108 (E).qxd 01.8.3 16:11 Page 14 NAMES OF PARTS Data Panel Viewfinder Spot focus area (69) Manual-focus indicator (75) Shutter speed/ISO display Date indicator (103) Exposure-mode indicator (54-66) Subject-program icons (40-45) Exposure- Subject-program indicators bracketing Self-timer (40-45) indicator (46) indicator Aperture/Exposure-com- (87) -
Page 9: Getting Started
9222-2163-11 MM-B108 (E).qxd 01.8.3 16:11 Page 16 STRAP GETTING Attaching the Strap Pass the strap STARTED through the strap eyelet from below as shown. • Attach the strap so that the tip comes inside. This section provides the information necessary to prepare the camera for use. -
Page 10: Batteries
9222-2163-11 MM-B108 (E).qxd 01.8.3 16:11 Page 18 BATTERIES Installing the Batteries Battery Condition Indicators Battery condition indicators shows the level of battery Your camera uses two 3V CR2 lithimum batteries to power. supply power for all camera operations. Turn the main switch to ON. Slide the battery-chamber A battery icon appears on the data •... -
Page 11: Lens
9222-2163-11 MM-B108 (E).qxd 01.8.3 16:11 Page 20 FILM LENS Attaching the Lens Always load or remove the film under subdued light to reduce the chances of fogging. This camera uses interchangeable lenses. See page 116 for information on which lenses are compatible with this camera. Loading the Film The camera automatically sets the correct film Remove the body and rear... -
Page 12: Film Chamber Lock
9222-2163-11 MM-B108 (E).qxd 01.8.3 16:11 Page 22 FILM Extend the leader between When the film is loaded correctly : • appears in the frame counter. The film the guide rails to the index speed (ISO) is displayed on the data panel for mark. -
Page 13: Rewinding The Film
9222-2163-11 MM-B108 (E).qxd 01.8.3 16:11 Page 24 FILM FULLY-AUTOMATIC Rewinding the Film After you have exposed the last frame, the camera will automatically OPERATION rewind the film. Wait until the film is completely rewound. • will appear and will blink on the data panel, indicating it is safe to Use full-auto when you are just starting out or when open the back-cover. -
Page 14: Handling The Camera
9222-2163-11 MM-B108 (E).qxd 01.8.3 16:11 Page 26 HANDLING THE CAMERA EYE-START Pressing the Shutter-release Button Instead the shutter-release button, the eye-start automatically activates the camera’s focus and exposure systems when you bring the camera to Press the shutter-release button partway down to activate the camera’s your eye. -
Page 15: Eye-Start
9222-2163-11 MM-B108 (E).qxd 01.8.3 16:11 Page 28 AUDIO SIGNAL EYE-START Canceling Eye-start Audio signal is initially on. The camera will produce an audio tone when : • focus is confirmed. 2 short beeps Turn the function dial to (Continuous AF (p. -
Page 16: Taking Pictures In Full-Auto
9222-2163-11 MM-B108 (E).qxd 01.8.3 16:11 Page 30 TAKING PICTURES IN FULL-AUTO Full-auto is the camera’s standard operating mode and is suited for use Center your subject in the in almost any situation. When selected, the camera sets the focus and wide focus frame . -
Page 17: Focus
9222-2163-11 MM-B108 (E).qxd 01.8.3 16:11 Page 32 FOCUS Focus Signals Special Focus Situations The camera may not be able to focus in the situations described below. The following signals appear in the viewfinder to indicate the focus status. Use focus lock (p. 34) or manual focus (p.75). •... -
Page 18: Focus Lock
9222-2163-11 MM-B108 (E).qxd 01.8.3 16:11 Page 34 FOCUS LOCK USING THE BUILT-IN FLASH The focus-lock function is used when the When appears in the viewfinder in full-auto, the built-in flash pops-up subject is off-center and outside the focus automatically when the shutter-release button is pressed partway down. frame. -
Page 19: Flash Range
9222-2163-11 MM-B108 (E).qxd 01.8.3 16:11 Page 36 USING THE BUILT-IN FLASH Flash Range Fill Flash The range of the built-in flash depends on the speed of the film and the Use the fill flash when taking pictures under fluorescent lighting or to selected aperture. -
Page 20: Red-Eye Reduction
9222-2163-11 MM-B108 (E).qxd 01.8.3 16:11 Page 38 USING THE BUILT-IN FLASH SUBJECT PROGRAM / Red-Eye Reduction When using flash in low-light conditions, light reflecting from the retina DRIVE MODES of your subject’s eyes may produce the effect known as red-eye. Use the built-in flash’s red-eye reduction mode to produce natural looking photographs. -
Page 21: Subject Program Selection
9222-2163-11 MM-B108 (E).qxd 01.8.3 16:11 Page 40 SUBJECT-PROGRAM SELECTION Portrait Landscape Portraits have the greatest impact when a Landscape photography requires a large shallow depth-of-field* is used to separate depth-of-field to make sure the subject the subject from the background. In and background are in focus. -
Page 22: Close-Up
9222-2163-11 MM-B108 (E).qxd 01.8.3 16:11 Page 42 SUBJECT-PROGRAM SELECTION Close-up Sports Use close-up mode when photographing Fast shutter speeds are needed to stop small objects like flowers or jewelry. In action. In sports mode, the camera will close-up mode, the camera automatically set the fastest possible shutter speed sets the best possible aperture and and continually adjust the focus to track... -
Page 23: Night Portrait
9222-2163-11 MM-B108 (E).qxd 01.8.3 16:11 Page 44 SUBJECT-PROGRAM SELECTION Night Portrait Photograping Night Scenes Night portraits balance the camera’s flash Cancel the flash in night portrait mode to exposure with the background exposure. photograph night scenes. The longer In night portrait mode, the camera control shutter speeds set in night portrait mode the aperture and shutter speed, allowing let you capture beautiful photographs of... -
Page 24: Drive Modes
9222-2163-11 MM-B108 (E).qxd 01.8.3 16:11 Page 46 DRIVE MODES Self-timer Press the shutter-release button partway down to lock The self-timer delays the release of the shutter for approximately 10 seconds after the shutter-release button is pressed. the focus. • For off-center subjects, use focus lock (p. -
Page 25: For Owners Of The Remote Control Model
9222-2163-11 MM-B108 (E).qxd 01.8.3 16:11 Page 48 DRIVE MODES Continuous Adavance For Owner’s of the Remote-control Model In this mode, the camera continues to release the shutter and advance The camera can be operated up to 5m (16.4 ft.) away with the IR Remote the film as long as the shutter-release button is held down.
Need help?
Do you have a question about the DYNAX 5 and is the answer not in the manual?
Questions and answers