Table of Contents
Advertisement
Quick Links
Advertisement
Table of Contents

Related Manuals for Sharkoon 5-BAY

Summary of Contents for Sharkoon 5-BAY
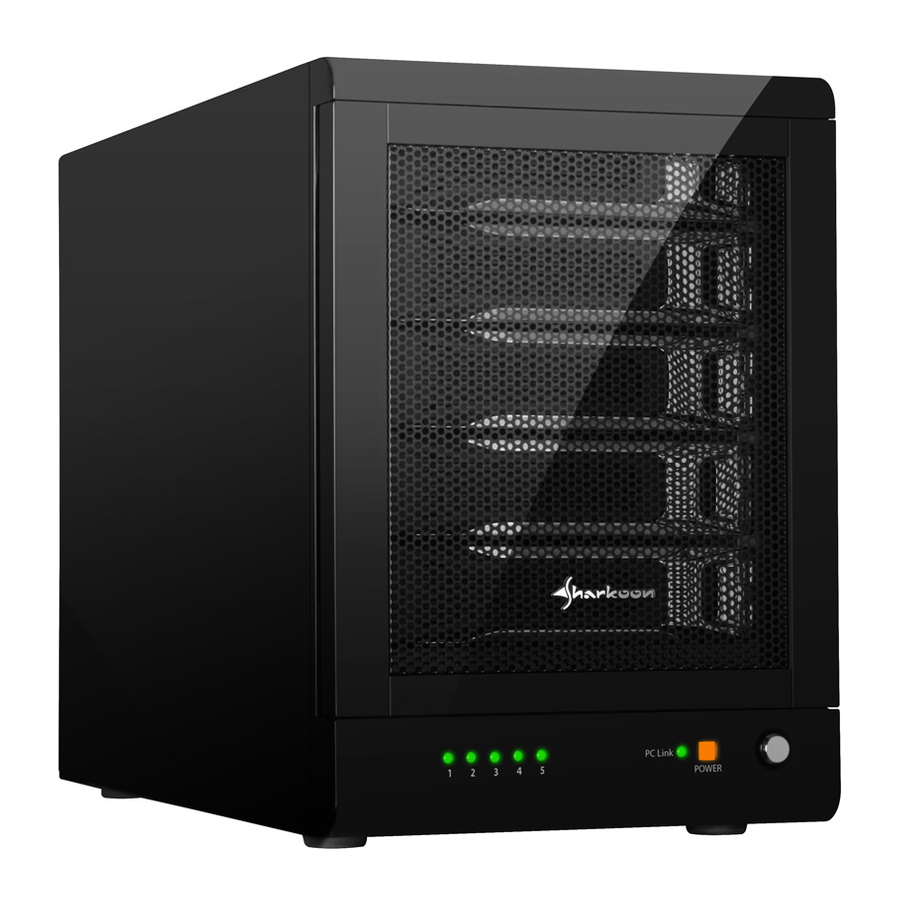
- Page 1 5-BAY RAID STATION Manual...
-
Page 2: Table Of Contents
9.1 Rebuilding a redundant drive 9.2 Rebuilding a HotSpare drive 10. Troubleshooting 11. Appendix 11.1 CLEAN mode 11.2 LARGE mode 11.3 CLONE mode 11.4 R0 mode 11.5 R1 mode 11.6 R10 mode 11.7 R3 mode 11.8 R5 mode 5-bay raid station... -
Page 3: Features
Dear customer! Congratulations for purchasing one premium quality SHARKOON product. For a long life time and to take full advantage of this product we recommend that you read this manual completely. Have a good time with our product! SHARKOON Technologies 1. -
Page 4: Usb Features
• Mouse or compatible pointing device • SATA connection: Intel ICH or optional Host Bus Adapter card and associated software drivers with Port Multiplier support • USB connection: USB 2.0 or 3.0 direct host connection 4. The device at a glance 5-bay raid station... -
Page 5: Rear Panel
4.1 Rear panel 4.2 The LED indications 5-bay raid station... - Page 6 GREEN (LOWER) HDD Unplugged / No Power HDD Plugged (Idle) HDD Plugged (Active) Blink (On) Error State (one or more bad partial volumes) HDD Rebuild (a physical partition is being Blink (On) rebuild; e.g. Mirroring Mode) 5-bay raid station...
-
Page 7: Package Contents
6.1 HDD installation 1. Open the front door, then unlock the HDD mounting frame lock and remove the HDD mounting frame from the 5-BAy RAID STATION (fig. 1). Fig. 1 2. Place the HDD into the HDD mounting frame (fig. 2). - Page 8 3. Use the mounting screws to securely attach the HDD to the mounting frame (fig. 3). Fig. 3 4. Slide the HDD mounting frame back into the 5-BAy RAID STATION (fig. 4). Fig. 4 5. Close the front door to complete the HDD installation (fig. 5).
-
Page 9: Power On/Off
Press the power button to switch on the device. Press again to power it off. 6.3 eSATA slot bracket installation 1. Remove the anchor screw of the slot bezel and take it from the rear side of your PC case (fig. 6). Fig. 6 5-bay raid station... -
Page 10: Configuration
ICH), the CLEAN mode is not available when configuring the 5-BAY RAID STATION. Only one disk is available on the host computer. 2. USB host connection If you are connecting your 5-BAy RAID STATION using an USB connection to your host, the USB port should be compliant with USB2.0 or 3.0. ... -
Page 11: Changing The Host Connection
Before you shut down your PC remove the 5-BAy RAID STATION from your system’s hardware configuration by double-clicking the symbol in the task bar. A menu will open up. Select the 5-BAy RAID STATION to securely remove it. Switch off the device and shut down your PC. 7.4 HDD HotPlug The hard disk drives should not be hot-plugged, but can be unplugged while the system is running. -
Page 12: Clean Mode
1. Switch off the device (fig. 8). Fig. 8 2. Toggle the RAID mode switches to the desired RAID mode according to the following chart (fig. 9): Fig. 9 3. Press and hold the setup button (fig. 10). Fig. 10 5-bay raid station... -
Page 13: Clone Mode With Hotspare
The CLONE mode with HotSpare drive requires a minimum of three drives to implement. 1. Switch off the device (fig. 12). Fig. 12 2. Insert two HDDs into the topmost drive bays (fig. 13). Fig. 13 5-bay raid station... - Page 14 3. Toggle the RAID mode switches to CLONE (fig. 14). Fig. 14 4. Press and hold the setup button (fig. 15). Fig. 15 5. Switch on the device and then release the setup button (fig. 16). Fig. 16 5-bay raid station...
- Page 15 6. Switch off the device (fig. 17). Fig. 17 7. Insert the HotSpare drive into the third HDD bay (fig. 18). Fig. 18 8. Switch on the device to complete the RAID mode setting (fig. 19). Fig. 19 5-bay raid station...
-
Page 16: R1 Mode With Hotspare
8.3 R1 mode with HotSpare 1. Switch off the device (fig. 20). Fig. 20 2. Insert three HDDs into the topmost drive bays (fig. 21). Fig. 21 3. Toggle the RAID mode switches to R1/R10 (fig. 22). Fig. 22 5-bay raid station... - Page 17 4. Press and hold the setup button (fig. 23). Fig. 23 5. Switch on the device and then release the setup button to complete the RAID mode setting (fig. 24). Fig. 24 5-bay raid station...
-
Page 18: R10 Mode With Hotspare
8.4 R10 mode with HotSpare 1. Switch off the device (fig. 25). Fig. 25 2. Insert five HDDs into the drive bays (fig. 26). Fig. 26 3. Toggle the RAID mode switches to R1/R10 (fig. 27). Fig. 27 5-bay raid station... - Page 19 4. Press and hold the setup button (fig. 28). Fig. 28 5. Switch on the power and then release the setup button to complete the RAID mode setting (fig. 29). Fig. 29 5-bay raid station...
-
Page 20: R3 Mode With Hotspare
The R3 mode with HotSpare HDD requires a minimum of four drives to implement. 1. Switch off the device (fig. 30). Fig. 30 2. Insert three drives into the topmost drive bays (fig. 31). Fig. 31 3. Toggle the RAID mode switches to R3 (fig. 32). Fig. 32 5-bay raid station... - Page 21 4. Press and hold the setup button (fig. 33). Fig. 33 5. Switch on the device and then release the setup button (fig. 34). Fig. 34 6. Switch off the device (fig. 35). Fig. 35 5-bay raid station...
- Page 22 7. Insert the hot spare HDD into the 4th HDD bay (fig. 36). Fig. 36 8. Switch on the device to complete the RAID mode setting (fig. 37). Fig. 37 5-bay raid station...
-
Page 23: R5 Mode With Hotspare
The R5 mode with HotSpare HDD requires a minimum of four drives to implement. 1. Switch off the device (fig. 38). Fig. 38 2. Insert three drives into the topmost drive bays (fig. 39). Fig. 39 3. Toggle the RAID mode switches to R5 (fig. 40). Fig. 40 5-bay raid station... - Page 24 4. Press and hold the setup button (fig. 41). Fig. 41 5. Switch on the device and then release the setup button (fig. 42). Fig. 42 6. Switch off the device (fig. 43). Fig. 43 5-bay raid station...
-
Page 25: Rebuilding A Redundant Or Hotspare Drive
Fig. 45 9. Rebuilding a redundant or HotSpare drive The 5-BAy RAID STATION duplicates all data to separate drives in order to protect against data loss due to drive failure in CLONE, R1, R3, R5, and R10 MODE. The following example illustrates the procedure of rebuilding a redundant or HotSpare drive. -
Page 26: Rebuilding A Redundant Drive
1. If drive 2 fails, please remove it from the device (fig. 46). Fig. 46 2. Switch off the device (fig. 47). Fig. 47 3. Replace the defective HDD with a hard disk drive of the same capacity or bigger (fig. 48). Fig. 48 5-bay raid station... -
Page 27: Rebuilding A Hotspare Drive
4. Switch on the device (fig. 49). Fig. 49 5. The 5-BAy RAID STATION will start rebuilding the virtual volume automatically (rebuild speed: approximately 200 GB/hour). 9.2 Rebuilding a HotSpare drive 1. If there is a HotSpare drive inserted into drive bay 5, and the drive 2 fails, the HotSpare drive 5 will replace the broken down drive. - Page 28 3. Replace the defective HDD with a hard disk drive of the same capacity or bigger (fig. 52). Fig. 52 4. Switch on the device (fig. 53). Fig. 53 5. The 5-BAy RAID STATION will replace the HotSpare drive in mounting bay 2 automatically. 5-bay raid station...
-
Page 29: Troubleshooting
5. Can the LARGE mode be used, when HDDs with different capacities or brand are built in? yes. 6. When the system is damaged in LARGE mode, is it still possible to read the data? No. The system is different from a RAID; the entire disk cannot be read. 5-bay raid station... -
Page 30: Appendix
It is also possible to create a LARGE volume using only a single hard disk drive connected to Port 1. However, it is not possible to expand an existing LARGE volume by adding another hard disk drive and still preserve any existing data on that volume. 5-bay raid station... -
Page 31: Clone Mode
It is also possible to create a CLONE volume using one hard disk drive connected to Port 1 of the 5-BAy RAID STATION, although no clone will occur until a second hard disk drive is connected. With only one hard disk drive connected, the CLONE volume will be available, although no data protection will be provided until a second hard disk drive is connected. -
Page 32: R0 Mode
Hard disk drive data segments are written to different disks, which increases performance. To implement the R0 mode storage policy, the 5-BAy RAID STATION creates a single virtual volume that is striped across all hard drives, with a storage capacity that is five times the capacity of the smallest drive. -
Page 33: R10 Mode
Host access takes precedence over the rebuild process. If you continue to use the R10 volume during the rebuild, the rebuild process will take a longer time to complete, and the host data transfer performance will also be affected. 5-bay raid station... -
Page 34: R3 Mode
Host access takes precedence over the rebuild process. If you continue to use the virtual R3 volume during the rebuild, the rebuild process will take a longer time to complete, and the host data transfer performance will also be affected. 5-bay raid station... -
Page 35: R5 Mode
When the offline drive comes back online, the appliance begins a rebuild process immediately to restore data redundancy. During this procedure the LED indications will notify you that a rebuild is in progress. 5-bay raid station... - Page 36 Host access takes precedence over the rebuild process. If you continue to use the virtual R5 volume during the rebuild, the rebuild process will take a longer time to complete, and the host data transfer performance will also be affected. 5-bay raid station...
- Page 37 All named products and descriptions are trademarks and/or registered trademarks of the respective manufacturers and are accepted as protected. As a continuing policy of product improvement at SHARKOON, the design and specifications are subject to change without prior notice. National product specifications may vary.
Need help?
Do you have a question about the 5-BAY and is the answer not in the manual?
Questions and answers