Table of Contents
Advertisement
Quick Links
Advertisement
Table of Contents

Related Manuals for Zte WiMAX


Summary of Contents for Zte WiMAX
- Page 1 Ofrecido por www.electromanuales.com ZTE WiMAX MODEM User Manual...
- Page 2 ZTE Corporation. The manual is published by ZTE Corporation. We reserve the right to make modifications on print errors or update specifications without prior notice. Copyright © 2010 by ZTE Corporation All rights reserved.
-
Page 3: Table Of Contents
Ofrecido por www.electromanuales.com TABLE OF CONTENTS General ..........................6 Welcome ........................ 6 Safety Precautions ....................6 Cleaning and Maintaining ..................7 Limited Warranty ....................7 Limitation of Liability ....................8 Getting Started ......................9 Appearance ......................9 Parts Supplied ......................9 LED Indicator ...................... - Page 4 4.2.3 Others ...................... 19 Ordinary Operation ..................... 20 Login ........................20 Router State ......................21 WAN Connection ....................23 5.3.1 WiMAX Connection .................. 23 5.3.2 WiMAX Information .................. 24 WIMAX Settings ....................25 5.4.1 Channel Settings ..................25 5.4.2 WiMAX Authentication ................27 Router ........................
- Page 5 Ofrecido por www.electromanuales.com 5.7.5 DMZ ......................51 5.7.6 System Security ..................52 5.7.7 Advanced Settings .................. 52 VPN ........................53 VoIP ........................54 5.9.1 User Details ....................54 5.9.2 Advanced ....................57 5.9.3 Supplementary ..................58 5.10 Advanced ......................59 5.10.1 Status .......................
-
Page 6: General
1 General Welcome Thanks for choosing the ZTE WiMAX MODEM (hereinafter referred to as “MODEM”). To get the most from your MODEM and to keep it in the best condition, please read this manual carefully. The pictures, symbols and contents in this manual are for reference only. They might not be completely identical with your MODEM. -
Page 7: Cleaning And Maintaining
MODEM to operate at higher power level than needed. Limited Warranty This warranty does not apply to defects or errors in the Product caused by: (a) Reasonable MODEM Appearance Disfiguration. (b) End User’s failure to follow ZTE’s installation, operation or maintenance instructions or General... -
Page 8: Limitation Of Liability
ZTE had been advised, knew or should have known of the possibility of such damages, including, but not limited to lost profits, interruption of business, cost of capital, cost of substitute facilities or product, or any downtime cost. -
Page 9: Getting Started
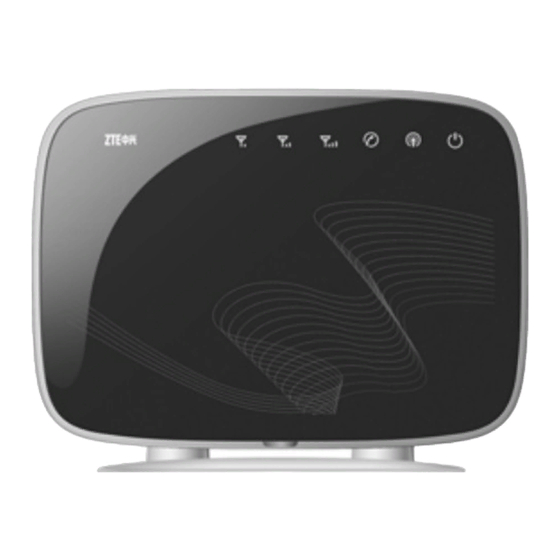
Ofrecido por www.electromanuales.com 2 Getting Started Appearance Front Panel Parts Supplied Parts Quantity MODEM Power adapter RJ-45 10/100 BaseT Ethernet cable User Manual Getting Started... -
Page 10: Led Indicator
1,2,3 WiMAX CINR I Led On, 2,3 Leds Off Signals is weak: 9<=CINR<=13 1,2,3 Leds Off No Signal, CINR<9 1 Led blinking Connecting to WiMAX network Hook on/Out of Service Blinking Registering VoIP/FoIP service 4 VoIP/FoIP Status Registered VoIP/FoIP service... -
Page 11: Working Condition
Dimensions (W × H × D) 201.7mm × 155.7mm × 54.8mm Weight About 511 g Please refer to the real objects for the related parameters about the charger. Your modem is only suitable for one type of WiMAX frequency range. Getting Started... -
Page 12: Ports
Ofrecido por www.electromanuales.com Ports All ports are in back panel. Port Indicator Description External power socket LAN1,LAN2, LAN port LAN3,LAN4 PHONE Phone port Reset Reset button WPS button is used to start WiFi Protected Setup authentication process. ON/OFF WLAN button Antenna connector Getting Started... -
Page 13: Connecting Modem
Ofrecido por www.electromanuales.com 3 Connecting MODEM Application Structure Network connection is shown as follows: Hardware Installation Make sure that your MODEM is powered off. You can turn on/off modem by connecting/disconnecting power cable. Connecting MODEM... -
Page 14: Connect To Lan
Ofrecido por www.electromanuales.com 3.2.1 Connect to LAN 1. Connect to LAN via Network Cable 2. Plug one end of an Ethernet network cable into LAN ports on the back of the MODEM, and plug the other end into an Ethernet port on a network device, for example, PCs or other network devices. -
Page 15: Preparation For Configuring Modem
Ofrecido por www.electromanuales.com 4 Preparation for Configuring MODEM Usually, MODEM has been configured by service provider and you can use it directly. But in some instance, you need configure MODEM by yourself. TCP/IP Installation and Configuration Installation If TCP/IP protocol is not installed, please install it first. Please refer to installation steps in Windows XP as follows (For classic start menu): 1. - Page 16 Ofrecido por www.electromanuales.com Preparation for Configuring MODEM...
- Page 17 Ofrecido por www.electromanuales.com 4. Select <Internet Protocol (TCP/IP)> and click <OK>. Configuration (For classic start menu) 1. Click <Start> and select <Settings>, then click <Network Connections>. 2. Double-click <Local Area Connection> and click <Properties>. 3. Double-click <Internet Protocol (TCP/IP)> and select <Obtain an IP address automatically>, <Obtain DNS server address automatically>.
-
Page 18: Checking
Ofrecido por www.electromanuales.com Note: If the service provider provides DNS IP address, please select <Use the following DNS server addresses> and enter the specified IP address. Checking 4.2.1 Check LAN Connection 1. Click <Start> and <Run>. In the Open field, enter command. Press the Enter key or click the <OK>... -
Page 19: Others
Ofrecido por www.electromanuales.com 2. Select <Connections>. 3. Click the <LAN Settings> button and remove anything that is checked. 4. Click the <Cancel> button to go back to the previous screen. 5. Click the <OK> button to confirm canceling proxy server in browser. 4.2.3 Others Sometimes you also need several parameters, please ask your service provider in detail. -
Page 20: Ordinary Operation
Ofrecido por www.electromanuales.com 5 Ordinary Operation Login To access the Web-based Utility of the MODEM, launch Internet Explorer and enter the MODEM’s default IP address (192.168.0.1) in the address field, then press the Enter key. A screen will appear asking you for your User Name and Password (detail as following picture). -
Page 21: Router State
Ofrecido por www.electromanuales.com Note: If you select Save after you give user name and password, the router will save them, next time when you want to log in the router with the same user name and password, what you need to do is click <Login>. When you access the MODEM setup page, the first screen you see as following: The whole interface is divided into two parts, and related functions can be executed by operation in the related areas. - Page 22 Network Type: The type of network. WAN Information • WiMAX Status: WiMAX network information. • IP Address: IP address for WAN connection. It is same IP address as the WiMAX address. • Primary DNS: Primary DNS address. • Secondary DNS: Secondary DNS address.
-
Page 23: Wan Connection
Subnet Mask: The subnet mask address • Default Gateway: Default gateway. • DHCP Server: DHCP server information. WAN Connection 5.3.1 WiMAX Connection After access MODEM setup page successfully, please click WAN Connection WiMAX Connection link to access the following screen: Ordinary Operation... - Page 24 • WAN Status: Wan current status • WAN IP Address: IP address for WAN connection. It is the same IP address as the WiMAX IP Address • WAN Netmask: Net mask assigned by DHCP server • WAN Gateway: Gateway IP address •...
-
Page 25: Wimax Information
Tx Power: Transmission power • PER: Packet error ratio • CINR: Carrier to interference and noise ratio WIMAX Settings 5.4.1 Channel Settings After access MODEM setup page successfully, please click WiMAX Settings Channel Settings link to access the following screen: Ordinary Operation... - Page 26 Ofrecido por www.electromanuales.com Ordinary Operation...
-
Page 27: Wimax Authentication
• Frequency: Frequency of the channel. After finish the configuration, click <Apply> button to take effect. 5.4.2 WiMAX Authentication After access MODEM setup page successfully, please click WiMAX Settings WiMAX Authentication link to access the following screen: 1. EAP-MD5 •... - Page 28 Ofrecido por www.electromanuales.com • Re-enter To Confirm: Enter user authentication password once again. • Anonymous Identity: Anonymous identity for EAP-MD5 After finishing the related configuration, click <Apply> button to take effect. 2. EAP-TLS • Default Identity: Default Identity for EAP-TLS •...
- Page 29 Ofrecido por www.electromanuales.com • Re-enter to Confirm: Enter user authentication password once again. • After finishing the above configuration, click <Apply> button to take effect. • Device Private Key File : Click <Browse…> button to select device private key file in local disk, then click <Update>...
-
Page 30: Router
Ofrecido por www.electromanuales.com • Default Identity: default identity for EAP-TTLS/MSCHAPv2 • Default Password: default password for EAP-TTLS/MSCHAPv2 • Re-enter to Confirm: Enter user authentication password once again • Anonymous Identity: anonymous identity for EAP-TTLS/MSCHAPv2 • After finishing the above configuration, click <Apply> button to take effect. •... -
Page 31: Dhcp Clients
Ofrecido por www.electromanuales.com • IP Address: IP address for LAN interface. • Subnet Mask: Subnet mask for the IP address. • MAC Address: MAC address for the LAN interface. • DHCP Type: Define the DHCP type. By default, router is set as DHCP server. •... -
Page 32: Wi-Fi Settings
Ofrecido por www.electromanuales.com • MAC Address: MAC address of DHCP client • IP Address: IP address of DHCP client • Expires in: The left time for lease, if this IP address is static bound, then demonstrated: Infinity • Click <Refresh> button to refresh the information. Wi-Fi Settings 5.6.1 Station List After access MODEM setup page successfully, please click Wi-Fi Settings... - Page 33 Ofrecido por www.electromanuales.com Ordinary Operation...
- Page 34 Ofrecido por www.electromanuales.com • Wi-Fi On/Off: Enable Wi-Fi or not. • Network Mode: If all of the wireless devices connect with this router in the same transmission mode, performance will be improved by choosing the appropriate wireless mode. • Network Name(SSID): Service Set Identifier (SSID). Enter a string less than 32 charac- ters as the name for your wireless local area network(WLAN).
- Page 35 Ofrecido por www.electromanuales.com WDS configuration is shown below: Step Description 1.Set the same SSID Manually set the SSID and channel is strongly recommended. and channel for APs And select the known channel from channel 1 to channel 14. ·If you select Disable, WDS is disabled. ·If you select Lazy Mode,WDS is enabled, and set wireless MAC address only on the peer APs.
-
Page 36: Advanced
Ofrecido por www.electromanuales.com The HT Physical Mode parameters are shown below: • Operating Mode: In Mixed Mode, packets are transmitted with a preamble compatible with the legacy 802.11a/g, the rest of the packet has a new format. In Green Field, high throughput packets are transmitted without a legacy compatible part. - Page 37 Ofrecido por www.electromanuales.com Ordinary Operation...
- Page 38 Ofrecido por www.electromanuales.com • Beacon Interval: The router broadcasts beacon message to announce that it has buff- ered frames to deliver. The default value is 100 (ms). Beacons are packets sent by an access point to synchronize a wireless network. Specify a beacon interval value. is recommended.
-
Page 39: Security
Ofrecido por www.electromanuales.com The Wi-Fi Multimedia parameters are shown below: • WMM Capable: When multimedia contents are transferred over wireless network, this function enhances data transfer performance. • APSD Capable: Automatic Power Save Delivery (APSD), enable or disable data flow using APSD during transmitting for power saving. - Page 40 Ofrecido por www.electromanuales.com Unless one of these encryption modes is selected, wireless transmissions to and from your wireless network can be easily intercepted and interpreted by unauthorized users. The security modes are described below: • OPEN: You can authenticate successfully with a SSID, whether it is valid or empty. •...
- Page 41 Ofrecido por www.electromanuales.com • Encrypt Type: Select NO ENCRYPTION or WEP. • WEP Keys: At most four keys can be set in the blank. Choose the primary key index. The primary key is the only key in use at a given time. Whatever keys you enter for an access point, you must also enter the same keys for the client adapter in the same order.
- Page 42 Ofrecido por www.electromanuales.com words, WEP key 1 on the AP must match WEP key 1 on the client adapter, WEP key 2 on the AP must match WEP key 2 on the client adapter, etc. Select Hex if use 10 or 26 hexadecimal numbers (0-9, or A-F).
-
Page 43: Wps
Ofrecido por www.electromanuales.com • WPA Algorithm: TKIP, AES or AUTO. • Pass Phrase: You can input a pass phrase encryption key format (8~64 bytes). • Key Renewal Interval: Define how long the key should be renewed. You can set Wireless MAC Filtering: •... - Page 44 Ofrecido por www.electromanuales.com Select Enable, click <Apply>, the WPS settings are shown in the following figure: This is used to setup security easily by choosing PIN (Pin Input Configuration) or PBC (Push Button Configuration) method to do Wi-Fi protected setup. Ordinary Operation...
-
Page 45: Firewall
Ofrecido por www.electromanuales.com • WPS Summary: Shows the WPS function status. • Click <Reset OOB> button to reset the settings. • WPS mode: Select PBC or PIN WPS mode. • PIN: There are two ways to use PIN mode, one is set PIN code on the client’s wireless adapter (you can find the PIN code in AP PIN field of WPS Summary), and the other way is set the client’s PIN code in Client PIN field. - Page 46 Ofrecido por www.electromanuales.com If you select Enable, the filter settings will appear: Ordinary Operation...
- Page 47 Ofrecido por www.electromanuales.com • Default Policy: Set how to handle the packet if none of the rules matches. • MAC address: Set the MAC address that will be filtered. • Dest IP Address: Set the destination IP address that will be filtered. •...
-
Page 48: Url Filter
Ofrecido por www.electromanuales.com 5.7.2 URL Filter After access MODEM setup page successfully, please click Firewall URL Filter link to access the following screen: Type URL address, and then click <Add> to add the URL address into the filtering list. The new URL filtering item will be shown in the Current URL Filter field. -
Page 49: Time Filtering
Ofrecido por www.electromanuales.com 5.7.3 Time Filtering After access MODEM setup page successfully, please click Firewall Time Filtering link to access the following screen: Select the Days and Time Range, and then click <Apply> to add the Time filtering. The new Time filtering item will be shown in the Current Time Rules field. - Page 50 Ofrecido por www.electromanuales.com If you select Enable, the Virtual Server Settings will appear: Ordinary Operation...
-
Page 51: Dmz
Ofrecido por www.electromanuales.com • IP Address: Set IP address for the virtual server. • Port Range: Set port numbers for the virtual server. • Protocol: Set protocol for the virtual server. • Comment: Type comment for the virtual server settings. Select Enable, and input the detail information in the Virtual Server Settings area, and then click <Apply>... -
Page 52: System Security
Ofrecido por www.electromanuales.com 5.7.6 System Security After access MODEM setup page successfully, please click Firewall System Security link to access the following screen: Allow or Deny the remote management function and Enable or Disable ping from WAN on requirement, and then click <Apply>. Click <Reset> to restore the default value. 5.7.7 Advanced Settings After access MODEM setup page successfully, please click Firewall Advanced Set-... -
Page 53: Vpn
Ofrecido por www.electromanuales.com • DNS Proxy: Disable or enable to send this DNS request to high-level DNS server. • NAT: Disable or enable the NAT in internal network. Click <Apply> to confirm. After access MODEM setup page successfully, please click VPN link to access the following screen: Ordinary Operation... -
Page 54: Voip
Ofrecido por www.electromanuales.com • Select Mode: Select L2TP or PPTP. • L2TP/PPTP Server IP Address: Input server IP address. • User Name: Input user Name • Password: Input password. • Select Operation: Select the operation, Connect or Disconnect. • VPN Status: VPN current status. Click <Apply>... - Page 55 Ofrecido por www.electromanuales.com Ordinary Operation...
- Page 56 • SIP Realm: This is a string value provided by the ITSP, such as AVSTW, or may be a domain name like www.zte.com.cn, defined by customer. • SIP Port: The listening/binding port of the local User Agents for receiving and transmitting SIP messages.
-
Page 57: Advanced
Ofrecido por www.electromanuales.com 5.9.2 Advanced After access MODEM setup page successfully, please click VoIP Advanced link to access the following screen: • Outbound Mode: Enable or disable the use of SIP outbound server config parameter. • STUN Mode: Enable or disable the use of STUN server to discover NAT mapping. •... -
Page 58: Supplementary
Ofrecido por www.electromanuales.com 5.9.3 Supplementary After access MODEM setup page successfully, please click VoIP Supplementary link to access the following screen: • Call Forwarding: Select call forwarding way, • Forwarding URI: Call forwarding to URI. • Incoming Call Barring: Enable or disable barring incoming call. •... -
Page 59: Advanced
Ofrecido por www.electromanuales.com 5.10 Advanced 5.10.1 Status After access MODEM setup page successfully, please click Advanced Status link to access the following screen: View software version, hardware version and system up time. Ordinary Operation... -
Page 60: Statistics
Ofrecido por www.electromanuales.com 5.10.2 Statistics After access MODEM setup page successfully, please click Advanced Statistics link to access the following screen: Ordinary Operation... -
Page 61: Management
Ofrecido por www.electromanuales.com 5.10.3 Management After access MODEM setup page successfully, please click Advanced Management link to access the following screen: To set new account, type new account and password, and then click Apply to confirm your configuration. Ordinary Operation... -
Page 62: Time
Ofrecido por www.electromanuales.com 5.10.4 Time After access MODEM setup page successfully, please click Advanced Time link to ac- cess the following screen: • Time Set Mode: Select the time set mode. • Manual Set Time: Set the time manually. • SNTP Server IP: Enter a server IP for time synchronization by SNTP. -
Page 63: Upgrade
Ofrecido por www.electromanuales.com 5.10.5 Upgrade After access MODEM setup page successfully, please click Advanced Upgrade link to access the following screen: Click <Browse...>, locate the latest software version, and then click <Upgrade>. Note: Do not upgrade software unless necessary. Wrongly upgrade action may cause router malfunction or can not work. - Page 64 Ofrecido por www.electromanuales.com • Upgrade Mode: Select upgrade mode. FTP or TFTP is available. If select TFTP, you don’t need user authorization. • Server Name: Remote FTP/TFTP server IP address. • Server Port: The port of Remote FTP/TFTP server address. •...
-
Page 65: Restore
Ofrecido por www.electromanuales.com 5.10.7 Restore After access MODEM setup page successfully, please click Advanced Restore link to access the following screen: Restore to set all the settings to their factory default values, and the device will restart. 5.10.8 Reboot After access MODEM setup page successfully, please click Advanced Reboot link to access the following screen: You can reboot the Home Gateway by webUI remotely, if the Gateway is not around you. -
Page 66: Ddns Settings
Ofrecido por www.electromanuales.com 5.10.9 DDNS Settings After access MODEM setup page successfully, please click Advanced DDNS Settings link to access the following screen: DDNS is a dynamic domain analysis system. After applying DDNS, a dynamic IP address to the mainframe also can provide domain name services. For example, the mainframe through dial- up or XDSL DHCP server gets IP address and domain names dynamically. - Page 67 Ofrecido por www.electromanuales.com This page includes three buttons. Refresh: Display the latest log items Clear: Clear current log item Export: Download the current log to the local specified directory Ordinary Operation...
-
Page 68: Logout
Ofrecido por www.electromanuales.com 5.11 Logout 1. Select Logout, a pop-up windows will appear as shown in the following figure : 2. Click OK to log out. Ordinary Operation... -
Page 69: Troubleshooting
Ofrecido por www.electromanuales.com 6 Troubleshooting This chapter lists some problems that you might encounter while installing or using MODEM, please read following relative information at first. If the problem still can not be solved, please contact with distributor or service provider. Problem Check Point Indicator light... - Page 70 Ofrecido por www.electromanuales.com Problem Check Point Access network failure 1. Verify the LAN connection successful. 2. Checking your TCP/IP settings. Refer to Windows Help for details. Make sure Obtain IP address automatically is selected in the settings. Can not access the setup 3.
- Page 71 Ofrecido por www.electromanuales.com Problem Check Point Others 1. Please Confirm the connectivity of telephone. 2. Make sure the telephones perfectly connect with Call failure MODEM. If the call still fails, please contact with your service provider. 1. Make sure you have clicked <submit> button after Web page configuration lost modify the configuration every time.
-
Page 72: Appendix Glossary
Ofrecido por www.electromanuales.com 7 Appendix Glossary Advanced Encryption Standard Domain Name Server: it can provide the service that network node name can be translated to network IP address in the internet. DDNS Dynamic Domain Name Server. DHCP Dynamic Host Configuration Protocol. Demilitarized Zone. - Page 73 Ofrecido por www.electromanuales.com MAC Address The Media Access Control (MAC) address is a unique number assigned by the manufacturer to any Ethernet networking device, such as a network adapter, that allows the network to identify it at the hardware level. For all practical purposes, this number is usually permanent. Unlike IP address, which can change every time a computer log in the network, the MAC address of a device stays the same, making it a valuable identifier for the network.
- Page 74 User Data Protocol: packet exchanging communication protocol in internet, its default under layer protocol is IP, provide simple protocol mechanism when transfer information to another user. Wide Area Network. Wired Equivalent Privacy WiMAX Worldwide Interoperability for Microwave Access. Appendix Glossary...
Need help?
Do you have a question about the WiMAX and is the answer not in the manual?
Questions and answers