D-Link DSM-G600 Installation Manual
Wireless network storage enclosure
Hide thumbs
Also See for DSM-G600:
- Install manual (312 pages) ,
- Instruction manual (74 pages) ,
- Manual (66 pages)
Table of Contents
Advertisement
Quick Links
Advertisement
Table of Contents

Subscribe to Our Youtube Channel
Related Manuals for D-Link DSM-G600


Summary of Contents for D-Link DSM-G600
- Page 1 Version 2.0 DSM-G600 Wireless Network Storage Enclosure...
-
Page 2: System Requirements
An available Ethernet port on the network* * It is required that an Ethernet cable is used during initial setup. Once your wireless configuration is set, you may disconnect the Ethernet cable and begin communicating wirelessly with your DSM-G600. Package Contents Manual and Software... -
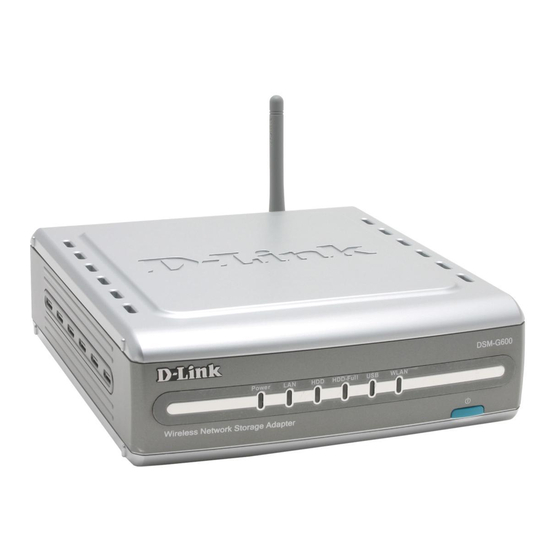
Page 3: Front Panel
DSM-G600 Install Guide Hardware Overview Front Panel WLAN LED A solid light indicates that wireless is ready. This LED blinks during wireless data transmission. LAN LED Solid indicates an Ethernet connection. Blinking indicates traffic at the Ethernet port. Power LED Solid indicates a connection to a good power source. -
Page 4: Rear Panel
Connects to your Ethernet network. The LAN port Press to safely remove USB supports Auto MDI/MDI-X, allowing you to connect a drives from the DSM-G600. straight-through or crossover cable. USB 2.0 Ports Use these ports to connect USB 2.0 drives. - Page 5 DSM-G600 Install Guide Installation Overview Client Mode Access Point Mode D-Link Systems, Inc.
-
Page 6: Installing The Hardware
Installing the Hardware DSM-G600 Install Guide Installing the Hardware Unscrew the two screws on the back panel of the DSM-G600 to remove the cover. Connect the IDE cable to the IDE cable connector on your hard drive. Note: Make sure the... - Page 7 DSM-G600. Note: It is required that an Ethernet cable is used during initial setup. Once your wireless configuration is set, you may disconnect the Ethernet cable and begin communicating wirelessly with your DSM-G600. D-Link Systems, Inc.
- Page 8 Note: When you first power on, the DSM-G600 will offer to format your hard drive if it is unformatted. This process may take several minutes depending on the size of your hard drive. During this process, the power LED will blink.
-
Page 9: Wireless Installation Considerations
Wireless Installation Considerations Wireless Installation Considerations The DSM-G600 lets you access your stored data and media files using a wireless connection from virtually anywhere within the operating range of your wireless network. Keep in mind, however, that the number, thickness and location of walls, ceilings, or other objects that the wireless signals must pass through, may limit the range. - Page 10 In this section, you will learn how to use the Wireless Network Setup Wizard to easily and securely set up the DSM-G600 on a wireless network. You will need to have a USB flash drive available to complete the WCN wireless setup on the DSM-G600.
- Page 11 DSM-G600 Install Guide Windows Connect Now D-Link Systems, Inc.
- Page 12 Follow the directions on the screen. When inserting the USB flash drive into the USB port on the DSM-G600, the USB LED will blink slowly as it detects the USB flash drive and then turn off. The USB LED will then quickly blink 3 times and turn off again.
- Page 13 DSM-G600 Install Guide Configuration Configuration To access the web-based configuration, insert the DSM-G600 CD into your CD-ROM drive. Launch D-Link Easy Click Search Utility. Highlight an available DSM-G600 Configuration and click to access the web-based utility. admin Type for the user name and leave the password field blank.
- Page 14 Configuration DSM-G600 Install Guide Configuration (continued) Click on Run Wizard. The Wizard will guide you through five steps: Password Time Zone LAN Settings Additional Settings Wireless Configuration Click Next. Enter and confirm a new password. Click Next. Time Select the appropriate Zone in the pulldown menu.
- Page 15 Dynamic IP address is selected. Click Next. Enter the Workgroup name, a Name for the DSM-G600 (useful if you have multiple storage enclosures on your network), and a Description. Click Next. In Wireless Mode, select Client Access Point mode.
- Page 16 Next on the following screen without any configuration changes. Refer to page 10 for WCN setup instructions. Note: The DSM-G600 cannot bridge or extend a wireless network via wireless. Plugging the unit into a router, switch, or hub using an Ethernet cable will allow you to create a wireless network or segment.
- Page 17 Click Next. For more information on WEP and WPA security, please refer to section on Wireless Security in your manual located on the D-Link CD-ROM. Skip to page 20 to continue your Client setup. D-Link Systems, Inc.
- Page 18 Configuration DSM-G600 Install Guide Configuration (continued) When selecting Access Point mode, you will need to enter the following network settings: SSID - Enter the SSID or network name. Channel - Select the channel of your wireless network (1-11). 802.11g Only Mode - Select Enabled if all your wireless devices are 802.11g,...
- Page 19 This key will need to be exactly the same on your clients. Click Next. For more information on WEP and WPA security, please refer to section on Wireless Security in your manual located on the D-Link CD-ROM. D-Link Systems, Inc.
- Page 20 Configuration DSM-G600 Install Guide Configuration (continued) Click Restart. You have completed the basic configuration using the setup wizard! D-Link Systems, Inc.
- Page 21 DSM-G600 Install Guide Accessing the DSM-G600 Viewing Files and Folders My Network To view the content on your internal/USB drive, double-click on the Places icon on your desktop and double-click on the folder that represents your internal/USB drive. By default, all users on your network will have read/write permissions to all folders and files on the internal/USB drive(s).
- Page 22 Mapping Drives DSM-G600 Install Guide Mapping Drives You can assign a drive letter (e.g. E:) to a specific folder on your internal/USB drive(s) that are connected to your DSM-G600. Insert the D-Link DSM-G600 CD into your CD drive. Click Launch D-Link Easy Search Utility.
- Page 23 DSM-G600 Install Guide Notes Notes D-Link Systems, Inc.
-
Page 24: Technical Support
Revised 07/26/2005 Copyright ©2005 D-Link Corporation/D-Link Systems, Inc. All rights reserved. D-Link, the D-Link logo are registered trademarks of D-Link Corporation or its subsidiaries in the United States and other countries. Other trademarks are the property of their respective owners. Maximum wireless signal rate based on IEEE Standard 802.11g specifications.
Need help?
Do you have a question about the DSM-G600 and is the answer not in the manual?
Questions and answers