Yamaha CRX-E300 Instructions For Use Manual
Cd receiver
Hide thumbs
Also See for CRX-E300:
- Owner's manual (192 pages) ,
- Service manual (87 pages) ,
- Service manual (86 pages)
Table of Contents
Advertisement
Quick Links
Advertisement
Table of Contents

Related Manuals for Yamaha CRX-E300


Summary of Contents for Yamaha CRX-E300
- Page 1 Downloaded From Disc-Player.com Yamaha Manuals...
-
Page 2: Safety Instructions
If liquid has been spilled, or objects have fallen into product and cart combination to overturn. the product, If the product has been exposed to rain or water, Downloaded From Disc-Player.com Yamaha Manuals I CAUTION... - Page 3 “ON”, please try to eliminate the problem by using one requirements. Modifications not expressly approved of the following measures: by Yamaha may void your authority, granted by the FCC, to use the product. Relocate either this product or the device that is being affected by the interference.
- Page 4 Laser component in this product is capable of injury. YAMAHA will not be held responsible for any emitting radiation exceeding the limit for Class 1. damage resulting from use of this unit with a voltage other than as specified.
-
Page 5: Table Of Contents
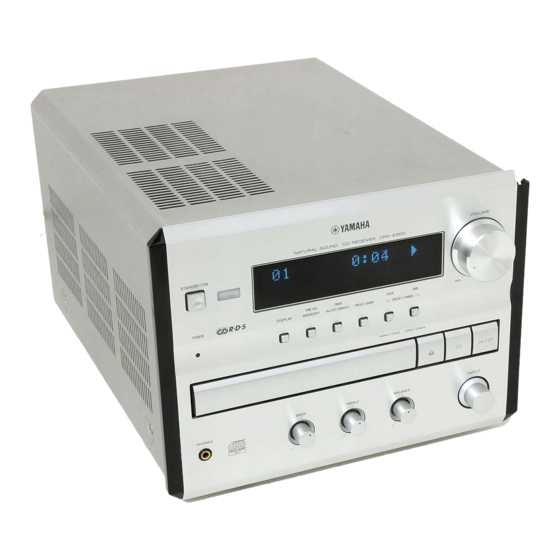
• SUBWOOFER output terminal • CD-RW compatible The CD receiver CRX-E300 is the main unit of the YAMAHA Piano Craft Series. You can upgrade the system by adding the cassette deck (KX-E300) and MD recorder (MDX-E300)*. * The cassette deck (KX-E300) and MD recorder (MDX-E300) may not be available for some areas. -
Page 6: Supplied Accessories
• Do not use any non standard shaped CD (heart, etc.) available on the market, because it may damage the unit. • Do not use a CD with tape, seals, or paste on it, because damage to the unit may result. Downloaded From Disc-Player.com Yamaha Manuals... -
Page 7: Names Of Buttons And Controls
6 PROG (program) indicator (P.14) 7 RANDOM indicator (P.13) B Tape side indicator (P.20) 9 TIMER indicator (P.16) 0 SLEEP indicator (P.17) q MEMORY indicator (P.11) w TUNED indicator (P.10) e CD Text indicators (P.13) Downloaded From Disc-Player.com Yamaha Manuals... -
Page 8: Remote Control
4 PROG (Program) (P.14) 5 RANDOM (Random) (P.13) VOLUME 6 TEXT/TIME (P.13) 7 ^ (Play/Pause) (P.12) 8 $ ! (Skip/Seach backward) (P.12) 9 ⁄ › (Skip/Seach forward) (P.12) 0 & (Stop) (P.12) q CD input (P.12) Downloaded From Disc-Player.com Yamaha Manuals... -
Page 9: Getting Started Remote Control
Remote control operation range Remote control VOLUME NATURAL SOUND CD RECEIVER CRX-E300 This remote control controls a whole system: not only STANDBY/ON CRX-E300 but also a cassette deck (KX-E300) and MD TIMER ADJ TIMER HOUR TIMER DISPLAY MEMORY AUTO/MAN'L PRESET/BAND PRESET/TUNING recorder (MDX-E300) that enhance your system. -
Page 10: Connecting The Speakers And Antennas
Set up the AM loop antenna, then connect it. To connect the subwoofer (optional) You can reinforce the bass frequencies by adding a subwoofer (optional). Connect the SUBWOOFER OUT terminal of the unit to the INPUT terminal of the subwoofer. AM ANT Downloaded From Disc-Player.com Yamaha Manuals... -
Page 11: Connecting Other Components
• If your system does not include MDX-E300, connect CRX-E300 and KX-E300 directly. AC OUTLET Connect the AC power plug of MDX-E300 to the AC outlet of CRX-E300. Then connect the plug of KX-E300 to the AC outlet of MDX-E300. -
Page 12: Setting The Clock
Note • In the event of a power failure or when the AC power cord is disconnected for more than five minutes, you must reset the clock. Downloaded From Disc-Player.com Yamaha Manuals... -
Page 13: Listening To A Source
TREBLE VOLUME the front panel, or POWER on the remote control. • Piano Craft series components that have correct system connections made to CRX-E300 can be VOLUME controlled to turn to the on or standby mode by NATURAL SOUND CD RECEIVER... -
Page 14: Tuning
• If automatic tuning search does not find the desired station, try manual tuning as described next. • When an FM stereo broadcast with sufficient signal strength is received, “STEREO” appears on the display and you can listen to stereo sound. Downloaded From Disc-Player.com Yamaha Manuals... -
Page 15: Presetting Stations
DUBBING START appear on the display. SLEEP DISPLAY The arrow will appear for a second when it is preset. VOLUME PRESET STEREO MEMORY TUNED Repeat steps 1 to 4 until all desired stations are preset. Downloaded From Disc-Player.com Yamaha Manuals... -
Page 16: Cd Operations
• This unit cannot play a CD-R or CD-RW disc unless the disc is finalized. Please make sure to finalize the disc on the CD Press CD on the remote control or turn to CD using recorder before playing on this unit. the input knob. Downloaded From Disc-Player.com Yamaha Manuals... -
Page 17: Selecting The Time Display And Cd Text
• The disc title, artist names, or track names may not be displayed with some CD TEXT discs. In this case, “(NO ENTRY)” appears on the display for about two seconds and then go back to the time display. Downloaded From Disc-Player.com Yamaha Manuals... -
Page 18: Repeat Play
Use the numeric buttons to select a track number until the desired track number appears on the display. PROG Repeat step 3 to program more tracks. You can select the same track again. Press ^ to start program play. Downloaded From Disc-Player.com Yamaha Manuals... - Page 19 To delete all program data When program play is stopped, press &. Note • Turning the unit to the standby mode or opening the disc tray also deletes the program data. Downloaded From Disc-Player.com Yamaha Manuals...
-
Page 20: Using The Built-In Timer
2. Timer Input clock. Select the source to be played by turning INPUT. • Timer recording is possible only when you select TUNER or AUX. Downloaded From Disc-Player.com Yamaha Manuals... -
Page 21: Sleep Timer
The unit will turn off automatically when the selected sleep time is reached. Note • If you press SLEEP while sleep timer is functioning, the remaining time is displayed. Then pressing the button successively changes the sleep time described as above. Downloaded From Disc-Player.com Yamaha Manuals... -
Page 22: System Control
PRESET TUNER PRESET 1 POWER TAPE 2 ^ (Play) 3 ⁄ › (Fast-foward) 4 $ ! (Rewind) TAPE REC/PAUSE REC/PAUSE 5 & (Stop) MODE DUBBING START 6 TAPE input 7 TAPE REC/PAUSE SLEEP DISPLAY VOLUME Downloaded From Disc-Player.com Yamaha Manuals... -
Page 23: Before Recording
MODE START SLEEP DISPLAY CD synchronized Turn CRX-E300 and all the components connected to it to stop mode. recording Decide the combination of the components. Each time you press DUBBING MODE, the mode will You can start and stop recording a CD on an MD or a tape change in the below order. -
Page 24: Copy Time Control
• Repeat step 5 to continue programming tracks. By specifying the length of the tape, CRX-E300 programs • The remaining time is shown on the display. If the tracks or helps you to program tracks so they will fit onto track is longer than the remaining time, “TM... -
Page 25: Additional Information
If it cannot be corrected, or if the fault is not listed in the SYMPTOM column, disconnect the power cord and contact your authorized YAMAHA dealer or service center for help. When taking the service, the MDX-E300 or KX-E300 may be needed. For details, contact your authorized YAMAHA dealer or service center. - Page 26 TV functions strangely when the Remote control is being used near TV set Relocate this unit away from the TV or cover the remote control is being used. with a remote control sensor. TV’s remote control sensor. Downloaded From Disc-Player.com Yamaha Manuals...
-
Page 27: Specifications
[U.K., Europe and Australia models] ...... 531 – 1611 kHz Weight ..................5.0 kg [Korea and General models] ....530/531 – 1710/1611 kHz Sensitivity FM (IHF, MONO) ..............1.0 µV Specifications are subject to change without notice. AM ..................300 µV/m Downloaded From Disc-Player.com Yamaha Manuals... - Page 28 Downloaded From Disc-Player.com Yamaha Manuals...
Need help?
Do you have a question about the CRX-E300 and is the answer not in the manual?
Questions and answers
When turn on with FM, system is on Auto, no sound, When Auto button pressed, goes to manual and there is sound.
The Yamaha CRX-E300 may have no sound in FM Auto mode but work in Manual mode because the automatic tuning might not be locking onto a strong station signal. In Auto mode, the unit scans for stations with sufficient signal strength, and if none are detected, no sound will be produced. In Manual mode, you can manually tune into a station even if the signal is weak. Try manually tuning a station or repositioning the antenna to improve reception.
This answer is automatically generated