Table of Contents
Advertisement
Installation Instructions
for use by heating contractor
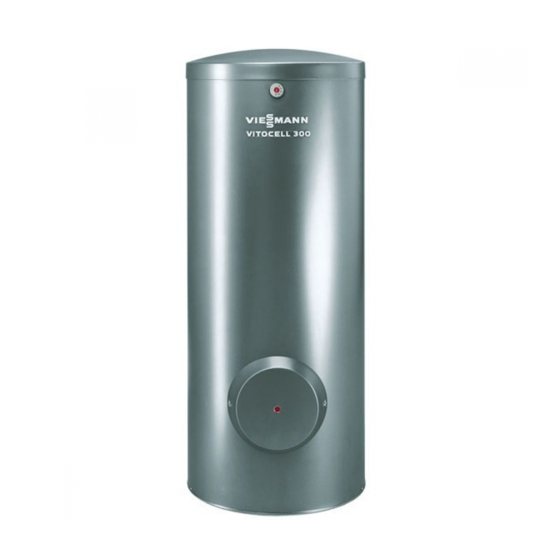
Vitocell 300
EVI Series
Indirect-fired domestic hot water storage tank
53 to 120 USG / 200 to 450 ltr capacity
This tank version is not suitable
for steam heating applications.
VITOCELL 300
5285 545 v1.1 10/2007
CAUTION
THE HEAT TRANSFER
MEDIUM MUST BE WATER
OR OTHER NON-TOXIC
FLUID HAVING A TOXICITY
RATING OR CLASS OF 1,
AS LISTED IN CLINICAL
TOXICOLOGY OF
COMMERCIAL PRODUCTS,
5TH EDITION.
THE PRESSURE OF THE
HEAT TRANSFER MEDIUM
MUST BE LIMITED TO A
MAXIMUM OF 30 PSIG BY
AN APPROVED SAFETY
OR RELIEF VALVE (SEE
PAGE 2).
IMPORTANT
Read and save these instructions
for future reference.
Advertisement
Table of Contents

Subscribe to Our Youtube Channel
Related Manuals for Viessmann Vitocell 300 EVI Series


Summary of Contents for Viessmann Vitocell 300 EVI Series
-
Page 1: Installation Instructions
Installation Instructions for use by heating contractor Vitocell 300 EVI Series Indirect-fired domestic hot water storage tank 53 to 120 USG / 200 to 450 ltr capacity This tank version is not suitable for steam heating applications. VITOCELL 300 CAUTION THE HEAT TRANSFER MEDIUM MUST BE WATER OR OTHER NON-TOXIC... - Page 2 Safety, Installation and Warranty Requirements Safety, Installation and Warranty Requirements Please ensure that this manual is read and understood before commencing installation. Failure to comply with the issues listed below and details printed in this manual can cause product/property damage, severe personal injury, and/or loss of life. Ensure all requirements below are understood and fulfilled (including detailed information found in manual subsections).
-
Page 3: Table Of Contents
Contents Page Safety Important Regulatory and Installation Requirements ..General Information About these Instructions ............Product Information . -
Page 4: Important Regulatory And Installation Requirements
For information regarding other Mechanical room Viessmann System Technology Ensure the mechanical room complies componentry, please reference with the requirements of the system documentation of the respective design guideline and/or technical data product. -
Page 5: About These Instructions
Vitocell: operator/ultimate owner where the - Technical Data Manual literature can be found. Contact - Installation Instructions Viessmann for additional copies. - Start-up/Service Instructions - Operating Instructions and User’s Information Manual - Installation instructions, installation fittings About These Instructions Take note of all symbols and notations intended to draw attention to potential hazards or important product information. -
Page 6: Tank Set-Up
Set-up Tank Set-up General information for all sizes H For narrow passageways, remove WARNING upper and lower portion of crating and carry DHW tank to its installation Install the DHW tank in a location by means of crating boards frost-protected and draft-free room. mounted on the tank. -
Page 7: Installation Of Dhw Tank With 120 Usg / 450 Liter Capacity
Set-up Tank Set-up (continued) Installation of DHW tank with 120 USG / 450 liter capacity All required components are included in the insulation jacket carton. 1. If not already installed, fit the thermal insulation blanket below the tank prior to the installation of the tank itself. -
Page 8: Recommended Service Clearances
Set-up Tank Set-up (continued) Recommended service clearances Storage capacity Rear inches Sides May be reduced if rear pipe inches connections can be reached with less clearance inches Front inches Minimum clearances to combustibles Storage capacity All sides inches... -
Page 9: Multiple Tank Set-Up
Set-up Multiple Tank Set-up only for 79 and 120 USG / 300 and 450 ltr capacities Two tanks, each with 79 USG / 300 ltr content, or up to four tanks, each with 120 USG / 450 ltr content, may be installed side-by-side. The tank battery is controlled via one DHW tank aquastat. -
Page 10: Orientation And Dimensions
Connections Orientation and Dimensions Storage capacity Number of tanks Layout Connections (individual tank) Heating water supply/return ∅’’ (common header size) Domestic cold/hot water ∅’’ (common header size) Recirculation tapping ∅’’ Domestic hot water supply and T&P valve connection Recirculation tapping Aquastat well Boiler water supply Boiler water return... -
Page 11: Control Connections
Connections Control Connections Installation of a DHW tank temperature sensor or aquastat 1. Carefully pull sensor mounting hardware out from tank sensor well. 2. Mount sensor on the outside of the sensor spring-clip (not in the center groove) so that it is flush with the front of the sensor spring-clip. - Page 12 (continued) Installation of a DHW tank temperature sensor or aquastat (continued) Where a Vitotronic 100 and a WARNING Viessmann Power/Pump Control Module (accessory) are utilized to control DHW To ensure optimum, safe operation, production: the supplied stainless steel well must be installed.
-
Page 13: Boiler Water Connections (Heat Exchanger Connection)
140°F / 60°C. Individual DHW tank 1. Pipe together boiler and tank as illustrated. Connections must be accessible for service (use factory supplied adaptors). Viessmann flexible piping of stainless steel (accessory) may be used. 2. For: - boiler water supply temperatures over 203°F / 95°C and... -
Page 14: Multiple Dhw Tanks
Recommended piping of multiple tanks system installed. The operating aquastat should be mounted on the tank which receives the boiler water supply last. Viessmann recommends the installation of an additional high limit aquastat in the main discharge pipe of the DHW system. IMPORTANT... -
Page 15: Domestic Water Connections
Connections Domestic Water Connections IMPORTANT This is a simplified conceptual drawing only! Piping and necessary componentry must be field verified. Proper installation and functionality in the field are the responsibility of the heating contractor. Fig 10. Domestic hot water supply Shut-off valve and T&P valve Drain... - Page 16 In situations where a booster pump is damage. used to maintain DHW pressure, Viessmann strongly recommends the installation of an oversized large expansion tank to ensure longer, less frequent pump cycles with less severe pressure gradients. If possible, use...
-
Page 17: Recirculation Connections
Connections Recirculation Connections H Pipe domestic hot water supply piping H Install recirculation pump, flow check H Connect tank battery to existing with tank as illustrated. Connections valve and recirculation timer (for recirculation piping. Cap off unused must be accessible for service (use shut-down during off-hours where recirculation connections of individual factory supplied adaptors). -
Page 18: Installation Of Inspection Opening
Connections Installation of Inspection Opening Fig 13. Installation of inspection opening cover for 53 and 79 USG / 200 and 300 liter tanks Fig 14. Installation of inspection opening cover for 120 USG / 450 liter tanks... -
Page 19: Pressure Drop Information
Appendix Pressure Drop Information Pressure drop on domestic hot water side Pressure drop on heating water side (secondary circuit) (primary circuit) 40 100 32 80 24 60 20 50 16 40 12 30 ltr/min ltr/h Waterflow Waterflow 79 USG / 300 ltr and 120 USG / 450 ltr storage capacities 53 USG / 200 ltr storage capacity... -
Page 20: Post Installation
Binder. 2. Install a protective hanging case near the boiler and store the Service Binder in this location. For a listing of applicable Viessmann literature, please see Important Regulatory and Installation Requirements on page 4. Viessmann Manufacturing Company (U.S.) Inc.
Need help?
Do you have a question about the Vitocell 300 EVI Series and is the answer not in the manual?
Questions and answers