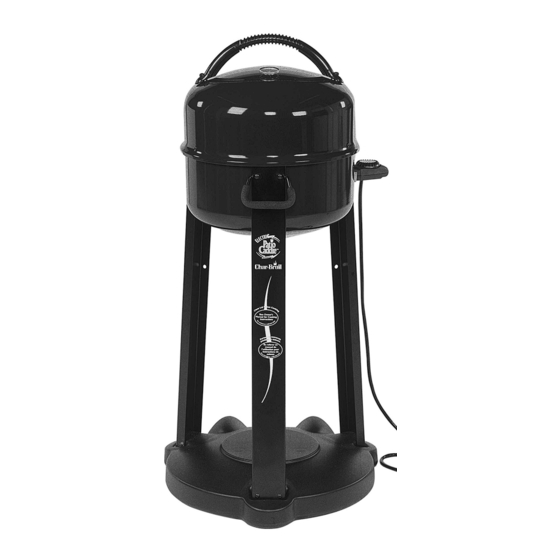
Char-Broil Electric Patio Caddie 4654870 Assembly, Use & Care Manual
Hide thumbs
Also See for Electric Patio Caddie 4654870:
- Assembling manual (16 pages) ,
- Assembly, use & care manual (16 pages)
Table of Contents
Advertisement
4654870 / 0–4165494 (02-02-05)
Assembly/USE & CARE
FOR OUTDOOR HOUSEHOLD USE ONLY. DO NOT
USE INDOORS OR FOR COMMERCIAL COOKING.
CAUTION:
Read and follow all safety statements, assembly
instructions and use and care directions before attempting to
assemble and cook.
INSTALLER/ASSEMBLER:
consumer.
CONSUMER:
Keep this manual for future reference.
WARNING
!
Failure to follow all manufacturer's instructions could result in
serious personal injury and/or property damage.
CAUTION
!
Some parts may contain sharp edges — especially as noted in
the manual! Wear protective gloves if necessary.
If you have any questions or need assistance during
assembly, please call
1-800-241-7548
Visit us on the web at: www.charbroil.com
C O L U M B U S , G A
© 2005 W. C. Bradley Co., All Rights Reserved
4654870
MANUAL
U
L
®
Leave these instructions with
.
Printed in USA
Advertisement
Table of Contents

Related Manuals for Char-Broil Electric Patio Caddie 4654870


Summary of Contents for Char-Broil Electric Patio Caddie 4654870
- Page 1 4654870 ASSEMBLY/USE & CARE MANUAL ® FOR OUTDOOR HOUSEHOLD USE ONLY. DO NOT USE INDOORS OR FOR COMMERCIAL COOKING. CAUTION: Read and follow all safety statements, assembly instructions and use and care directions before attempting to assemble and cook. INSTALLER/ASSEMBLER: Leave these instructions with consumer.
-
Page 2: Call Grill Service Center For Help And Parts
Do not use 16 or 18 gauge extension cords. Damage to household wiring and/or fire could result. Certified Grill Parts And Accessories®, Char-Broil and Design®, Char-Broil (Gas Grill Briquettes)®, Char- Diamonds®, Cooking Zone and Design®, Diamond Flame®, Executive Chef®, Faststart®, Flare Fighter®, FlavorMaster®, Gas Grill Silouette and Design®, H2O Smoker®, Lava Flame®, MasterFlame®, MasterFlame Precision... - Page 3 If the product fails to operate due to manufacturing defect the use only. Do not use defective part will be repaired or replaced at Char-Broil’s option. The indoors or for commercial product, along with proof of purchase, must be returned postage prepaid.
- Page 4 Parts List Key Qty. Description Part # A..1 ..Base ...............4154381 B..1 ..Cooking Grate ............4152860 C ..1 ..Element Assembly..........4159277 D ..1 ..Grill Bottom.............4509581 E..1 ..Grill Lid ..............4509582 F..1 ..Control Leg w/Slot ..........4302497 G ..1 ..Leg .................4302534 H ..1 ..Leg w/Logo.............4525611 I ..1 ..Briquette Grate ............4156128 J ..1 ..Top Insulation Bowl ..........4152826 K..1 ..Bottom Insulation Bowl...........4152827 L ..1 ..Controller..............4150235...
- Page 5 Necessary tools for assembly of your grill include a Items to Assemble Phillips screwdriver, adjustable wrench or pliers. 1 Temperature Gauge 1 Top Insulation Bowl (A 3/8” nut driver would be ideal). 1 Flat Washer Items to Assemble Qty: 1 1 Wing Nut 1 Grill Lid Qty: 1...
- Page 6 Items to Assemble Items to Assemble 1 Control Leg w/Slot 1 Leg w/Logo 2 Machine Screws 1 Handle 2 Hex Nuts (keps) 1 Plain Leg 2 Tee Nuts 4 Machine Screws Qty: 4 Qty: 4 4 Hex Nuts (keps) Qty: 2 4 Tee Nuts Attach handle to leg with logo.
- Page 7 Items to Assemble 1 Briquet Grate CAUTION Ceramic Briquets Do not use more than 10 ceramic briquets and replace Note pattern of briquets. frequently. Persistent grease fires can result. Use 10 or less ceramic See Use and Care section on Controlling Grease Fires. Items to Assemble IMPORTANT: Orient heating element so that the notch is on top.
- Page 8 Items to Assemble: A Cooking grate rests on tee nuts. 1 Cooking Grate Items to Assemble: NOTE: Legs not shown for clarity 1 Grease Clip 1 Grease Cup IMPORTANT: Bend tabs of insulation bowl straight down toward grease cup to avoid grease spillage. Clip grease cup bracket onto bar at notches...
- Page 9 Items to Assemble: Insert controller into element bracket. 1 Controller Remove protective film from controller prior to use. Raised lip of controller should be inserted until it is snug against element bracket. Raised Lip Element Bracket Protective Film Raised Lip Ensure that controller knob is fully rotated counterclockwise to the OFF position prior to plugging controller into grill and outlet.
- Page 10 • Use grill only on a firm and level surface to prevent tipping over. • To prevent household circuit breakers from tripping, keep electric Replace damaged insulation bow(s) only with Char-Broil certified controller dry and do not use other electrical products on the same replacement parts.
- Page 11 Cleaning your grill: Food safety: Excess build up of burned grease and food particles will reduce the grill’s • Food safety is a very important part of enjoying the outdoor cooking cooking performance. To obtain optimum performance. experience. To keep food safe from harmful bacteria, follow these four basic steps: •...
- Page 12 Troubleshooting Problem Possible Cause Prevention/Solution Grill not heating • Controller turned off. • Turn controller knob to maximum setting. • No power. • Be sure controller is fully seated in heating element bracket and grill is properly plugged into outlet. •...
- Page 13 Electric Patio Caddie Cooking Chart Cooking Zones Cooking times and temperatures may vary according to specific First preheat on HIGH to maximum sustained temperature. Then recipes, cooking conditions, or barbecue equipment used. Take place food on grill and adjust controller to obtain desired this into consideration to insure best results.
- Page 14 PAGE BLANK INTENTIONALLY...
- Page 15 Please register your grill online at: WWW.GRILLREGISTRATION.COM (If you register online, you do not need to send in this registration card.)
Need help?
Do you have a question about the Electric Patio Caddie 4654870 and is the answer not in the manual?
Questions and answers