Table of Contents
Advertisement
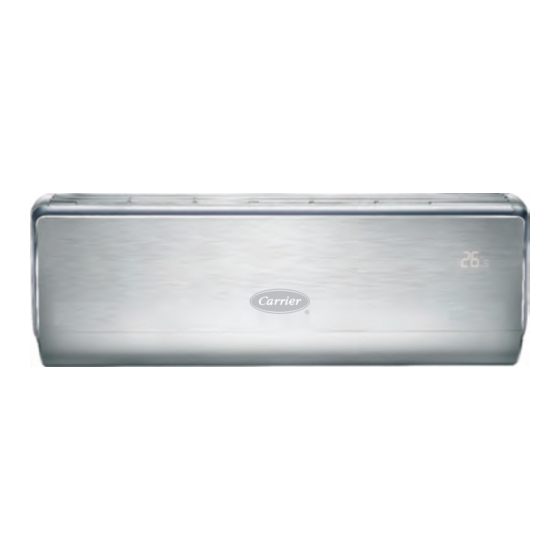
40GRQ / 38GRQ
High --Wall Ductless Split System
Sizes 09 to 18
Owner' s Manual
NOTE: Read the entire instruction manual before starting the
installation.
Please read this Owner's Information Manual carefully before installing and using this appliance
and keep this manual for future reference.
For your convenience, please record the model and serial numbers of your new equipment in the
spaces provided. This information, along with the installation data and dealer contact information,
will be helpful should your system require maintenance or service.
UNIT INFORMATION
Model #
Serial #
INSTALL ATION INFO RMATION
Date Installed
SAFETY CONSIDERATIONS . . . . . . . . . . . . . . . . . . . . . . . . .
the environmentally sound refrigerant
NOTE TO EQUIPMENT OWNER:
DEALERSHIP CONTACT INFORMATION
Company Name:
Address:
Phone Number:
Technician Name:
TABLE OF CONTENTS
. . . . . . . . . . . . . . . . . . . . . . . . . . .
. . . . . . . . . . . . . . . . . . . . . . . . . . . . .
. . . . . . . . . . . . . . . . . . . . . . . . . . . . . . . . . . . . . .
. . . . . . . . . . . . . . . . . . . . . .
. . . . . . . . . . . . . . . . . . . . . . . . . . . . . . . . . . . . .
.
. . . . . . . . . . . . . . . . . . . . . . . .
. . . . . . . . . . . . . . . . . . . . . . . . . . . . . . . . . . . . .
. . . . . . . . . . . . . . . . . . . . . . . . . . . . . . . . .
. . . . . . . . . . . . . . . . . . . . . . . . . . . . . . . . .
. . . . . . . . . . . . . . . . . . . . . . . . . . . . . . . . . . . .
. . . . . . . . . . . . . . . . . . . . . . . . . . . . . . . . . . .
. . . . . . . . . . . . . . . . . . . . . . . . . . . . . . . .
. . . . . . . . . . . . . . . . . . . . . . . . . . . . . . . .
. . . . . . . . . . . . . . . . . . . . . . . . . . .
. . . . . . . . . . . . . . . . . . . . . . . . . . . . . . .
PAGE
2
2
3
3
. . . . . . . . . . . . . . . . . . . .
4
. . . . . . .
5
6
16
. . . . . . . . . . . . . . . . . . . .
17
19
23
24
. . . . . . . . . . . . . . . . . . . . . .
26
. . . . . . . .
31
34
34
35
35
36
38
Advertisement
Table of Contents

Subscribe to Our Youtube Channel
Related Manuals for Carrier 40GRQ


Summary of Contents for Carrier 40GRQ
-
Page 1: Table Of Contents
40GRQ / 38GRQ High --Wall Ductless Split System Sizes 09 to 18 Owner' s Manual TABLE OF CONTENTS PAGE SAFETY CONSIDERATIONS ...... -
Page 2: Safety Considerations
SAFETY CONSIDERATIONS CAUTION Installing, starting up, and servicing air- -conditioning equipment can be hazardous due to system pressures, electrical components, EQUIPMENT DAMAGE HAZARD and equipment location (roofs, elevated structures, etc.). Failure to follow this caution may result in equipment Only trained, qualified installers and service mechanics should damage or improper operation. -
Page 3: Working Temperature Range
Working temperature range Indoor side DB/WB ( (°F/°C) °F/°C Outdoor side DB/WB Maximum cooling 115/75(46.1/23.9) 80/-(26.7/-) Maximum heating 75/64.9(23.9/18.3) NOTICE: The operating temperature range (outdoor temperature) for cooling only unit is -0.4°F(-18°C) ~114.8°F(46°C) ; for heat pump unit is -22°F (-30°C) ~ 72.5°F(24°C) Model Numbers... -
Page 4: Parts Name
Parts name Indoor Unit air inlet panel power wire filter horizontal louver air outlet remote controller power display tem.display Outdoor Unit air inlet Connection wire air outlet NOTE: The illustration above is only a sketch. Different models may be slightly different. -
Page 5: Instructions - Programming Remote And Air Conditioner
Instructions - programming remote and air conditioner The RF remote control must be synchronized with air conditioner prior to use. Follow the instructions below. Note Synch remote controls within 6.5ft (2m) from air conditioning unit. While synching, the remote controller and air conditioner should be on standby status. -
Page 6: Remote Controller
Remote controller ON/OFF button +/- button Cool button Heat button Fan button I FEEL button up down swing button Mode button Left right swing button T-ON/T-OFF button Clock button X-fan button Air button Light button Sleep button WIFI button Introduction for icons on display screen Set fan speed Send signal Operation mode... - Page 7 Matching Remote Control The RF remote control must be synchronized with air conditioner prior to use. Follow the instructions below. Note Synch remote controls within 6.5ft (2m) from air conditioning unit. While synching, the remote controller and air conditioner should be on standby status.
-
Page 8: Remote Control Functions
REMOTE CONTROL FUNCTIONS Note: After the air conditioner has been properly installed, you can use the remote control to operate the air conditioner. Press the power button on the remote control. The green indicator light will display on the air conditioner unit. Follow the instructions for using the remote control. - Page 9 REMOTE CONTROL FUNCTIONS button utton can turn on (display " " icon ) or turn off ( not display " " icon) left&right swing function. neously can switch between simple swing mode and fixed swing mode. During switching time, “ ”...
- Page 10 REMOTE CONTROL FUNCTIONS Note: button utton can turn on ( display " " icon) or turn of no display (horizontal louvers stops at current position) -10-...
- Page 11 REMOTE CONTROL FUNCTIONS T-ON/T-OFF button T-ON button “T-ON” button can set the time for timer on. After pressing this button, " " icon disappears and the word “ON" on remote controller blinks. Press “+” or “-”button to adjust T-ON setting. After each pressing “+” or “-”button, T-ON setting will increase or decrease 1min.
- Page 12 REMOTE CONTROL FUNCTIONS X-FAN button Pressing this button in COOL or DRY mode, the icon " " is displayed and the indoor fan will continue operation for 2 minutes in order to dry the indoor unit even though you have turned off the unit. After energization, X-FAN OFF is defaulted. X-FAN is not available in AUTO, FAN or HEAT mode.
- Page 13 REMOTE CONTROL FUNCTIONS In Sleep 1 and Sleep 2, the air conditioner will run according to a group of presetting temperature curves. Sleep 3 - the sleep curve setting under DIY Sleep mode: (1) Under Sleep 3 mode, long press "AIR" button, the remote controller will enter the setting of personalized sleep.
- Page 14 REMOTE CONTROL FUNCTIONS - COMBINATION KEYS X-FAN This function indicates moisture levels will blow away after unit stops to prevent mold. 1.When X-FAN function is on: Press ON/OFF button (on remote) to turn off the unit. The indoor fan will run for approximately 2 minutes at low speed. Press X FAN button to stop indoor fan.
-
Page 15: Operating Unit
Operating unit After initializing unit, press the ON/OFF button on remote control to turn on air conditioner. Press "MODE" on remote control to select mode: AUTO, COOL, DRY, FAN, or HEAT. Press "+" or " - " button to set temperature. (Temperature can’t be adjusted under auto mode). -
Page 16: Lost Or Damaged Remote Control
Lost or damaged remote control If the remote control is lost or damaged, the air conditioner can be turned off directly from the unit. Lift the display panel on top of the air conditioner, then press the AUX button to turn on or turn off the air conditioner. If the air conditioner is on, it will operate through the AUTO MODE. - Page 17 CLEANING AND MAINTENANCE Open panel 113°F (45°C) WARNING Clean filter every three months. If dust accumulates quickly, clean filter more frequently. -17-...
- Page 18 CLEANING AND MAINTENANCE Preparing to clean filter 1. Check whether air inlets and air outlets are blocked. 2. Check whether air switch, plug and socket are in good condition. 4. Check whether mounting bracket for outdoor unit is damaged or corroded. If yes, please contact dealer.
-
Page 19: Troubleshooting
Troubleshooting Please identify problems and possible solutions for requesting maintenance assistance. If problem can not be resolved by following the steps described, contact your dealer or a qualified professional. Problem Possible cause Solution Determine if interference has Remove the plug from the wall occurred due to severe static outlet. - Page 20 Troubleshooting Problems Possible Causes Solutions burnt out? air switch or fuse. Air condit- ioner does not start. after stopping operation? on the unit again. Is remote control function setting correct? Occurs if indoor air rapidly cools Mist is coming down. After a while, indoor out of indoor temperature and humidity will unit's air outlet.
- Page 21 Troubleshooting Problems Possible causes Solutions Sources of foul odors: furniture, Foul odors cigarettes, etc. Air conditioner Occurs when there's suddenly interference: thunder, wireless power, and then turn on the operates normally devices, etc. unit again. without repair Outdoor ating mode, it may generate unit has vapor, which is a normal vapor...
-
Page 22: Error Codes
Troubleshooting Error Codes al, temperature indictor on indoor unit will ation of error code. Error code Troubleshooting It can be eliminated after restarting the unit. If not, It can be eliminated after restarting the unit. If not, It can be eliminated after restarting the unit. If not, It can be eliminated after restarting the unit. -
Page 23: Installation Diagram
Installation diagram Space to the wall At least 0.49 ft (15cm) At least 0.49ft (15cm) Space to the wall Drainage pipe -23-... -
Page 24: Tools For Installation
Tools for installation 1 Level meter 2 Screw driver 3 Impact drill 4 Drill head 5 Pipe expander 6 Torque wrench 7 Open-end wrench 8 Pipe cutter 9 Leakage detector 10 Vacuum pump 11 Pressure meter 12 Universal meter 13 Inner hexagon spanner 14 Measuring tape Note: INSTALLATION TIPS... -
Page 25: Grounding Requirement
Grounding requirement The Air conditioner must be properly grounded to avoid electric shock. 2. The yellow-green wire in air conditioner is grounding wire, which can't be used for other purposes. 3. The grounding resistance should comply with national electric safety regulations. 4. -
Page 26: Indoor Unit Installation
INDOOR UNIT INSTALLATION Step one: choosing installation location rm it with the client. Step two: install wall-mounting frame 1. Hang the wall-mounting frame on the wall; adjust it in horizontal position with the plastic expansion particles in the holes. 3. Fix the wall-mounting frame on the wall with tapping screws (ST4.2X25TA) and Step three: open piping hole 1. - Page 27 INDOOR UNIT INSTALLATION Indoor outdoor Note: 2 1/6 in (55mm) opening the hole. 5-10 2 3/4 in (70mm) The plastic expansion particles are locally. Step four: outlet pipe 1. The pipe can be led out in the 2. When select leading out the pipe direction of right, rear right, left or from left or right, please cut off the rear left.
- Page 28 INDOOR UNIT INSTALLATION Hex nut diameter open-end wrench 1/4 in (6 mm) 20.34~27.12 ft.lb(15~20 N.m) 3/8 in (9.52 mm) 40.68~54.24 ft.lb(30~40 N.m) union nut 1/2 in (12 mm) 61.02~74.58 ft.lb(45~55 N.m) pipe 5/8 in (16 mm) 81.36~88.14 ft.lb(60~65 N.m) torque wrench 3/4 in (19 mm) 94.93~101.7 ft.lb(70~75 N.m) indoor pipe...
- Page 29 INDOOR UNIT INSTALLATION 2. Make the power connection wire go through the cable-cross hole at the back cable-cross hole the front side. power connection wire with wire clip.After finishing wiring into the wire-crossing groove as shown in the following figure, in order to avoid pressing the wire when closing the electric box cover.
- Page 30 INDOOR UNIT INSTALLATION Step eight: bind up pipe 1. Bind up the connection pipe, power drain hose connection pipe band cord and drain hose with the band. indoor and outdoor power cord indoor unit pipe indoor power cord liquid pipe 3.
-
Page 31: Outdoor Unit Installation For Single Zone Aplications (Refer To The 38Gj Owner's Manual For Multizone)
CAUTION NOTE CAUTION EQUIPMENT DAMAGE HAZARD Failure to follow this caution may result in equipment damage or improper operation. In regions with snowfall and cold temperatures, avoid installing the outdoor unit in areas where it can be covered by snow. If the outdoor unit is installed in areas where heavy snow is expected, a field supplied ice or snow stand and/or field supplied--installed wind baffle should be installed to protect the unit from snow accumulation and/or blocked air intake. - Page 32 OUTDOOR UNIT INSTALLATION FOR SINGLE ZONE APLICATIONS (REFER TO THE 38GJ OWNER'S MANUAL FOR MULTIZONE) Step four: connect indoor and outdoor pipes 1. Remove the screw on the right han- 2. Remove the screw cap of valve and dle of outdoor unit and then remove aim the pipe joint at the bellmouth of the handle.
- Page 33 OUTDOOR UNIT INSTALLATION FOR SINGLE ZONE APLICATIONS (REFER TO THE 38GJ OWNER'S MANUAL FOR MULTIZONE) 2. Fix the power connection wire and signal control wire with wire clip (only for cooling and heating unit). tightening Step six: neaten the pipes 1.
-
Page 34: Vacuum Pumping
Vacuum pumping Use vacuum pump 1. Remove the valve caps on the liquid valve and gas liquid valve piezometer valve and the nut of refri- gas valve gerant charging vent. refrigerant charging 2. Connect the charging hose valve cap vent gerant charging vent of gas nut of refrigerant valve and then connect the... -
Page 35: Checking Installation
Checking installation Items to be checked Possible problem The unit may drop, shake or emit noise. Has the refrigerant leakage been tested? (heating) capacity. It may cause condensation and water dripping. It may cause condensation and water Is water drained well? dripping. -
Page 36: Configuring Connection Pipe
Configuring connection pipe 1. Standard length of connection pipe 16.4 ft (5 m),24.6 ft (7.5 m),26.2 ft (8 m) 2.Min. length of connection pipe is 9.8 ft (3 m). 3.Max. length of connection pipe and max. high difference. Max length Max length Cooling Max height... - Page 37 Configuring connection pipe Additional refrigerant charging amount for R410A Outdoor unit throttle Liquid pipe(in/mm) Gas pipe(in/mm) Cooling only(oz/ft (g/m)) Cooling and heating(oz/ft (g/m)) 3/8 in (9.52 mm) 1/4 in (6 mm) 0.2 oz/ft (15 g/m) 0.2 oz/ft (20 g/m) 1/2 in (12 mm) 1/4 in (6 mm) 5/8 in (16 mm) 0.2 oz/ft (15 g/m)
-
Page 38: Pipe Expanding Method
Pipe expanding method Note: Improper pipe expanding is the main cause of refrigerant leakage. Please expand the pipe according to the following steps: A: Cut the pipe E: Expand the port the distance of indoor unit and hard outdoor unit. mold expander pipe... - Page 40 66129916984 Copyright 2014 Carrier Corporation S 7310 W. Morris St. S Indianapolis, IN 46231 Edition Date: 11/14 Catalog No: 38-40GR-01OM Replaces: New Manufacturer reserves the right to change, at any time, specifications and designs without notice and without obligations.
Need help?
Do you have a question about the 40GRQ and is the answer not in the manual?
Questions and answers
How do I turn the timer off? and What does it mean when the onoff light is on under the time on the remote??
To turn off the timer on a Carrier 40GRQ:
- To cancel TIMER ON: If T-ON is active, press the “T-ON” button to cancel it.
- To cancel TIMER OFF: If T-OFF is active, press the “T-OFF” button to cancel it.
When the ON or OFF light is on under the time on the remote, it indicates that TIMER ON or TIMER OFF is currently set and active.
This answer is automatically generated