LifeSize Bridge 2200 Installation Manual
Hide thumbs
Also See for Bridge 2200:
- Installation manual (14 pages) ,
- Installation manual (15 pages) ,
- Administrator's manual (31 pages)

Related Manuals for LifeSize Bridge 2200


Summary of Contents for LifeSize Bridge 2200
- Page 1 ® LifeSize Bridge™ 2200 Installation Guide April 2011...
-
Page 2: Deployment Considerations
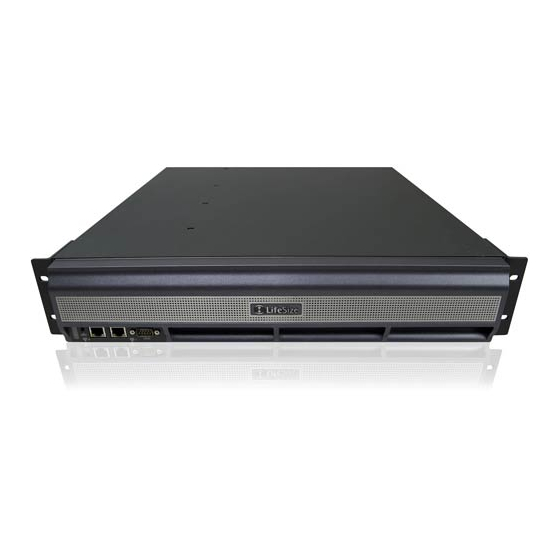
LifeSize Bridge 2200 Installation Guide LifeSize Bridge 2200 Components LifeSize Bridge 2200 is a 2U (8.89 cm, 3.5 inch) rack-mountable system that ships with the following components: • LifeSize Bridge 2200 • Power cord • Serial cable For best performance, use a Category 6 Ethernet cable (not included) to connect the LifeSize Bridge 2200 to your network. - Page 3 LifeSize Bridge 2200 Installation Guide Insert the power cord into the back of the system. Insert the opposite end of the power cord into a grounded power outlet. ARTWORK IN PROGRESS Insert the serial cable into the serial port on the front of the system. Insert the opposite end of the serial cable into a serial port on a computer.
- Page 4 LifeSize Bridge 2200 Installation Guide Installing LifeSize Bridge 2200 into a Rack Use the included rack mounting hardware to install LifeSize Bridge 2200 into your rack. The rack mounting procedure can vary because of differences among racks. Therefore, refer to the installation instructions that came with your rack in conjunction with these instructions.
- Page 5 LifeSize Bridge 2200 Installation Guide Removing the Rack Mounting Brackets Starting at the right side of the chassis (facing the front with the plastic bezel and LifeSize logo), remove the four flat head screws and the rack mounting bracket from the chassis.
- Page 6 LifeSize Bridge 2200 Installation Guide Installing the System Into a Rack After you have the rack mounting brackets in the correct position, install the system into the rack. Line up the system in the desired position on the rack. NOTE Ensure that sufficient access is provided to the serial port to allow connection for set-up and servicing.
- Page 7 Your system is then configured with the IP address of 169.254.x.x. Use the LifeSize Utility to configure your system using the default IP address 169.254.1.1. Refer to the LifeSize Bride 2200 Administrator Guide for instructions on installing and using the utility.
- Page 8 Type exit to close the serial connection. Disconnect the serial cable from the system and your computer. Open the LifeSize Utility to further configure the system. Additional Configuration from the Serial Port Use the following optional commands for additional configuration of the system.
- Page 9 Use the reset <defaults [swap]> command to reset the system to default values. Use the swap argument to reset the system using the previous installation. Refer to the LifeSize Bridge Administrator Guide for instructions on installing and using the LifeSize Utility for additional configuration from a browser.
- Page 10 ©2010–2011 Logitech, and its licensors. All rights reserved. LifeSize Communications, a division of Logitech, has made every effort to ensure that the information contained in this document is accurate and reliable, but assumes no responsibility for errors or omissions. Information in this document is subject to change without notice.
Need help?
Do you have a question about the Bridge 2200 and is the answer not in the manual?
Questions and answers