Table of Contents
Advertisement
Quick Links
Advertisement
Table of Contents

Related Manuals for Axesstel PG130


Summary of Contents for Axesstel PG130
- Page 2 INTRODUCTION The Fixed Wireless phone operates through a wireless connection instead of a landline phone cable, enabling the subscriber to set up the phone at any where wireless service is available. Axesstel GSM/GPRS Quad Band Fixed Wireless Phone provides high quality and superior performance with many features such as excellent voice quality, data service, caller ID, three-way calling, call waiting, short message service, speaker phone etc.
-
Page 3: Table Of Contents
TABLES OF CONTENTS Safety Precautions……………….…..4 Advanced Features Checking Parts .……………………..….…5 Changing Greeting Message....31 Setting up Your Phone ……….……..…6 System Reset…………………………….31 Getting to Know Your Phone …………...10 Restricting Use of the Phone…………..32 Display Icons………………………..…..….11 Locking / Unlocking the Phone………...33 Function Keys……..……………..……..12 Changing the Lock Code…………...…..33 Language………………………………...33 Basic Operation... -
Page 4: Safety Precautions
SAFETY PRECAUTIONS 1. Avoid placing the phone in a dusty location, or near a source of gas or fire. 2. Don't Shake, hit or drop the phone. 3. To clean the outside of the phone, use only a soft, dry cloth. The chemicals in alcohol, benzene or acetone can damage the surface of the phone. -
Page 5: Checking Parts
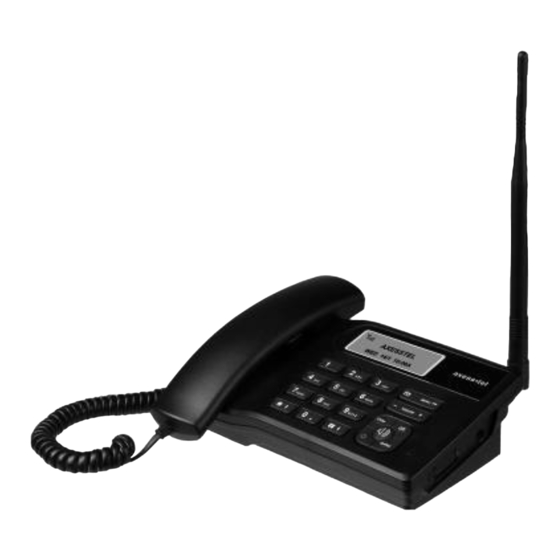
CHECKING PARTS After unpacking your phone, make sure that you have all the parts shown below. If any piece is missing or broken, please call your customer service center. 1. Main Unit 2. Handset 3. Antenna 4. Battery 5. Power Adaptor 6. -
Page 6: Setting Up Your Phone
SETTING UP YOUR PHONE Installing SIM card 1. Remove SIM bracket cover. 2. Lift SIM bracket by pulling. 3. Insert proper SIM card. 4. Put the bracket back in place. 5. Close the cover. - Page 7 USING SIM CARD FOR THE FIRST TIME 1. Entering PIN code. NOTE1: The PIN feature function can be set on/off in PIN setup menu. NOTE2: PIN code can be changed in PIN setup menu. 2. If an incorrect PIN code is entered, an error message displays.
-
Page 8: Desktop Installation
Installing the phone This phone operates by receiving DC power from the AXESSTEL power adaptor, which connects to an electrical outlet. The phone is equipped with a rechargeable battery as a back up in case of an AC power failure. Desktop installation Attach the handset Connect the antenna... - Page 9 Service Status Check Display in the Service Area When the phone’s power is turned on, LCD will display POWER ON Image while the phone loads information from SIM card. After the loading is finished, LCD will display Greeting with date and time. The number of bars of signal strength indicator (antenna icon) indicates the strength of service signal of the area.
-
Page 10: Getting To Know Your Phone
GETTING TO KNOW YOUR PHONE 1. Antenna 2. Message 3. Menu 4. Volume 5. Clear 6. OK 7. Speaker 8. Power 9. Redial 10. Scroll 8. Power 1. Antenna: Adjusting the position of antenna improves the sound quality of the call. 2. -
Page 11: Display Icons
DISPLAY ICONS Icons display on the screen to indicate what features you are using, signal strength and battery status etc... Indicate the strength of the signal. More bars indicates stronger signal. Indicates the level of battery power. The more bars, the more power. -
Page 12: Function Keys
FUNCTION KEYS 1. Press this key to retrieve messages. 2. Press this key to display the phone's main menu. 3/4. Press this key to control the volume of keypad, earpiece And speaker. In the menu mode, use this key to scroll through The menu items. -
Page 13: Basic Operation
Basic Operation Making Calls Redial Receiving Calls Adjusting Volumes Choosing the Ring Tones Message Service... -
Page 14: Making Calls
MAKING CALLS 1. Make sure your phone is turned on. 2. Pick up the handset to hear a dial tone. When the phone fails to acquire service signal, you will hear "No Service" tone (intermittent tone). 3. Dial the number to call. The LCD window displays the number. -
Page 15: Redial
REDIAL Redial the last number you dialed. 1. Pick up the handset or press <SPEAKER> key. 2. Press <Redial>. NOTE: You may not redial when there is no last number dialed stored in the memory. "Log empty!" message is displayed on the LCD. RECEIVING CALLS When there is an incoming call, the phone rings blinks "Incoming Call"... -
Page 16: Adjusting Volumes
ADJUSTING VOLUMES You can control the sound volumes including the key tone, Earpiece, speaker and the ringer Adjusting earpiece volume Pick up the handset and press <Volume> repeatedly during a phone call to adjust earpiece volume. Adjusting ring volume 1. Press <MENU> , <4> (Sound) , <4> (Ring Volume) 2. -
Page 17: Message Service
MESSAGE SERVICE Message service is a network dependent feature and is available only when your service provider supports it. Make sure your service provider is providing message service before using this function. Sending New Text Messages 1. Press <MESSAGE> key, <1>(New message). 2. - Page 18 Received Text Message 1. When a new text message arrives, ‘1 New Message’ will be displayed and Message Icon appears in the icon line. 2. Press <MESSAGE> key, <2> (Inbox) or press <OK> to view message directly. 3. Press <Volume> (or <*>, <#>) to select message you want to see and press <OK>.
- Page 19 Erasing Received Messages 1. Press <MESSAGE> key, <2>(Inbox). 2. Press <MENU> and select <5> (Delete all). 3. Press <OK>. Erasing Sent Messages 1. Press <MESSAGE> key, <3>(Outbox). 2. Press <MENU> and select <5> (Delete all). 3. Press <OK>. Retrieve Saved Message 1.
-
Page 20: Phone Book
Phone book Internal phone Book Storing in phonebook Searching For Entries in Phonebook Erasing An Entry in Phonebook Erasing All Entries in Phonebook One-Touch Dialing... - Page 21 INTERNAL PHONE BOOK Your phone has an internal "Phone Book" in which you can store up to 500 frequently used names and numbers. Or you can store to SIM card. STORING IN PHONEBOOK 1. Press <MENU> , <2> (Contacts), <2>(Add new name). 2.
-
Page 22: Searching For Entries In Phonebook
Setting One-Touch Speed Dial 1. Press <Menu> , <2> (Contacts), <3> (Speed dials). 2. Select Speed Dial location you wish to program. Location 1 is assigned for Voicemail access number. Up to 9 speed dials are possible. 3. Press <MENU> ,<1> (Add from contacts) 4. - Page 23 Searching by Phone Number 1. Press <MENU>, <2>(Contacts), <1>(Search), <2>(Number). 2. Enter all or part of the number you remember and press <OK>. 3. The phone displays the memory location and names which contain your entry. NOTE: When there is no exact match, “Not found” will be displayed. 4.
-
Page 24: Erasing An Entry In Phonebook
ERASING AN ENTRY IN PHONEBOOK To Erase a Specific Number 1. Press <MENU>, <2> (Contacts), <1> (Search). 2. Search the entry that you like to erase. Press <OK> to select and press <MENU> to view options. 3. Select <5> (Delete) option. 4. -
Page 25: Useful Features
Useful Features Call History Mute Selecting Time Mode Setting The Alarm Checking and Clearing Call Times... -
Page 26: Call History
CALL HISTORY Your phone stores the last 50 outgoing calls, incoming, and missed Calls combined (only when Caller ID function is activated). You can display and redial these numbers. Redialing Outgoing Calls 1. Press <MENU>, <1> (Call log), <2> (Dialled calls) NOTE: If there’s no outgoing call history, “Log empty”... -
Page 27: M U T
Erasing Call History 1. Press <MENU>, <1> (Call log), <5> (Delete call log). 2. Press <1> (All calls) to delete all of call logs. MUTE This feature lets you mute the microphone, so that the other party cannot hear your voice or the sound of your surroundings. This function is available only during conversation. -
Page 28: Selecting Time Mode
SELECTING TIME MODE 1. Press <Menu>, <3>(Time and alarm). 2. Press <1>(Set time) to change the time displayed on the idle screen. 3. Press <2>(Set date) to change the date displayed on the idle screen. 4. Press <3>(Time format) to change the time format to be 12 hour or 24 hour format. -
Page 29: Setting The Alarm
SETTING THE ALARM You can set the alarm sound daily or one time only. 1. Press <MENU>, <3>(Time and alarm), <5>(Morning alarm). 2. Press <1>(Alarm status) and set ON to enable Alarm Function. 3. Press <2> to enter time. 4. Press <3>(Alarm tone) to select the desired alarm tone. 5. -
Page 30: Advanced Features
Advanced Features Changing Greeting Message System Reset Restricting Use of the Phone Locking / Unlocking the Phone Changing the Lock Code Language... -
Page 31: Changing Greeting Message
CHANGING GREETING MESSAGE This feature lets you change the greeting message that the phone displays during standby mode. 1. Press <Menu>, <5> (Configuration), <1> (Greeting). 2. Enter your new greeting message with alphanumeric keys NOTE: Press <#> to switch between capital and lower case Example) To enter “My Phone”... -
Page 32: Restricting Use Of The Phone
RESTRICTING USE OF THE PHONE You can restrict the use of the phone by unauthorized persons Restricting Outgoing Calls 1. Press <Menu>, <5> (Configuration), <9> (Call barring). 2. Press <3> (Outgoing calls), <1> (Voice calls) 3. Select <1> (Activate). 4. Enter Network Password. NOTE: If you don’t know the password, Please contact your service provider to activate Outgoing Barring. -
Page 33: Locking / Unlocking The Phone
LOCKING / UNLOCKING THE PHONE You can lock your phone so that calls cannot be made by unauthorized persons. You can still receive incoming calls. Turning the phone off does not unlock the phone; the phone stays in locked mode until you change it. 1. -
Page 34: Optional Features
Optional Features Call Divert Call Waiting Three-way Calling / Conference Call Data and Fax Call Service... -
Page 35: Three-Way Calling
Call Divert Call Divert is a feature that lets you forward your incoming calls to another phone number, even if your phone is turned off or is in no service area. To set Call Divert, press <MENU>, <5> (Configuration), <8> (Call divert). And select Call Divert options as needed. -
Page 36: Miscellaneous
Miscellaneous Menu Table Specification Conformance Statements How To Setup Data Connection... - Page 37 MENU OPTION TABLE Explanation Details/Send message/ 1) All calls Shows all of call related records. Save number/Delete/Delete all Details/Send message/ 2) Dialled calls Shows all of sent call records Save number/Delete/Delete all Details/Send message/ 3) Received calls Shows all of received call records Save number/Delete/Delete all Details/Send message/ 4) Missed calls...
- Page 38 RX 869 ~ 894 900 : TX 880 ~ 915 , RX 925 ~ 960 Frequency Range PG130 1800 : TX 1710 ~ 1785, RX 1805 ~ 1880 1900 : TX 1850 ~ 1910, RX 1930 ~ 1990 Channel Bandwidth...
-
Page 39: Sar Information
SAR INFORMATION THIS MODEL PHONE MEETS THE GOVERNMENT’S REQUIREMENTS FOR EXPOSURE TO RADIO WAVES. Your wireless phone is a radio transmitter and receiver. It is designed and manufactured not to exceed the emission limits for exposure to radiofrequency (RF) energy set by the Federal Communications Commission of the U.S. Government. - Page 40 SAFETY INFORMATION FOR RF EXPOSURE Body worm operation This device was tested for typical body-worn operations with the back of the phone kept 20 mm. from the body. To maintain compliance with FCC RF exposure requirements, use similar accessories that maintain a 20 mm. separation distance between the user’s body and the back of the phone, including the antenna.
- Page 41 HOW TO SET UP DATA CONNECTION FOR CIRCUIT SWITCHED DIGITAL FAX/DATA AND GPRS DATA 1. INTRODUCTION For the data connection, below requirements are needed. - SIM card from your network service provider featuring CSD or GPRS. - PC or laptop with USB port - Windows 2K or later version - USB data cable included in box - Installation CD included in the box...
- Page 42 The screen below will be displayed on your PC, ensure you have the highlighted items completed to achieve successful connection. Please note these configuration may be pre- set for the user if this unit is supplied to user by the local network operator so all the user required to do is to press create connection.
- Page 43 Press "Create Connection" as shown below:...
- Page 44 Press "OK" as shown below:...
- Page 45 The list of Network dialup connections will popup, select the newly created dialup connection in this example it is New Operator. Click on Properties as shown below:...
- Page 46 Click on Configure:...
- Page 47 Deselect the highlighted items and press OK as shown below:...
- Page 48 Press Dial the unit should connect to the internet within few seconds.. If you want to connect again after disconnecting then please follow the instruction below: Either Click on the Icon on the Desktop Or go to “Network Connections” menu. Click Start button (Windows) > Control Panel > Network and Internet Connection >...
Need help?
Do you have a question about the PG130 and is the answer not in the manual?
Questions and answers