Table of Contents
Advertisement
Quick Links
Advertisement
Table of Contents

Subscribe to Our Youtube Channel
Related Manuals for Synology RX415


Summary of Contents for Synology RX415
- Page 1 RX415 User’s Guide Synology_UG_RX415_20140715...
-
Page 3: Table Of Contents
Table of Contents Chapter 1: Getting Started PackageContents 6ExpansionUnitataGlance LEDIndicatorBehavior 8Default/ManualSwitchBehavior 8RESETButtonBehavior HardwareSpecifications SafetyInstructions Chapter 2: Setting Up ToolsandPartsforDriveInstallation 11InstallDrives ConnectwithSynologyRackStation ConfirmConnectionandManageStorageSpaces LearnMore ... -
Page 5: Getting Started
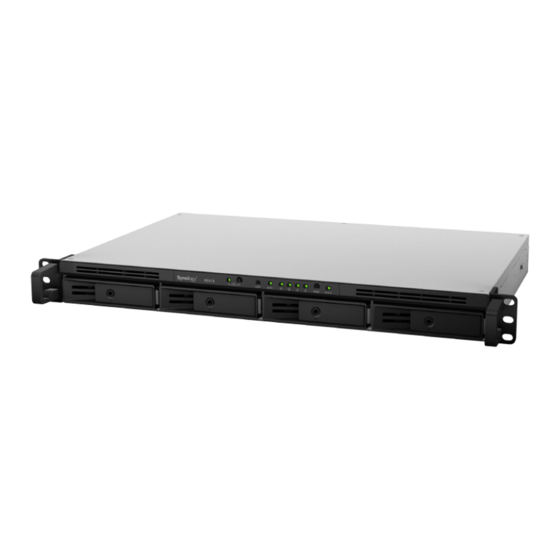
Getting Started ThankyouforpurchasingthisSynologyRX415expansionunit.This productisspeciallydesignedtoexpandthestoragecapacityofaSynology RackStation.Inthechaptersbelow,we'llprovideinstructionstosetupand startusingthisexpansionunit. PackageContents Beforestarting,pleasecheckthepackagecontentstoverifythatyouhave receivedtheitemsbelow. Main unit x 1 AC power cord x 1 User’s guide x 1 Rack mount kit x 2 Hard drive tray key x 2 Expansion cable Rack mount kit Screws for 3.5”... -
Page 6: Chapter 1: Getting Started
ExpansionUnitataGlance Front 2 3 4 5 6 Back 10 11 Article Name Location Description 1.Presstopowerontheexpansionunit. 2.Pressandholdtoshutdown. Note: Theexpansionunitwillbeturnedonoroff POWER Button automaticallywhenthelinkedRackStationpowerson and Indicator oroff.However,thePOWERbuttonhasnopower-off functionwhenvolumeiscreatedtopreventaccidental volumedamage. Displayswarningsregardingfanortemperature ALERT status.Formoredetails,pleaseseetheLED Indicator Indicator Behaviortablebelow. eSATA DisplaysthestatusofthelinkedRackStation. Indicator Front Displaysthestatusofharddisks.Formoredetails, 4 Disk Indicators pleaseseetheLED Indicator Behaviortable... -
Page 7: Ledindicatorbehavior
Installharddriveshere. Trays Disposesofexcessheatandcoolstheexpansion unit.Ifthefanisnotworking,theexpansionunitwill “beep”everyfewseconds. Power Port Connectthepowercordhere. Inthedefaultmode,theexpansionunitcanauto Back poweron/offwiththelinkedRackStation,whilein MANUAL/ themanualmode,theexpansionunitcannotauto DEFAULT poweronwiththeRackStationwhenusingasits Switch independentvolume.Formoredetails,pleasesee theDefault/Manual Switch Behaviortablebelow. ConnectsanySynologyRackStationlistedinthe eSATA Port Supported Modelstablebelow. LEDIndicatorBehavior Indicator Color Status Description Green Static Poweredon POWER Poweredoff Static Volumenormal Green Blinking STATUS Volumedegradedorcrashed... -
Page 8: 8Default/Manualswitchbehavior
Default/ManualSwitchBehavior Mode Cross-volume Models Independent-volume Models Default Autopoweron/off Autopoweron/off Manual Autopoweron/off Noautopoweron/off Cross-volumemodelsrefertothosemodelsdesignedtobepaired Note: withexpansionunits,suchasRS814+.Independent-volumemodelsrefer tothosemodelswhich,whenpaired,donotsupportexpandingexisting volumesacrossthemainunitandexpansionunits,suchasRS214. Expansionunitspairedwithindependent-volumemodelscanonlyform independentvolumes. RESETButtonBehavior Default/Manual Applicable Volume Type Behavior Switch Mode Models RS814, PresstheRESETbuttontoshut Cross-volume Default/Manual RS814+, downandrestarttheexpansionunit. RS814RP+ PressingtheRESETbuttonwillshut downtheexpansionunit,andthe volumeinsidetheexpansionunit Default willbeshownas"crashed."Restart RS214toautomaticallyrestartthe... -
Page 9: Hardwarespecifications
Overheating Auto Shutdown Power Recovery SyncedwithRackStation(Defaultmode) AC Input Power Voltage 100Vto240VAC Power Frequency 50~60Hz,SinglePhase Operating Temperature 5°C~35°C(40°F~95°F) Storage Temperature -10°C~70°C(15°F~155°F) Relative Humidity 5%to95%RH Maximum Operating Altitude 2,000meters(6,500feet) Certification FCCClassA,CEClassA,BSMIClassA Cross-volumemodels:RS814,RS814+, RS814RP+ Supported Models Independent-volumemodels:RS214 Note: 1 Pleasevisitwww.synology.comforthelatestcompatiblemodels. 2 DSMneedstobeupgradedtoversion5.0-4493orabove. Chapter1:GettingStarted... -
Page 10: Safetyinstructions
SafetyInstructions Keepawayfromdirectsunlightandawayfromchemicals.Makesure theenvironmentdoesnotexperienceabruptchangesintemperatureor humidity. Placetheproductrightsideupatalltimes. Donotplacenearanyliquids. Beforecleaning,unplugthepowercord.Wipewithdamppapertowels. Donotusechemicaloraerosolcleaners. Topreventtheunitfromfallingover,donotplaceoncartsorany unstablesurfaces. Thepowercordmustplugintothecorrectsupplyvoltage.Makesure thatthesuppliedACvoltageiscorrectandstable. Toremoveallelectricalcurrentfromthedevice,ensurethatallpower cordsaredisconnectedfromthepowersource. Riskofexplosionifbatteryisreplacedwithanincorrecttype.Disposeof usedbatteriesappropriately. Chapter1:GettingStarted... -
Page 11: Chapter 2: Setting Up
Setting Up ToolsandPartsforDriveInstallation • Ascrewdriver • Atleastone3.5”or2.5”SATAdrive (Pleasevisitwww.synology.comforcompatibledrivemodels.) Warning:Ifyouinstalladrivethatcontainsdata,thesystemwillformatthedrive anderasealldata.Ifyoustillneedthedata,pleasebackitupbeforeinstallation. InstallDrives 1 Pulltheharddrivetrayhandleinthedirectionasindicatedbelowtoremove theharddrivetray. - Page 12 2 Loaddrivesinthedrivetrays: • For 3.5” drives: Placethedriveinthedrivetray.Turnthetrayupside downandtightenscrewsintothefourspotsindicatedbelowtosecurethe drive. • For 2.5” drives: Placethedriveinthedrivetray.Turnthetrayupside downandtightenscrewsintothefourspotsindicatedbelowtosecurethe drive. 3 Inserttheloadedharddrivetrayintotheemptyharddrivebay. Important:Makesurethetrayispushedinalltheway.Otherwise,thedrivemight notbeabletofunctionproperly. ...
- Page 13 4 Pressthehandleinflushwiththefrontpaneltoholdtheharddrivetrayin place. 5 Inserttheharddrivetraykeyintotheharddrivetraylock,turnthekey clockwisetolockthehandleoftheharddrivetray,andthenremovethekey. 6 Repeatthestepsabovetoinstallallprepareddrives. 7 Fixthetworackmountkitsonbothsideswiththenutsprovided. 8 Drivesarenumberedasshownbelow. Note:IfyouwanttocreateaRAIDvolume,werecommendallinstalleddrivesbe thesamesizeinordertooptimizedrivecapacityusage. ...
-
Page 14: Connectwithsynologyrackstation
ConnectwithSynologyRackStation 1 Connectoneendofthepowercord(s)tothepowerportoftheexpansion unit,andtheothertothepoweroutlet(s). RX415 Synology RackStation 2 Connectoneendoftheexpansioncabletotheexpansionunit,andtheother tothemainRackStationunit. e S A e S A The side inscribed with “eSATA” should face up. Aftertheconnectioniscomplete,theexpansionunitwillbeturnedonoroff automaticallywhenthelinkedRackStationpowersonoroff. ... -
Page 15: Confirmconnectionandmanagestoragespaces
ConfirmConnectionandManageStorageSpaces 1 LogintotheDiskStationManager(DSM)ofthemainRackStationunit. 2 GotoControl Panel>External Devices>ExternalDevicestoconfirmthe expansionunitissuccessfullyconnected. 3 GotoStorage Managertomanagestoragespacecreationorexpansion. • If you want to create a new volume on the expansion,clickCreateand followtheinstructionsofthewizard. ... -
Page 16: Learnmore
• If you want to expand an existing volume with expansion unit,select thevolumeyouwanttoexpandfromthevolumelist,clickManage,and followtheinstructionsofthewizard. Fordetailedinformationaboutvolumemanagement,gotoStorage Manager andseeDSM Help. Limitations:Beforeusingthisexpansionunit,pleaseseethelimitationsbelow. •ThisexpansionunitcanbelinkedtoonlyoneSynologyRackStationatatime. •ThedataofsomeDSMpackagescanbestoredontheexpansionunitonlyifyou createanexpandedvolumewithit.Thedatacannotbestoredontheexpansion unitifanindependentvolumehasbeencreatedonit. •HarddrivespreviouslyusedinaSynologyRackStationarenotreadablewhen directlyinsertingthemintothisexpansionunit,andviseversa. LearnMore Congratulations!Yourexpansionunitissetupnow.Formoreinformationor onlineresources,pleasevisitwww.synology.com. ... - Page 17 Software or published specifications for the Software, if any, use the Software in any commercial hosted or or otherwise set forth on the Web Site. Synology service bureau environment; (c) reverse engineer, will use commercially reasonable efforts to, in...
- Page 18 (INCLUDING, BUT NOT LIMITED TO LOSS OF this Warranty, the Software or services provided DATA, INFORMATION, REVENUE, PROFIT OR by Synology with respect to the Software or the BUSINESS)ARISINGOUTOFORRELATINGTO relationship between you and Synology will be THEUSEORINABILITYTOUSETHESOFTWARE...
- Page 19 Nothing in this Section Section 22. Entire Agreement. This EULA shallbedeemedtoprohibitorrestrictSynologyfrom sets forth the entire agreement of Synology and seekinginjunctiverelieforseekingsuchotherrights you with respect to the Software and the subject and remedies as it may have at law or equity for...
- Page 20 Customer, is downloaded providers’holidays;(5)anyworkwithanythirdparty by Customer at the Web Site, or is pre-installed equipmentorsoftware;(6)anywarrantyofthehard on the Product by Synology, and includes any diskifinstalledbyCustomeroranyotherthirdparty; firmware, associated media, images, animations, or (7) any warranty of compatibility with the hard...
- Page 21 OF INFRINGEMENT OR MISAPPROPRIATION; elects to replace any Product under this Warranty OR (D) CLAIM INTORT (WHETHER BASED ON set forth in Section 2.1, then Synology will ship a NEGLIGENCE, STRICT LIABILITY, PRODUCT replacement Product at Synology's expense via LIABILITY OR OTHER THEORY). SYNOLOGY...
- Page 22 D i s p u t e R e s o l u t i o n . A n y d i s p u t e , tobeinvalid,illegal,orunenforceable,theremainder controversy or claim arising out of or relating to ofthisWarrantywillremaininfullforceandeffect. this Warranty, the Product or services provided by Synology with respect to the Product or the...
- Page 23 E n t i r e A g r e e m e n t . T h i s Wa r r a n t y constitutes the entire agreement, and supersedes any and all prior agreements, between Synology andCustomerrelatedtothesubjectmatterhereof. ...
- Page 24 P/N15-06C010240 PrintedinTaiwan...
Need help?
Do you have a question about the RX415 and is the answer not in the manual?
Questions and answers