Table of Contents
Advertisement
Quick Links
Advertisement
Table of Contents

Related Manuals for Synology RX1217sas


Summary of Contents for Synology RX1217sas
- Page 1 Expansion Unit RX1217sas Hardware Installation Guide...
-
Page 2: Table Of Contents
At a Glance Safety Instructions Chapter 2: Hardware Setup Tools and Parts for Drive Installation Install Drives Connect with Synology NAS Server Chapter 3: Maintenance Replace Malfunctioning PSU Replace Malfunctioning SAS / Fan Module Appendix A: Specifications Appendix B: LED Indicator Table... -
Page 3: Package Contents
Chapter Before You Start Thank you for purchasing Synology RX1217sas expansion unit! Before setting up your new expansion unit, please check the package contents to verify that you have received the items below. Also, make sure to read the safety instructions carefully to avoid harming yourself or damaging your Synology product. -
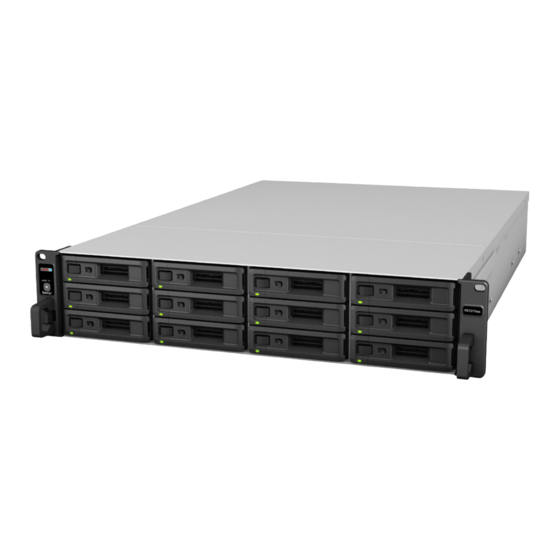
Page 4: At A Glance
Fan Module Disposes of excess heat and cools the expansion unit. RX1217sas automatically powers on when the power cord is plugged into the power source. For more information, please see "Connect with Synology NAS Server". For more information about the rail kit installation, please refer to the Quick Installation Guide that comes with the rail kit. -
Page 5: Safety Instructions
Safety Instructions Keep away from direct sunlight and away from chemicals. Make sure the environment does not experience abrupt changes in temperature or humidity. Place the product right side up at all times. Do not place near any liquids. Before cleaning, unplug the power cord. Wipe with damp paper towels. Do not use chemical or aerosol cleaners. -
Page 6: Chapter 2: Hardware Setup
Chapter Hardware Setup Tools and Parts for Drive Installation • A screwdriver www.synology.com • At least one 3.5” or 2.5” SAS / SATA drive (please visit for compatible drive models) Warning: If you install a drive that contains data, the system will format the drive and erase all existing data. Please back up any important data before installation. - Page 7 3 Insert the loaded drive tray into the empty drive bay. Note: Make sure the tray is pushed in all the way. Otherwise, the drive might not be able to function properly. 4 Push the handle inward to secure the drive tray. 5 Push the switch on the drive tray handle to the left to lock the drive tray.
-
Page 8: Connect With Synology Nas Server
Connect with Synology NAS Server 1 Connect one end of the expansion cable to the SAS OUT port of the Synology NAS server and the other to the SAS IN port of RX1217sas. Please make sure that the release band (in blue) of the cable faces rightward when plugging into the Synology NAS server, and that of the cable faces upward when plugging into RX1217sas;... - Page 9 3 Press the power button on the front panel to power on the Synology NAS server. The Expansion Unit ID of RX1217sas connected to the Synology NAS server will be displayed in sequence on the back panel. Note: 1. Even with the Synology NAS server and expansion unit(s) powered on, you can still connect them with one or more RX1217sas if needed.
-
Page 10: Chapter 3: Maintenance
Note: 1. By pressing the Beep Off button, you can silence the long beeping sound when you hear it. 2. RX1217sas supports component hot-swapping, but we recommend unplugging all power cables of the expansion unit before replacing any component. 2 Push the lever of the PSU at the back panel in the indicated direction. -
Page 11: Replace Malfunctioning Sas / Fan Module
Replace Malfunctioning SAS / Fan Module If a SAS / fan module malfunctions, please see the instructions below to pull out the SAS / fan module and replace the malfunctioning module. To replace the malfunctioning SAS / fan module: 1 Unplug the expansion cables from the SAS / fan module on which the malfunctioning module is to be replaced. 2 Push the lever of the SAS / fan module at the back panel in the indicated direction. - Page 12 To replace the SAS module's malfunctioning fan: 1 Remove the malfunctioning fan by pulling it up from the module. The fans are numbered as shown below. 2 Prepare a new fan, align the arrow to point at the back panel as illustrated below, and insert it back into the fan slot.
-
Page 13: Appendix A: Specifications
Appendix Specifications Item RX1217sas Compatible Drive Type 3.5” / 2.5” SAS / SATA x 12 Maximum Raw Capacity 120TB (12 x 10TB HDD) • SAS IN x 1 Expansion Port • SAS OUT x 1 • 88 x 430.5 x 692 (Not including rack mount kits) Size (H x W x D) (mm) •... -
Page 14: Appendix B: Led Indicator Table
Please try to restart your Synology NAS server or re-insert the drive(s), and then run the HDD / SSD manufacturer's diagnostic tool to check the health status of the drive(s). If you can log into DSM, please run the built-in S.M.A.R.T. test to scan the drive(s). If the problem... - Page 15 IMPORTANT–READ CAREFULLY: THIS END USER LICENSE AGREEMENT ("EULA") IS A LEGAL AGREEMENT BETWEEN YOU (EITHER AN INDIVIDUAL OR A LEGAL ENTITY) AND SYNOLOGY, INC. ("SYNOLOGY") FOR THE SYNOLOGY SOFTWARE INSTALLED ONTO THE SYNOLOGY PRODUCT PUCHASED BY YOU (THE “PRODUCT”), OR LEGALLY DOWNLOADED FROM WWW.SYNOLOGY.COM, OR ANY OTHER CHANNEL PROVIDED BY SYNOLOGY...
- Page 16 Section 15. Termination. Without prejudice to any other or other legal action or proceeding to enforce rights or rights, Synology may terminate this EULA if you do not abide remedies under this EULA, the prevailing party will be by the terms and conditions contained herein. In such event,...
- Page 17 SYNOLOGY, INC. LIMITED PRODUCT WARRANTY THIS LIMITED WARRANTY ("WARRANTY") APPLIES TO THE PRODUCTS (AS DEFINED BELOW) OF SYNOLOGY, INC. AND ITS AFFILIATES, INCLUDING SYNOLOGY AMERICA CORP, (COLLECTIVELY, "SYNOLOGY"). YOU ACCEPT AND AGREE TO BE BOUND BY THE TERMS OF THIS WARRANTY BY OPENING THE PACKAGE CONTAINING AND/OR USING THE PRODUCT.
- Page 18 DAMAGES. the Product specifications; (b) has been repaired, modified or altered by anyone other than Synology or its agent or Limitation of Liability. SYNOLOGY'S AND ITS designee; (c) has been in any way misused, abused, or SUPPLIERS' LIABILITY ARISING OUT OF OR RELATING damaged;...
- Page 19 Nothing in this Section shall be deemed to prohibit or restrict arbitration and will not be conducted on a class-wide or class Synology from seeking injunctive relief or seeking such other action basis. The arbitration shall be held in King County, rights and remedies as it may have at law or equity for any Washington, U.S.A.
- Page 20 FCC Declaration of Conformity This device complies with Part 15 of the FCC Rules. Operation is subject to the following two conditions: (1) this device may not cause harmful interference, and (2) this device must accept any interference received, including interference that may cause undesired operation.
Need help?
Do you have a question about the RX1217sas and is the answer not in the manual?
Questions and answers