Table of Contents
Advertisement
Advertisement
Table of Contents

Related Manuals for Synology NVR216


Summary of Contents for Synology NVR216
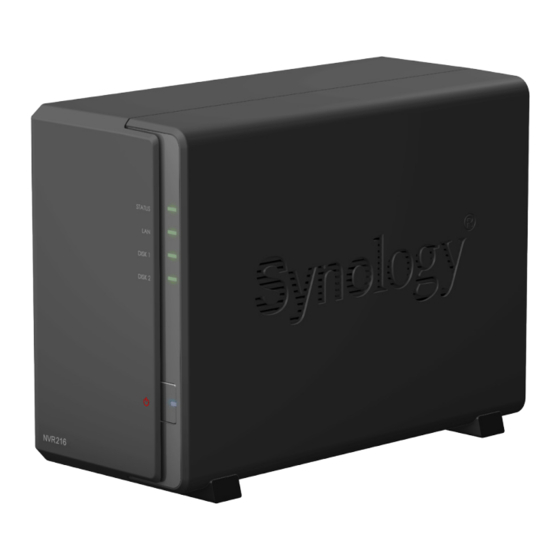
- Page 1 Synology Network Video Recorder NVR216 with Surveillance Station User's Guide...
-
Page 2: Table Of Contents
Table of Contents Chapter 1: Before You Start Chapter 2: Hardware Setup Tools and Parts for Drive Installation Install Drives Start Up Your NVR Chapter 3: Install DSM and Surveillance Station on NVR Install DSM with Web Assistant Get Your NVR Ready Learn More Chapter 4: Get Started with Surveillance Station Add an IP Camera to Surveillance Station... -
Page 3: Chapter 1: Before You Start
Chapter Before You Start Thank you for purchasing Synology Network Video Recorder (NVR). NVR combines the network-attached storage (NAS) with PC-less configuration, operation, and local display of the network video recording package – Surveillance Station. Before setting up your new NVR, please check the package contents to verify that you have received the items below. Also, make sure to read the safety instructions carefully to avoid harming yourself or damaging your NVR. - Page 4 Supported USB devices include USB drive, mouse, keyboard, and uninterruptible power supply (UPS). Any other devices are not supported on your NVR. For more information about Synology Expansion Unit supported by your NVR, please visit www.synology.com. 4 Chapter 1: Before You Start...
-
Page 5: Safety Instructions
Safety Instructions Keep away from direct sunlight and away from chemicals. Make sure the environment does not experience abrupt changes in temperature or humidity. Place the product right side up at all times. Do not place near any liquids. Before cleaning, unplug the power cord. Wipe with damp paper towels. Do not use chemical or aerosol cleaners. -
Page 6: Chapter 2: Hardware Setup
Chapter Hardware Setup Tools and Parts for Drive Installation • A screwdriver www.synology.com • At least one 3.5” or 2.5” SATA drive (please visit for compatible drive models.) Warning: If you install a drive that contains data, the system will format the drive and erase all existing data. Please back up any important data before installation. - Page 7 b Slide the 2.5" Disk Holder into the drive bay, and push it all the way until the drive is firmly connected to the SATA connector. Secure the Disk Holder with the provided screws. 3 Repeat the steps above to install the other drive if you have prepared one. 4 The position of drives is as follows: Note: If you want to create a RAID volume, we recommend that all installed drives are of the same size to make the best...
-
Page 8: Start Up Your Nvr
Start Up Your NVR 1 Connect one end of the AC power adapter to the power port of the NVR. Connect the other end to a power outlet. 2 Use the LAN cable to connect the NVR to your switch, router, or hub. 3 Press the power button to turn on the NVR. -
Page 9: Chapter 3: Install Dsm And Surveillance Station On Nvr
Chapter Install DSM and Surveillance Station on After hardware setup is finished, please install DiskStation Manager (DSM) – Synology’s browser-based operating system – on your NVR. Install DSM with Web Assistant Your NVR comes with a built-in tool called Web Assistant that helps you download the latest version of DSM from the Internet and install it on your NVR. -
Page 10: Get Your Nvr Ready
Package Center in DSM to install Surveillance Station manually. Learn More Congratulations! Your NVR is now ready for action. For more information or online resources about your NVR, please visit www.synology.com. 10 Chapter 3: Install DSM and Surveillance Station on NVR... -
Page 11: Chapter 4: Get Started With Surveillance Station
Get Started with Surveillance Station Assuming that your Synology NVR has been connected to the local network and successfully installed DSM and Surveillance Station 7.1 (or above), this chapter will guide you through the main features of Surveillance Station, including configuring IP Camera, monitoring camera feeds with Live View, playing back recordings with Timeline and Recording, and other related add- ons. - Page 12 5 Click the search icon to search for all the IP cameras correctly connected to your local area network. Note: You can also manually enter the camera's information, including Name, IP address, Port, Brand, Camera model, Username, and Password. 6 In the Camera Search Result window, select an IP camera you wish to add to Surveillance Station, and click OK. 7 You can click Test Connection to check if your IP camera has been correctly configured.
-
Page 13: Monitor Camera Feeds With Live View
Monitor Camera Feeds with Live View In Live View, you can monitor real-time video feeds from IP cameras paired with your NVR, capture snapshots, or adjust camera feeds with pan, tilt, and zoom (PTZ) controls. Camera feeds can be arranged in layouts and customized depending on your individual surveillance needs. - Page 14 Start Monitoring by Configuring Live View Layout To configure your live view layout and start monitoring your camera feeds, please do the following: 1 Click Management on the Layout Panel. 2 Select your preferred type of live view layout. For details, please refer to Surveillance Station Help > Live View > Monitor Live Views.
- Page 15 6 Tick the Alert checkbox for the Live View Analytics item which was just now configured in IP Camera. 7 Click Save Alert Panel on Alerts Panel. to finish the configuration. Now you can track alerted video clips by clicking Setup Scheduled Patrol with PTZ Control and Action Rule If your IP cameras support PTZ control and preset position, you can customize several preset positions, and setup patrol paths composed of a serial concatenation of existing preset positions.
- Page 16 6 Go to Patrol tab in PTZ Control. 7 Click the plus button to add a patrol path. 8 Enter the Name of the newly added patrol path. Select Interval (sec.) to have the patrol repeat after a specified time in seconds.
- Page 17 15 Set the Action Device as Camera. Select the Device as the PTZ camera you have configured preset positions and patrol paths. Select Action as Patrol. Specify the Patrol path you have configured. Specify your preferred Loops per cycle and Interval.
-
Page 18: Playback Video Recordings With Timeline
Playback Video Recordings with Timeline In Timeline, you can play back recordings that were captured with IP cameras and stored on your NVR. Recordings can be filtered based on camera or date. In addition, footage recorded at different times or with different cameras can be watched simultaneously, allowing you to easily have a full understanding of the entire environment. -
Page 19: Authorize User Privileges
Truncate a Video File in Process of Being Recorded If you wish to truncate the video clip which is being recorded, please right-click on the clip marked "- Recording", and select Truncate the recording to immediately stop recording and archive the recorded portion. Note: Surveillance Station will start another clip for continuous recording. - Page 20 5 Select Choose an existing privilege profile, and select the default All-Object Spectator (Spectator) from the drop-down list. Note: You can also choose Create a new privilege profile to customize the privileges that you wish to grant to the new user.
-
Page 21: Discover More Features With Add-Ons
Help > Add-ons > CMS in Surveillance Station. VisualStation Synology VisualStation is a live view and playback solution designed to supplement and enhance your Surveillance Station configuration. With a VisualStation device, you can enjoy the rich features of Surveillance Station without the need to constantly keep a computer running. -
Page 22: Chapter 5: Setup And Operate Surveillance Station Local Display
Chapter Setup and Operate Surveillance Station Local Display Connect a Monitor to Your NVR Having set up your NVR with DSM and Surveillance Station installed, you can leverage the local display feature of the network video recording system. Please prepare an HDMI monitor and an HDMI cable, and do the following: 1 Connect one end of the HDMI cable to the HDMI port of the NVR, and connect the other end to a monitor. -
Page 23: Navigate Local Display Desktop
Navigate Local Display Desktop Surveillance Station Local Display delivers a consistent user experience. You can easily switch between the operations in Local Display on a monitor directly connected to your NVR, and in Surveillance Station and DSM on your PC. Name Function This menu includes the following applications:... -
Page 24: Function Limitations
Options The Options window contains the following two tabs: 1 Login: Change the password and display language for the currently logged in Local Display user. The Setting of Auto Login at Startup (configurable for Administrator only) facilitates the access to Local Display. 2 Others: You can determine to show/hide resource monitor, as well as other settings related to Local Display login. -
Page 25: System
System In System, you can view the the information of your NVR and configure settings for Surveillance Station. Information In the Information tab, you can view the basic information of your NVR and the following items: 1 Version information of DSM, Surveillance Station, Local Display, and Device Pack 2 Time server and time zone 3 External devices Storage... -
Page 26: Specifications
• Basic • JBOD • RAID 0 • RAID 1 Supported RAID Type • RAID 5 • RAID 6 (with DX213) • Synology Hybrid RAID (Up to 2-Disk Fault Tolerance with DX213) Agency Certification • FCC Class B • CE Class B • BSMI Class B... - Page 27 Please try to restart your NVR or re-insert the drive(s), and then run the HDD/SSD manufacturer's diagnostic tool to check the health status of the drive(s). If you can log into DSM, please run the built-in S.M.A.R.T. test to scan the drive(s). If the problem remains unresolved, please contact Synology Technical...
- Page 28 IMPORTANT–READ CAREFULLY: THIS END USER LICENSE AGREEMENT ("EULA") IS A LEGAL AGREEMENT BETWEEN YOU (EITHER AN INDIVIDUAL OR A LEGAL ENTITY) AND SYNOLOGY, INC. ("SYNOLOGY") FOR THE SYNOLOGY SOFTWARE INSTALLED ONTO THE SYNOLOGY PRODUCT PUCHASED BY YOU (THE “PRODUCT”), OR LEGALLY DOWNLOADED FROM WWW.SYNOLOGY.COM, OR ANY OTHER CHANNEL PROVIDED BY SYNOLOGY...
- Page 29 Section 15. Termination. Without prejudice to any other or other legal action or proceeding to enforce rights or rights, Synology may terminate this EULA if you do not abide remedies under this EULA, the prevailing party will be by the terms and conditions contained herein. In such event,...
- Page 30 SYNOLOGY, INC. LIMITED PRODUCT WARRANTY THIS LIMITED WARRANTY ("WARRANTY") APPLIES TO THE PRODUCTS (AS DEFINED BELOW) OF SYNOLOGY, INC. AND ITS AFFILIATES, INCLUDING SYNOLOGY AMERICA CORP, (COLLECTIVELY, "SYNOLOGY"). YOU ACCEPT AND AGREE TO BE BOUND BY THE TERMS OF THIS WARRANTY BY OPENING THE PACKAGE CONTAINING AND/OR USING THE PRODUCT.
- Page 31 Product specifications; (b) has been repaired, modified Limitation of Liability. SYNOLOGY'S AND ITS or altered by anyone other than Synology or its agent or designee; (c) has been in any way misused, abused, or SUPPLIERS' LIABILITY ARISING OUT OF OR RELATING damaged;...
- Page 32 Nothing in this Section shall be deemed to prohibit or restrict arbitration and will not be conducted on a class-wide or class Synology from seeking injunctive relief or seeking such other action basis. The arbitration shall be held in King County, rights and remedies as it may have at law or equity for any Washington, U.S.A.
Need help?
Do you have a question about the NVR216 and is the answer not in the manual?
Questions and answers