Table of Contents
Advertisement
Advertisement
Table of Contents

Related Manuals for McIntosh C39


Summary of Contents for McIntosh C39
- Page 1 AUDIO/VIDEO CONTROL CENTER...
- Page 3 AUDIO/VIDEO CONTROL CENTER...
- Page 4 WARNING: THIS UNIT IS CAPABLE OF PRODUCING HIGH SOUND PRESSURE LEVELS. CONTINUED EXPOSURE TO HIGH SOUND PRESSURE LEVELS CAN CAUSE PERMANENT HEARING IMPAIRMENT OR LOSS. USER CAUTION IS ADVISED AND EAR PROTECTION IS Copyright 1993 © by Mcintosh Laboratory Inc. RECOMMENDED WHEN PLAYING AT HIGH VOLUMES.
-
Page 5: Table Of Contents
Please take a short time to read the information in this manual. We want you to be as familiar as possible with all the features and functions of your new piece of Mcintosh. This will en- sure that you receive all the performance benefits this instrument can offer you, and that it will become a highly valued part of your home music system. -
Page 6: Service Contract
4. The service contract is issued to you as the original purchaser. To protect you from misrepresentation this contract cannot be transferred to a second owner. 5. Units in operation outside the United States and Canada are not covered by the Mcintosh Factory Service Contract, irrespective of the place of purchase. Nor are units acquired outside the USA and Canada, the purchasers of which should consult with their dealer to ascertain what, if any, service contract or warranty may be available locally. -
Page 7: Introduction
The C39 has the added feature of the Mcintosh designed " H A L L " signal processing cir- cuits. The "HALL" feature allows you to enhance the realism of two channel program sources such as a compact disc. -
Page 8: How To Install The C39
DOLBY SURROUND, PRO LOGIC and the Double-D Symbol are trademarks of Dolby Licensing Laboratory. Home THX®Audio is a registered trademark of Lucasfilm Ltd. The C39 can be placed upright on a table or shelf, standing on its own plastic feet. It can HOW TO also be installed in an optional Mcintosh L74 equipment cabinet. -
Page 9: Home Theater Audio Channel Configuration With
Dolby Surround encoding is also used for MTS and satellite broadcasts as well as other audio-only program sources such as compact discs. Use the C39 CINEMA 1 mode with its Dolby Pro Logic processing to enjoy listening to these other program sources. -
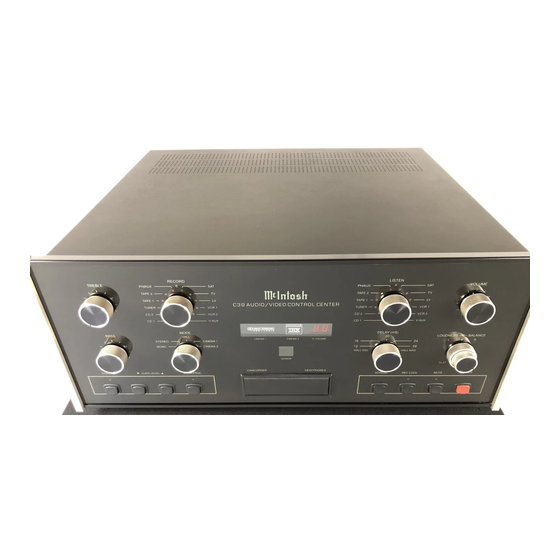
Page 10: Front Panel Controls, Switches And Pushbuttons
Detailed information on Home Theater loudspeaker setup is covered in the manual enclos- ed with your Mcintosh HT Series Home Theater loudspeakers. The C39 can be remotely controlled. Most of the operating functions performed at the front FRONT PANEL panel, also can be done by the C39 Hand Held Remote Controller. The following information CONTROLS, refers only to the front panel. - Page 11 LEFT Surround and RIGHT Surround outputs. The Left, Right and Center signals of 80Hz and lower are combined by the C39 and fed to the SUBWOOFer Output. The Dolby Pro Logic Indicator on the C39 front panel lights when the MODE Switch is in CINEMA 1 position.
- Page 12 1. The Dolby Pro Logic™ indicator lights when the C39 is switched to CINEMA 1 or CINEMA 2 Mode. 2. The Home THX Audio indicator lights when the C39 is in CINEMA 2 Mode, and the optional THX-M Module is installed.
- Page 13 H. SYS CAL, SYStem CALibrate, (SUR CAL) Allows the volume level of all six channels to be accurately set using the built-in C39 noise generator. Calibration includes individual channel volume level adjustment or trimming which may be required due to room geometry or differences in amplifiers or speakers. The calibra- tion can be done by cycling through the six channels automatically or manually, depending on the setting of the C39 rear panel SURROUND CALIBRATE switch.
- Page 14 This switch allows you to change the time delay of the signals in the surround sound chan- nels. The numbers indicate the time delay in milliseconds when the C39 is in CINEMA 1 (Dolby Pro Logic), or CINEMA 2 (Home THX Audio) operating modes. The HALL mode of operation has slightly longer delay times.
-
Page 15: Front Panel
Area " B " to indicate the area is muted. R. POWER Press POWER to turn on the C39 system. The front panel will illuminate and show the pro- gram signals and operating modes selected in Area "A". Only the Area A outputs and Area "A"... - Page 16 0 to 9 to control the desired relays on the HC-1, 5. Press SYS OFF to turn the entire C39 system off from either Area "A" or Area " B " after the SYS OFF is activated.
-
Page 17: Hand Held Remote
HOW TO MAKE CONNECTIONS ALL SIGNALS FED TO THE SIX UNBALANCED OUTPUTS ALSO APPEAR AT THE C39 REAR PANEL 6 CHANNEL OUTPUT CONNECTOR AND ARE FED THROUGH A 25 CON- DUCTOR SUBMINIATURE "D" MALE-TO-FEMALE COMPUTER TYPE CABLE TO A MAT-... - Page 18 When an external signal processor is properly connected, the program signals will feed to the processor from the C39 PROCESSOR TO jacks, and return to the C39 at the PROCESSOR FROM jacks.
-
Page 19: The Rear Panel And How To Make Connections
For example, CD1 Inputs could be used for a single disc player, and CD2 Inputs for a CD changer. When the C39 is used with the CR 10 Remote Control System, only the CD2 input will func- tion with the CR 10. - Page 20 TV: Connect a coaxial cable from the C39 TV coaxial output to the coaxial antenna input of a TV receiver being used as a monitor. Whenever the C39 is turned OFF, the RF signals feed from the ANT/CABLE connector directly to the TV connector for normal TV reception.
- Page 21 The interconnect cable from the C39 POWER CONTROL jack to the MC7106 POWER CON- TROL IN jack uses single conductor shielded wire with 1/8" mini phone plugs. Connections REAR PANEL are to the sleeve and tip of the plug. 22. SURROUND CALIBRATE, (AUTO, MANual)
- Page 22 IR Sensor or WK-1 Keypad. This allows the C39 Remote Controller to send control signals to the C39 for Area "A" functions without aiming it at the C39 front panel. An example would be if the C39 were installed behind a cabinet door that would block the front panel sensor.
-
Page 23: Rear Panel
Connect a Mcintosh Model W102 Tuner Control cable from the TUNER CONTROL connec- tor to a connector on a compatible Mcintosh tuner. This allows you to select and control tuner operating functions with the C39 hand held remote controller transmitting to a C39 sensor. -
Page 24: How To Set Up Your Mclntosh Home Theater
Home Theater use. The MC7106 is also licensed for Home THX Audio and in- cludes a convenient 25 conductor THX connector that accommodates a computer type cable to receive all six audio channels and AC power control from a matching connector on a C39 Control Center. -
Page 25: Home Theater Layout
Home THX Cinema Directivity HOME (as seen from the side) THEATER LAYOUT The front speakers must be aimed directly at the listening area. This is due to their vertical directivity, which greatly enhances dialog intelligibility and im- age localization. The Surround speakers must be even with and above the listener. -
Page 26: Home Theater Hookup
HOME LV (LASER DISC) VCR1 THEATER HOOK-UP TELEVISION TUNER VCR 2 OR MX130 TO CR10 MC7106 MclNTOSH HT-1 MclNTOSH HT-1 MclNTOSH HT-1 LEFT FRONT CENTER RIGHT FRONT MCINTOSH HT-2 SUB WOOFER MclNTOSH HT-3 MclNTOSH HT-3 RIGHT SURROUND LEFT SURROUND... -
Page 27: Volume Level Calibration
(For future reference, list the final calibration trim numbers in the space provided in this manual. If the C39 AC power cord is disconnected from the AC power line, or AC power is interrupted, the backup power supply will turn off and calibration memory will be lost. - Page 28 A convenient method for surround volume level calibration in the Automatic mode, CALIBRATION is to use the UP ( ) and DOWN ( ) SURROUND pushbuttons on the C39 Hand Held Remote Controller and operate it from a position located in the listening area at seated ear height.
- Page 29 (For future reference, list the final calibration trim numbers in the space provided in this manual. If the C39 AC power cord is disconnected from the AC power line, or AC power is interrupted, the backup power supply will turn off and calibration memory will be lost. The calibration process must then be repeated.)
- Page 30 Do this by pressing the " U P " or " D O W N " SURROUND pushbuttons on the C39 Hand Held Remote Controller until you are satisfied with the results. These changes will remain as long as the C39 continues to operate.
-
Page 31: Specifications
FREQUENCY RESPONSE SPECIFICATIONS MONO and STEREO MODES LEFT, CENTER and RIGHT FRONT channels +0, - 0 . 5 d B from 20Hz to 20,000Hz HALL MODE LEFT, CENTER and RIGHT FRONT channels, +0, - 0 . 5 d B from 20Hz to 20,000Hz. LEFT and RIGHT SURROUND channels, +0, - 3 d B from 100Hz to 7000Hz. - Page 32 SIGNAL TO NOISE RATIO A-WEIGHTED SPECIFICATIONS MONO, STEREO and HALL MODES LEFT, CENTER and RIGHT FRONT channels, PHONO: 90dB below 10mV input, (84dDB IHF). HIGH LEVEL: 100dB below rated output (95dB IHF). DOLBY PRO-LOGIC and THX MODES All outputs greater than 70dB below reference level. MAXIMUM INPUT SIGNAL PHONO: 60mV.
-
Page 33: Custom Installation
CUSTOM INSTALLATION 1/4" OUTLINE OF FRONT PANEL DRAWING EDGE OF CUTOUT PANEL HEIGHT 7" 177.8mm END CAPS 6-9/16" 166.7mm 7-1/16" 179.8mm 7/32" 17-1/16" 5.3mm 433.4mm 3/16" SUPPORT SHELF 5.1mm BOTTOM OF CUTOUT AND TOP OF SUPPORT SHELF MUST COINCIDE MOUNTING SURFACE OUTLINE OF UNIT (SIDE VIEW) 6x1/2... - Page 34 The letters and numbers correspond to the paragraphs on pages 8 through 2 1 .
- Page 36 04013600...
Need help?
Do you have a question about the C39 and is the answer not in the manual?
Questions and answers