Table of Contents

Subscribe to Our Youtube Channel
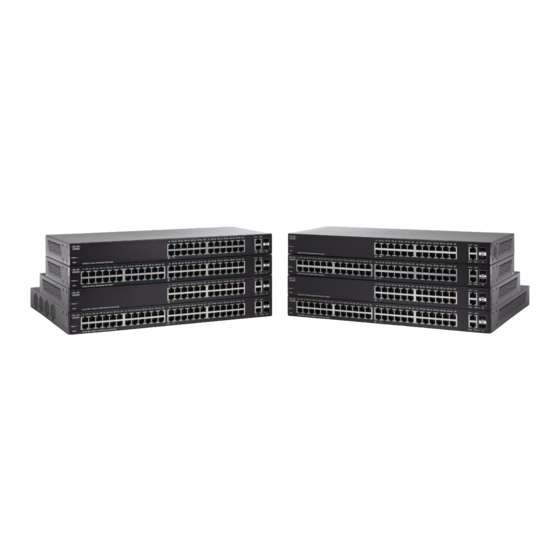
Summary of Contents for Cisco SF220-24
-
Page 1: Quick Start Guide
Quick Start Guide Cisco 220 Series Smart Plus Switches Package Contents • Cisco 220 Series Smart Plus Switch • Power Cord • Rack-Mount Kit and Rubber Feet • Console Cable • This Quick Start Guide • Product CD • Technical Support Contacts... -
Page 2: Before You Begin
Welcome Thank you for choosing the Cisco 220 Series Smart Plus Switch, a Cisco network communications device. This device is designed to be operational right out-of-the-box as a standard bridge. In the default configuration, it will forward packets between connecting devices after power up. -
Page 3: Front Panel
Gigabit Interface Converter (miniGBIC) ports. The term SFP will be used in this guide. • The SFP ports are compatible with Cisco modules MFEBX1, MFEFX1, MFELX1, MGBLH1, MGBLX1, MGBSX1, MGEBX1, and MGBT1. -
Page 4: Back Panel
8-4A 50-60Hz CONSOLE POWER—The power port connects the switch to power. CONSOLE—The console port connects the supplied console cable to a computer’s serial port for configuration using a terminal emulation program. Cisco 220 Series Smart Plus Switches Quick Start Guide... -
Page 5: Mounting The Cisco 220 Switch
Attach one of the supplied brackets on the side of the switch so that the four holes align to the screw holes, and use the four supplied M5 (non-PoE models) or M4 (PoE models) screws to secure it. Cisco 220 Series Smart Plus Switches Quick Start Guide... - Page 6 Suggested hardware is illustrated here. Insecure mounting might damage the device or cause injury. ARNING Cisco is not responsible for damages incurred by insecure wall-mounting. Cisco 220 Series Smart Plus Switches Quick Start Guide...
- Page 7 For the best support of the switch and cables, make sure that the switch is attached securely to wall studs or to a firmly attached plywood mounting backboard. Mount the switch with the front panel facing down as shown here. Cisco 220 Series Smart Plus Switches Quick Start Guide...
-
Page 8: Connecting Network Devices
802.3at and 802.3af on SG220-50P port 1 to 4; 802.3af on port 5 to 48 The PoE switch should be connected only to PoE networks ARNING without routing to the outside plant. Cisco 220 Series Smart Plus Switches Quick Start Guide... -
Page 9: Configuring The Cisco 220 Switch
PoE ports. Configuring the Cisco 220 Switch The Cisco 220 switch can be accessed and managed by two different methods: over your IP network by using the web-based interface, or by using the switch’s command-line interface through the console port. Using the console port requires advanced skills. -
Page 10: Configuring Your Switch Using The Web-Based Interface
IP subnet through one or more IP routers. Locate the IP address of the switch. The switch can be accessed and managed by Cisco network tools and services including the Cisco FindIT Network Discovery Utility that enables you to automatically discover all supported Cisco devices in the same local network segment as your computer. - Page 11 When the login page appears, choose the language that you prefer to use in the web-based interface and enter the username and password. The default username is cisco. The default password is cisco. Usernames and passwords are both case sensitive. Click Log In.
-
Page 12: Configuring Your Switch Using The Console Port
Make sure that any configuration changes made are saved AUTION before exiting. You are now ready to configure the switch. Refer to the Cisco 220 Series Smart Plus Switches Command Line Interface Reference Guide for further information. Cisco 220 Series Smart Plus Switches Quick Start Guide... -
Page 13: Troubleshoot Your Connection
System LED provides an indication of where the switch received the IP address (See Front Panel, page 3 for details.) Make sure that no other device is using the same IP address as the switch. Cisco 220 Series Smart Plus Switches Quick Start Guide... -
Page 14: Returning The Cisco 220 Switch To The Factory Default Settings
– Disconnect the switch from the network or disable all DHCP servers on your network. – With the power on, press and hold the Reset button for more than ten seconds. Cisco 220 Series Smart Plus Switches Quick Start Guide... -
Page 15: Where To Go From Here
(Partner Login Required) This is a class A product. In a domestic environment this ARNING product may cause radio interference in which case the user may be required to take adequate measures. Cisco 220 Series Smart Plus Switches Quick Start Guide... - Page 16 Cisco and the Cisco logo are trademarks or registered trademarks of Cisco and/or its affiliates in the U.S. and other countries. To view a list of Cisco trademarks, go to this URL: www.cisco.com/go/trademarks. Third-party trademarks mentioned are the property of their respective owners.


Need help?
Do you have a question about the SF220-24 and is the answer not in the manual?
Questions and answers