
Related Manuals for FaVal MERCURY S75


Summary of Contents for FaVal MERCURY S75
-
Page 1: Operating Instructions
Digital Satellite Receiver MERCURY S75 Operating Instructions _______________________________________________________________ Version 1.0 18.08.08... -
Page 2: Table Of Contents
Table of Contents _______________________________________________________________ Table of Contents Table of Contents....................2 Preface ....................... 3 Safety Information....................4 Receiver Front View .................... 6 Receiver Back...................... 6 Remote control ....................7 Remote control buttons ..................8 Connect Receiver ....................9 1. Installation .....................10 1.1 Antenna Settings ..................10 1.2 Edit Satellite....................11 1.3 Transponder List ..................12... -
Page 3: Preface
Thank you very much for choosing our Satellite Receiver. You have selected a receiver of our new generation – the experience of 10 years of digital transfer technology go into our FaVal Receivers. Please read through the operating instructions carefully to prevent malfunctioning of the device. -
Page 4: Safety Information
Safety Information _______________________________________________________________ Safety Information Read the operating instructions thoroughly before connecting the device. Operate the device only on mains with a corresponding power connection. • Operate the device near an outlet and configure it freely accessibly for safety • reasons. - Page 5 Safety Information _______________________________________________________________ Batteries can contain poisonous substances. Keep batteries out of reach of • children, as the batteries could be swallowed. Leaking batteries can cause damage in the remote control. Batteries can • contain poisonous substances which are harmful to the environment. Dispose of the batteries in complete accordance with the legal regulations.
-
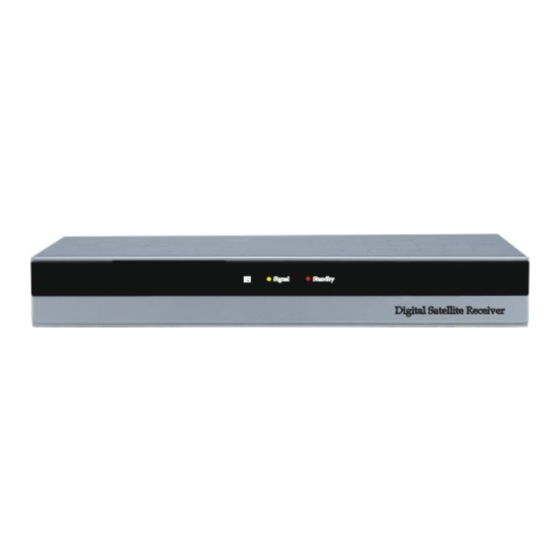
Page 6: Receiver Front View
Receiver Front View _______________________________________________________________ Receiver Front View Receiver Back 1. Digital Audio: Digital coaxial audio connection 2. Audio-L: Left analog audio connection 3. Audio-R: Right analog audio connection 4. LNB OUT: Loop-through connection of the receiver 5. TV: SCART connection TV set 6. -
Page 7: Remote Control
Remote control _______________________________________________________________ Remote control... -
Page 8: Remote Control Buttons
Remote control buttons _______________________________________________________________ Remote control buttons Symbol Explanation Turn on and standby Enter program directly, digit input 0- 9 Check if subtitles are available for the broadcast SUBTL Switch from 4:3 to 16:9 full-screen mode 16:9 – Lower volume VOL ◄... -
Page 9: Connect Receiver
Connect Receiver _______________________________________________________________ Connect Receiver (Fig. similar) -
Page 10: Installation
1. Installation _______________________________________________________________ 1. Installation Connect the receiver with the antenna cable and plug the receiver into your TV set. Plug the power plugs of the connected devices in the power socket and switch on the receiver with the Standby button. Then press the “MENU”... -
Page 11: Edit Satellite
1. Installation _______________________________________________________________ Scan mode Select “Search” to search for channels on the selected satellite. In the next submenu first select the type of search function for the selected satellite: FTA, ALL, FTA+NIT, ALL+NIT FTA (Free-To-Air): Search all free-to-air channels (not encrypted channels) on the selected satellite. -
Page 12: Transponder List
1. Installation _______________________________________________________________ 1.3 Transponder List By pressing the GREEN BUTTON in the installation menu of the antenna settings the list of previously selected satellites is opened in the transponder list. In this menu item you can search, edit, add or delete individual transponder of a satellite. -
Page 13: Edit Program
2. Edit Program _______________________________________________________________ 2. Edit Program Open the “Edit Program” menu at Main Menu / Program. In this menu you can change, block, remove from program list, delete, move and re-sort programs. Navigate the program list with the “CH ▲” “CH ▼”... -
Page 14: Edit Favorites
3. Edit Favorites _______________________________________________________________ Block channel Select the channel you would like to block. First press the RED BUTTON to open the expanded channel options and then press the BLUE BUTTON. The selected channel is now shown on the list with a lock symbol. Blocked channels can only be viewed by entering your personal identification number (PIN). -
Page 15: Set A/V Output
4. System settings _______________________________________________________________ 4.2 Set A/V output In this menu item you can tune the picture on your TV set. TV norm Select the output format here which your color television set supports. You can select among PAL, NTSC, SECAM or AUTOMATIC. Video Output Mode Select the video output mode of your receiver here. -
Page 16: Parental Lock
4. System settings _______________________________________________________________ 4.4 Parental Lock In this menu you can select which menu options should be password-protected and can be accessed only after entering the PIN number. (The PIN number in the factory setting is “0000”.) To block one of the menu items, select the option "On" after the corresponding display. -
Page 17: Games
5. Games _______________________________________________________________ 5. Games On your receiver there are – according to model – games installed. You can call up the game settings with the color buttons. While you play, the program most recently seen is shown in a small TV window. -
Page 18: Basic Operating Steps
7. Basic Operating Steps _______________________________________________________________ Program Define the channel the receiver should switch on here. 7. Basic Operating Steps Switch between radio mode and TV mode To switch between radio mode and TV mode, press the “TV/RADIO” button. Channel select To go to the previous channel or next channel, press the arrow buttons “CH ▲”... -
Page 19: Cleaning
Cleaning _______________________________________________________________ Cleaning Danger of electric shock! Liquid must not enter the receiver. Never clean with a wet cloth. Unplug from the power socket before cleaning the power plug. Note! Do not use solvent-containing cleaning agents like benzine or thinner. These can damage the surface of the case. -
Page 20: Eliminating Malfunctions
Eliminating malfunctions _______________________________________________________________ Eliminating malfunctions Symptom Possible cause and remedy The display does not work. The power cable is not connected. Connect the power cable to the power socket. No tone, picture, LED on The receiver is in standby. the receiver. Press the "POWER"... -
Page 21: Technical Information
Technical Information _______________________________________________________________ Technical Information Receiver Operating temperature 0 ºC bis +40 ºC Storage temperature –40 ºC bis +65 ºC LNB/TUNER Input F-socket IEC 169–24 Input frequency range 950 MHz ~ 2150 MHz Input level range –65 dBm bis –25 dBm LNB supply current 14/18 V, max. - Page 22 Technical Information _______________________________________________________________ Notes:...
- Page 23 Technical Information _______________________________________________________________ Service Please contact your specialized dealer. Declaration of conformity Compliance with the following guidelines and norms for this product is hereby declared: Low Voltage Guidelines 73/23/EWG EN 60 335-1 EN 60 335-2-15 Guidelines for Electromagnetic Compatibility 89/336/EWG EN 55 013:2001 EN 55 020 EN 61 000-3-2000...
- Page 24 Thank you very much for choosing our product. Our product is in compliance with legal requirements and was made under constant quality control. The technical data complies with the present state at the time of printing. Subject to change.
Need help?
Do you have a question about the MERCURY S75 and is the answer not in the manual?
Questions and answers