Table of Contents
Advertisement
Advertisement
Table of Contents

Related Manuals for V-ZUG Miwell SL


Summary of Contents for V-ZUG Miwell SL
- Page 1 V-ZUG Ltd Microwave Miwell SL Operating instructions...
- Page 2 The model number corresponds to the first three digits on the identification plate. These operating instructions apply to the models: Type Model no. Size system MW-SL SMS 55 MW-SL/60 EURO 60 Variations depending on the model are noted in the text. © V-ZUG Ltd, CH-6301 Zug, 2012...
-
Page 3: Table Of Contents
Contents 1 Safety precautions 1.1 Symbols used ..........5 1.2 General safety precautions . - Page 4 8 Care and maintenance 8.1 Cleaning the exterior ........52 8.2 Cleaning the appliance door .
-
Page 5: Safety Precautions
Safety precautions Symbols used Denotes important safety precautions. Failure to observe said precautions can result in injury or in damage to the appliance or fittings! Information and precautions that should be observed. Information on disposal. Information about the operating instructions. Indicates step-by-step instructions. -
Page 6: General Safety Precautions
1 Safety precautions General safety precautions • Read the operating instructions before using the appliance for the first time! • This appliance is not intended for use by persons (including children) with reduced physical, sensory or mental capabilities, or lack of experience and/or knowledge, unless they are supervised or have been given instruction concerning use of the appliance by a person responsible for their safety. -
Page 7: Appliance-Specific Safety Precautions
1 Safety precautions Appliance-specific safety precautions • READ THE IMPORTANT SAFETY INSTRUCTIONS CAREFULLY AND RETAIN FOR FUTURE USE. • WARNING: Children should only use the appliance in the combined operating mode under adult supervision due to the temperatures generated. • WARNING: In the event that the appliance door or door seal is damaged, the appliance must not be used until it has been repaired by a qualified competent person. - Page 8 1 Safety precautions • WARNING: Liquids and other foods must not be heated in sealed containers, as they are liable to explode. • The appliance is intended to be used in household. • Only use containers that are suitable for use in microwave appliances.
- Page 9 1 Safety precautions • Microwave heating of beverages can result in delayed eruptive boiling, therefore care must be taken when handling the vessel. • The contents of feeding bottles and baby food jars must be stirred or shaken and the temperature must to be checked before consumption, in order to avoid burns and scalds.
- Page 10 1 Safety precautions • Do not use abrasive cleaning agents or sharp metal scrapers for cleaning the glass of the appliance door, as they can scratch the surfaces. This can destroy the glass. • Under no circumstances use a steam cleaner.
-
Page 11: Disclaimer
1 Safety precautions Disclaimer • Any repairs, modifications or manipulations to the appliance, especially any live parts, may only be carried out by the manufacturer, its Customer Services or similarly qualified persons. Repairs if carried out incorrectly may cause serious injury, damage to the appliance and fittings, as well as affect the functioning of the appliance. -
Page 12: Instructions For Use
1 Safety precautions Instructions for use • The appliance corresponds to recognised technology standards and the relevant safety regulations. Proper use of the appliance is essential to avoid damage and accidents. Please observe the precautions given in these operating instructions. •... - Page 13 1 Safety precautions Caution: Danger of injury! • Be careful that fingers do not get caught in the door hinges. Otherwise, if the appliance door is moved, there is a risk of injury. Particular care should be taken when children are around. •...
-
Page 14: Microwave
1 Safety precautions How to avoid damaging the appliance • The construction of the appliance may not be changed in any way. Do not apply force to or interfere with the appliance door or the control and safety devices. The illumination may only be replaced by our Customer Services. •... - Page 15 1 Safety precautions Heating foods and liquids • Do not leave your appliance unattended when heating or cooking food in containers that are made of plastic, paper or other flammable materials. The containers can melt or ignite. • Do not heat beverages or food that contain alcohol. Ignition hazard and danger of explosion! •...
- Page 16 1 Safety precautions • The cooking time depends on the quantity, nature and initial temperature of the food, as well the dishes being used. Always start with the shorter cooking time given to avoid overcooking the food. Otherwise, smaller quantities or food with a low moisture content can dry out and possibly ignite.
-
Page 17: Note On Accessories
1 Safety precautions Note on accessories The accessories get very hot during use – burns hazard! Always wear protective gloves or use oven cloths. Turntable roller and glass turntable • You should use the appliance at all times and exclusively with the turntable roller and the glass turntable supplied. - Page 18 1 Safety precautions Food cover • Use the food cover with the Power&Favorit and microwave modes only. The food cover could otherwise melt. Cookware • You should ensure that the cookware does not touch the sides of the cooking space as it rotates. Note also when using the microwave and combi modes: •...
-
Page 19: Disposal
1 Safety precautions Disposal Packaging Danger of suffocation! Packaging materials (e.g. plastic, polystyrene) can be dangerous for children. Keep packaging materials away from children. All packaging material is marked and should be collected for recycling and disposed of in an environmentally friendly way. Disconnection Pull the plug out of the mains socket or have the appliance disconnected ➤... -
Page 20: Appliance Description
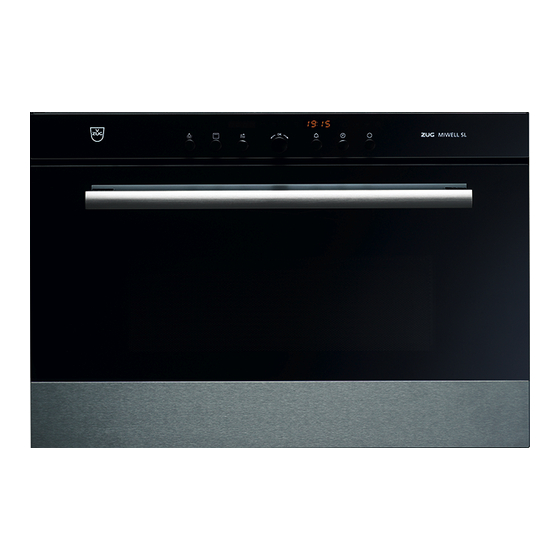
Appliance description Construction Operating and display elements Illumination Appliance door Microwave inlet Safety lock Grill Ventilation slots Identification plate... -
Page 21: Operating And Display Elements
2 Appliance description Operating and display elements Buttons Illumination Timer Operating mode Time, operating time, switch-off time Microwave operating modes Adjusting knob Displays Microwave power level Time, operating time, switch-off time, timer, etc. Operating mode Grill Microwave operating modes Power&Favorit PerfectDefrost Microwave CombiCrunch... -
Page 22: Accessories
2 Appliance description Accessories Turntable roller and glass turntable You should always use the turntable roller and the glass turntable in combination with the other accessories. Place the turntable roller in the fitting in the floor of ➤ the cooking space. Position the glass turntable on the turntable roller ➤... - Page 23 2 Appliance description CombiCrunch grip Use the CombiCrunch grip for taking the Combi- ➤ Crunch plate out of the cooking space. Wire rack When using the combi mode, you should never place metal dishware on the wire rack. Otherwise, arcing can occur which will damage the appliance.
-
Page 24: Ventilation Fan
2 Appliance description Ventilation fan The fan switches on automatically during operation. The fan can continue to run at the end of operation to cool the electronic components. During this time, the appliance door can be opened and the food removed. The fan switches off automatically. -
Page 25: Operating The Appliance
Operating the appliance The operating modes, the operating time, the switch-off time and various other functions can be selected by pressing the appropriate button once or more. • The symbol for the function selected illuminates or flashes. • A recommendation flashes in the corresponding digital display. •... -
Page 26: Example
3 Operating the appliance Example Liquids such as milk microwaved without a teaspoon become superheated. Disturbing the vessel even slightly can cause the liquid to erupt. Burns hazard! Burns hazard from heat produced during cooking! Use protective gloves or oven cloths. Keep children away. Stir liquids before consuming them. - Page 27 3 Operating the appliance Selecting the operating mode Select the operating mode. ➤ – flashes in the left digital display. – The symbol flashes. – The symbol illuminates. – illuminates in the right digital display. Turn the adjusting knob to change the microwave power level to ➤...
-
Page 28: User Settings
User settings You can adjust the settings. With the appliance switched off, hold the adjusting knob depressed ➤ for 5 seconds. – appears in the digital display. Press the adjusting knob to confirm. ➤ – appears in the digital display for «Start protection on». Turn the adjusting knob to select setting. -
Page 29: Start Protection
4 User settings Start protection Start protection prevents an operating mode being started accidentally. If the length of time between closing the appliance door and starting the appliance is longer than 1 minute, start protection is automatically activated. • If any attempt is made to start any operating mode, appears in the digital displays. -
Page 30: Time Functions
Time functions The following time functions are available: • Time • Timer – can be used at any time and independently of all other functions • Operating time – time-controlled switch-off of the appliance • Delayed start – time-controlled switch-on and switch-off of the appliance When the appliance is switched off, the time display is dimmed between 24:00 and 6:00. -
Page 31: Timer
5 Time functions Timer The timer functions like an egg timer. It can be used at any time and independently of all other functions. Setting Press the button. ➤ – flashes in the right digital display. – The symbol flashes. Turn the adjusting knob to set the timer duration. - Page 32 5 Time functions Checking and changing Press the button. ➤ – The countdown to the time remaining flashes in the right digital display. – The symbol flashes. Turn the adjusting knob to change the timer duration. Switching off before time Press the button 2×.
-
Page 33: Operating Time
5 Time functions Operating time The operating mode selected switches off automatically when the operating time is up. Setting Select the desired operating mode. ➤ If the right digital display does not flash, press the button. ➤ – A corresponding recommended value appears in the right digital display. - Page 34 5 Time functions End of the operating time When the set duration is up: – The appliance switches off automatically. – A long, intermittent acoustic signal is emitted for 1 minute. – flashes in the right digital display. – The symbol flashes.
-
Page 35: Delayed Start
5 Time functions Delayed start The delayed start is activated when for the operating mode selected both an operating time and a switch-off time are set. The appliance switches automat- ically on and off again at the desired times. Delayed start can only be selected if the operating time is shorter than 20 minutes. - Page 36 5 Time functions Setting the switch-off time Press the button again. ➤ – The switch-off time – without a delayed start – e.g. flashes in the right digital display. – The symbol flashes. Turn the adjusting knob to set the switch-off time. ➤...
- Page 37 5 Time functions Checking and changing Press the button 1×. ➤ – The operating time is visible for 2 seconds. Press the button 2×. ➤ – The switch-off time flashes. It can be changed. The operating time, the operating mode and the microwave power level cannot be changed.
-
Page 38: Operating Modes
Operating modes All the operating modes are described below. See also the notes in Tips on settings. ➤ Operating mode Symbol Range Recommendation Grill – 15 mins. 1000 W 1000 W Power&Favorit 0–2 mins. 30 secs. 50 secs. 0–850 W 650 W Microwave 0–... - Page 39 6 Operating modes Always use the turntable roller and the glass turntable ➤ in combination with the other accessories. Accessories For browning and crisping food, as well as gratinating and toasting. Preheat the cooking space for 5 minutes. Place the food to be grilled directly on the wire rack. For everyday use for heating liquids –...
-
Page 40: Power&Favorit
6 Operating modes Power&Favorit The heating of liquids, e.g. 2 dl coffee, can be saved with this operating mode. Select the operating mode. ➤ – illuminates in the left digital display. – The symbol flashes. – flashes in the right digital display. Turn the adjusting knob to set the operating time. -
Page 41: Perfectdefrost
6 Operating modes PerfectDefrost This operating mode is for perfectly defrosting food that has a net weight of 50–2500 g. An automatic programme is defined for the following 5 food groups: Left digital display Food group Max. weight Meat 2000 g Chicken 2500 g Fish... -
Page 42: Combicrunch
6 Operating modes The appliance stops roughly halfway through the defrosting duration. – A triple acoustic signal is emitted. – appears in the left digital display. – appears in the right digital display. Open the appliance door. ➤ Stir or turn the food. ➤... -
Page 43: Combi Mode
6 Operating modes Combi mode The combi mode is only possible with the microwave and grill. Select the operating mode. ➤ – flashes in the right digital display. – The symbols flash. Turn the adjusting knob to set the duration (maximum of ➤... -
Page 44: Tips On Settings
Tips on settings Symbols used Grill Microwave operating modes Watts Weight mins. Duration in minutes Accessories Optimal use The recommended settings given in recipe books are likely to be too high and the accessories not optimal for this appliance. In the following tables, you will find information to help you get the best use out of the appliance. -
Page 45: Heating Up
7 Tips on settings Heating up Quantity mins. Plated meal 300 g – – 2–3 – Goulash 300 g – – – Soup 3 dl – – 1.5–2 – Sauce 3 dl – – 2–3 – Hamburgers – – 6–8 –... -
Page 46: Defrosting
7 Tips on settings Defrosting Food Quantity mins. Small sausages 500 g – – 500 g – – Shrimps 200 g – – 200 g – – Spinach 300 g – – – – Mixed vegetables 250 g – – –... -
Page 47: Simultaneous Defrosting And Cooking
7 Tips on settings Simultaneous defrosting and cooking Frozen food Quantity mins. 200 g Pizza 300 g – – – 400 g 5–6 Hamburgers – – – 7–8 200 g Fish fingers – – – 300 g 200 g Chips 300 g –... -
Page 48: Cooking
7 Tips on settings Cooking Meat Quantity mins. Joint of pork 1 kg – – – Joint of veal 1 kg – – – 15–18 1 kg 22–24 thick Pork chop – – – 1 kg 18–20 thin Haunch of lamb 1 kg –... - Page 49 7 Tips on settings Fish Quantity mins. 500 g 10–12 Fish, whole – 800 g 12–15 400 g 3–5 Fillet of fish – – – 500 g 5–6 2 slices Salmon – – – 7–8 à 200 g Fillet of dover sole 400 g –...
- Page 50 7 Tips on settings Fresh vegetables Quantity mins. 300 g 3–4 Broccoli – – 500 g 6–8 4–5 Artichoke – – 6–8 300 g 3–4 Carrots – – 400 g 6–8 300 g 3–4 Cauliflower – – 500 g 6–8 Brussels sprouts 500 g –...
- Page 51 7 Tips on settings Fresh vegetables Quantity mins. 7–8 Sweet pepper – – – 10–12 Peas * 250 g – – 4–5 Tomatoes * 400 g – – 2–3 Spinach * 250 g – – 3–4 Zucchetti 250 g – –...
-
Page 52: Care And Maintenance
Care and maintenance Allow the appliance and accessories to cool down before cleaning. The appliance may not be used if the appliance safety door catch is damaged. Inspect these parts regulary. Do not use abrasive cleaning agents or cleaning aids such as steel wool, knives, glass scrapers, razor blades, etc. -
Page 53: Cleaning The Cooking Space
8 Care and maintenance Cleaning the cooking space Always replace the turntable roller and glass turntable immediately after cleaning. Do not use abrasive cleaning agents. Do not use scouring pads, wire wool, etc. as such products will damage the surface. Clean the cooking space regularly, especially when food has been spilt. -
Page 54: Cleaning The Accessories
8 Care and maintenance Cleaning the accessories Allow the glass turntable to cool down before cleaning. Allow the CombiCrunch plate to cool down well before cleaning. Do not immerse the CombiCrunch plate in water whilst still hot or cool it under running water. Rapid cooling will damage the ComiCrunch plate. -
Page 55: What To Do If
Trouble-shooting This section lists faults that can be solved simply by following the instructions given. If another fault is displayed or the fault cannot be remedied, please call Customer Services. Please note down the FN number and the error message in full, e.g. , before calling Customer Services. - Page 56 9 Trouble-shooting … a scratching noise can be heard when the appliance is switched on Possible cause Solution • Cooking space floor and Clean the floor of the cooking space and ➤ turntable roller are soiled. the turntable roller regularly. …...
-
Page 57: After A Power Failure
9 Trouble-shooting … the appliance switches off prematurely Possible cause Solution • Appliance is overheated. Check the ventilation slots. These must be ➤ freely accessible. • Ventilation slots are Remove any objects obstructing the ➤ obstructed. ventilation slots. Wait for the appliance to cool down. ➤... -
Page 58: Accessories And Spare Parts
Accessories and spare parts Please give model number of the appliance and exact description of the accessory or spare part when ordering parts. Turntable roller Glass turntable Food cover CombiCrunch plate CombiCrunch grip Wire rack... -
Page 59: Technical Data
Technical data External dimensions See installation instructions ➤ Electrical connection See identification plate 1 ➤ Automatic energy-saving stand-by To avoid consuming power unnecessarily, the appliance is equipped with automatic energy-saving stand-by. To reduce power consumption to a minimum, select , «Time display invisible», in the user settings. - Page 60 Disposal Packaging • All packaging materials (cardboard, plastic film (PE) and polystyrene (EPS)) are marked and should, if possible, be collected for recycling and disposed of in an environmentally friendly way. Disconnection • Disconnect the appliance from the mains. With a fixed appliance, this is to be carried out by a qualified electrician! Safety •...
- Page 61 Index Accessories ... . 17, 22, 58 Food cover ....18, 23 Cleaning ....54 Foods Ordering .
- Page 62 13 Index Packaging ....60 Technical data ....59 PerfectDefrost .
-
Page 63: Repair Service
➤ – The identification plate is on the left-hand side of the cooking space. If the appliance is not working properly, contact your nearest V-ZUG Ltd Service Centre using freephone 0800 850 850 and stand in close proximity to the appliance. -
Page 64: Quick Instructions
Switching Power&Favorit on Press the button. ➤ Press the adjusting knob to confirm. ➤ V-ZUG Ltd Industriestrasse 66, 6301 Zug Tel. +41 (0)41 767 67 67, Fax +41 (0)41 767 61 61 vzug@vzug.ch, www.vzug.ch Service Centre: Tel. 0800 850 850 J944.013-2...
Need help?
Do you have a question about the Miwell SL and is the answer not in the manual?
Questions and answers