Table of Contents
Advertisement
Quick Links
Advertisement
Table of Contents

Related Manuals for V-ZUG MWCXSL60g


Summary of Contents for V-ZUG MWCXSL60g
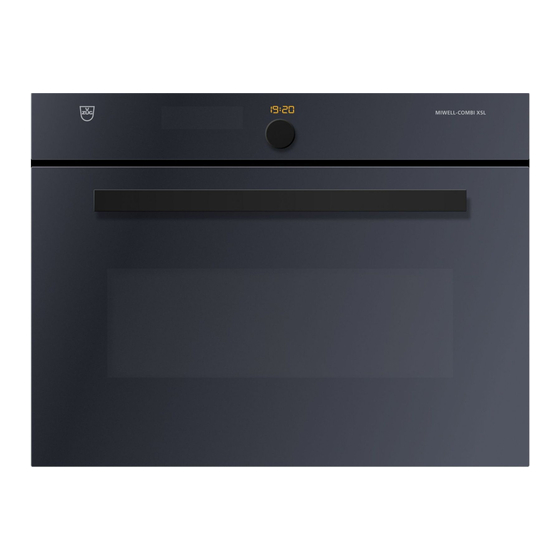
- Page 1 Operating instructions Miwell-Combi XSL Microwave...
- Page 2 These operating instructions apply to: Type Product family Size system MWCXSL 24009 60-450 Variations depending on the model are noted in the text. Colour operating instructions can be downloaded from the internet from www.vzug.com. © V-ZUG Ltd, CH-6301 Zug, 2015...
-
Page 3: Table Of Contents
Table of contents 1 Safety precautions 5 Symbols used ...................... 5 General safety precautions ................. 6 Appliance-specific safety precautions ............. 7 Instructions for use .................... 8 Accessories...................... 11 2 Disposal 13 3 Using for the first time 14 4 Appliance description 15 Construction...................... 15 Operating and display elements .............. 15... - Page 4 Aborting the operation .................. 34 End of operation.................... 34 6.10 Switching the appliance off ................ 36 7 AutomaticPlus 37 Overview ....................... 37 Selecting and starting automatic programme .......... 41 8 Tips and tricks 42 Unsatisfactory cooking result................ 42 Saving energy...................... 43 9 User settings 44 Selecting user settings.................. 44 Adjusting user settings .................. 44 Language...................... 44 Childproof lock .................... 45...
-
Page 5: Safety Precautions
Safety precautions Symbols used Denotes important safety precautions. Failure to observe said precautions can result in injury or in damage to the appliance or fittings! Information and precautions that should be observed. Information on disposal Information about the operating instructions ▸... -
Page 6: General Safety Precautions
1 Safety precautions General safety precautions ▪ Read the operating instructions before using the appliance for the first time! ▪ This appliance can be used by children aged 8 and above and by persons with reduced physical, sensory or mental cap- abilities, or lack of experience and/or knowledge, provided they are supervised or have been instructed on the safe use of the appliance and have understood the hazards involved. -
Page 7: Appliance-Specific Safety Precautions
1 Safety precautions Appliance-specific safety precautions ▪ READ THE IMPORTANT SAFETY INSTRUCTIONS CARE- FULLY AND RETAIN FOR FUTURE USE. ▪ WARNING: In the event that the door, door seals or interior are damaged, the appliance must not be used until it has been repaired by a qualified competent person. -
Page 8: Instructions For Use
1 Safety precautions ▪ Heating beverages in a microwave can result in delayed eruptive boiling (super boiling). Scalding hazard! Be careful when you handle the container! ▪ The contents of feeding bottles and baby food jars must be stirred or shaken and the temperature must to be checked before consumption in order to avoid burns and scalds. - Page 9 1 Safety precautions ▪ Any repairs, modifications or manipulations to the appliance, especially any electrically live parts, may only be carried out by the manufacturer, its Cus- tomer Services or a similarly qualified person. Repairs if carried out incor- rectly may cause serious injury, damage to the appliance and fittings, as well as affect the functioning of the appliance.
- Page 10 1 Safety precautions Caution: Risk of burns! ▪ The appliance gets very hot when in use. The appliance door also gets hot. ▪ Steam and/or hot air may escape from the cooking space when the appli- ance door is opened. ▪...
-
Page 11: Accessories
1 Safety precautions Caution: Risk to life! ▪ Danger of suffocation! Keep packaging material, e.g. plastic film and poly- styrene, away from children. Packaging material can be dangerous for chil- dren. How to avoid damaging the appliance ▪ Close the appliance door carefully. ▪... - Page 12 1 Safety precautions ▪ Do not cook food directly on the glass turntable. ▪ Do not place hot food or containers on the glass turntable when it is cold. ▪ Do not place frozen food or containers on the glass turntable when it is hot. CombiCrunch plate ▪...
-
Page 13: Disposal
Disposal Packaging ▪ All packaging materials (cardboard, plastic film (PE) and polystyrene (EPS)) are marked and should, if possible, be collected for recycling and disposed of in an environmentally friendly way. Disconnection ▪ Disconnect the appliance from the mains. With a fixed appliance, this is to be carried out by a qualified electrician! Safety ▪... -
Page 14: Using For The First Time
Using for the first time Before operating the newly installed appliance for the first time, the following steps should be taken: ▸ Remove the packaging and transportation material as well as any blue pro- tective film from the cooking space. ▸... -
Page 15: Appliance Description
Appliance description Construction Operating and display elements Ventilation opening Door handle Appliance door Operating and display elements 00:00 Display Touch buttons Adjusting knob Digital display (time/timer) Touch buttons Operating modes AutomaticPlus Automatic reheating Temperature/microwave power level setting Timer Start Back Time Switch off... -
Page 16: Cooking Space
4 Appliance description Cooking space Appliance door Locking mechanism for appliance door Door seal Microwave inlet Level for baking tray Illumination Grill Hot air fan Moisture sensor Glass turntable Ventilation slots... -
Page 17: Accessories
4 Appliance description Accessories Turntable roller and glass turntable Always use the turntable roller and the glass turntable, also in com- bination with the other accessories. ▸ Place the turntable roller in the fitting in the floor of the cooking space. ▸... - Page 18 4 Appliance description High/Low wire rack Never place metal dishes on the wire shelf in the combi mode. This could cause sparks which could damage the appliance. ▸ In the grill mode, place the food directly on the wire rack and do not cover. Food cover Only use the food cover for microwave operation and for «Auto-...
-
Page 19: Ventilation Fan
4 Appliance description Ventilation fan The fan switches on automatically during operation. The fan can continue to run at the end of operation to cool down the electronic components. During this time, the appliance door can be opened and the food removed. The fan switches off automatically. -
Page 20: Operating Modes
Operating modes Always use the turntable roller and the glass turntable, also in com- bination with the other accessories. Overview of operating modes All the operating modes and fast heating are described below. Follow the advice under «Tips and tricks» (see page 42) and in the separate «Tips on settings». -
Page 21: Microwave
5 Operating modes Microwave 50–900 W Power range 650 W/5 min Recommended value Accessories Foods and liquids are heated using microwaves. Uses ▪ Precooked foods ▪ Frozen and convenience foods ▪ Liquids Preparing eggs: ▸ Crack open the eggs and beat them before cooking. ▸... - Page 22 5 Operating modes Particularly suitable for microwave and combi mode ▪ Glass ▪ Porcelain ▪ Microwaveable plastic ▪ Silicon baking mould Permitted for microwave mode ▪ Aluminium packaging for convenience foods ▸ Follow the manufacturer’s instructions Forbidden for microwave mode ▪...
-
Page 23: Combicrunch
5 Operating modes CombiCrunch Recommended duration 2 min Accessories Use the CombiCrunch plate exclusively. Risk of burns! The cooking space and the CombiCrunch plate get very hot. Always use the supplied CombiCrunch grip or an oven cloth to re- move the CombiCrunch plate. Do not place the hot CombiCrunch plate on heat-sensitive surfaces. -
Page 24: Hot Air
5 Operating modes Hot air Temperature range 50–250 °C Recommended value 180 °C/15 min Accessories with All temperatures in these operating instructions are in degrees Celsius. Apply the corresponding conversions via the user setting «De- grees Fahrenheit» (see page 47). A heating element behind the back wall of the cooking space heats up the air inside the cooking space, which is circulated evenly. -
Page 25: Fast Heating
5 Operating modes Uses ▪ Fast baking of cakes, lasagne, baked dishes, etc. Fast heating Fast heating can only be used if the cooking space is empty and only with the «Hot air» mode! With «Fast heating», the cooking space is heated using hot air and the grill, which shortens the preheating time. -
Page 26: Grill Combi Mode
5 Operating modes Uses ▪ Gratinating ▪ Toasting ▸ Place the food to be grilled directly on the wire rack. ▸ Place a plate under the wire rack to catch food particles and condensate. Use a fork to prick the skin or peel of foods such as potatoes, toma- toes, sausages, shellfish or similar. -
Page 27: Grill-Forced Convection
5 Operating modes Uses ▪ Fast browning and gratinating, e.g. for baked potatoes or vegetables Use a fork to prick the skin or peel of foods such as potatoes, toma- toes, sausages, shellfish or similar. Otherwise, the steam that is produced will be unable to escape and may cause the food to explode. -
Page 28: Grill-Forced Convection Combi Mode
5 Operating modes 5.11 Grill-forced convection combi mode Risk of damage to the appliance! Use glass or porcelain cookware only. Do not use metal or silicone cookware. Power range 50–650 W Recommended value 350 W/15 min Accessories In the combi mode, food is also cooked with microwaves, which shortens the cooking time. -
Page 29: Operating The Appliance
Operating the appliance The different menus are selected by pressing the corresponding sensor but- tons. Selected sensor buttons and functions are illuminated in white; all other sensor buttons are illuminated in orange. The following sensor buttons are available with the following menus: Operating modes AutomaticPlus Automatic reheating... -
Page 30: Selecting And Starting The Operating Mode
6 Operating the appliance Selecting and starting the operating mode Risk of burns when heating liquids in the microwave! When liquids such as milk are heated in a microwave, delayed boiling can occur, and disturbing the vessel, even slightly, can cause the li- quid to erupt. -
Page 31: Changing The Microwave Power Level/Temperature
6 Operating the appliance With a delayed start, the settings summary remains visible for 3 minutes, then the display goes out. The sensor buttons are illuminated in white; the sensor button is illuminated in orange. Changing the microwave power level/temperature The microwave power level and the temperature cannot be changed during an automatic programme. -
Page 32: Changing The Duration
6 Operating the appliance Changing the duration The duration cannot be changed for automatic programmes. To change the duration during a running operating mode: ▸ Press the sensor button. – The duration remaining is displayed. ▸ Change the duration by turning the adjusting knob and pressing to confirm. –... -
Page 33: Interrupting
6 Operating the appliance When the timer finishes When the set duration is up: – An acoustic signal is emitted for 1 minute. – The display says «Timer finished». ▸ Confirm the message and switch off the acoustic signal by pressing the ad- justing knob or a sensor button. -
Page 34: Aborting The Operation
6 Operating the appliance Aborting the operation ▸ Press the sensor button. – The operating mode is aborted and all settings are cleared. – An acoustic signal is emitted. – The appliance switches off. ▸ Open the appliance door and remove the food. End of operation ▪... - Page 35 6 Operating the appliance As long as the residual temperature is above 80° C, the following is displayed, e.g.: During this time, the residual heat will still keep the food warm for some time. As soon as the temperature falls below 80° C, the display goes out. The cooling fan can continue to run for a short period.
-
Page 36: Switching The Appliance Off
6 Operating the appliance 6.10 Switching the appliance off ▸ Press the sensor button. – An acoustic signal is emitted. – The display and all sensor buttons go out. For operating modes with hot air: – The residual temperature is displayed as long as it is above 80° C. During this time, the residual heat will still keep the food warm for some time. -
Page 37: Automaticplus
AutomaticPlus With «AutomaticPlus» , food can be prepared quickly and easily. The dura- tion, preparation method and possible accessories are recommended auto- matically depending on the desired technique. Neither a duration nor a delayed start can be set. No settings can be changed during operation. Follow the advice in the tips on settings. - Page 38 7 AutomaticPlus PerfectDefrost «PerfectDefrost» is used for defrosting food. The following food groups can be selected: Symbol Food group Weight Accessories Meat 100–2000 g Chicken 100–2500 g Fish 100–2000 g – Vegetables 100–2000 g Bread 100–1000 g Automatic reheating Food and liquids are heated using microwaves in the «Automatic reheating»...
- Page 39 7 AutomaticPlus Keep warm Cooked foods can be kept warm for a short time using the «Keep warm» setting. ▸ Cover the food over with aluminium foil or heat-resistant lid. ▸ Do not use plastic film or a food cover. If the cooking space is already hot, open the appliance door and allow the cooking space to cool down for 3 to 4 minutes before starting the «Keep warm»...
- Page 40 7 AutomaticPlus Risk of damage to the appliance from sparks! Do not place tin cans in the cooking space! Always empty vegetables from a tin can onto a plate or into a bowl before placing them in the cooking space. Baking The following types of food can be baked using the automatic programme «Bake»:...
-
Page 41: Selecting And Starting Automatic Programme
7 AutomaticPlus Selecting and starting automatic programme The cooking space must be cool, otherwise the required cooking time cannot be calculated correctly. ▸ If the appliance is switched off, first press the adjusting knob. ▸ Press the sensor button. ▸ Select the required automatic programme. ▸... -
Page 42: Tips And Tricks
Tips and tricks Unsatisfactory cooking result... Baking and roasting Result Solution ▪ The baking or roast looks ▸ Next time, set a lower temperature and good on the outside but is extend the operating time. still doughy or raw on the ▸... -
Page 43: Saving Energy
8 Tips and tricks Uneven browning Result Solution ▪ The food/baked good has ▸ Next time, set a lower temperature and browned unevenly. adjust the operating time. ▸ If using , check that the levels and accessories used correspond to those recommended in the separate «Tips on settings». -
Page 44: User Settings
User settings Selecting user settings The following user settings can be changed: Language Temperature unit Childproof lock Time format Time display Contrast Illumination Factory settings Acoustic signal Adjusting user settings You can adjust the user settings: ▸ When the appliance is switched off, hold the adjusting knob depressed for 5 seconds. -
Page 45: Childproof Lock
9 User settings Childproof lock The childproof lock prevents an operating mode from being started accident- ally. When you try to start an operating mode, an acoustic signal is emitted and the message «Childproof lock» appears in the display. The childproof lock is activated: ▪... -
Page 46: Illumination
9 User settings After a power failure After a power failure, the time must be set before the appliance can be operated normally again. – The sensor button is illuminated in white. – flashes in the digital display. ▸ Set the time and confirm. Time display With the «Visible»... -
Page 47: Temperature Unit
9 User settings Temperature unit The temperature can be displayed in «°C» or «°F». ▪ °C: Degrees Celsius ▪ °F: Degrees Fahrenheit Time format The time can be displayed in the European 24-hour time format or the US 12‑hour format (a.m./p.m.). 9.10 Contrast With this function, the readability of the display can be adjusted based on how... -
Page 48: Care And Maintenance
Care and maintenance Risk of burns from hot surfaces! Allow the appliance and the accessories to cool down before cleaning them. Risk of leaking microwaves! Regularly check the appliance door, the door seal and the door lock. If these parts are damaged, do not use the appliance any more. Improper use can result in damage to the appliance! Do not use scouring or acidic cleaning agents, sharp or scouring metal scrapers, steel wool, scouring pads, etc. -
Page 49: Cleaning The Door Seal
10 Care and maintenance 10.3 Cleaning the door seal ▸ Clean the door seal with a soft cloth dampened with water, but do not use any cleaning agent. ▸ Wipe dry with a soft cloth. 10.4 Cleaning the cooking space Always replace the turntable roller and glass turntable after cleaning. -
Page 50: Cleaning The Accessories
10 Care and maintenance 10.5 Cleaning the accessories Allow the glass turntable and the CombiCrunch plate to cool down be- fore cleaning. Never immerse the CombiCrunch plate when still hot in detergent water or hold it under running water to it cool down. Cooling down the plate quickly can damage it. -
Page 51: Trouble-Shooting
Trouble-shooting 11.1 What to do if ... This section lists faults that can be solved simply by following the instructions given. If another fault is displayed or the fault cannot be remedied, please call Customer Services. Before calling Customer Services, please note down the error mes- sage in full as well as the serial number (FN) of your appliance. -
Page 52: After A Power Failure
11 Trouble-shooting ... the appliance is causing interference with television or radio reception Possible cause Solution ▪ Appliance is not defective. When in use, it can cause interference with television or radio reception. This is a similar kind of interference to that caused by small electrical appliances (mixers, vacuum cleaners, etc.). -
Page 53: Accessories And Spare Parts
Accessories and spare parts Please give model number of the appliance and exact description of the ac- cessory or spare part when ordering parts. Turntable roller Glass turntable Food cover CombiCrunch plate CombiCrunch grip Wire rack... - Page 54 12 Accessories and spare parts High wire rack Baking tray...
-
Page 55: Technical Data
Technical data Dimensions ▸ See installation instructions Electrical connection ▸ See identification plate 1 13.1 Temperature measurement The temperature inside the cooking space is measured when the cooking space is empty according to an internationally accepted standard. Own meas- urements can be imprecise and are not suitable for checking the accuracy of the temperature. -
Page 56: Index
Index Aborting the operation ......... 34 Defrosting ............38 Accessories ........11, 17, 53 Delayed start..........30 Acoustic signal ..........46 Dimensions ............ 55 Ambient temperature ........19 Disconnection..........13 Appliance door Disposal............13 Door seal Cleaning .......... 48 Automatic programme Cleaning .......... - Page 57 14 Index Language............44 Safety .............. 13 safety precautions Appliance-specific ........ 7 Before using for the first time .... 8 Maintenance ..........48 Correct use.......... 8 Melting ............40 General........... 6 Microwave ............21 Saving energy..........43 Note on use........ 21 Scratching noise ........... 51 Tableware ...........
- Page 58 Notes...
-
Page 59: Service & Support
Your repair order Call the free service number 0800 850 850 to contact your nearest V-ZUG service centre. You can arrange an onsite visit by us by phone if you wish. General queries, accessories and service agreement V-ZUG will be happy to help you with any general administrative or technical queries, to accept your orders for accessories and spare parts and to inform you about our progress- ive service agreements. - Page 60 ▸ Press the touch button. ▸ Set the hours and minutes and confirm. J24009013-R03 400011043617 V-ZUG Ltd, Industriestrasse 66, CH-6301 Zug Tel. +41 58 767 67 67, Fax +41 58 767 61 61 info@vzug.com, www.vzug.com Service Centre: Tel. 0800 850 850...
Need help?
Do you have a question about the MWCXSL60g and is the answer not in the manual?
Questions and answers