SOMFY Situo RTS Operating And Installation Manual
Hide thumbs
Also See for Situo RTS:
- Installation manual (2 pages) ,
- How to set up (15 pages) ,
- Installation manual
Table of Contents
Advertisement
Advertisement
Table of Contents

Related Manuals for SOMFY Situo RTS


Summary of Contents for SOMFY Situo RTS
- Page 1 Situo RTS Operating and installation guide...
-
Page 2: Table Of Contents
Situo RTS Contents 1. Brief introduction to the Situo RTS control point 1.1 What is the Situo RTS for? 1.2 A few definitions 2. Safety - Important information 2.1 Installation and commissioning 2.2 Operating 2.3 Environment 3. Content of the kit and tools required 3.1 List of parts... -
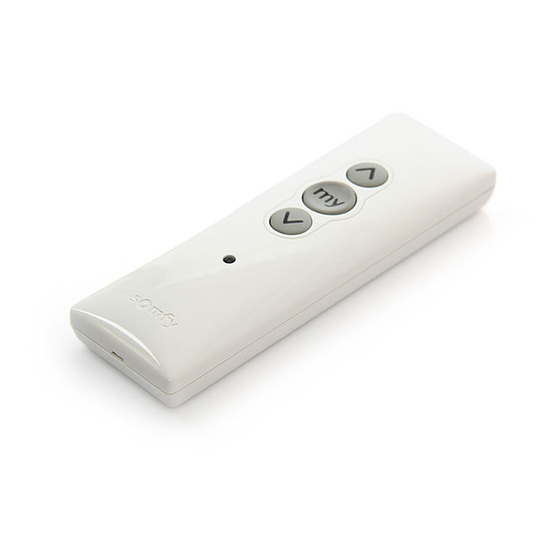
Page 3: Brief Introduction To The Situo Rts Control Point
Radio Technology Somfy (RTS) (e.g. roller shutter motors, blinds motors, etc). The Situo RTS is used as an individual control to control a single product (e.g. one roller blind) at a time. 1.2 A few definitions Installation All of the Radio Technology Somfy products a house is equipped with. -
Page 4: Safety - Important Information
Avoid moving the product if ice has formed in it, unless the motor is fitted with anti-freeze protection. Do not leave the product near a window in full sun: the Situo RTS cannot withstand temperatures above 60°C. Do not immerse or soak the Situo RTS in any liquid. -
Page 5: Content Of The Kit And Tools Required
Situo RTS 3. Content of the kit and tools required 3.1 List of parts Before starting installation and commissioning of the Situo RTS, check that all parts listed in the table below are present in the correct quantity (Q): Components... -
Page 6: Technical Data
5.1 Identifying the original control point 5.1.1 Installation recommendations To add a Situo RTS, use the control point linked to the product which controls only this product: pressing the up or down button only causes movement of the product to which the new Situo RTS must be connected. -
Page 7: One-Touch Point
5.1.2 Original control points ind the original control point in the list below and refer to the relevant para- graph to add the new Situo RTS: 1) Control point fixed to the wall with a single button, called a One-touch point, see paragraph 5.2;... - Page 8 RTS and turn it over to access the PROG button (E). Briefly press the PROG button (E) on the new Situo RTS: the product will move briefly again (or emit a series of 8 beeps) to indicate that the new Situo RTS has been programmed.
- Page 9 Remove the battery from the original control point using a plastic object. Press on the centre section of the one- touch point button. Refit the battery in the base of its brac- ket (with text legible). Copyright © 2008 Somfy SAS. All rights reserved.
- Page 10 RTS and turn it over to access the PROG button (E). Briefly press the PROG button (E) on the new Situo RTS: the product will again move briefly (or emit a series of 8 beeps) to indicate that the new Situo RTS has been programmed.
- Page 11 RTS and turn it over to access the PROG button (E). Press the PROG button (E) on the new Situo RTS until the product moves brie- fly (or emits a series of 3 beeps): the programming function of the control point is activated for approximately 2 minutes.
- Page 12 RTS and turn it over to access the PROG button (E). Press the PROG button (E) on the new Situo RTS with the tip of a pencil until the product moves briefly (or emits a series of 3 beeps): the programming...
-
Page 13: Point With Up/Stop/Down Buttons
Caution! Once the front cover has been removed, if there is no PROG button then the control point is not compatible: the Situo RTS cannot be linked to the product. 5.3.2 Adding the Situo RTS Switch the mains power supply back... - Page 14 Situo RTS Briefly press the PROG button (E) on the new Situo RTS: the product will again move briefly (or emit a series of 8 beeps) to indicate that the new Situo RTS has been programmed. Press the down button on the new...
- Page 15 Removing the original control point. Do not dispose of the original control point with household waste, see para- graph 2.3. Refer to the “Mounting the bracket” section to finish installing the Situo RTS. Copyright © 2008 Somfy SAS. All rights reserved.
-
Page 16: Timer
Caution! Once the front cover has been removed, if there is no PROG button then the control point is not compatible: the Situo RTS cannot be linked to the product. 5.4.2 Adding the Situo RTS Switch the mains power supply back... - Page 17 RTS and turn it over to access the PROG button (E). Press the PROG button (E) on the Situo RTS until the product moves brie- fly (or emits a series of 3 beeps): the programming function of the control point is activated for approximately 2 minutes.
-
Page 18: Telis 1 Rts/Telis Soliris Rts Remote Controls
Turn the original Telis over: the PROG button (e) is located on the rear cover. Press the PROG button (e) with the tip of a pencil until the product moves briefly (or emits a series of 3 beeps): Copyright © 2008 Somfy SAS. All rights reserved. - Page 19 RTS and turn it over to access the PROG button (E). Briefly press the PROG button (E) on the new Situo RTS: the product will again move briefly (or emit a series of 8 beeps) to indicate that the new Situo RTS has been programmed.
- Page 20 Somfy assistance service. Do not dispose of the original control point with household waste, see para- graph 2.3. Refer to the “Mounting the bracket” section to finish installing the Situo RTS. Copyright © 2008 Somfy SAS. All rights reserved.
-
Page 21: Telis 4 Rts/Telis 4 Soliris Rts Remote Controls
RTS and turn it over to access the PROG button (E). Briefly press the PROG button (E) on the new Situo RTS: the product will again move briefly (or emit a series of 8 beeps) to indicate that the new Situo RTS has been programmed. - Page 22 RTS and turn it over to access the PROG button (E). Press the PROG button (E) on the new Situo RTS until the product moves brie- fly (or emits a series of 3 beeps): the programming function of the control point is activated for approximately 2 minutes.
-
Page 23: Replacing A Lost Or Broken Control Point
Caution: If, after having followed this operation, there is not a brief move- ment (or a series of beeps) from the product, contact the Somfy assis- tance service so they can provide guidance for the replacement. -
Page 24: Mounting The Bracket
Do not leave the Situo in a window or conservatory where it may be subject to excess heat as the Situo RTS cannot withstand temperatures above 60°C. The minimum distance which must be kept between RTS enabled products is 30 cm (e.g. -
Page 25: Everyday Use Of The Situo Rts
Gently remove the front cover with a flat, pointed tool (such as a flathead screwdriver) around the lower section. Lever it and lift the cover upwards, without using force, to detach the mounting lugs from the front cover. Copyright © 2008 Somfy SAS. All rights reserved. -
Page 26: Maintenance
Press a button on the front: if the indi- cator light comes on, the battery has been correctly replaced. 8.4 Maintenance Clean the Situo RTS with a damp cloth using a multipurpose household or glass cleaning product. Do not immerse or soak the Situo RTS in any liquid. -
Page 27: Problems With The Situo Rts
Situo RTS. For any problems or unresolved questions, please contact the Somfy assistance service on the number given on the back cover of this guide. Copyright © 2008 Somfy SAS. All rights reserved. - Page 28 Tel: +1 (0) 609 395 1300 Website: www.somfy.com/nam/index. cfm?language=en-us Somfy hereby declares that this product conforms to the essential requirements and other relevant provisions of Directive 1999/5/CE. A Declaration of Conformity is available at www.somfy.com/ce. For use in the European Union, the Swiss Confederation (Switzerland) and Norway.
Need help?
Do you have a question about the Situo RTS and is the answer not in the manual?
Questions and answers