Table of Contents
Advertisement
Quick Links
Advertisement
Table of Contents

Related Manuals for Salton multipot HC1351


Summary of Contents for Salton multipot HC1351
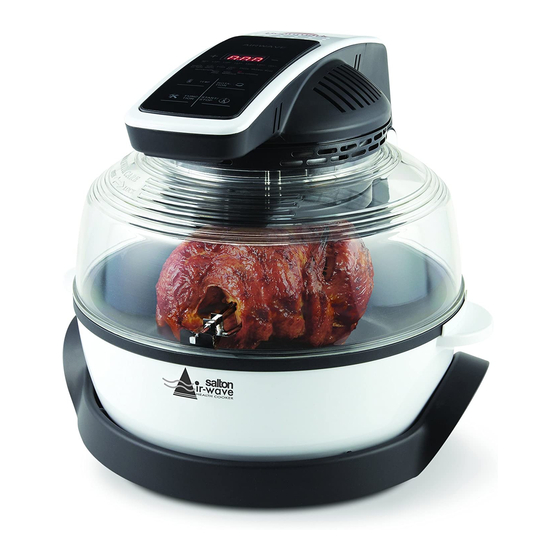
- Page 1 air-wave health cooker Instruction Booklet Model HC1351...
-
Page 3: Important Safeguards
Return appliance to Salton for examination, repair or adjustment. All servicing, other than cleaning, should be performed by an authorized service representative. See Warranty section. 8. The use of accessories or attachments not recommended by Salton may cause fi re, electric shock or injury. 9. DO NOT use outdoors. -
Page 4: Grounded Plug
19. Always open Cover away from you so that the escaping steam is channeled away from your face. 20. DO NOT insert oversized foods or utensils into the oven as they may create a fi re or risk of electric shock. There must be at least ¾” (2cm) space between the food and the heater protection plate inside the cover. -
Page 5: Description Of Parts
DESCRIPTION OF PARTS 1. Main Housing 2. Removable Transparent Cover 3. Drive Assembly 4. Base Bowl 5. Control Panel a) ‘+’ – Increase Time or Temperature b) LED readout c) ‘-‘ Decrease Time or Temperature d) Temperature Indicator Lights e) ‘Manual’ - f) Preprogrammed Settings g) Rotation Indicator Lights h) Temperature Control Button... -
Page 6: Before First Use
BEFORE FIRST USE 1. Disassemble the Air Wave Health Cooker by following the directions in the ‘How to Assemble/Disassemble’ section. 2. Remove any manufacturing residue left on the removable parts by washing in warm soapy water. These include the Transparent Cover, Base Bowl, Rotating Drum, Rotisserie Kit, Tongs, High and Low Cooking Racks and Rack Handle. - Page 7 3. Turn the Cover clockwise until it stops rotating. NOTE: The Drive Shaft Hole should now be at the 6 o’clock position. How to Disassemble the Oven 1. Turn all controls to off, unplug from the wall outlet and allow the appliance to cool completely.
- Page 8 4. Place the assembled Rotisserie in position in the oven. The square end of the shaft must be placed in the drive end of the main housing. 5. The rounded end of the Shaft rests in the groove at the front of the Base Bowl.
- Page 9 4. The rounded end of the Shaft rests in the groove at the front of the Base Bowl. 5. NOTE: Do not overfi ll the Rotating Drum. When cooking French Fries allow room for suffi cient movement when the Drum is rotating for even cooking.
- Page 10 14. Press the Rotation Button and choose between ‘ON’, ‘Intermittent’ or ‘OFF’. The indicator light will change between the 3 settings as you press the Rotation Button. Rotation should only be used when you are using the Rotating Drum or the Rotisserie. 15.
-
Page 11: Helpful Hints
15. NOTE: All pre-set programs are a guide. Depending on the temperature and thickness of food you may have to adjust the time. Simply press on the ‘+ or –‘ Button to cook to your liking. HELPFUL HINTS 1) Is your food cooked? a) Steaks: rare, medium and well done Rare: Flesh springs back when pressed lightly with a fi nger. - Page 12 The Air-Wave Health Cooker cooks 30% faster than a conventional oven so reduce the cooking time by 30% for recipes from your conventional oven cook books. IMPORTANT NOTE: ALWAYS CHECK THE RESULTS BEFORE SERVING WITH AN INSTANT READ THERMOMETER, ESPECIALLY WHEN COOKING LARGE PIECES OF MEAT.
- Page 13 FOOD RACK SETTING TIME TEMP °C TEMP °F HEIGHT (MIN) Fish: Lobster (whole) High Manual 15 – 20 165 – 180 330 – 355 Salmon steak 4 oz. High Manual 10 – 12 (110 g) Salmon steak 4 oz High Manual 15 –...
- Page 14 Internal Food Temperature Guide FOOD °F °C Beef, Lamb or Veal Medium Rare Beef, Lamb or Veal Medium Beef, Lamb, Pork or Veal Well Done Chicken Breast Chicken Thighs or Wings Fish and Shellfi sh Ground Beef or Ground Pork Ground Chicken or Ground Turkey RECIPES Poultry...
- Page 15 Fried Chicken 1 lg ½ cup (125 ml) buttermilk whole chicken, cut in 8 pieces 1 cup (250 ml) bread crumbs • In a shallow dish whisk egg and buttermilk together. • Dip chicken in buttermilk and let soak for 5 minutes. •...
- Page 16 Fish Grilled Salmon Fillets 1 lb. (450 g) Salmon Fillets (skin on) Lemon Dill Marinade: 1/3 cup (85 ml) olive oil 1/4 cup (60 ml) lemon juice 2 tbsp. (30 ml) chopped fresh dill (2 tsp.- 10 ml dried) 1 tsp. (5 ml) grated lemon rind 1/4 tsp.
- Page 17 • Add onions and mushrooms and cook for 2 minutes. • Add parsley, dill, pepper, salt, white wine/chicken broth and bread crumbs. Mix until well combined. • Add crab meat and shrimp. Stir lightly until combined. • Divide the stuffi ng between each of the sole fi lets. Roll tightly. •...
- Page 18 Roasted Potatoes For best results we recommend the following procedure: • Use medium size potatoes. • Parboil for 10/12 minutes in boiling water. • Strain and let cool. • Toss potatoes in a bowl with olive or vegetable oil. • Season with salt and pepper. •...
- Page 19 1-1/2 lbs. (.7 kgs) ground beef 1-1/2 cups (375 ml) cooked rice • Cut tops off peppers and remove seeds and membranes. • Chop edible top of peppers and set aside. • Rinse peppers. • Place in a large pot and cover with salted water. •...
-
Page 20: Care And Cleaning
CARE AND CLEANING 1. Ensure that the appliance is OFF. 2. Unplug from the wall outlet. 3. Allow the appliance to cool completely before cleaning. Metal parts will retain residual heat for a signifi cant time after the appliance has been turned off. -
Page 21: Limited Warranty
**The original sales receipt is the only acceptable proof of purchase** Salton Canada warrants that this appliance shall be free from defects in material and workmanship for a period of fi ve (5) years from the date of original purchase. - Page 22 2-3 weeks) For added protection, we suggest that you use an insured delivery service with tracking information when returning your product. Salton Canada will not be held responsible for in-transit damage or for packages that are not received.
Need help?
Do you have a question about the multipot HC1351 and is the answer not in the manual?
Questions and answers