Table of Contents
Advertisement
Quick Links
Advertisement
Table of Contents

Related Manuals for Salton HB1737


Summary of Contents for Salton HB1737
- Page 1 Instruction Booklet Model: HB1737...
-
Page 2: Important Safeguards
IMPORTANT SAFEGUARDS When using electrical appliances, basic safety precautions should always be followed including the following: 1. Read all instructions. 2. To protect against electrical hazards, do not immerse motor body, cord, plugs, or the appliance in water or other liquid. 3. -
Page 3: Polarized Plug
17.Always attach plug to appliance first, then plug cord into the wall outlet. To disconnect, turn any control to ‘OFF’, then remove plug from wall outlet. 18.This appliance is for Household Use Only. Do not use appliance for other than intended use. 19.Do not leave unit unattended while in use. 20.Before using for the first time, clean the accessories carefully. DO NOT immerse the Motor Body in water or any liquid. SAVE THESE INSTRUCTIONS HOUSEHOLD USE ONLY POLARIZED PLUG This appliance has a polarized plug (one blade is wider than the other). To reduce the risk of electric shock, this plug will fit in a polarized outlet only one way. If the plug does not fit fully in the outlet, reverse the plug. -
Page 4: Before First Use
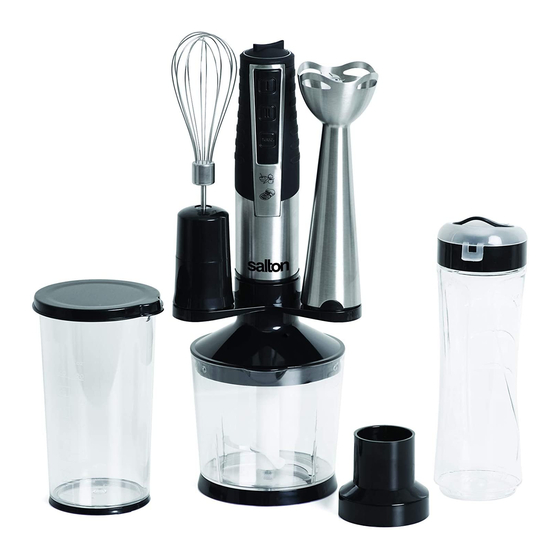
BEFORE FIRST USE 1. Read all instructions carefully and keep them for future reference. 2. Remove all packaging. 3. Wash the Blending Attachment; Whisk; ToGo Bottle & Lid; Smoothie Attachment; Chopper with Lid and Blade; Measuring Cup and Lid and Storage Bracket in warm soapy water. Do not wash the Blending Attachment, Smoothie Attachment and Chopper Lid in the dishwasher. NOTE: - DO NOT IMMERSE THE MOTOR BODY IN WATER OR ANY OTHER LIQUID. - Be careful when handling the blades on the Blending Attachment, Smoothie Attachment and Chopper, the blades are sharp. - Page 5 3. Choose the desired speed setting. See the Speed Settings section. NOTE: Speed 1, 2 or Turbo must be kept depressed for the duration of use. 4. Move the hand blender gently in an up and down motion, until the mixture is at the desired consistency. Once ingredients have reached the desired consistency, release the Speed Button. NOTE: If food gets lodged around the Blade or the Blade Guard, unplug the unit from the wall outlet and use a spatula to dislodge the food.
-
Page 6: Helpful Hints
1. Place the Chopper Blade onto the metal pin in the center base of the Chopper Bowl. 2. Prepare food to be processed in the Chopper Bowl by cutting into uniform size pieces. IMPORTANT: Do not fill above the (MAX) marking. 3. Line up the slots on the Chopper Bowl with the guide dots on the Lid and turn until it locks into place. 4. Align the Motor Body with the Center Hub in the Chopper Lid. Turn the Motor Body clockwise until it locks into place. NOTE: Make sure the Chopper Lid is thoroughly dry and there is no water left inside before attaching the Motor Body. 5. Plug the unit into the wall outlet. 6. Turn the Variable Speed Dial at the top of the Motor Body to the desired speed between MIN and MAX then press the Speed II Button. NOTE: Speed II must be depressed for the duration of use. 7. - Page 7 water left inside before attaching to the Motor Body. 2. Place food to be processed in the Measuring Cup or a deep bowl. 3. Plug the unit into the wall outlet and choose the desired Speed. NOTE: Speed 1, 2 or Turbo must be kept depressed for the duration of use. 4. Move the hand blender gently in an up and down motion, until the mixture is at the desired texture. 5. Once ingredients have reached the desired consistency, release the Speed or Turbo Buttons. 6. Wait until the motor has completely stopped before lifting the Whisk out of the Measuring Cup or bowl.
-
Page 8: Care And Cleaning
the top. Keeping one hand on the ToGo Bottle turn the Motor Body counterclockwise and remove from the Smoothie Blender Attachment. 8. Remove the Smoother Blender Attachment by turning it counterclockwise. 9. Cover the ToGo Bottle with it’s Lid. 10.The Smoothie can be consumed immediately or taken with you without having to transfer to a different container. CARE AND CLEANING Storage Bracket The Storage Bracket is designed to be placed over the Chopper Bowl with Lid for convenient storage of the Motor Body in the center circle and... - Page 9 RECIPES Smoothies & Milkshakes Eggnog Milkshake 1 cup (250 ml) store bought ready eggnog 1/4 tsp. ( 1 ml) vanilla 1 scoop vanilla ice cream Pinch nutmeg Follow the instructions in the How to Use the Hand Blender or Smoothie Blender Attachment sections and blend the first 3 ingredients until mixture is smooth and creamy. Sprinkle with nutmeg. Vanilla or Chocolate Milkshake 2 scoops vanilla or chocolate ice cream 1 cup (250 ml) milk...
- Page 10 NOTE: The Fruit Smoothie recipe does not have any measurements. It is intended to give you examples of what you could use so you can mix and match different yogurts and frozen fruit to your create own unique smoothie. Soups Creamy Broccoli Soup 2 tsp. (10 ml) olive oil small onion, chopped 1 bunch fresh broccoli 1-1/2 cups (375 ml)
- Page 11 4. Remove pot from heat and let cool down. 5. Follow the instructions in the How to Use the Hand Blender section. 6. Stir in the milk and cloves. 7. Season with salt and pepper to taste. 8. Reheat and serve. Serves 6 Dressings, Sauces and Dips Greek Salad Dressing 1/2 cup (125 ml) extra virgin olive oil 2 tbsp.
- Page 12 4. Season with salt and pepper to taste. 5. Store in fridge for up to 2 days. Raspberry Vinaigrette 1 1/2 cup (375 ml) fresh raspberries 1/3 cup (80 ml) olive oil 1/3 cup (80 ml) grapeseed oil 1/4 cup (60 ml) white vinegar 1 tbsp (15 ml) sugar 1 tbsp (15 ml) lemon juice 1/2 tsp (3 ml) salt 1. Place all ingredients in the Measuring Cup.
- Page 13 Hummus 1/2 can (400 ml) chickpeas 1 tsp. (5 ml) salt large garlic cloves, crushed 4 tbsp. (60 ml) lemon juice 3/4 cup (80 ml) tahini 1/2 cup (125 ml) water 1. Place all ingredients in the chopper. Follow the directions in the How to Use the Chopper section. 2. Serve with fresh cut vegetables such as broccoli, cauliflower, carrots, radishes, celery, etc. 3. Store leftovers in the fridge for up to 2 weeks. Breakfast and Dessert Crepe Batter 1 cup (250 ml)
- Page 14 speed for 30 seconds. 3. Unplug the unit from the wall outlet. Remove the cover then scrape down the sides of the bowl with a spatula. 4. Continue to process until you reach the desired consistency. NOTE: When mixing thick ingredients do not run the Motor Body for longer than 30 seconds without stopping and allowing it to cool down for 1 – 2 minutes.
- Page 15 LIMITED WARRANTY **The original sales receipt is the only acceptable proof of purchase** Salton Canada warrants that this appliance shall be free from defects in material and workmanship for a period of two (2) years from the date of original purchase.
- Page 16 2-3 weeks) For added protection, we suggest that you use an insured delivery service with tracking information when returning your product. Salton Canada will not be held responsible for in-transit damage or for packages that are not received.
Need help?
Do you have a question about the HB1737 and is the answer not in the manual?
Questions and answers