
Related Manuals for Raymarine RS130


Summary of Contents for Raymarine RS130
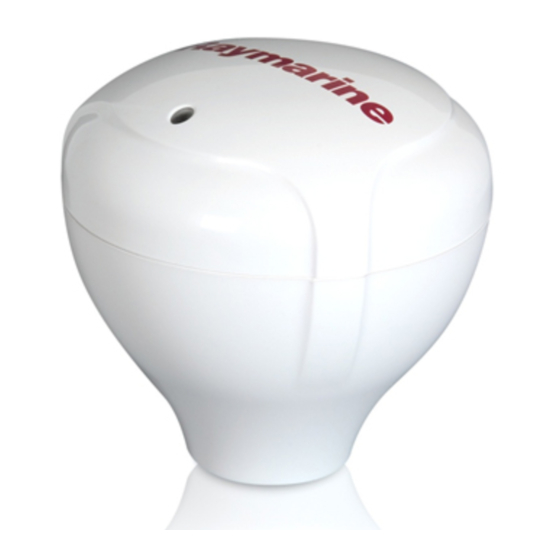
- Page 1 R S 1 3 0 G P S Re c e ive r Ins ta lla tion ins tructions Docume nt numbe r: 87134-1 Da te : 04-2011...
- Page 3 , SeaTalk and Sportpilot are registered trademarks of Raymarine UK Limited. RayTalk, Seahawk, Smartpilot, Pathfinder and Raymarine are registered trademarks of Raymarine Holdings Limited. FLIR is a registered trademark of FLIR Systems, Inc. and/or its subsidiaries. All other trademarks, trade names, or company names referenced herein are used for identification only and are the property of their respective owners.
-
Page 5: Table Of Contents
Important information ............7 5.1 GPS receiver LED indications ........34 Chapter 2 Planning the installation ......11 5.2 GPS troubleshooting ..........35 5.3 Raymarine customer support ........36 2.1 Installation checklist ..........12 2.2 SeaTalk GPS systems — examples ......13 Appendix A Technical specification ....... - Page 6 RS130 GPS Receiver – Installation instructions...
-
Page 7: Chapter 1 Introduction
(such as in an engine room or near fuel tanks). • install and connect the RS130 as a part of your system of Raymarine electronics; Warning: Product grounding • conduct checks to ensure that the RS130 has been installed correctly;... -
Page 8: Water Ingress
Directive requires the recycling of waste electrical and electronic a separate battery. equipment. Whilst the WEEE Directive does not apply to some Raymarine products, we support its policy and ask you to be aware • Raymarine specified cables are used. of how to dispose of this product. -
Page 9: Suppression Ferrites
EMC performance. If a ferrite has to be removed for any purpose (e.g. installation or maintenance), it must be replaced in the original position before the product is used. Use only ferrites of the correct type, supplied by Raymarine authorized dealers. Warranty registration To register your Raymarine product ownership, please visit www.raymarine.com... - Page 10 RS130 GPS Receiver – Installation instructions...
-
Page 11: Chapter 2 Planning The Installation
Chapter 2: Planning the installation Chapter contents • 2.1 Installation checklist on page 12 • 2.2 SeaTalk GPS systems — examples on page 13 • 2.3 Seatalk on page 18 • 2.4 Parts and accessories on page 18 Planning the installation... -
Page 12: Installation Checklist
It can also provide GPS data to SeaTalk devices via the optional SeaTalk1 to SeaTalkng converter. The GPS receiver must be connected to a SeaTalk system that includes at least one of the following devices: RS130 GPS Receiver – Installation instructions... -
Page 13: Seatalk Ng Gps Systems - Examples
2.2 SeaTalk GPS systems — examples Example: Basic GPS system featuring a SeaTalk multifunction display and instrument SeaTalk D12017-1 1. SeaTalk Multifunction display. 2. SeaTalk Instrument. 3. SeaTalk GPS receiver. Planning the installation... - Page 14 Example: Extended GPS system featuring a SeaTalk multifunction display NM EA 0183 SeaT alk D12016-1 1. SeaTalk Multifunction display. 2. NMEA 0183 DSC VHF radio. 3. SeaTalk Instrument. 4. SeaTalk Instrument. 5. SeaTalk GPS receiver. RS130 GPS Receiver – Installation instructions...
- Page 15 Example: Extended GPS system featuring a G-Series processor unit SMART NM EA 0183 SeaT alk D12018-1 1. SeaTalk G-Series GPM processor unit. 2. NMEA 0183 DSC VHF radio. 3. SeaTalk SPX course computer. 4. SeaTalk Instrument. 5. SeaTalk Instrument. 6. SeaTalk GPS receiver.
- Page 16 D12066-1 1. 12 v power supply (only required if power not supplied via SeaTalk). 2. SeaTalk multifunction display (via SeaTalk to SeaTalk adaptor cable). 3. SeaTalk GPS receiver. 4. SeaTalk1 to SeaTalk converter. RS130 GPS Receiver – Installation instructions...
- Page 17 Example: Extended GPS system featuring a SeaTalk multifunction display and SeaTalk1 instrument SMART NM EA 0183 SeaT alk D12024-1 1. SeaTalk1 instrument (via SeaTalk to SeaTalk adaptor cable). 2. SeaTalk1 to SeaTalk converter. 3. SeaTalk Multifunction display. 4. NMEA 0183 DSC VHF radio. 5.
-
Page 18: Seatalk Ng
CAN bus technology. Compatible NMEA 2000 and SeaTalk / SeaTalk devices can also be connected using the appropriate interfaces or adaptor cables as required. D12020-1 1. GPS receiver. 2. Pole mount kit. 3. SeaTalk spur cable (6 meters). RS130 GPS Receiver – Installation instructions... - Page 19 4. Screw pack, consisting of: • Studs (quantity: 2) • Thumb nuts (quantity: 2) • Screws (quantity: 2) 5. Flush mount gasket. 6. Mounting template. Optional accessories You may also require the following: • SeaTalk inline terminator — useful for long cable runs. An example scenario is a SeaTalk GPS receiver mounted on a radar arch.
- Page 20 RS130 GPS Receiver – Installation instructions...
-
Page 21: Chapter 3 Cables And Connections
Chapter 3: Cables and connections Chapter contents • 3.1 General cabling guidance on page 22 • 3.2 SeaTalk connection overview on page 23 • 3.3 SeaTalk connection overview — long cable runs on page 23 • 3.4 NMEA 2000 connection overview on page 24 •... -
Page 22: General Cabling Guidance
• Unless otherwise stated use only standard cables of the correct type, supplied by Raymarine. Strain relief • Ensure that any non-Raymarine cables are of the correct quality Ensure adequate strain relief is provided. Protect connectors from and gauge. For example, longer power cable runs may require strain and ensure they will not pull out under extreme sea conditions. -
Page 23: Seatalk Ng Connection Overview
3.2 SeaTalk connection overview 3.3 SeaTalk connection overview — long cable runs Use the supplied SeaTalk spur cable to connect the GPS receiver to a SeaTalk backbone. Use the optional SeaTalk inline terminator to connect the GPS receiver’s spur cable directly to the extreme end of the SeaTalk backbone using the inline terminator. -
Page 24: Nmea 2000 Connection Overview
1. SeaTalk GPS receiver. SeaTalk networks. 2. SeaTalk to DeviceNet adaptor cable (male or female version Blanking plug Inserted into unused spur connector as appropriate). positions in a 5-way connector or 3. DeviceNet cable. T-piece. RS130 GPS Receiver – Installation instructions... -
Page 25: Seatalk Ng Cables And Accessories
3.6 SeaTalk cables and accessories Description Part No Notes SeaTalk 5 m (16.4 ft) A06036 SeaTalk cables and accessories for use with compatible products. backbone Description Part No Notes SeaTalk 20 m (65.6 ft) A06037 Backbone Kit A25062 Includes: backbone •... -
Page 26: Power Connection
ONE 12 V power source. This can be provided by: – A battery. – A Raymarine course computer, via a SeaTalk system or a SeaTalk system. If your vessel has a 24 V supply a suitable voltage convertor is required. -
Page 27: Chapter 4 Installation
Chapter 4: Installation Chapter contents • 4.1 Location requirements on page 28 • 4.2 Pole mounting the GPS receiver on page 28 • 4.3 Flush mounting the GPS receiver on page 30 • 4.4 GPS receiver SeaTalkng connection on page 31 •... -
Page 28: Location Requirements
• Ensure the GPS receiver is NOT mounted in the path of the beam emitted from any radar scanner units. GPS receiver mounting options There are 3 different mounting options for the GPS receiver. • Pole mount. • Flush mount. • Rail mount. RS130 GPS Receiver – Installation instructions... - Page 29 1. Securely attach the pole mount base to a suitable pole. 2. Pass the cable and connector through either: • 2a) the center of the pole mount bracket and the pole; or • 2b) the cable exit hole alongside the center hole. 3.
-
Page 30: Flush Mounting The Gps Receiver
1 inch 14 TPI thread. 2. Secure the rail mounting bracket to the GPS receiver. 3. Secure the bracket to a suitable rail. 4. Route the cable along the rail and secure with cable ties. D12047-1 RS130 GPS Receiver – Installation instructions... -
Page 31: Gps Receiver Seatalkng Connection
4.4 GPS receiver SeaTalkng connection 2. Ensure cable end connector is correctly orientated, then fully insert. Secure the SeaTalk plug into the GPS receiver connector. 3. Rotate collar clockwise until it snaps into the LOCKED position. 1. Rotate collar to the UNLOCKED position. D12049-1 Installation... -
Page 32: Checking Gps Operation
A solid circle on the chart indicates that neither heading nor Course Over Ground (COG) data is available. Note: Raymarine recommends that you check the displayed vessel position in the chart application against your actual proximity to a known charted object. GPS receivers typically have an accuracy of between 5 and 15 m. -
Page 33: Chapter 5 Troubleshooting And Support
Chapter 5: Troubleshooting and support Chapter contents • 5.1 GPS receiver LED indications on page 34 • 5.2 GPS troubleshooting on page 35 • 5.3 Raymarine customer support on page 36 Troubleshooting and support... -
Page 34: Gps Receiver Led Indications
No GPS fix. 900 ms 0 ms 0 ms 100 ms Short flash green Normal operation. 1 ms 333 ms 333 ms 333 ms Continuously alternating red, orange, green Unit is in test mode. RS130 GPS Receiver – Installation instructions... -
Page 35: Gps Troubleshooting
VHF radio. GPS installation problem. Refer to the installation instructions. Note: A GPS Status screen is available within the Setup menu of Raymarine multifunction displays. This provides satellite signal strength and other relevant information. Troubleshooting and support... -
Page 36: Raymarine Customer Support
5.3 Raymarine customer support Raymarine provides a comprehensive customer support service. You can contact customer support through the Raymarine website, telephone and email. If you are unable to resolve a problem, please use any of these facilities to obtain additional help. -
Page 37: Appendix A Technical Specification
Appendix A Technical specification Satellite Differential Type • WAAS (United States) • EGNOS (Europe) Nominal supply voltage 12 or 24 V dc • MSAS (Japan) Operating voltage range -10% to +30% of nominal supply range • GAGAN (India) Power consumption 50 mW max. - Page 38 RS130 GPS Receiver – Installation instructions...
- Page 40 www.ra ym a rin e .c o m...
Need help?
Do you have a question about the RS130 and is the answer not in the manual?
Questions and answers