
Subscribe to Our Youtube Channel
Related Manuals for Meade EXT90


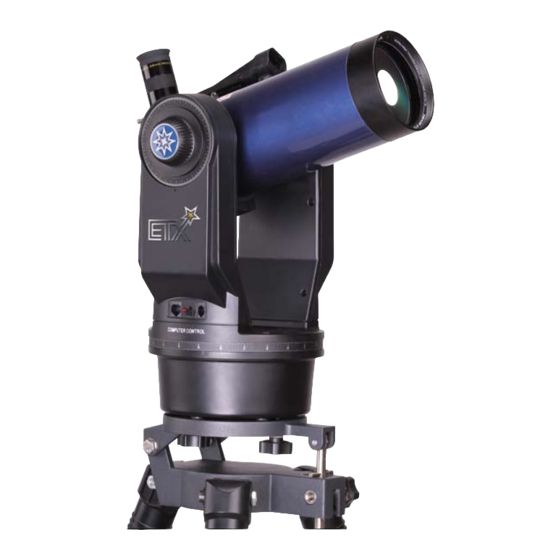
Summary of Contents for Meade EXT90
- Page 1 Instruction Manual ETX90 Maksutov-Cassegrain Telescopes with AutoStar #497 Hand Controller...
- Page 2 WARNING! Never Meade ETX90 ® telescope look Sun! Looking at or near the Sun will cause instant and irreversible damage to your eye. Eye damage is often painless, so there is no warning to the observer that damage has occurred until it is too late.
-
Page 3: Table Of Contents
Basic Astronomy ......46 Meade Series 5000 Premium Eyepieces ..18 Power Supplies . -
Page 4: Introduction
Congratulations on receiving your new ETX90 telescope. You’ll find that this telescope system has all you need to explore the Universe we live in. Meade’s concept was to create a telescope that would be simple enough for anyone to use, yet capable enough for the experienced amateur to stretch their knowledge and skills. With the ETX’s’... -
Page 5: Getting Started
GETTING STARTED You may want to perform the ETX telescope assembly indoors in the light so that you become familiar with the parts and operation before moving the telescope outside into the dark for observing. Just follow the simple steps below and you will be up and running before you know it. -
Page 6: Mounting The Telescope
Thread both attachment explode, catch fire, or leak. Improperly installed knobs into the base of the telescope. Tighten to a firm batteries void your Meade warranty. Always remove feel only. the batteries if they will not be used for a long period of time. -
Page 7: Attaching Accessories
Attaching Accessories Your Telescope is now Fully Assembled Be sure the telescope master power switch is Now remove the dust cover from the front in the off position. Remove the ETX90 handbox and of the telescope tube. Be careful not to touch the the coiled interface cable from the packing materials. -
Page 8: Using The Red Dot Finder
Using the Red Dot Finder Adjusting the Red Dot Finder On/Off & Brightness Adjustment Because your telescope has so much magnification, Now, without moving the telescope, adjust the indicated its field of view is very small. This can make it thumb screws until you have put the red dot on the hard to know exactly where your telescope is object at which you were looking. -
Page 9: Aligning The Etx90
Aligning the ETX90 still level, rotate it so that it points in the direction of the North Star. Lock the horizontal lock. The tube is pointing To automatically track and locate objects in the night True North and now in the Alt/Az home position. sky, the ETX90 must first be aligned on the sky. -
Page 10: Moving Through Autostar's Menus
horizontal lock. The tube is pointing True North and Note: The location settings (country/state/province now in the Alt/Az home position. and city, or zip code) are only asked for the first time you turn on the control panel. If you wish to Moving Through AutoStar’s Menus change this setting later on, use the Site menu. -
Page 11: How To Perform The Easy Align Procedure
AutoStar automatically picks two stars from its database ENTER. If that area of the sky is obscured by for the Easy Align procedure. During this procedure, an object, you can prompt AutoStar to chose an AutoStar slews the telescope to a first alignment star. alternate star by pressing either one of the two The user is asked to verify that the telescope is pointed Scroll Keys. -
Page 12: Go To Saturn
Go To Saturn Using the Guided Tour After performing the Easy Alignment procedure, the This example demonstrates using “Tonight’s Best” motor drive begins operating and the telescope is Guided Tour. aligned for a night of viewing. Objects in the eyepiece 1. -
Page 13: Key Features Identified On The Telescope
Eyepiece Auxiliary (AUX) Port Red Dot Viewfinder Handbox (HBX) Port Eyepiece Holder Thumbscrew Battery Connector (not shown, accessible thru battery compartment door on top of 90° Eyepiece Holder base housing) Optical Tube ... - Page 14 Flip-Mirror and Flip-Mirror Control Knobs Photo Port Declination (Dec.) Setting Circle (on left fork arm) Viewfinder Alignment Screws Dust Cap Bubble Level/Compass (in eyepiece holder)` Figure 4: ETX90 Left Side Figure 7: ETX90 Bubble Level Figure 5: ETX90 Dust Cap Figure 8: ETX90 Red Dot ...
-
Page 15: Key Features Explained
11.5 ft to infinity. Rotate the CAUTION: Use care to install batteries as indicated focus knob clockwise to focus on distant object. Meade by the battery compartment. Follow battery makes a complete line of accessories to enable you to manufacturer’s precautions. - Page 16 Improperly installed batteries void your Meade warranty. Always remove the batteries if they are not to be used for a long period of time. AutoStar Suite DVD. Right Ascension (R.A.) Setting Circle: See page 53 for detailed information.
-
Page 17: Telescope
OPTIONAL ACCESSORIES Meade makes a complete line of accessories to enable of view with 48x magnification. This is a very good all you to get the most fun and performance from your purpose eyepiece for your telescope, but you should ETX Series telescope. -
Page 18: Meade Series 5000 Premium Eyepieces
The Series 5000 HD-60 Eyepieces represent the highest level of eyepiece technology. Featuring advanced lens designs with 6 and 7 elements, super fully multi-coated lenses and some of the widest fields of view available, they provide the user with the highest- contrast, pinpoint-sharp images and spectacular wide field views of the heavens. -
Page 19: Power Supplies
AutoStar or the op- and Win7 compatible. tional #497 AutoStar Computer Controller. Accessories at Meade.com. Now you can order all these and more accessories or any Meade products right from the Meade Web Site www.meade.com and... -
Page 20: Autostar #497 Handbox - Basic Usage Buttons, Display And Their Functions
Take a guided tour of the best celestial objects to view on any given night of the year. • Download the latest satellite data and software revisions directly from the Meade website (www. meade.com) and share software with other AutoStar enthusiasts. - Page 21 •The AutoStar Computer Controller provides control • Date of virtually every telescope function within a compact • Site coordinates handbox. AutoStar has soft-touch keys designed to • Local Time and Local Sidereal Time (LST) have a positive feel. The LCD (Liquid Crystal Display) is backlit with a red LED (Light Emitting Diode) for •...
-
Page 22: Observing Using Autostar's' Keys
appropriate key shown below. essentially an on-screen instruction manual. Nine available speeds are: If you have a question about an AutoStar operation, e.g., INITIALIZATION, ALIGNMENT, Number Key “1” = 1x (Guide) etc., hold down the ? key and follow the directions Number Key “2”... -
Page 23: Observe The Moon
the telescope up, down, right, or left. If you wish to observe a distant land object, such as a mountain top or a bird, you want to use your telescope 4. Press a Number key (Pg. 20, Fig. 10, 6) to in its Terrestrial Observing mode. -
Page 24: Autostar Operation
AutoStar Operation Important Note: No matter how many levels into AutoStar are traveled, each press of the MODE key moves up a level, until the top level, “Select Item”, is reached. Once in the Select Item level, press MODE to return to the topmost level, “Select Item: Object”. -
Page 25: Entering Data Into Autostar
Entering Data into AutoStar object in the eyepiece of the telescope for you to view. The telescope comes pre-loaded with: • To enter numbers and text: • “Tonight’s Best”, a selection of the most a) Use the Number keys, or interesting objects visible on any night. -
Page 26: Autostar Menu Tree
AutoStar #497 MENU TREE Figure 14: The AutoStar #497 Menu Tree... -
Page 27: Event Menu
Star is a database of stars listed in different categories keep pressing MODE until the “Select Item: Object” such as named, double, variable, or nearby. menu is displayed. Press ENTER to select this menu. Important Note: When an object is selected, pressing 2. -
Page 28: Glossary Menu
of eclipse. Use the Scroll Up and Down keys to display • Start/Stop: Activates the timer set previously. the available data. Use the Scroll keys to toggle between ON and OFF. When ON is displayed, press ENTER to Min. (Minimum) of Algol is the minimum brightness activate the timer. -
Page 29: Setup Menu
Sleep Scope is a power saving option that shuts Telescope accesses the several options, including: down AutoStar and the telescope without forgetting its • Model: Allows you to select the telescope alignment. With “Sleep Scope” selected, press ENTER model connected to AutoStar. to activate the Sleep function. - Page 30 • Reverse L/R reverses the functions of the Left you observe will remain centered in the eyepiece. and Right Arrow keys (i.e., the Right key moves If “Terrestrial” is selected, the tracking motor is the telescope to the left). turned off. •...
- Page 31 • Software: Sends only the basic AutoStar software. This is useful if one user has downloaded a new version of AutoStar software from the Meade website (www.meade.com) and wants to pass this software along to friends. • All: Everything – user-defined information...
-
Page 32: Advanced Autostar Features
Advanced AutoStar Features Adding Observing Sites observing sites list. Choosing a site already on the list (as opposed to using the “Custom” If you plan to observe using AutoStar at different feature) makes it easier to edit, as the “Time geographic locations, you can store up to six Zone”... -
Page 33: Finding Objects Not In The Database
Using AutoStar to Find Objects Not in keys to enter the digits for the Right Ascension the Database coordinate of your object. When you are finished, press ENTER. In this procedure, you will enter coordinates of celestial 7. “Declination: +00°.00’” displays. Use the Number objects that do not appear in any of the AutoStar keys to enter the digits for the Declination database lists. -
Page 34: How To Create Your Own Guided Tour
Satellite orbits change and new satellites (including Interactive Mode: Tour name appears on the first line the Space Shuttle) are launched. Visit the Meade web of the AutoStar display and the name of the object site (www.meade.com) approximately once a month displays on line 2. -
Page 35: Writing A Tour
For example: “The / Extreme Object Orion Nebula is considered “awesome” by many who / (c) 2009 Meade Instruments Corporation view it”. Writing a Tour Command Line... - Page 36 NGC xxxx information about the satellite from its database. For example: SATELLITE: “Intl Space Stn” Enter NGC followed by the desired New General Catalog number and AutoStar provides the user with a description of the object from its database. For ASTEROID “name”...
-
Page 37: Landmarks
STAR “name” There are no bright globular” “clusters visible at this time”. Enter STAR followed by the name of the desired star in PICK END quotes. For example: STAR “Vega” AUTO SLEW ON / AUTO SLEW OFF LANDMARK az alt “title” “description” With AUTO SLEW ON enabled in the tour, AutoStar automatically slews the telescope to objects first before Enter the azimuth (az) for the desired object in... - Page 38 To Add a landmark to the database: To Select a landmark from the database: 1. Make sure the telescope is located and aligned In this procedure, you will store the location of terrestrial exactly as when the desired landmark was landmarks in AutoStar’s memory.
-
Page 39: Identify
Advanced Alt/Az Alignment Identify If you would rather choose your own alignment This procedure allows you to use AutoStar to identify stars from the AutoStar database during the Alt/Az objects you have found in the night sky using the Arrow keys. If the object is not in AutoStar’s database, alignment procedure, AutoStar offers two methods described below. - Page 40 when the correct location displays. d. The next screen asks for the city (listed alphabetically) closest to the observing site. Use the Scroll keys to scroll through the list of cities. Press ENTER when the correct city appears on screen. 5.
-
Page 41: Browse
One-Star Alt/Az Alignment One-Star Alignment requires some knowledge of the night sky. AutoStar provides a database of bright stars. One-Star Alignment is identical to Two-Star Alt/Az: Alignment (see “Two-Star ALT/AZ Alignment,” above), except only one star from this database is chosen by the observer for alignment. -
Page 42: Maintenance
Inspecting the Optics be lost, necessitating a return of the telescope to the A few words about the so-called “Flashlight Test:” If a Meade factory. flashlight or other high-intensity light source is pointed If your ETX model is used outdoors on a... -
Page 43: Troubleshooting
bright spots or uneven coatings, giving the appearance from the telescope. of poor quality optics. These effects are only seen • Confirm that the flip-mirror control (Pg 14, Fig. when a high intensity light is transmitted through lenses 4, 20) is in the “up” position if using the eyepiece holder or reflected off the mirrors and can be seen on any (Pg 13, Fig. -
Page 44: How To Get In Contact
• An eyepiece in the standard 90° observing or call the Meade Customer Service Department position reverses an object left-for-right: To view a to provide an explanation of the problem, as well as correctly oriented image requires the optional #932 your name, address and daytime telephone number. -
Page 45: Training The Drive
APPENDIX A: Verify that AUTOSTAR Press > until it TRAINING THE DRIVE INITIALIZATION is is centered complete. Scope slews left. Bring target back Perform this procedure if you are experiencing any Press MODE until to center using Select Item is displayed. pointing accuracy problems. -
Page 46: Basic Astronomy
So across the lunar surface. These dark areas are large as you look through your Meade ETX90 telescope, keep ancient impact basins that were filled with lava from Galileo in mind. To him, a telescope was not merely a... - Page 47 Planets change positions in the sky as they orbit through the ETX90. Titan, around the Sun. To locate the planets on a given day or the largest of Saturn’s 18 month, consult a monthly astronomy magazine, such moons can also be seen as Sky and Telescope or Astronomy.
-
Page 48: Specifications
APPENDIX C: SPECIFICATIONS Model and Product Number ETX90 # 3514-04-15 Optical System Optical Design Maksutov-Cassegrain Primary Mirror Diameter 3.5” (90mm) Primary Mirror Material Optical quality glass Focal Length, Focal Ratio 1250mm, f/13.8 Optical Coatings Ultra-High Transmission Coatings (UHTC™) Resolving Power (arcseconds) 1.3 arcseconds Limiting Visual Stellar Magnitude 11.7... - Page 49 SPECIFICATIONS Model and Product Number ETX90 Portable Observatory # 3514-04-20 Optical System Optical Design Maksutov-Cassegrain Primary Mirror Diameter 3.5” (90mm) Primary Mirror Material Optical quality glass Focal Length, Focal Ratio 1250mm, f/13.8 Optical Coatings Ultra-High Transmission Coatings (UHTC™) Resolving Power (arcseconds) 1.3 arcseconds Limiting Visual Stellar Magnitude 11.7...
-
Page 50: Appendix D
APPENDIX D: EQUATORIAL (POLAR) ALIGNMENT Equatorial Alignment Earth’s axis), if extended to infinity, would cross the celestial sphere. Thus, the North Celestial Pole (Fig. In equatorial (or “polar”) alignment, the telescope is 17) is that point in the sky where an extension of the oriented so that the horizontal and vertical axes of the North Pole intersects the celestial sphere. -
Page 51: Equatorial Mount
viewed through a telescope such as an ETX, this motion is rapid indeed. If the motor drive has not been engaged, celestial objects viewed in the telescope Latitude control bar eyepiece drift entirely out of the field of view in 15 to 60 seconds, depending on the magnification employed. - Page 52 “locked” positions, use the Arrow keys to move the Easy Polar Alignment optical tube. Two alignment stars are chosen by AutoStar based on the date, time and location. First, choose “Polar” from the “Setup: Telescope: Mount” menu. The rest of the North Celestial procedure is identical to the Alt/Az Easy (Two-Star)
- Page 53 Setting Circles 1. Identify the celestial coordinates (R.A. and Dec.) of a bright, easy-to-find object, such as a bright star. (Avoid The ETX models are equipped with R.A. and Dec. using Polaris or any object near Polaris.) Coordinates setting circles (Pg 13, Fig. 3, 19 and 22) to aid in of bright stars are listed in astronomy magazines, locating faint celestial objects when the telescope has text books or star charts.
-
Page 54: Latitude Chart
APPENDIX E: Northern hemisphere observers (N): If the site is over 70 miles (110 km) North of the listed city, add one degree LATITUDE CHART for every 70 miles. If the site is over 70 miles South of Latitude Chart for Major Cities of the World the listed city, subtract one degree per 70 miles. -
Page 55: Appendix F
APPENDIX F: MAKSUTOV-CASSEGRAIN OPTICAL SYSTEM In the optical design of the ETX90, light enters from the images at the focal plane. The oversize 96mm-diameter right through a multi-coated meniscus lens, proceeds to primary mirror results in a fully-illuminated (unvignetted) an f/2.2 primary mirror, and then to a convex secondary field of view significantly wider than can be obtained mirror that multiplies effective focal length by a factor of with Maksutov optics incorporating primary mirrors of... -
Page 56: Magnetic Declination North America
APPENDIX G: MAGNETIC DECLINATION NORTH AMERICA 60°N 50°N 40°N 30°N East Declination West Declination 20°N 10°N 130°W 120°W 110°W 100°W 90°W 80°W... -
Page 57: Magnetic Declination - The World
APPENDIX H: MAGNETIC DECLINATION WORLD... -
Page 58: How To Recycle
RECYCLING INFORMATION (EU Countries only) Correct Disposal of this Product (Waste Electrical & Electronic Equipment) This marking shown on the product or its literature indicates that it must not be disposed of in unsorted municipal waste at the end of its working life To prevent possible harm to the environment or human health from uncontrolled waste disposal, please separate this from other types of wastes and recycle it as required... -
Page 59: One Year Limited Warranty
Every Meade telescope, spotting scope, and telescope accessory is warranted by Meade Instruments Corp. (“Meade”) to be free of defects in materials and workmanship for a period of ONE YEAR from the date of original purchase in the USA and Canada. Meade will repair or replace a product, or part thereof, found by Meade to be defective, provided the defective part is returned to Meade, freight-prepaid, with proof of purchase. - Page 60 27 Hubble, Irvine, California 92618 10/06/11 55-09007 (800) 626-3233 www.meade.com 3514-04-15 / 3514-04-20...
Need help?
Do you have a question about the EXT90 and is the answer not in the manual?
Questions and answers